

Add advanced workflow logic
Use signals and checkpoints to control how and when your workflow steps run
Introduction
Once a workflow runs on its own — on a schedule, or kicked off by someone else — you'll want it to make smart decisions without you watching: skip the report rebuild if the data never arrived, hold everything downstream when the numbers look wrong, or only proceed when several things have all happened. Redbird handles this with two features that work together:
- Signals announce that something happened. A node can send a signal when it succeeds, fails, or produces new data — and an AI Data Tool step can send a custom signal based on any condition you describe about your data (a threshold crossed, missing values found, an unusual spike or anomaly in the data).
- Checkpoints decide whether a run continues. A checkpoint sits before or after a node and holds a condition written in plain language that combines one or more signals with and/or/not logic and optional time-based logic. When the workflow runs, the checkpoint evaluates to true or false: true, and the run proceeds; false, and everything after the checkpoint stays put.
Signals tell the workflow what happened; checkpoints use that to decide what runs. Together they let you build workflows that react to events, enforce conditions, and stop bad data from flowing into the outputs your team relies on.
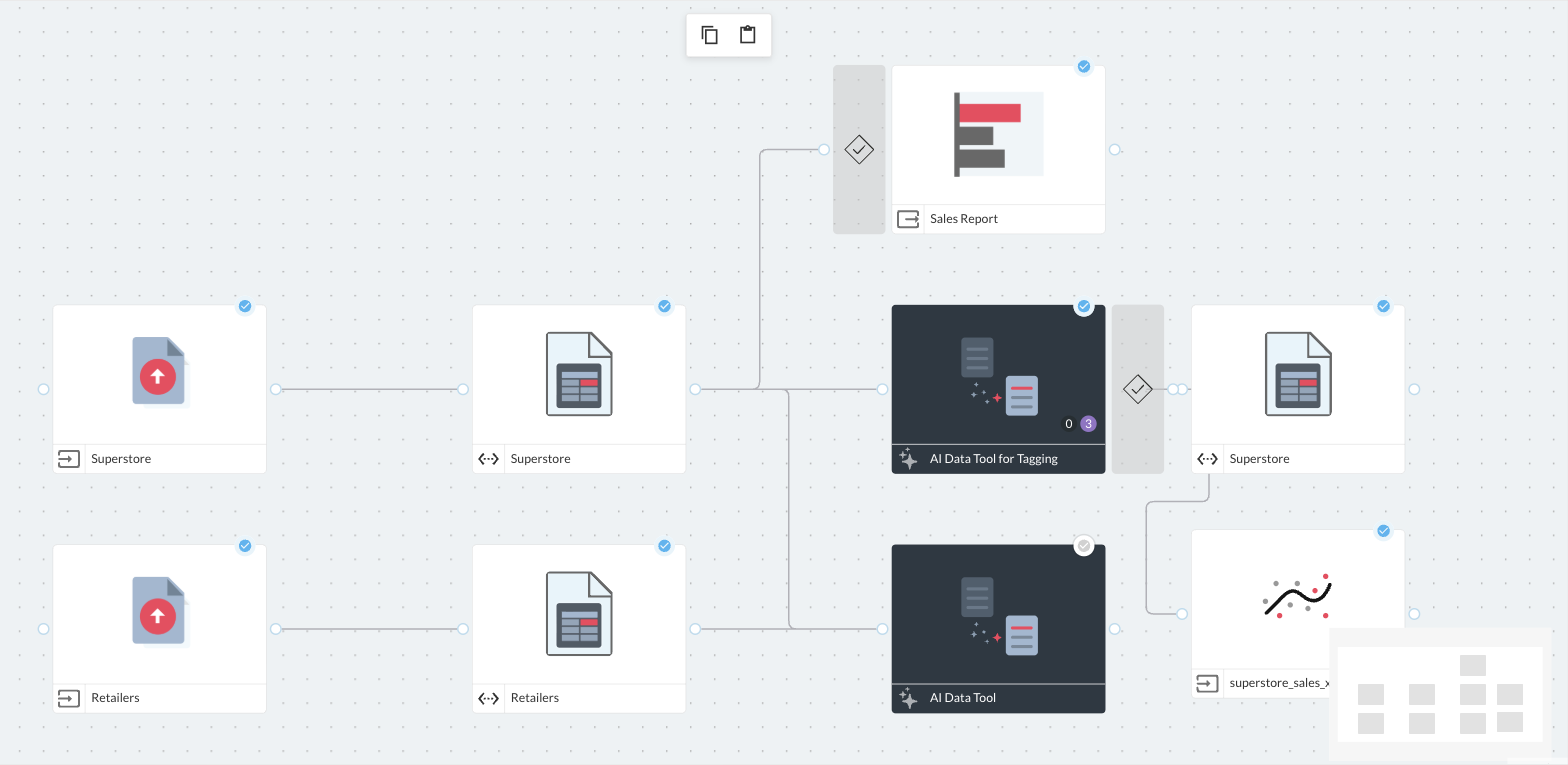
As everywhere in Redbird, the fastest way to set any of this up is to describe what you want to Autopilot in chat — it creates the signals and checkpoints for you and confirms the details before proceeding. You can also configure everything by hand on the workflow canvas; both routes are covered below. (New to workflows? Start with Build & run workflows.)
Signals
A signal is a named event that part of your workflow sends when something specific happens. Redbird records every time a signal fires, with a timestamp — so a checkpoint can later ask not just "did this happen?" but "did this happen in the last 24 hours?" or "has this happened every day this week?"
There are two kinds of signals.
Built-in node signals
Every node can announce the outcome of its own runs. Three ready-made signals are available on each node, switched off by default:
- On success — fires each time the node runs successfully.
- On failure — fires when a run of the node errors.
- On updated — fires when a run produces new or changed data (a run that changes data fires both On updated and On success).
To turn one on by hand, click the node on the canvas, choose Signals in the Node Details panel on the right, and flip the toggle you want. The signal is created immediately, named after the node (for example, Superstore: On Updated), with a unique signal code you can copy — you'll only need the code to reference the signal from a different workflow.
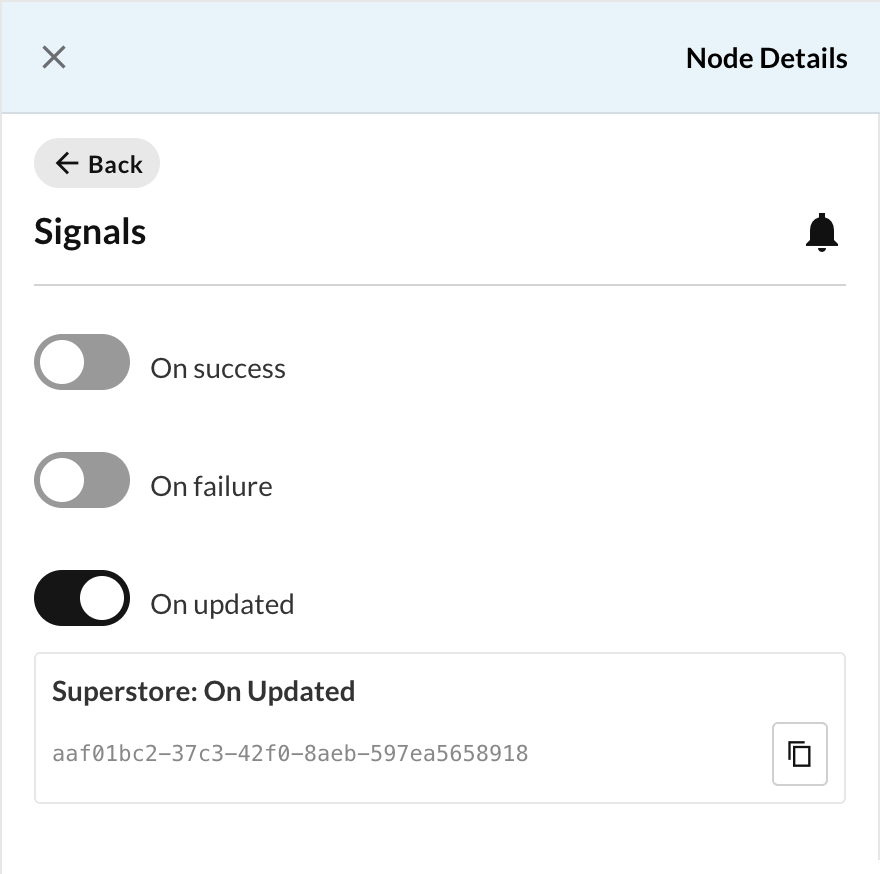
You can also just ask Autopilot:
Turn on the "On updated" signal for the Superstore node
Switching a signal off deletes it. The toggle doesn't pause a signal — it removes it, along with its history. Any checkpoint that referenced it is automatically disabled and shows a warning until you edit its condition. If a checkpoint still needs the signal, update the checkpoint first.
Custom signals from AI Data Tool steps
Built-in signals cover how a run went. For conditions about what's in your data, add a signal to an AI Data Tool step. The step's prompt describes the condition in plain language; the signal fires whenever the step runs and the condition is met.
The primary way is to describe it to Autopilot:
Add a step to the AI Data Tool node that sends a signal named "Low Retailer Sales" if any retailer's total Sales is below 100,000
To set one up by hand instead, open the AI Data Tool node's editor and write the condition into a step's Prompt box. Where the signal belongs in the sentence, press the @ key — the Actions menu opens with Send Signal and a Name field. Name the signal and press Enter.
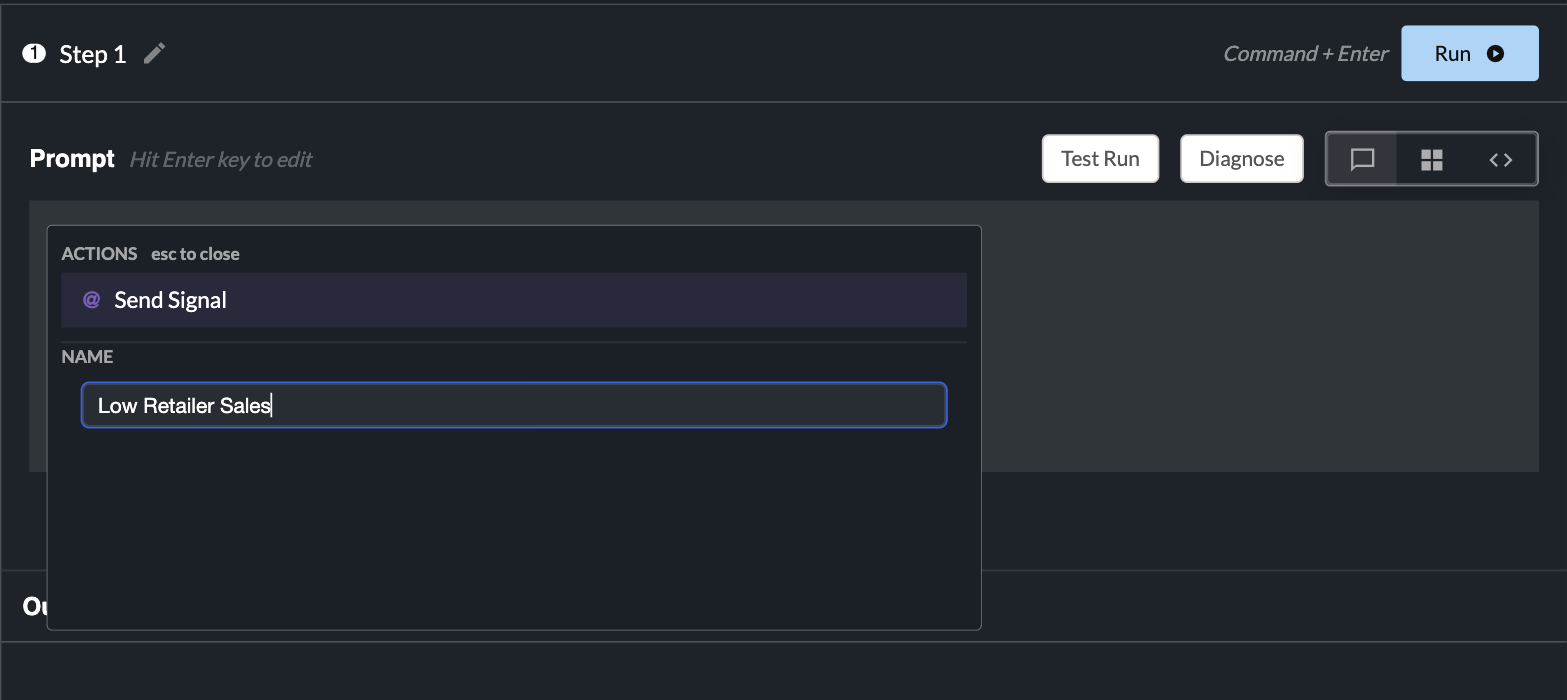
The signal becomes a purple pill inside the prompt. When the step runs, the data is checked against your condition — the signal fires only if it's met.
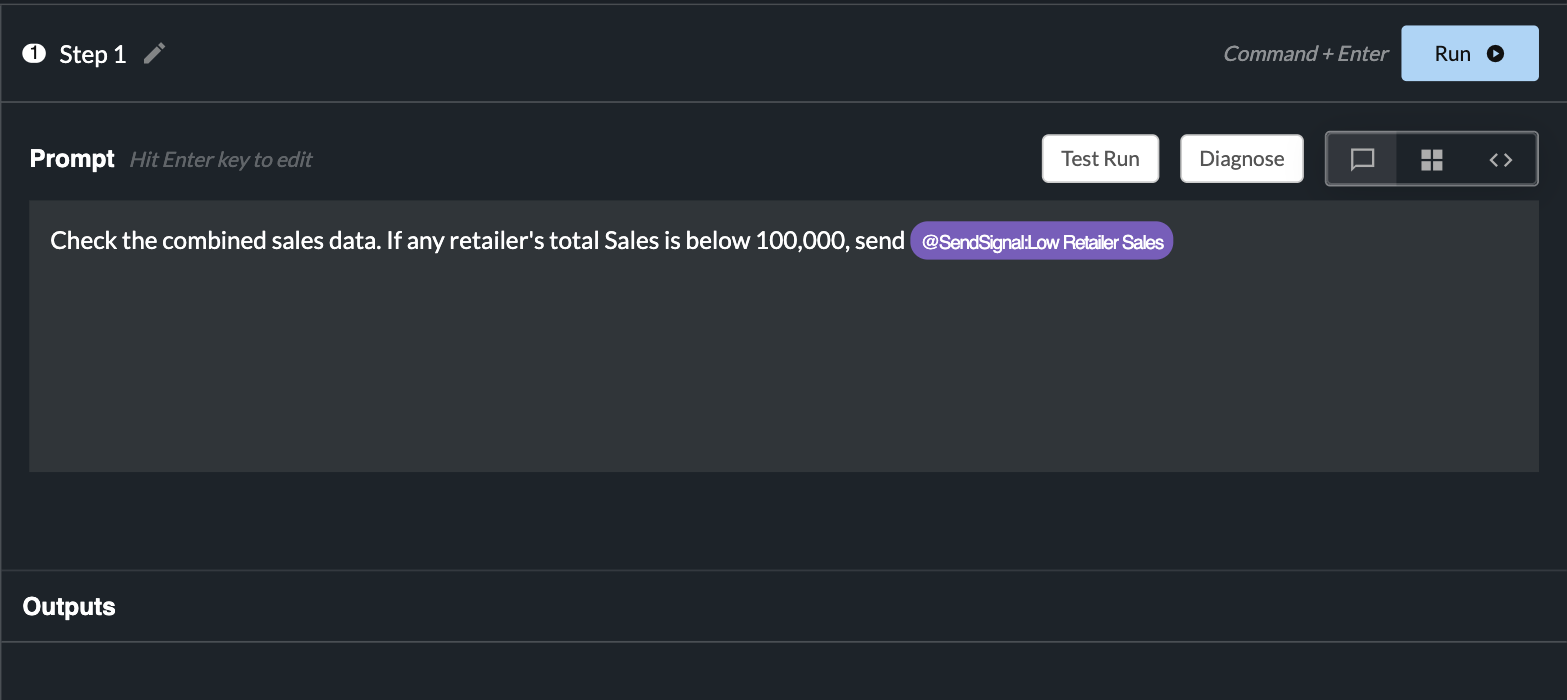
This is also where anomaly detection lives: describe what "unusual" means in the step's prompt — "send the signal if this week's total is more than double the average of the previous four weeks" — and the signal fires only when the data looks abnormal. A checkpoint can then hold the rest of the workflow whenever (or unless) that happens.
A custom signal starts working after its step first runs as part of a node run for the node the step lives within. Run the AI Data Tool node once after adding the signal — until then, checkpoints can reference it but will report that the signal exists but has never fired. Test runs of a step check your logic but never fire signals.
Where signals can be used
Any checkpoint in the same workflow can reference any of its signals (with one exception: a node's own signals can't gate that same node). Signals also power triggered workflow runs — automated runs that start when signals fire, set up from the run options on the canvas or by asking Autopilot (see Build & run workflows).
Checkpoints
A checkpoint is a pass/fail condition attached to one node. Each node has two checkpoint positions, and can have one checkpoint in each:
- Before node runs — evaluated first. If the condition isn't met, the node is skipped.
- After node runs — the node runs, then the condition is evaluated against the result. If it isn't met, the node's output is held back and nothing downstream of the checkpoint runs.
In both cases, a failed checkpoint stops the whole branch: the node's downstream steps don't run either. Use a "before" checkpoint to save the work entirely ("don't rebuild the report unless fresh data arrived"), and an "after" checkpoint to let a step run but quarantine its result ("run the preparation step, but only pass its output along if the quality signal fired").
A checkpoint never starts a run on its own. It's evaluated at the moment a run reaches its node — manual, scheduled, or triggered. If the condition becomes true while nothing is running, nothing happens until the next run.
Adding a checkpoint
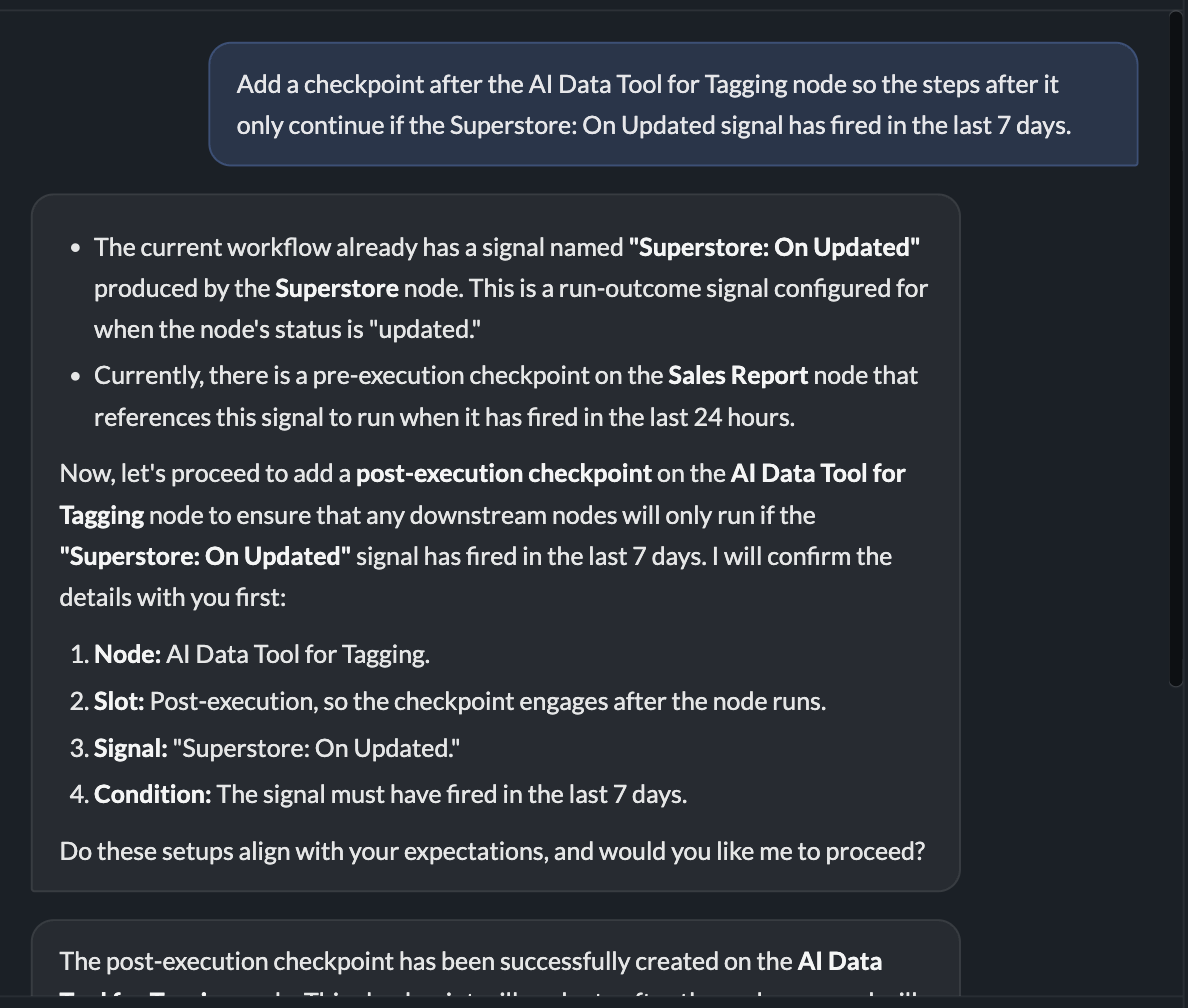
The primary way is to ask Autopilot, naming the node, the position, and the condition:
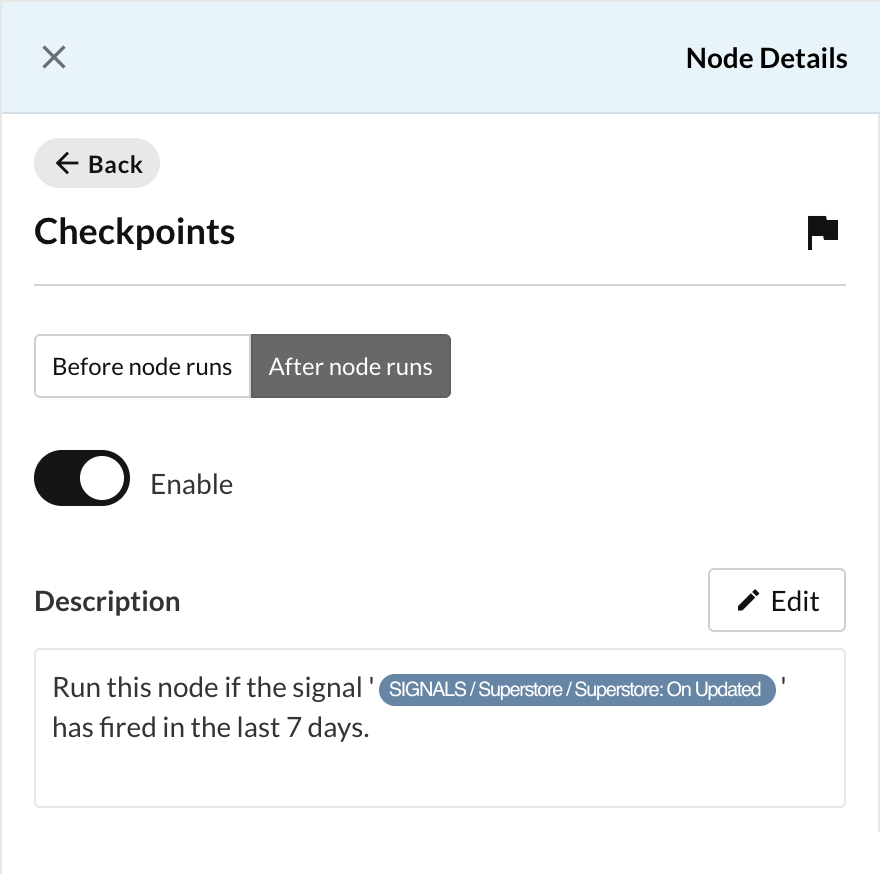
Add a checkpoint after the AI Data Tool for Tagging node so the steps after it only continue if the Superstore: On Updated signal has fired in the last 7 days.
Autopilot confirms the node, position, signal, and condition before creating it — and warns you if a referenced signal has never fired yet.
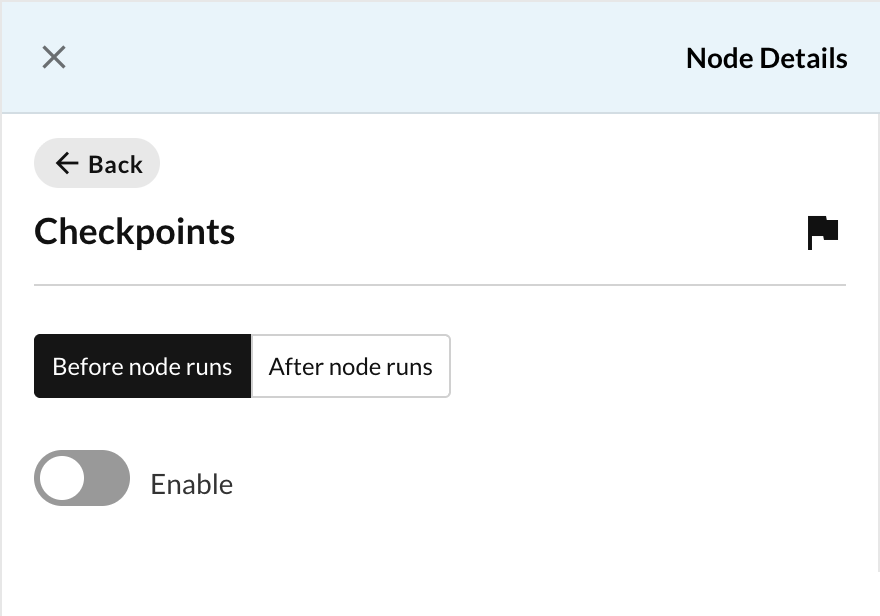
To add one by hand, click the node on the canvas and choose Checkpoints in the Node Details panel. Pick the Before node runs or After node runs tab, then switch on Enable.
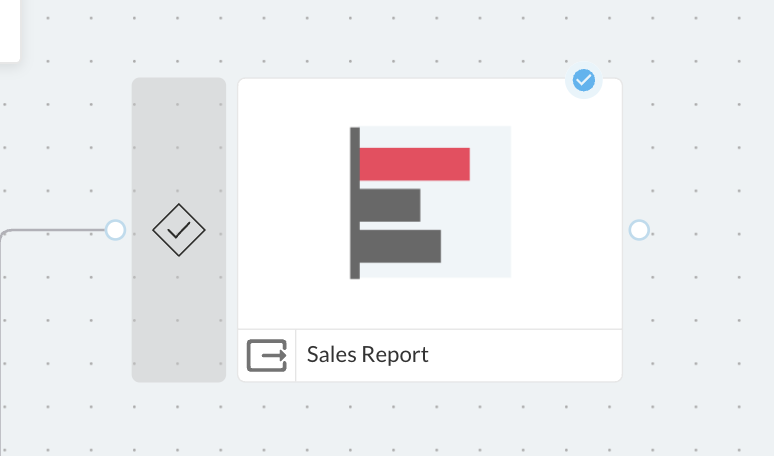
On the canvas, a node's checkpoints appear as small diamond-shaped markers on its left (before) and right (after) sides — a filled marker with a tick means a checkpoint is in place.
Writing the condition
Click Edit next to the checkpoint's Description (you can also double-click the grey checkpoint marker or ask Autopilot to open it) to reach the checkpoint's configuration screen. Rename the checkpoint with the pencil icon at the top.
- The Signals panel on the left lists every signal in this workflow, grouped by the node that produces it. To reference a signal from a different workflow, click the + icon and paste the signal code you copied from its source node.
- Write the condition in plain language in the Condition Prompt box. Type / wherever a signal belongs — a picker opens and the chosen signal is inserted as a pill.
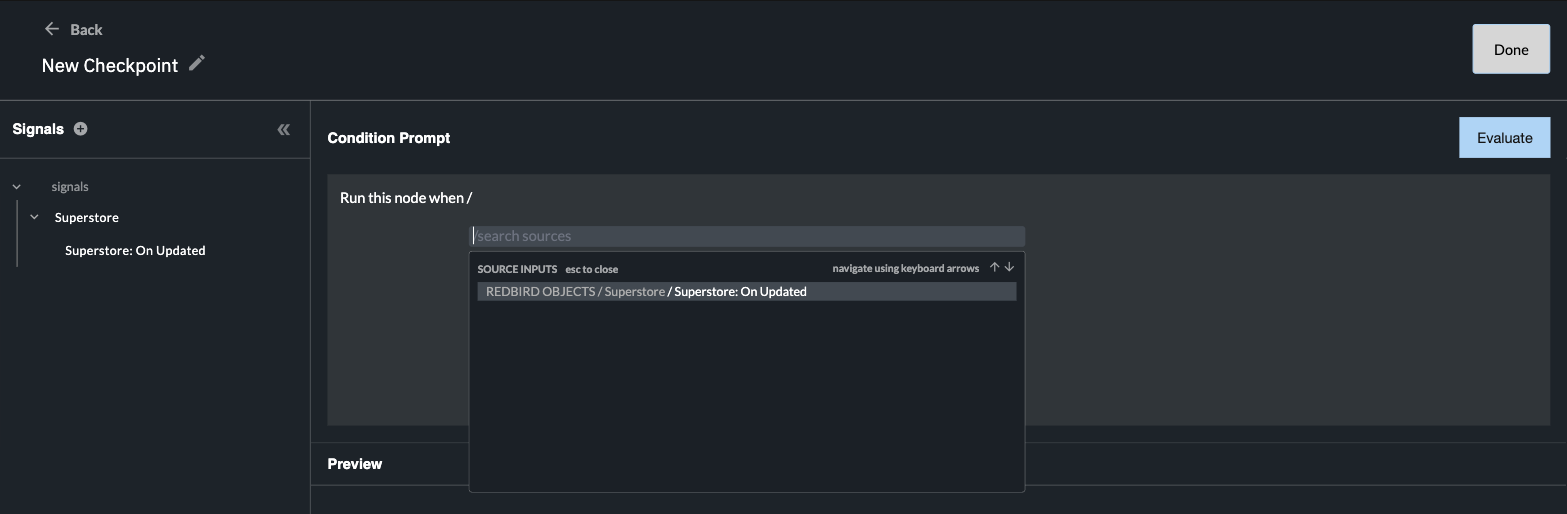
A condition combines signals with and/or logic and optional time-based logic. For example:
- "Run this node when [Signal A] has fired in the last 24 hours."
- "Run this node if [Signal A] or [Signal B] fires, but not [Signal C]."
- "Run this node when [Signal A] has fired every day over the last week."
The condition decides only when to proceed, based on which signals fired and when. What each signal means — the threshold, the comparison, the anomaly — is defined where the signal is created, not in the checkpoint.
Your edits save automatically. Click Evaluate to test the condition against the current state of your signals — the Preview below shows when the checkpoint last passed, each referenced signal with a tick or cross and when it last fired, and whether the next run would pass. Evaluating is a dry run; it doesn't affect the checkpoint or your workflow.
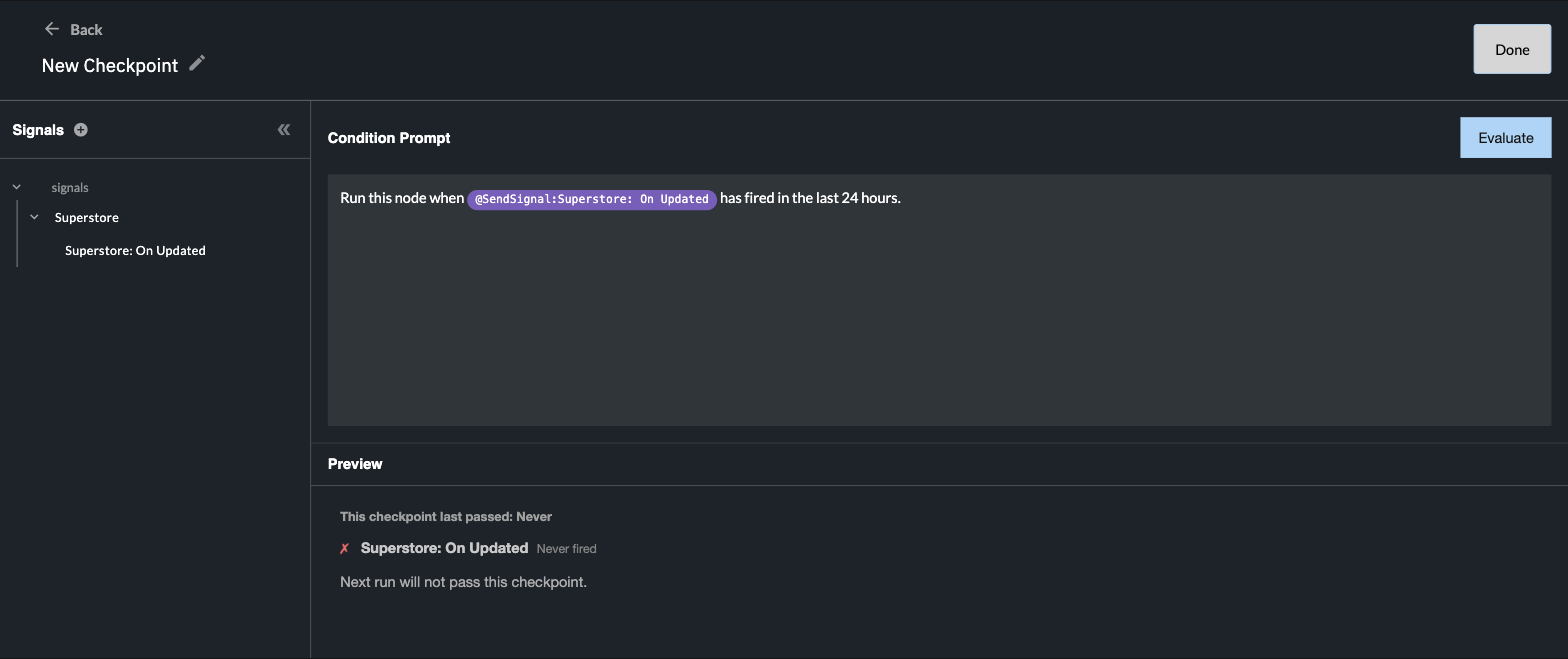
Click Done to return to the canvas. The condition is also visible any time in the node's Checkpoints panel.
What happens on a run
When a run reaches a node with checkpoints, each condition is evaluated in the moment, using the full history of the referenced signals and the current time.
- If everything passes, the run proceeds normally.
- If a checkpoint fails, that node is blocked — skipped entirely for a "before" checkpoint, or run with its result held back for an "after" checkpoint — and every step downstream of it is skipped too.
A blocked checkpoint isn't an error. The run itself finishes normally, the canvas shows a notice that a checkpoint blocked a node, and the blocked steps are labeled Checkpoint skipped in the run history — your workflow simply declined to proceed, exactly as designed.
Good to know
- A signal that has never fired can't pass a checkpoint. If you reference a brand-new signal, run its node once so it starts firing.
- A checkpoint waits for fresh activity. After it passes once, it won't pass again on the same old signal fire — it needs new activity from a referenced signal. The exception is conditions written around time ("fired within the last hour"), which are checked against the clock on every run.
- Conditions lock after they pass in a real run. Once a checkpoint has let a run through, its condition can no longer be edited on the configuration screen. Ask Autopilot to change it, or remove the checkpoint and create a new one.
- Don't leave an enabled checkpoint empty. An enabled checkpoint with no condition written blocks its node on every run.
- Removing is permanent. Switching off a checkpoint's Enable toggle deletes it and its condition — there's no paused copy kept behind.
Signals tell you; checkpoints decide. Use a signal on its own when you just want a record that something happened. Add a checkpoint when the workflow itself should hold back unless things look right. They're at their best combined: an AI Data Tool step watches the data and fires a signal, and a checkpoint downstream only lets the expensive steps — model training, report rebuilds, emails — run when it has.
A worked example
Suppose a workflow pulls sales data daily, prepares it, and rebuilds a report your team reads every Monday:
- Turn on the On updated signal on the dataset node, so there's a record of every day fresh data actually arrived.
- Add an AI Data Tool step that checks the prepared data and sends a "Data looks wrong" signal if any retailer's total is implausibly low.
- Put a checkpoint before the report node: "Run this node when [Superstore: On Updated] has fired in the last 24 hours, but not if [Data looks wrong] fired today."
Now a stalled data feed or a bad file quietly stops the run before it touches the report — and the version your team opens on Monday is always the last good one.
Updated 4 days ago