Dashboard - Configuring Advanced Formulas
Overview
Advanced Formulas allow you to perform more complex data calculations within the configuration for a dashboard object. This is helpful in situations where your raw dataset doesn’t have the data you need for your calculation living in just one column or you need to apply specific logic before computing the output values that you will need to visualize.
How It Works
Advanced Formulas are an alternative to the Basic Formulas that are the default method for calculating values for your dashboard object. The end result of using Advanced Formulas is the same as when using Basic Formulas (a completed dashboard object/visualization). The only difference is that Advanced Formulas allow for more detailed control over exactly how the output values are calculated through the use of advanced configurations that leverage the following concepts:
- Expressions: Definitions that are configured to specify how output values should be calculated. Expressions make use of Operators, Columns, Calculated Columns, and Scopes in defining how to perform a calculation.
- Operators: Mathematical or Order operators that define how to execute a calculation
- Mathematical operators: +, -, x, /, *
- Comparison operators: =, !=, >, >=, <, <=
- Order operators: ( and )
- Calculations will be performed based on the standard convention of parenthetical
groupings used in mathematical formulas
- Calculations will be performed based on the standard convention of parenthetical
- Values: Numerical, Text, or Boolean constants used within Expressions
- Numerical values are typed within an Expression without any other notation (e.g. 100) and can
be used within Advanced Formula Expressions or Calculated Column Expressions - Text values are typed within an Expression surrounded by quotes (e.g. “Redbird”) and can only
be used within Calculated Column Expressions - Boolean values are either True or False
- Numerical values are typed within an Expression without any other notation (e.g. 100) and can
- Formulas: Fully configurable formulas that perform a calculation using Columns, Calculated Columns,
and Scopes - Columns: Fields already available in the source dataset
- Calculated Columns: Fields not available in the source dataset, which have been calculated on the fly
using Expressions, Operators, Formulas, Columns, and Logic Rules. - Logic Rules: Rules used within a Calculated Column configuration to calculate a new field based on
logical conditions. Rules include IF, ELSE IF, and ELSE conditions.
Both Basic Formulas and Advanced Formulas are configured within a Series section of a dashboard object configuration view and contribute to creating a calculated dashboard object.
Information:"Show All" will show all values in the selected column with no calculation or aggregation applied. This is applicable only to Tables.
Configuration
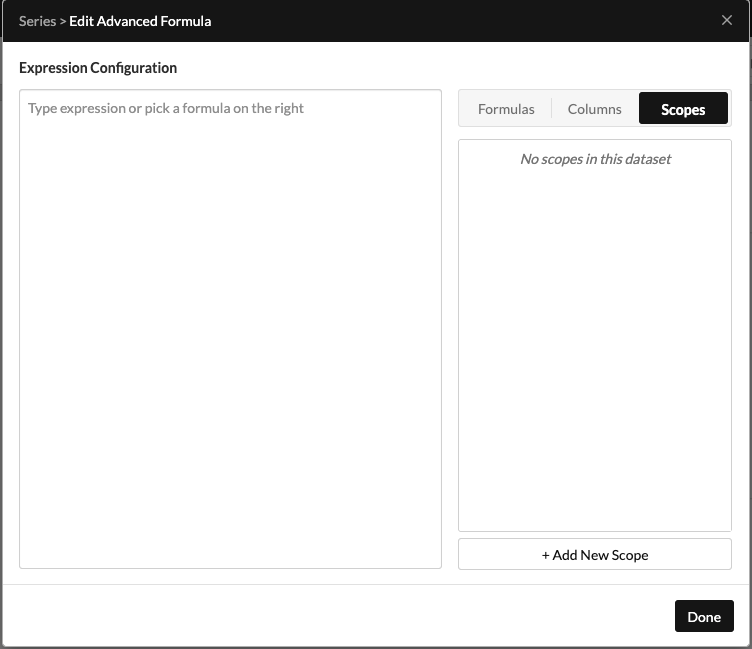
Accessing the Advanced Formulas Expression Builder
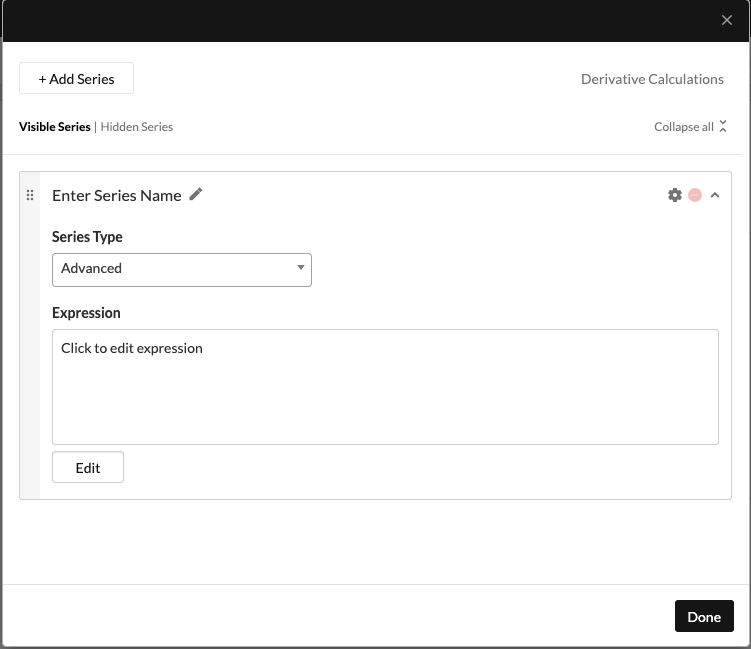
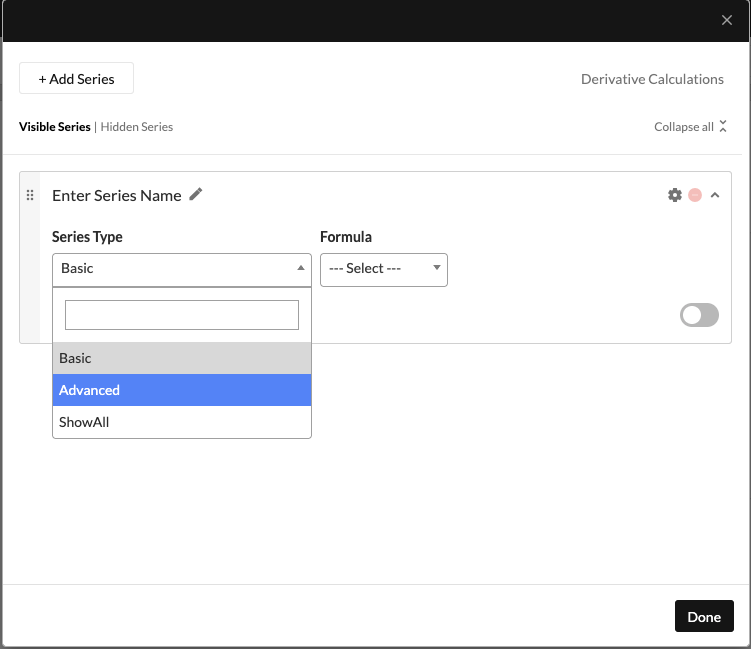
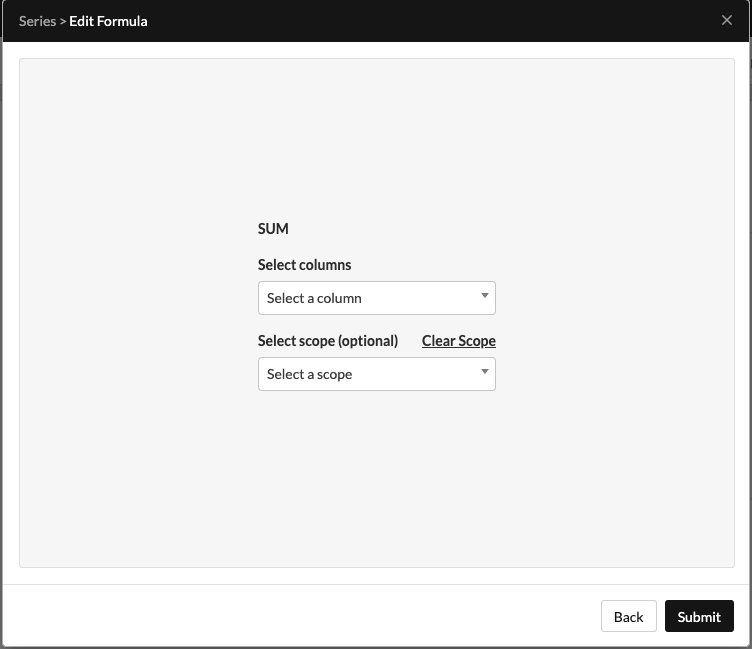
- To access the Advanced Formulas Expression Builder, click on the Advanced toggle within any Series section of your dashboard object’s configuration view.
-
This will activate the Expression Summary Block below the drop-down. Initially, the Expression Summary Box will be empty. To start editing your Expression, either click in the box or the Edit button underneath the box. This will launch a modal window with the Expression Builder.
-
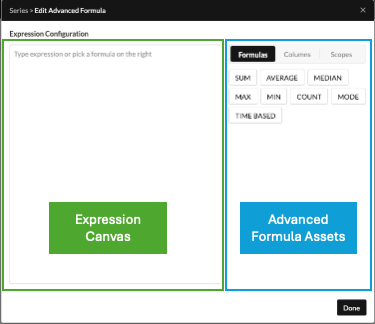
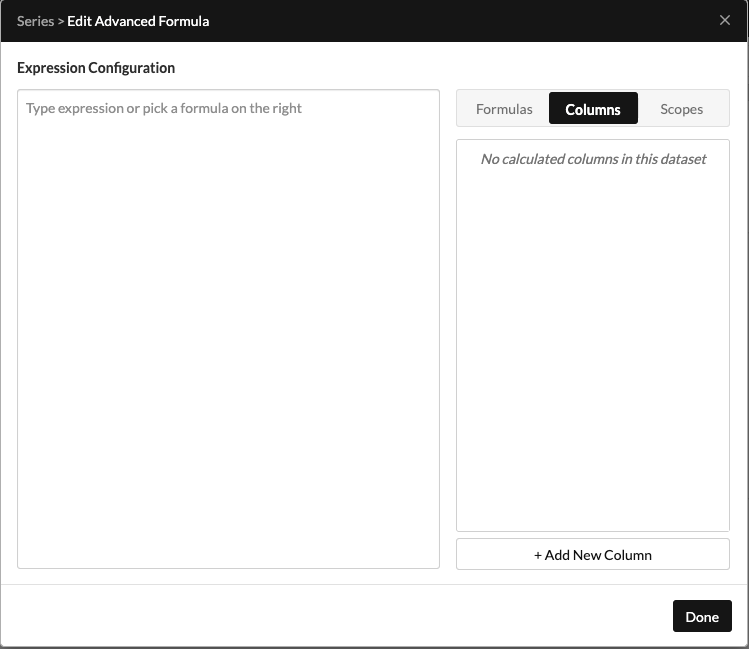
Your Expression Builder will initially contain an empty Expression Canvas and Assets area to the right of the Expression Canvas. You are now ready to configure your Advanced Formula.
Building Your Advanced Formula Expression
Expressions
-
You can now build out an Advanced Formula Expression by adding and managing assets from the assets area on the right side of the modal. These assets define how the value for the dashboard object should be calculated.
-
As you add assets to your configuration, the Expression Canvas on the left side of the modal will update and the assets will be checked for validity. You can then configure them in more detail and add operators to the expression. We will provide further details on how to do this below.
-
The simple example below illustrates the use of Formulas, Operators, and Values to calculate an output value:
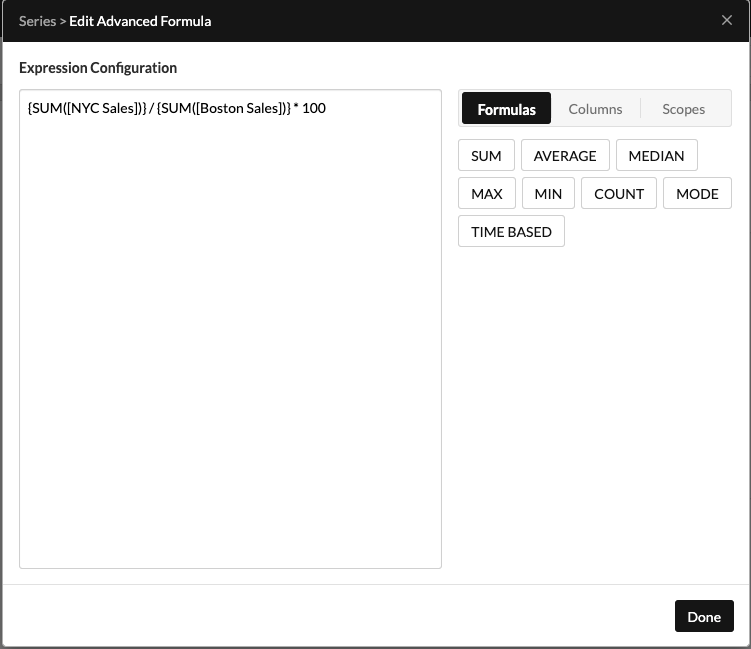
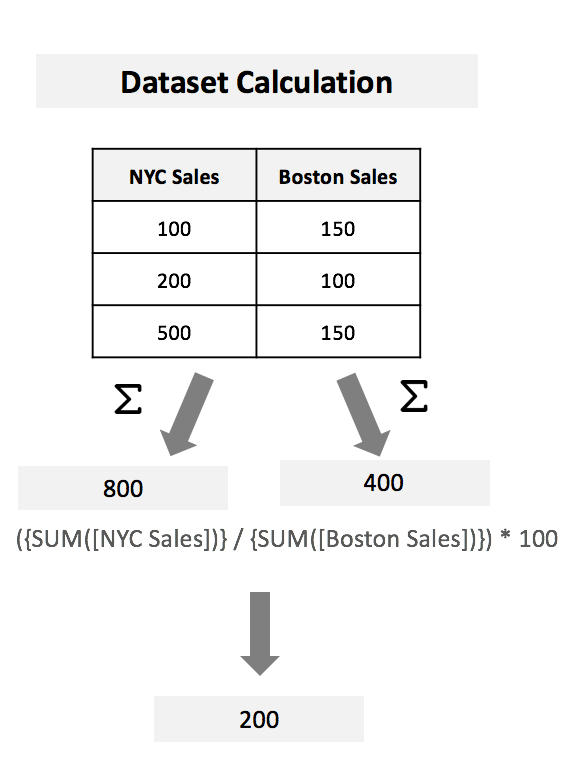
-
Formulas can be added to the Expression Canvas by either:
- Selecting the Formulas toggle in the Assets Area and then clicking on the desired formula
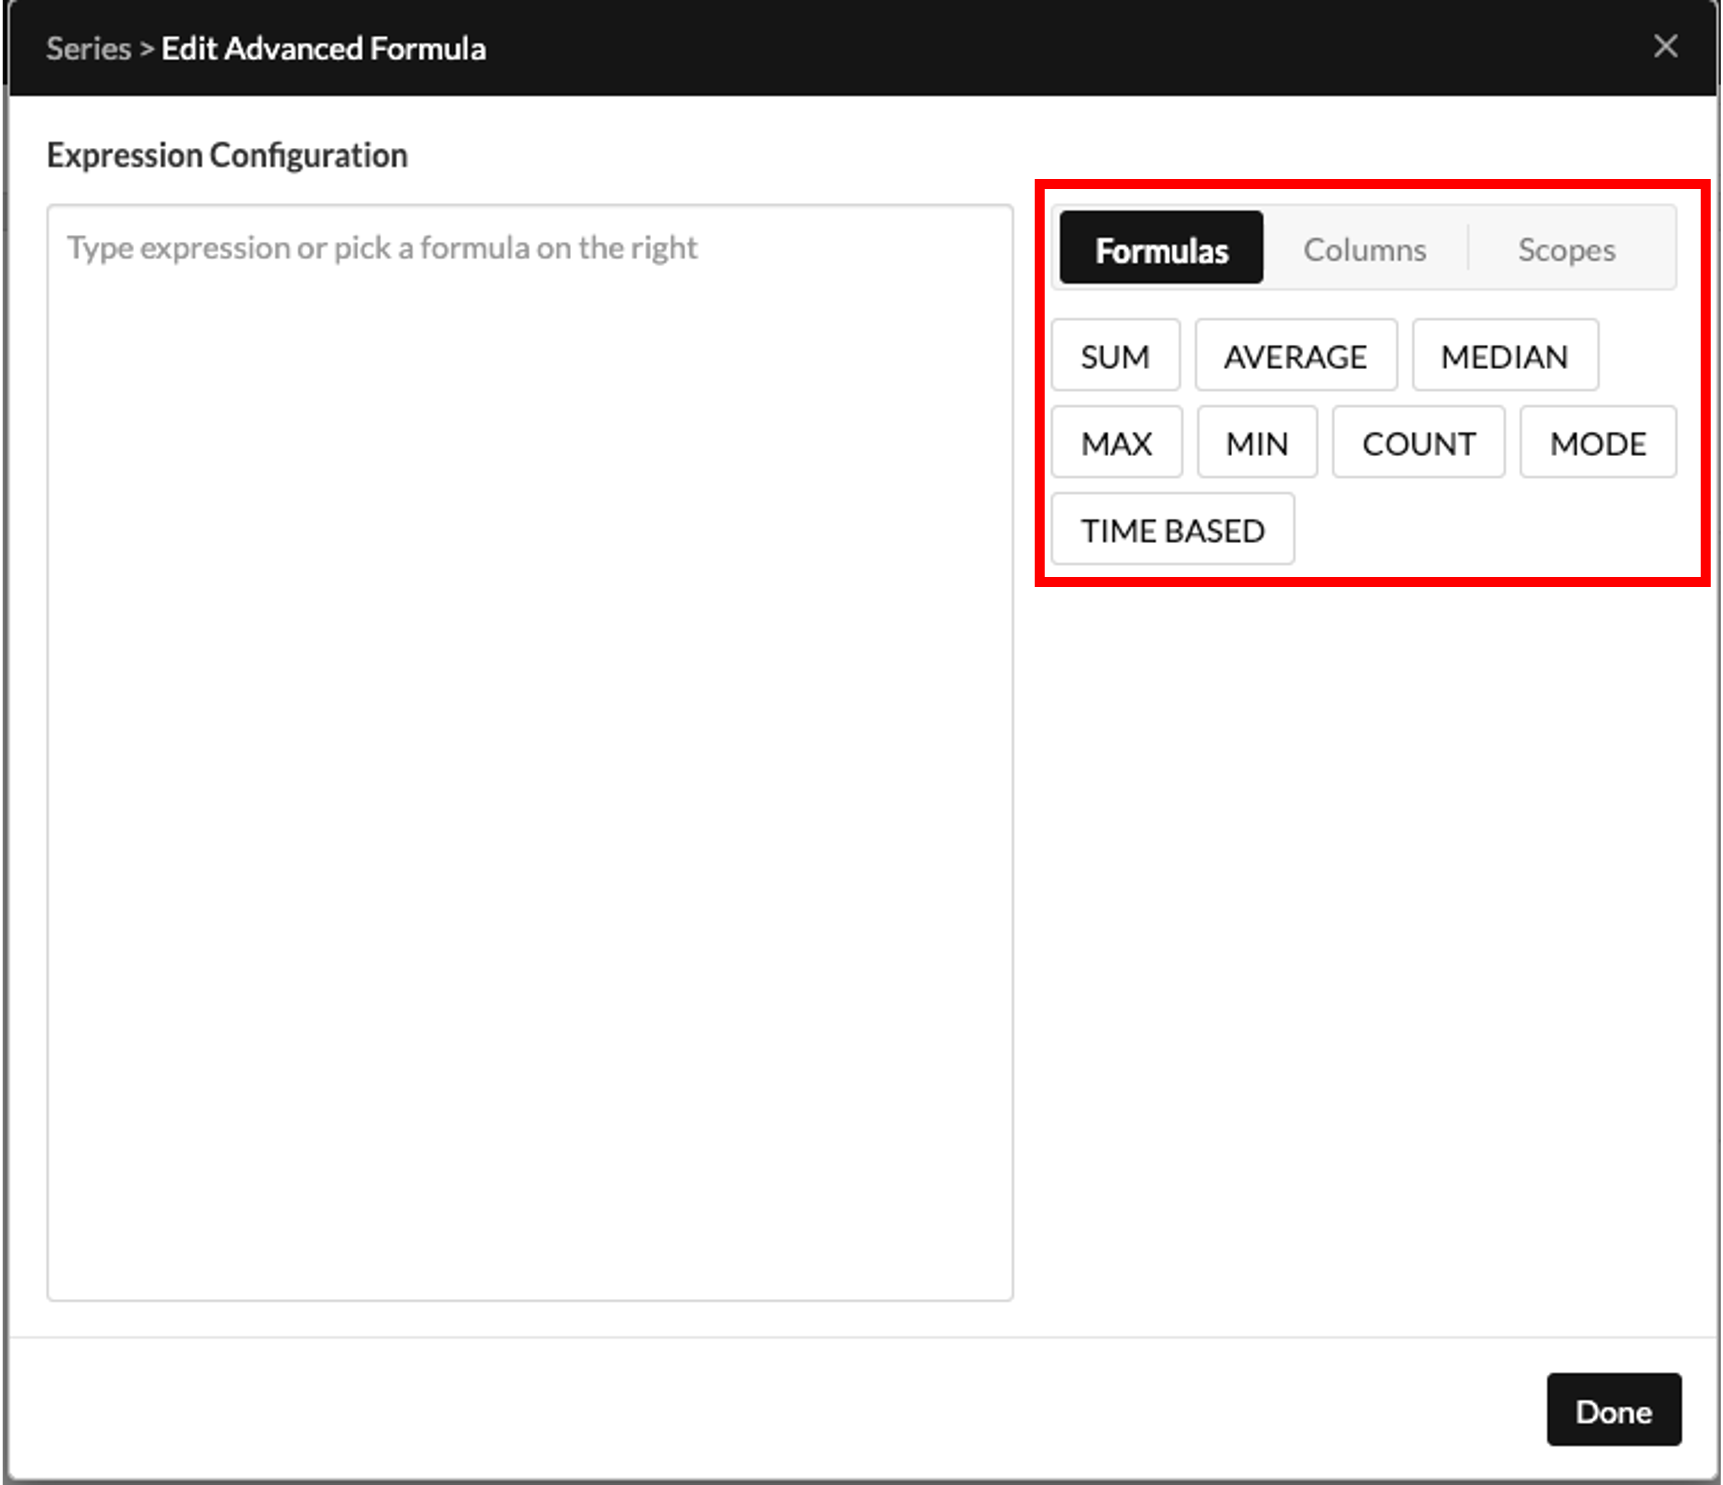
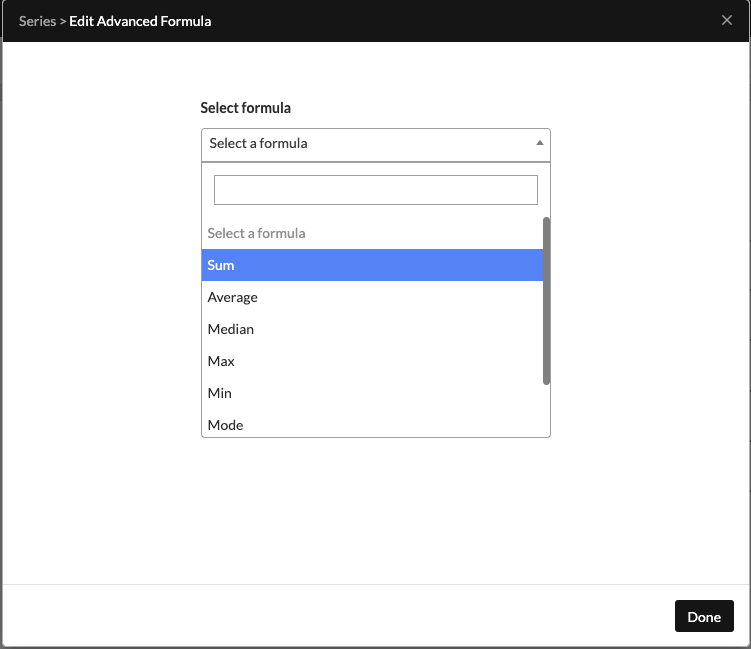
- Typing open curly bracket “{“ while your cursor is active in the Expression Canvas, and selecting your formula from the searchable dropdown that appears next
- Selecting the Formulas toggle in the Assets Area and then clicking on the desired formula
- Once you’ve selected your formula, choose the columns you want to apply it to.
You can also optionally apply scopes to further control when or where the rule is applied (see the Scopes section in this guide for more details).
- Operators and Values can be added to the Expression Canvas by typing them in directly while your cursor is active within the canvas editor.
Calculated Columns
Calculated Columns may need to be leveraged if the data you need is not already available as a field within your dataset as is. Redbird’s Calculated Columns functionality lets you easily create new fields on the fly based on your source dataset, and use these Calculated Columns in Formulas just as you would a regular Column from your source dataset.
Creating Calculated Columns
- To create a new Calculated Column, click on the Column toggle within the Assets Area
-
Initially, you will not have any Calculated Columns listed and will need to create a new Calculated Column by clicking on Add New Column at the bottom of the Assets Area.
-
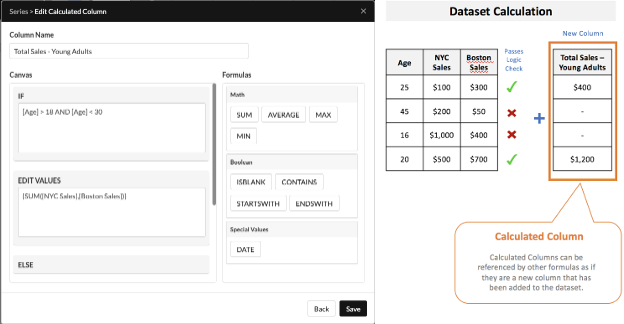
This will create a new calculated column for you. Click on the pencil icon in that newly created column to take you to the Calculated Column Editor view, where you can take the following actions:
-
Enter the name for the new Calculated Column
-
Use the Building Blocks on the right side of the editor to create the logic for calculating your new column. Building Blocks options include the following:
-
Actions: (Edit Values)
- Lets you create an Expression to define how the values in the newly Calculated Column will be calculated.
- The Edit Values Expression must return a numerical value and can leverage mathematical Formulas, Columns, Values, and Operators.
ImportantWithin a Calculated Column configuration, the Edit Values Expression calculates output values by applying Formulas to the dataset 'horizontally', so a Formula can have multiple Columns selected within its configuration. In the example given below, SUM([NYC Sales], [Boston Sales]) will iterate row by row and sum the values within the NYC Sales and Boston Sales columns horizontally for that row and drop the output value from the calculation into the new Calculated Column as the value for that row. If your Edit Values Expression also has Mathematical operators they will take the values resulting from all Formula calculations and produce meta calculations using those values on a row-by-row basis. In the below example, after Formulas have finished calculating for the first row in the dataset, the expression is equivalent to:
SUM ($100,$300)
Which evaluates the output value for that row:
$400
-
Conditions: (IF, ELSE IF blocks)
- Let you create an Expression that implements a logical check before proceeding
- IF or ELSE IF Expressions must return a boolean value (TRUE or FALSE) and can leverage Formulas, Columns, Values, and Operators
ImportantWith a Calculated Column configuration, the IF or ELSE IF Expressions apply a logical check to the dataset 'horizontally', to determine what EDIT VALUES actions to take or not take for a given row. In the below example, the IF Expression checks the age column on a row-by-row basis to see if the value for that row is between the values of 18 and 30, and returns either True or False. In our example, the first and last rows evaluate to True, whereas the second and third rows evaluate to False. This results in the Edit Values action only being executed for the first and last rows, leaving empty values in the Calculated Column for the two rows that evaluated to False and the respective calculated value for each of the two rows that evaluated to True.
-
-
Managing Calculated Columns
- Once Calculated Columns have been created, you can manage them through the Assets Area of the Advanced Formulas Expression Builder modal. To view the list of Calculated Columns, just select the Columns toggle within the Assets Area
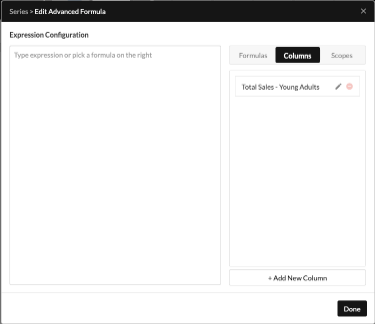
- From here, you can either click the pencil icon to access and modify the configuration for the Calculated Column or the delete icon to delete the Calculated Column.
Using Calculated Columns
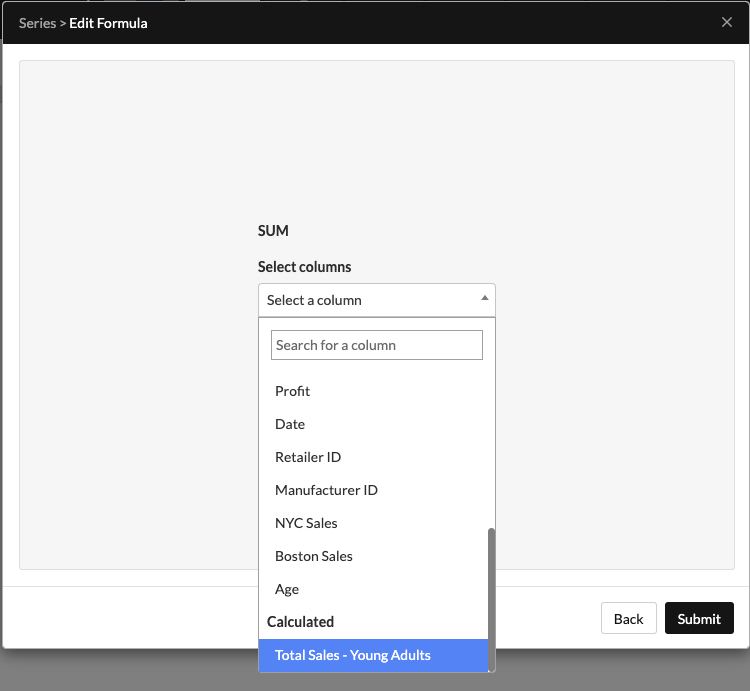
- Once Calculated Columns have been created, you can use them within Formula configurations just as you would have regular Columns that were already fields within your source dataset.
- To select a Calculated Column within a Formula configuration, just search for the Calculated Column name within the column selection dropdown or scroll to the section of the dropdown named ‘Calculated’ to see a list of all Calculated Columns. Regular Columns are listed under the first section of the dropdown called ‘Original’.
Scopes
Scopes may need to be leveraged if you need to execute a Formula calculation on a subset of your dataset rather than on all rows in your dataset. Redbird’s Scopes functionality lets you easily create conceptual subsets of your data (i.e. Scopes), and use these Scopes in Formulas to target which rows in your dataset to execute the Formula calculation on. Scopes bring big efficiency gains to your dashboards by enabling you to define a Scope just once and re-use it anytime you need to perform a calculation on just that subset of the data.
With Scopes, you can easily perform a calculation that sums the values for a particular product or region (or any other conceptual subset of your data). Scopes also allow you to create more complex calculations that let you keep the calculation free to compute off of the default values in your dataset.
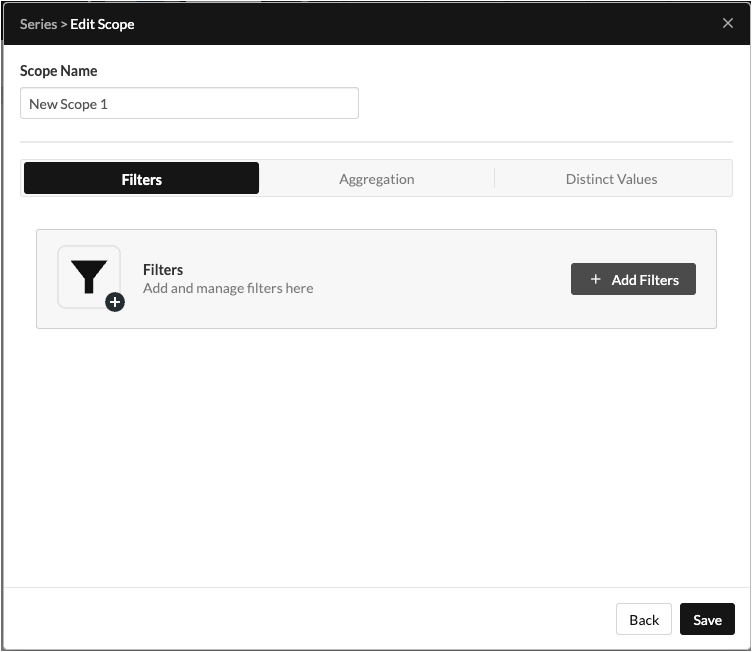
Creating Scopes
- To create a new Scope, click on the Scopes toggle within the Assets Area
- Initially, you will not have any Scopes listed and will need to create a new Scope by clicking on Add New Scope at the bottom right side of the Assets Area.
- This will create a new Scope for you. Click on the pencil icon in that new Scope to take you to the Scope Editor view, where you can take the following actions:
- Enter the name for the new Scope
- Add any Filters to restrict the values included in your Scope.
- Filters can be added through the Filters section of the Scope Editor
- In the example below, we can see how adding a Filter (Sales > $400) to our Scope impacts the result for a Formula that calculates the Sum of Sales for our dataset
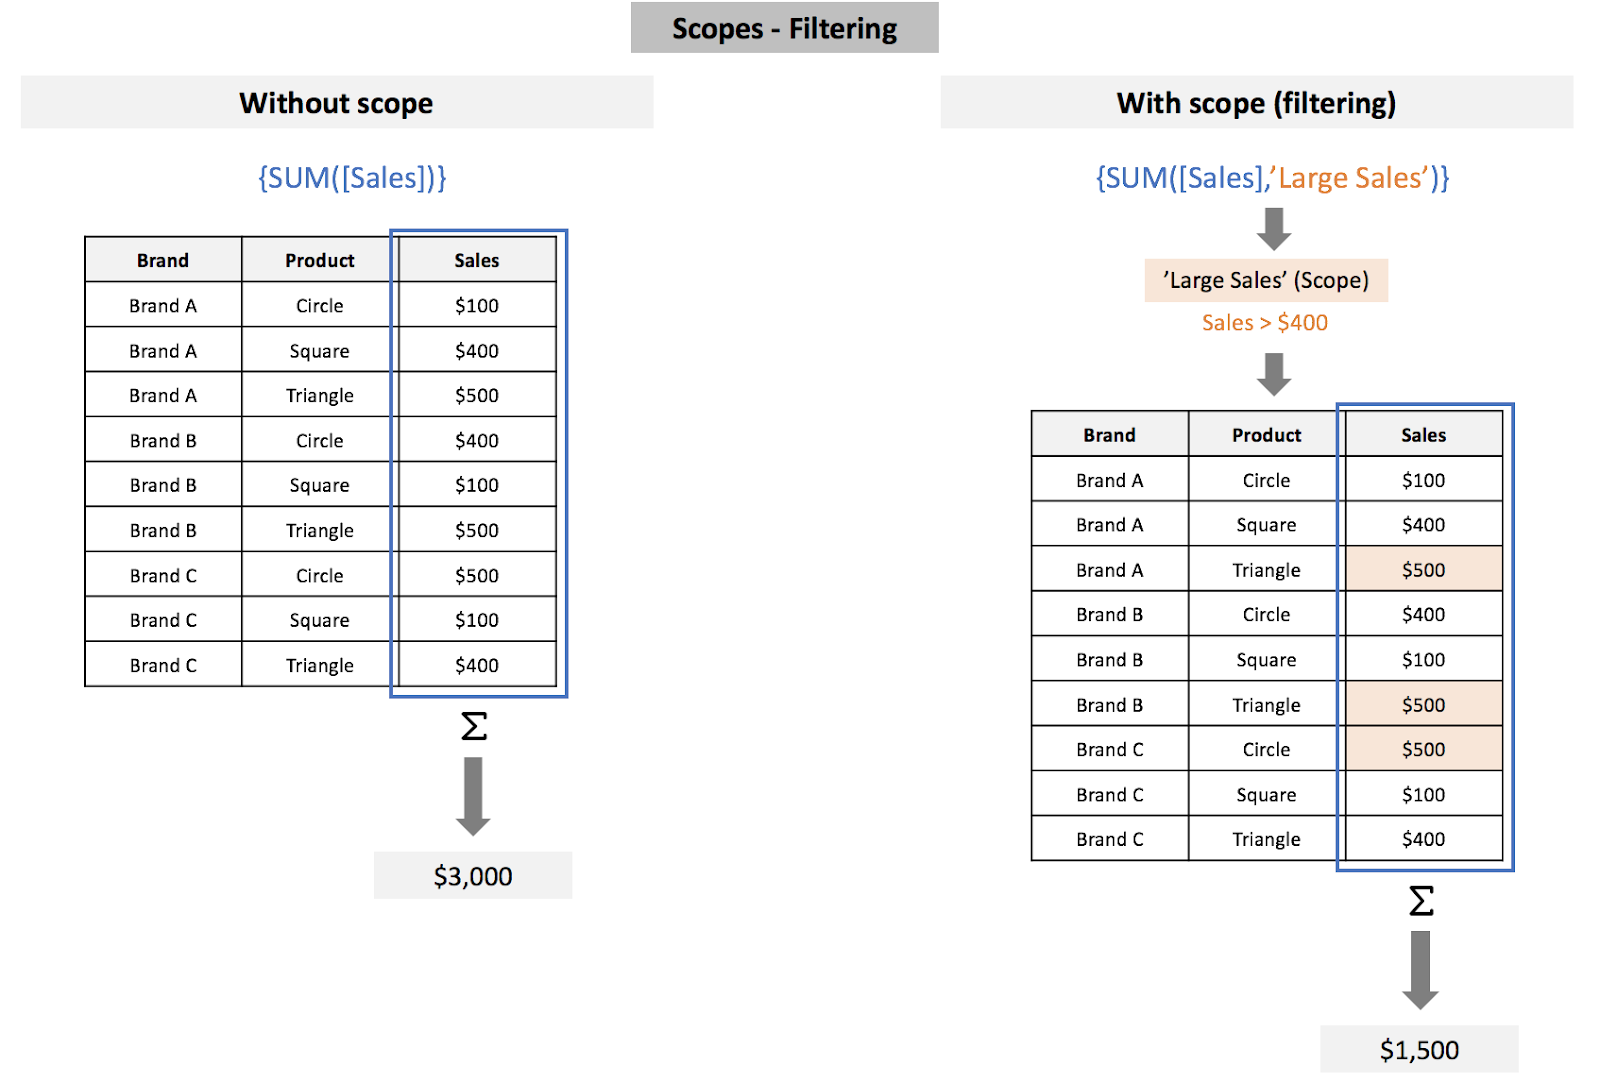
- Filters can be added through the Filters section of the Scope Editor
- Add any Distinct Values criteria to restrict the dataset based on unique rows across a selected number of columns
- Distinct Values criteria can be set within the Distinct Values section of the editor by clicking the ‘Distinct values’ tab, setting the toggle to on, and selecting the Columns you want to deduplicate off of in the Column selector
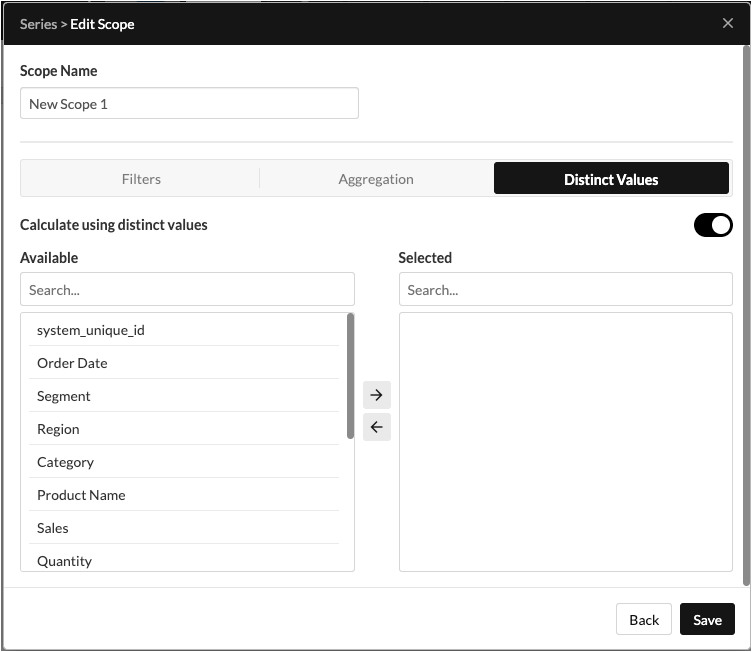
- In the example below, we can see how adding a Distinct Values criteria (Deduplicate by Product) to our Scope impacts the result for a Formula that calculates the Count of values for our dataset
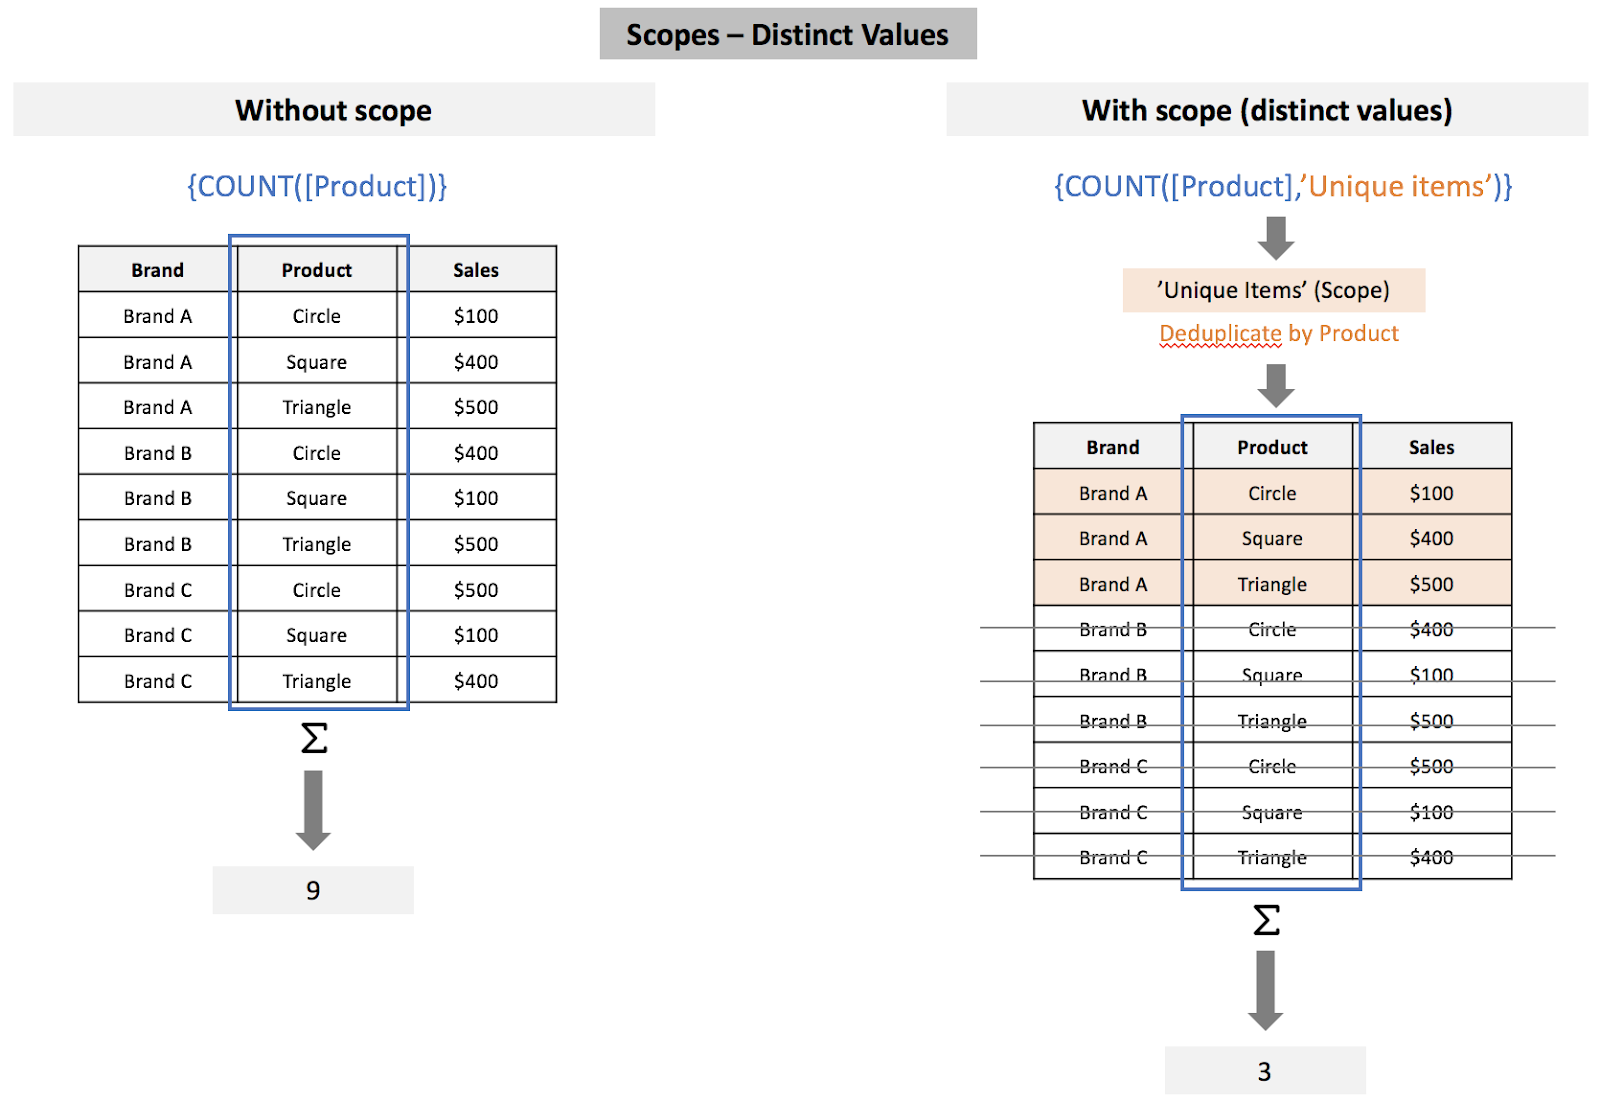
- Distinct Values criteria can be set within the Distinct Values section of the editor by clicking the ‘Distinct values’ tab, setting the toggle to on, and selecting the Columns you want to deduplicate off of in the Column selector
- Add any Aggregation Anchors to restrict the dataset based on anchoring the data subset by different criteria. These can be accessed by clicking on the Aggregation tab.
- Aggregation Anchors operate within the context of your dashboard object configuration, and specifically in relation to your configuration for Category and Split. For a refresher on the Category and Split configuration options, please go to the article here
- Aggregation Anchors conceptually set your desired subset of data within your calculation to one of four options: Default, Category, Split, or All
- Default
- Will not anchor your calculation to a specific subset of your data, and will calculate the output values using the natural scope within the formula’s execution
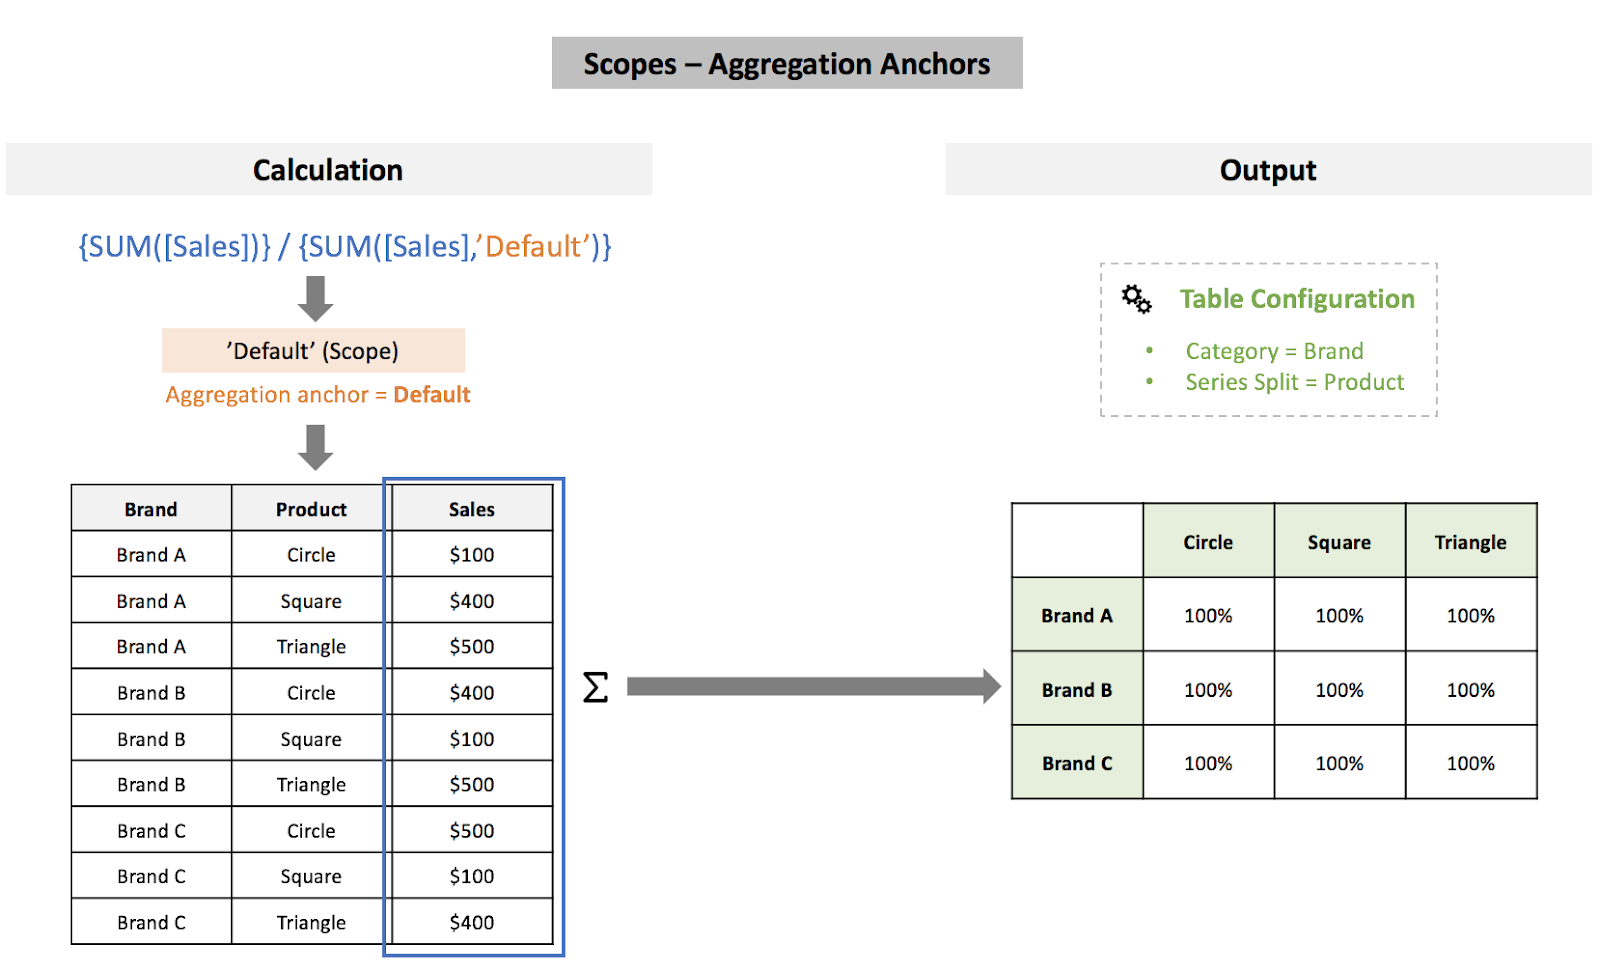
- Will not anchor your calculation to a specific subset of your data, and will calculate the output values using the natural scope within the formula’s execution
- Category
- Will anchor your calculation to the subset of data rows matching the current Category value for the output value being calculated
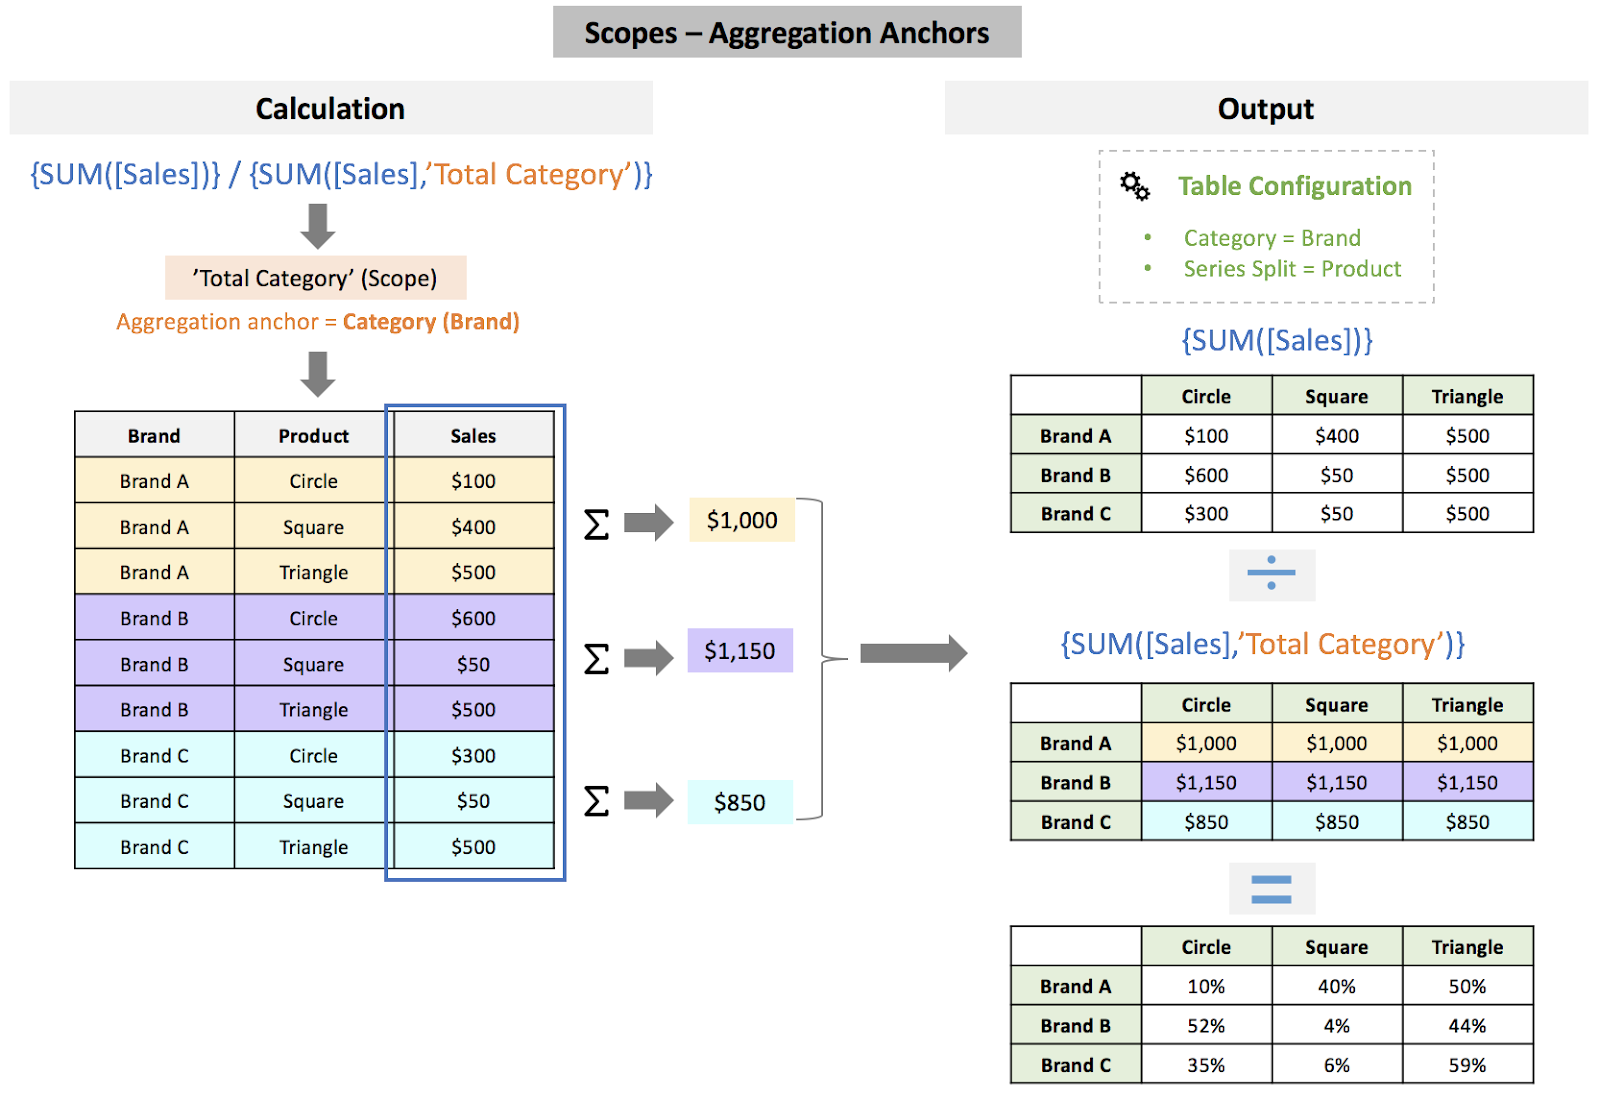
- Will anchor your calculation to the subset of data rows matching the current Category value for the output value being calculated
- Split
- Will anchor your calculation to the subset of data rows matching the current Split value for the output value being calculated
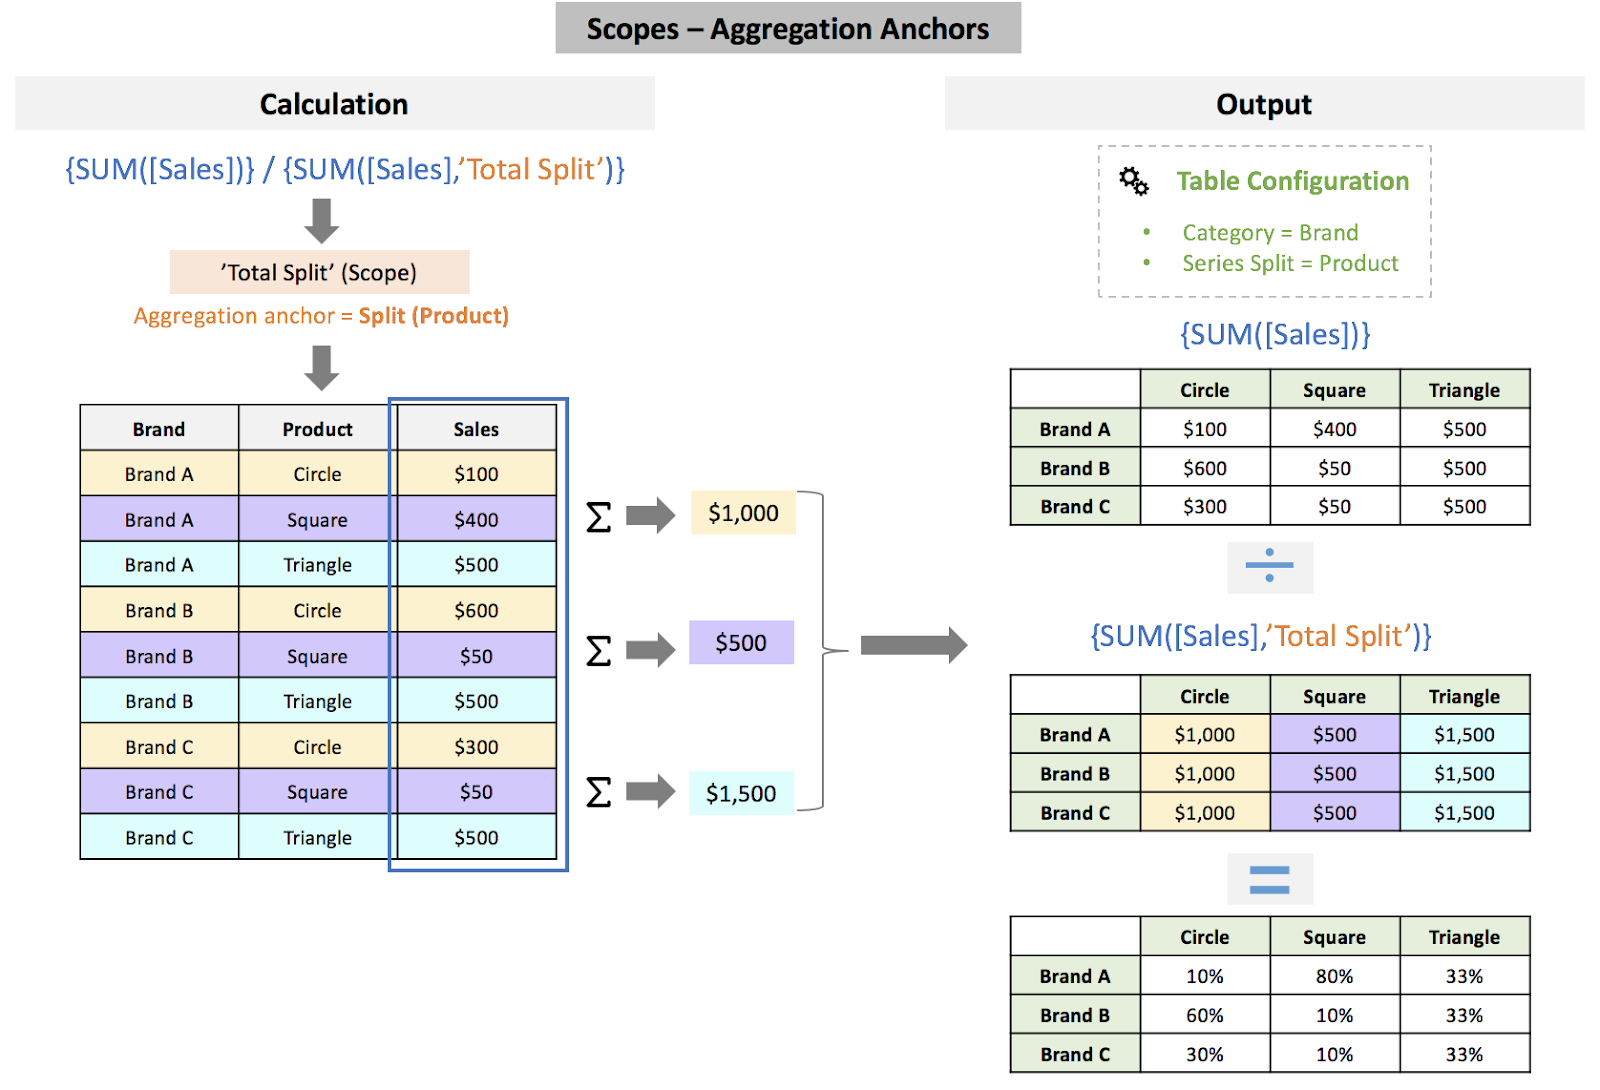
- Will anchor your calculation to the subset of data rows matching the current Split value for the output value being calculated
- All
- Will anchor your calculation to the entire dataset (all rows) regardless of the current Category and/or Split value for the output value being calculated

- Will anchor your calculation to the entire dataset (all rows) regardless of the current Category and/or Split value for the output value being calculated
- Default
Managing Scopes
- Once Scopes have been created, you can manage them through the Assets Area of the Advanced Formulas Expression Builder modal. To view the list of Scopes, just select the Scopes toggle within the Assets Area
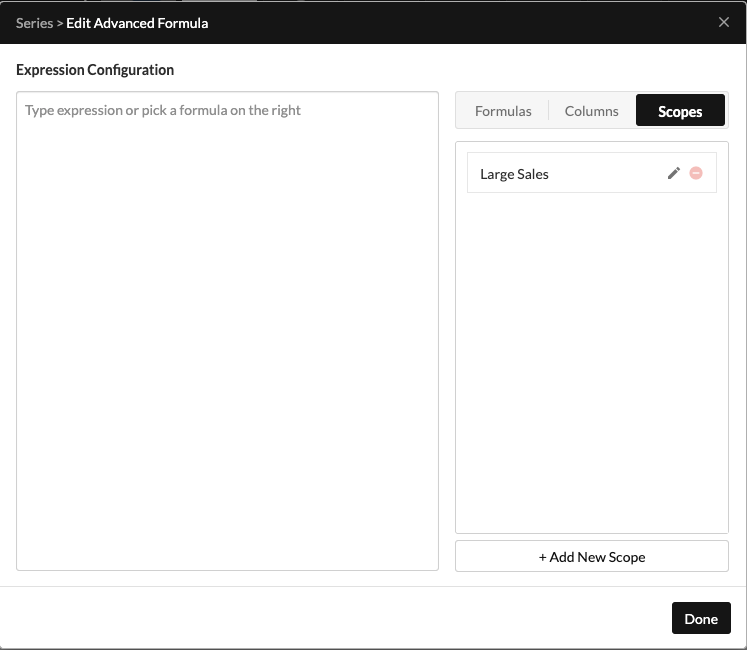
- From here, you can either click Edit to access and modify the configuration for the Scope or to delete the Scope.
Important:Deleting a Scope will invalidate any Formula that is currently using that Scope within its calculation. Proceed carefully and check with collaborators that are working with you on the dashboard before deleting a Scope.
Using Scopes
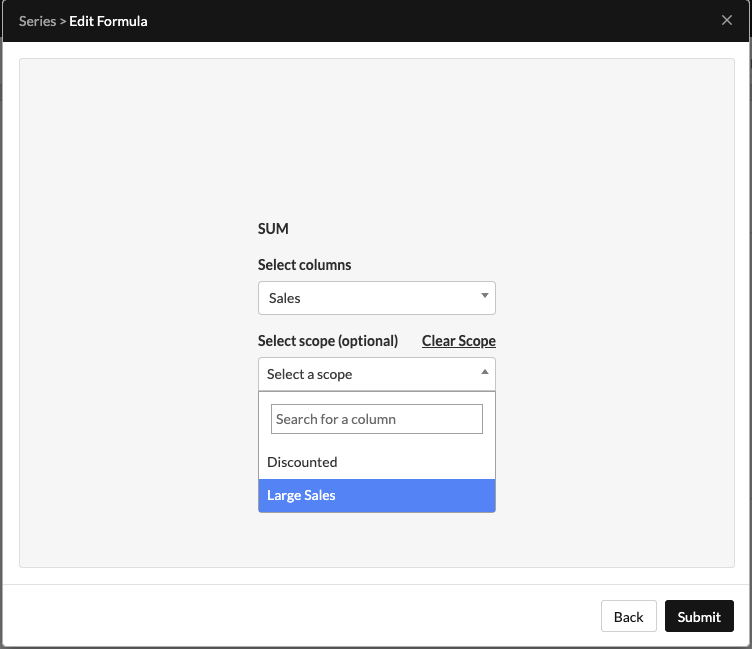
- Once Scopes have been created, you can use them within Formula configurations to restrict the formula execution to that specific Scope
- To select a Scope within a Formula configuration, just search for the Scope name within the scope selection dropdown
- Click Clear Scope if you wish to remove the current selected Scope.