

Talk to Autopilot
Master the Autopilot interface — chat threads, focus levels, the Resources panel, and the preview panel
Introduction
Autopilot is Redbird's AI assistant and the primary way to get things done on the platform: you describe what you want, and Autopilot builds it. The screen is arranged around that conversation — the chat in the middle, the Resources panel on the left, and the preview panel on the right, which shows whatever you're working on.
This guide covers each part, plus the idea that ties them together: Autopilot always works at the level of what you're focused on — your whole workspace, one workflow, or a single node — and the panels follow along.
Chat threads
Your conversations with Autopilot live in chat threads. The thread selector at the top of the chat shows which thread you're in; click it to switch threads, start a new one with + New chat, or use the pencil and trash icons beside a thread to rename or delete it.
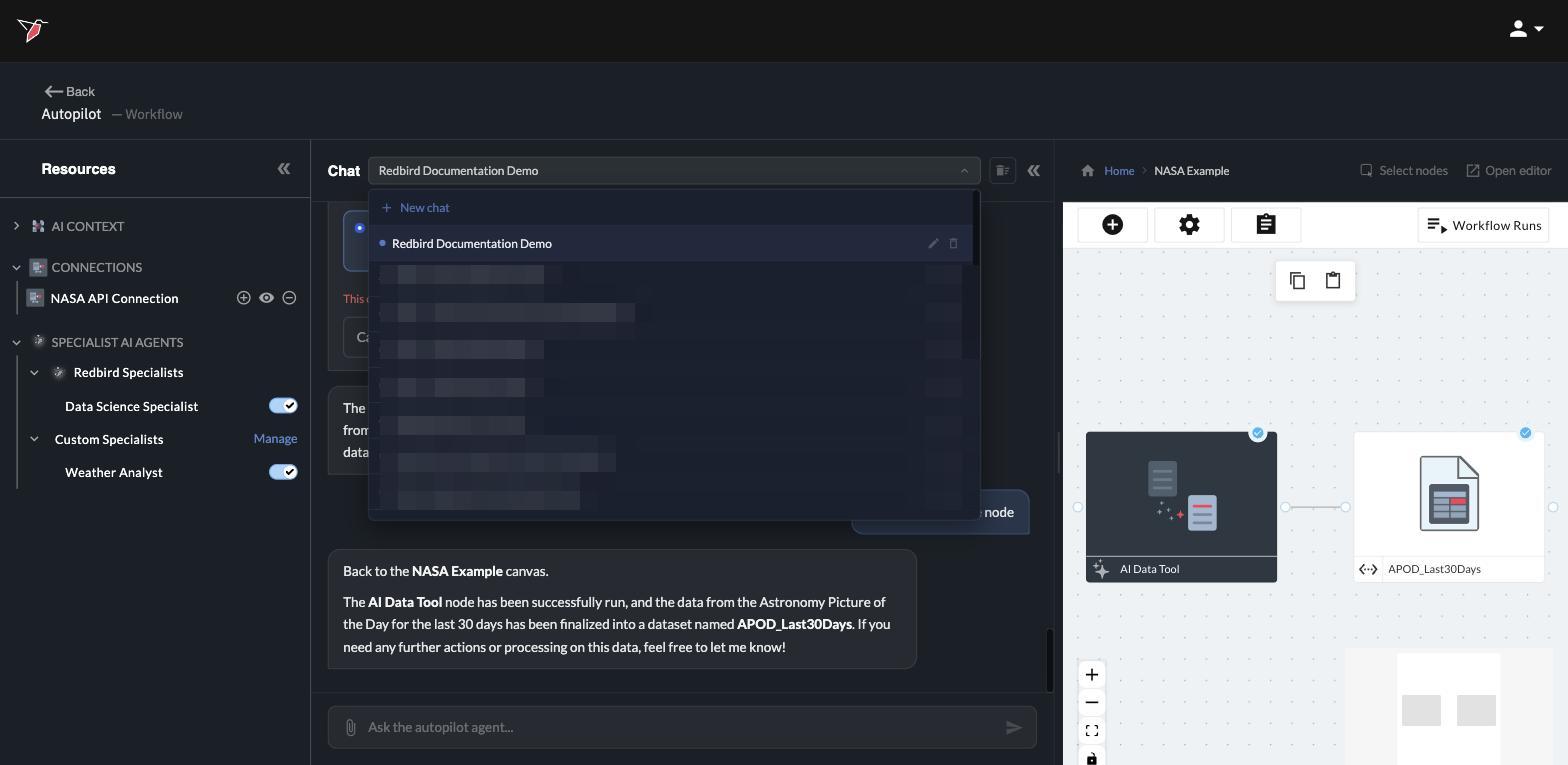
Threads keep your different tasks separate — Autopilot remembers the context of the thread you're in, so a reporting project and a data-cleanup project don't talk over each other. To wipe a thread's conversation and start fresh in place without deleting the thread object itself, use the clear icon (the trash can just right of the thread selector).
In the message box at the bottom you can type requests, attach files with the paperclip icon, and send with Enter. Anything you can do in Redbird is fair game to ask for — creating workflows, connecting to tools outside of Redbird that you use, collecting data, transforming it, building reports, or just asking questions about the data and documents in your workflow.
Point at exactly what you mean. When a request concerns a specific object, you don't have to describe it — reference it precisely, in either of two ways:
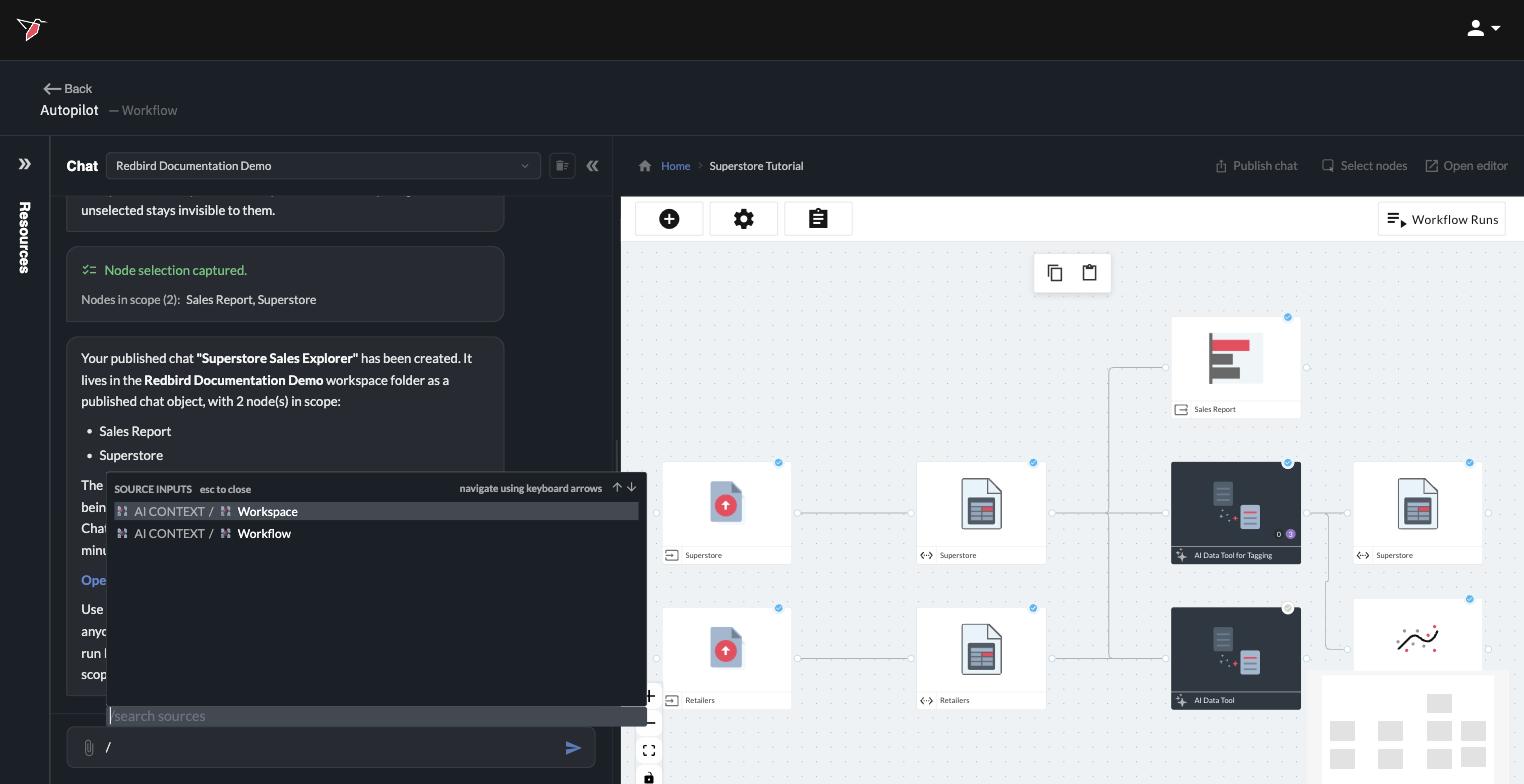
- Type / in the message box to open the source inputs menu: a searchable list of the sources available to you in the Resources panel at your current focus. Pick one and it attaches to your message as a reference.
- Switch on Select elements at the top of the preview panel and click any element shown there — a workflow, node, or individual object within a node configuration — and it attaches to your message as a reference pill.
Either way, your next request acts on exactly what you referenced — "summarize this," "make this a pie chart" — with no ambiguity about which "this" you mean. Both surfaces are covered in detail later in this article: the Resources panel and the preview panel's Select elements each have their own section below.
Autopilot follows your focus
Autopilot always works at one of three levels, shown just next to the Autopilot title at the top of the screen:
- Workspace — you're at the top level, among your folders and workflows. Ask Autopilot to create folders or workflows, navigate, or find things.
- Workflow — you've opened a workflow, which represents an overall process or flow of work to accomplish an objective based on data, documents, or other information; the workflow canvas is shown on the right when the Autopilot scope is focused on a workflow. Requests now apply to this workflow: connect to tools, collect data, add data transformation steps, run a workflow, schedule automated workflow runs.
- Workflow Node — you're focused on a single node within a workflow canvas. Workflow nodes represent a specific step or logical portion of an overall workflow like connecting to a tool or building a report. Autopilot often switches scope to a workflow node itself when it starts working on one, and you can double-click any node to focus it). Once a node is in focus in the preview panel, autopilot chat requests now apply to that node.
You'll see Autopilot narrate its own focus too — "I'm now focused on the AI Data Tool node" — and the breadcrumb above the preview panel (for example, Home → Superstore Tutorial → AI Data Tool) always shows exactly where you are. To move back up a level, click a higher item in that breadcrumb.
The Resources panel
The Resources panel on the left holds everything Autopilot can draw on to do its work. Click the double-arrow icon to expand or collapse it. Its sections adjust to your current focus level — deeper levels like specific nodes show more available resources since they inherit the available resources from their parent workflow or workspace in addition to the resources available to that specific node only:
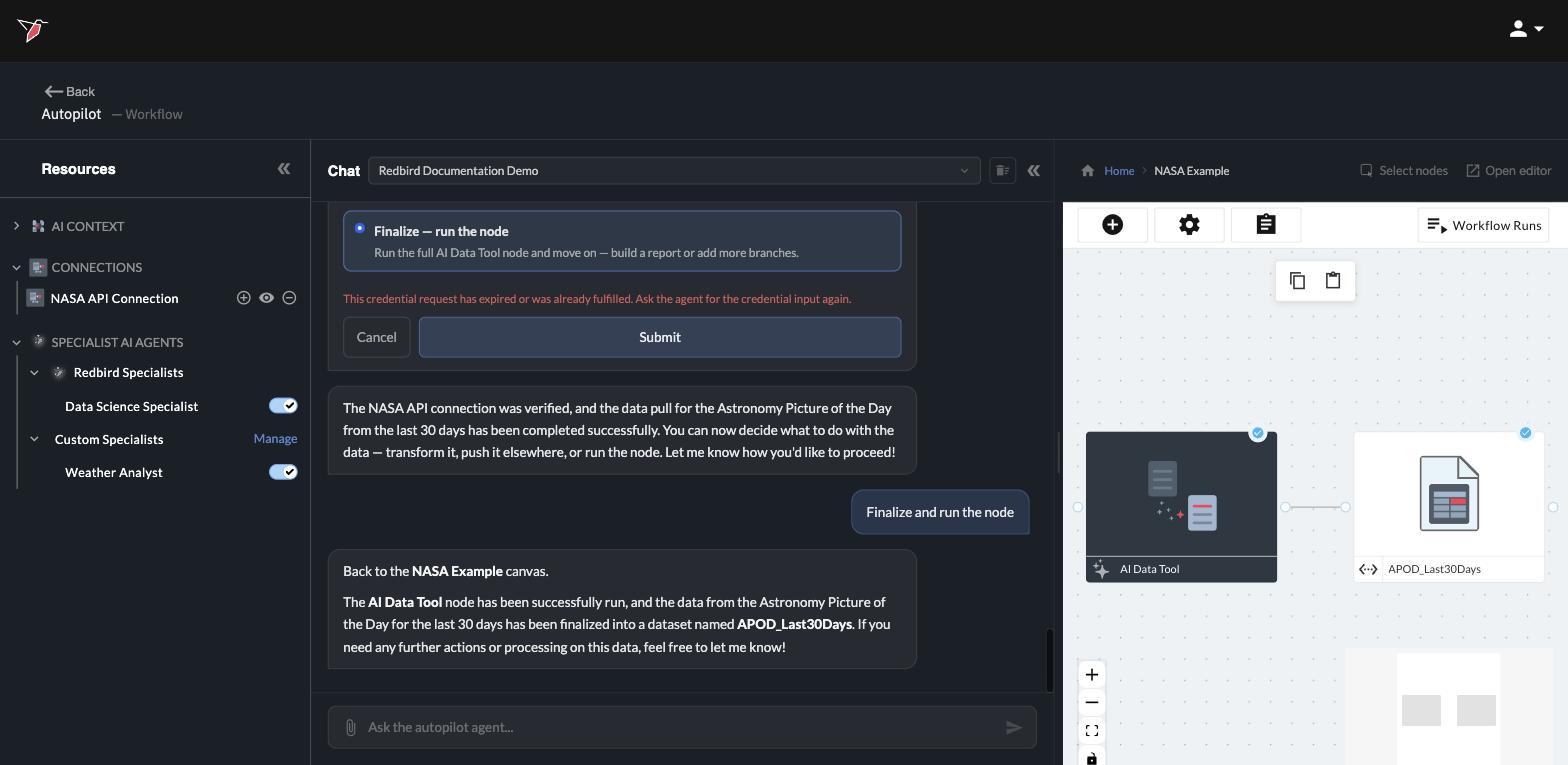
The resources panel has sections for different types of available resources, each serving a different purpose:
- Uploads — files you've attached (documents, spreadsheets, presentations). Each upload can be expanded to see its pages, previewed with the eye icon, or managed from its three-dot menu. This is a staging area from which uploaded objects can be directly used within the chat and can also be moved to a workflow canvas or AI Context, at which point the uploaded object will be consumed and removed from the Uploads section.
- AI Context — standing notes and reference material Autopilot should keep in mind and reference if relevant to the task at hand. At deeper focus levels this splits into Workspace, Workflow, and Node rows, so context can apply everywhere, to one workflow, or to a single node — use the plus (+) icon on a row to add context at that level. You can manage which level a certain piece of AI Context belongs to by simply asking Autopilot to move a specific context object to the desired level (Workspace, Workflow, or Node), which will determine when the context object gets used.
- Connections — the connections available within the current scope object (see Connect your tools). Preview one with the eye icon or remove it with the minus icon. Connections are authenticated connections to tools outside of the Redbird platform that allow users to pull / push information to and from those tools and interact with them on an automated basis by providing natural language instruction to Autopilot.
- Specialist AI Agents — focused experts Autopilot can bring into the conversation, with an on/off toggle for each (see Adding specialist AI agents).
- Node Inputs — appears at the node level: the other inputs feeding the node you're focused on through edge connections on the workflow canvas from other nodes into the current node.
The preview panel
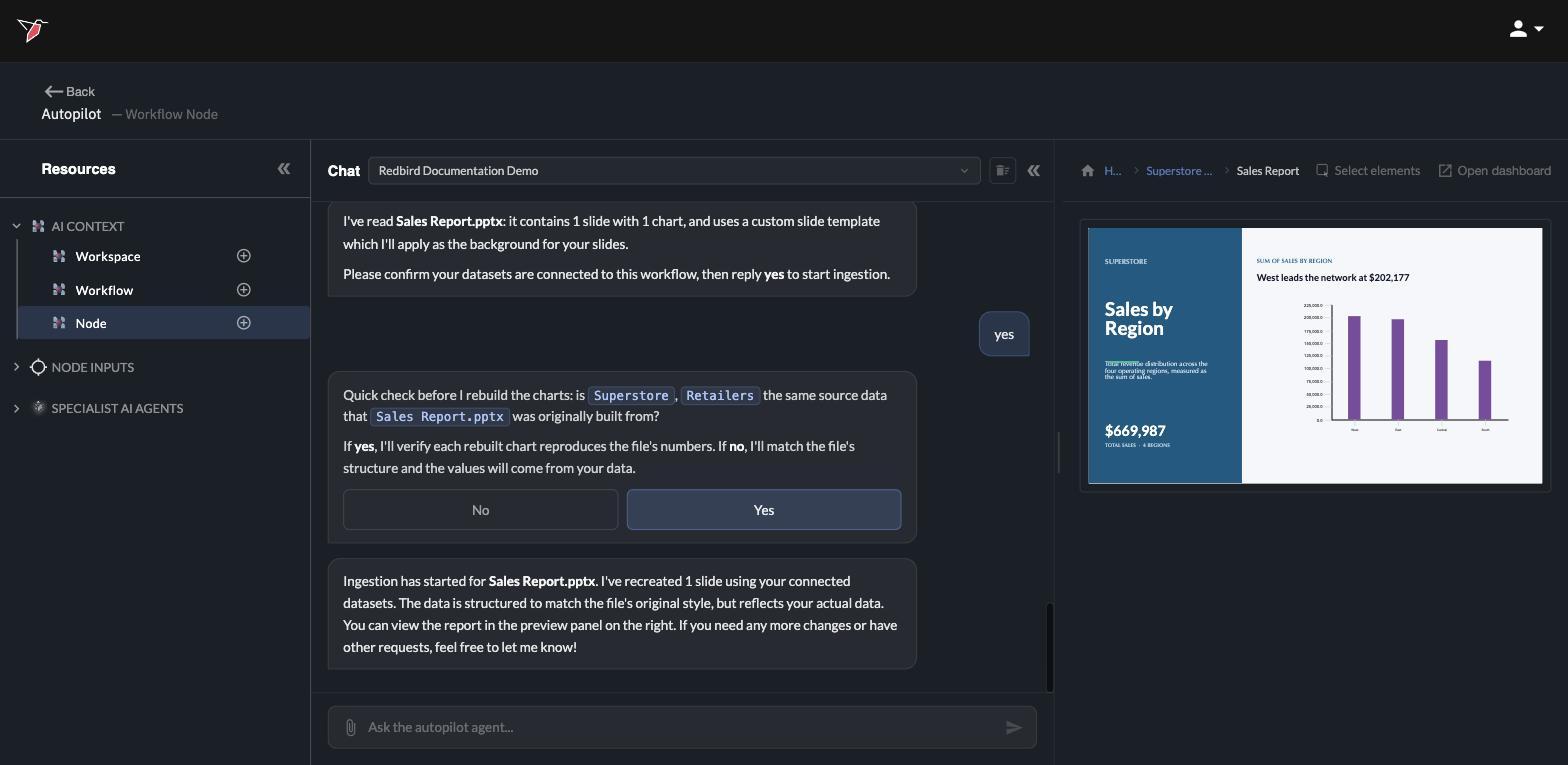
The panel on the right always shows the thing you're working on, at your current focus: the workspace's folders, a workflow's canvas, a node's steps and outputs, a dataset preview, or — as here — a report output.
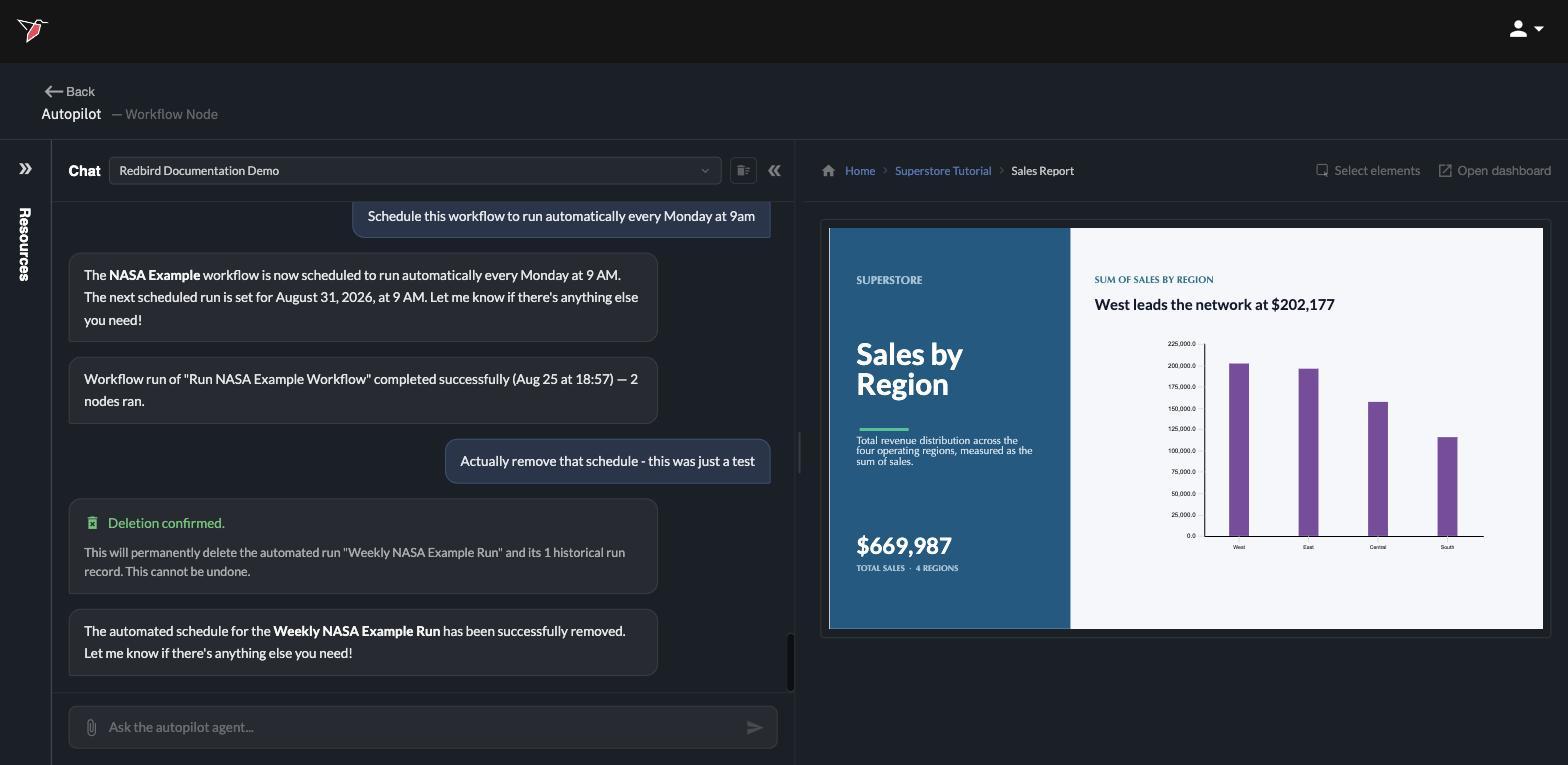
Three things to know:
- It's interactive. Scroll and click through whatever's shown — inspect a dataset preview, or look over a report slide by slide.
- Select elements (top of the panel) turns pointing into context: switch it on, click any element in the preview and that element attaches to your next chat message, so you can say "make this a pie chart" and Autopilot knows exactly which "this" you mean.
- Open editor / Open report (top-right) goes deeper into the object shown. Open editor on an AI Data Tool node opens its step editor for hands-on work. On a presentation, click any slide directly in the preview (or click Open report, then the slide) to open the slide editor view, where every component — headlines, charts, tables, images — can be fine-tuned by hand.
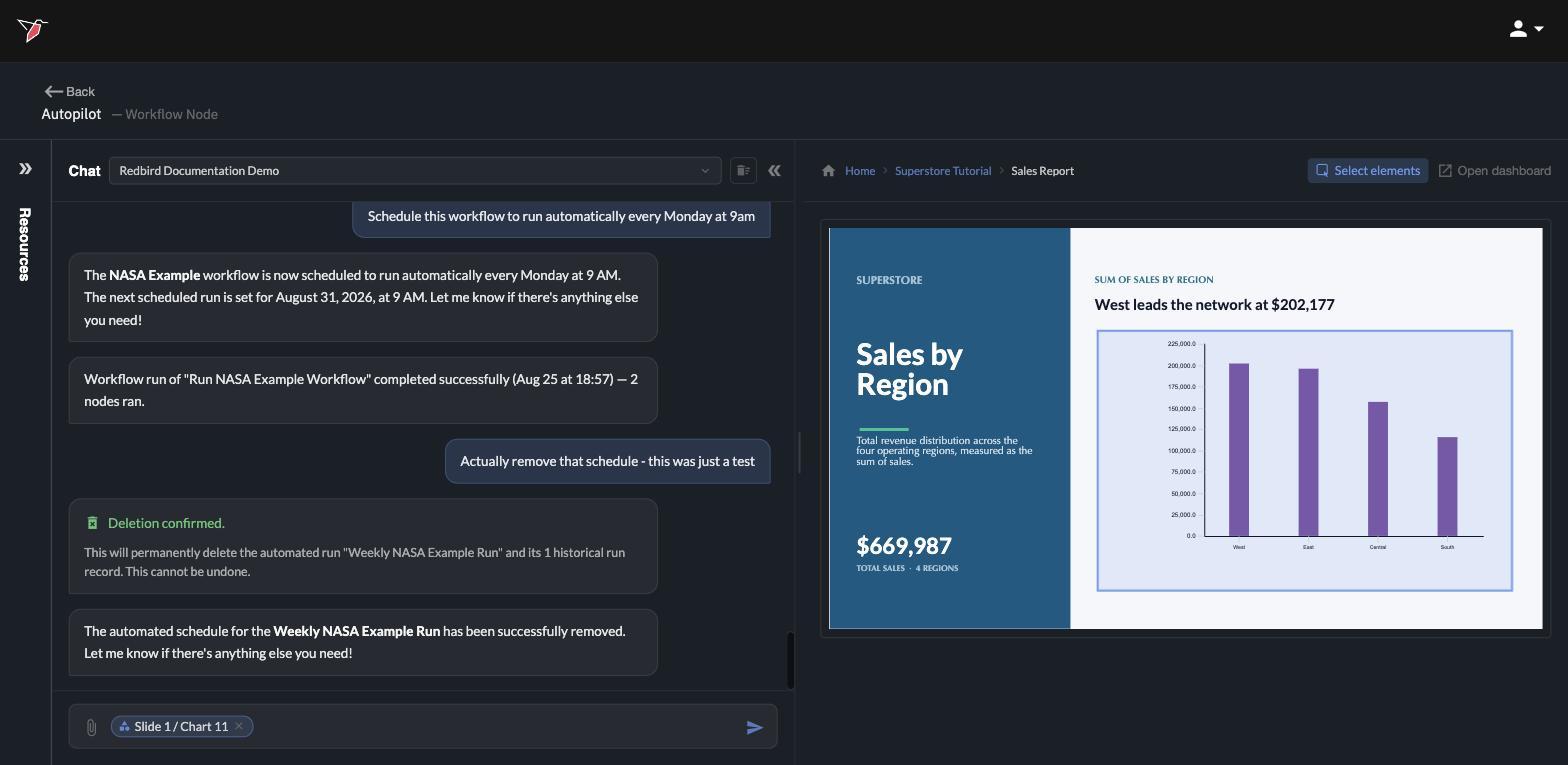
If you're ever unsure where a request will land, glance at the level next to the Autopilot title and the breadcrumb above the preview. Autopilot applies your request to what you're focused on — focusing first, then asking, is the surest way to act on exactly the right thing.
Updated 4 days ago