Pushing to a Data Warehouse
Background
After collecting and processing data on Redbird, there might be a need to push that data to a data warehouse. This can be accomplished through the Data Warehouse Output app which can be added as a step to the overall workflow.
Please ensure that you have the adequate permission required to push data into the warehouse associated with your credentials.
Redbird currently offers connections to Amazon Redshift, Google Big Query, AWS PosgreSQL, Snowflake, Databricks and Azure SQL.
Connecting in Dataset NodesNote: You need to connect the Redbird datasets on your canvas to the Data Warehouse node (by drawing a line between them) to push those datasets to your data warehouse.
Create a Configuration and Entering Credentials
- Double-click the node to enter configuration mode
- Name your configuration by clicking the gray pencil at the top of your screen
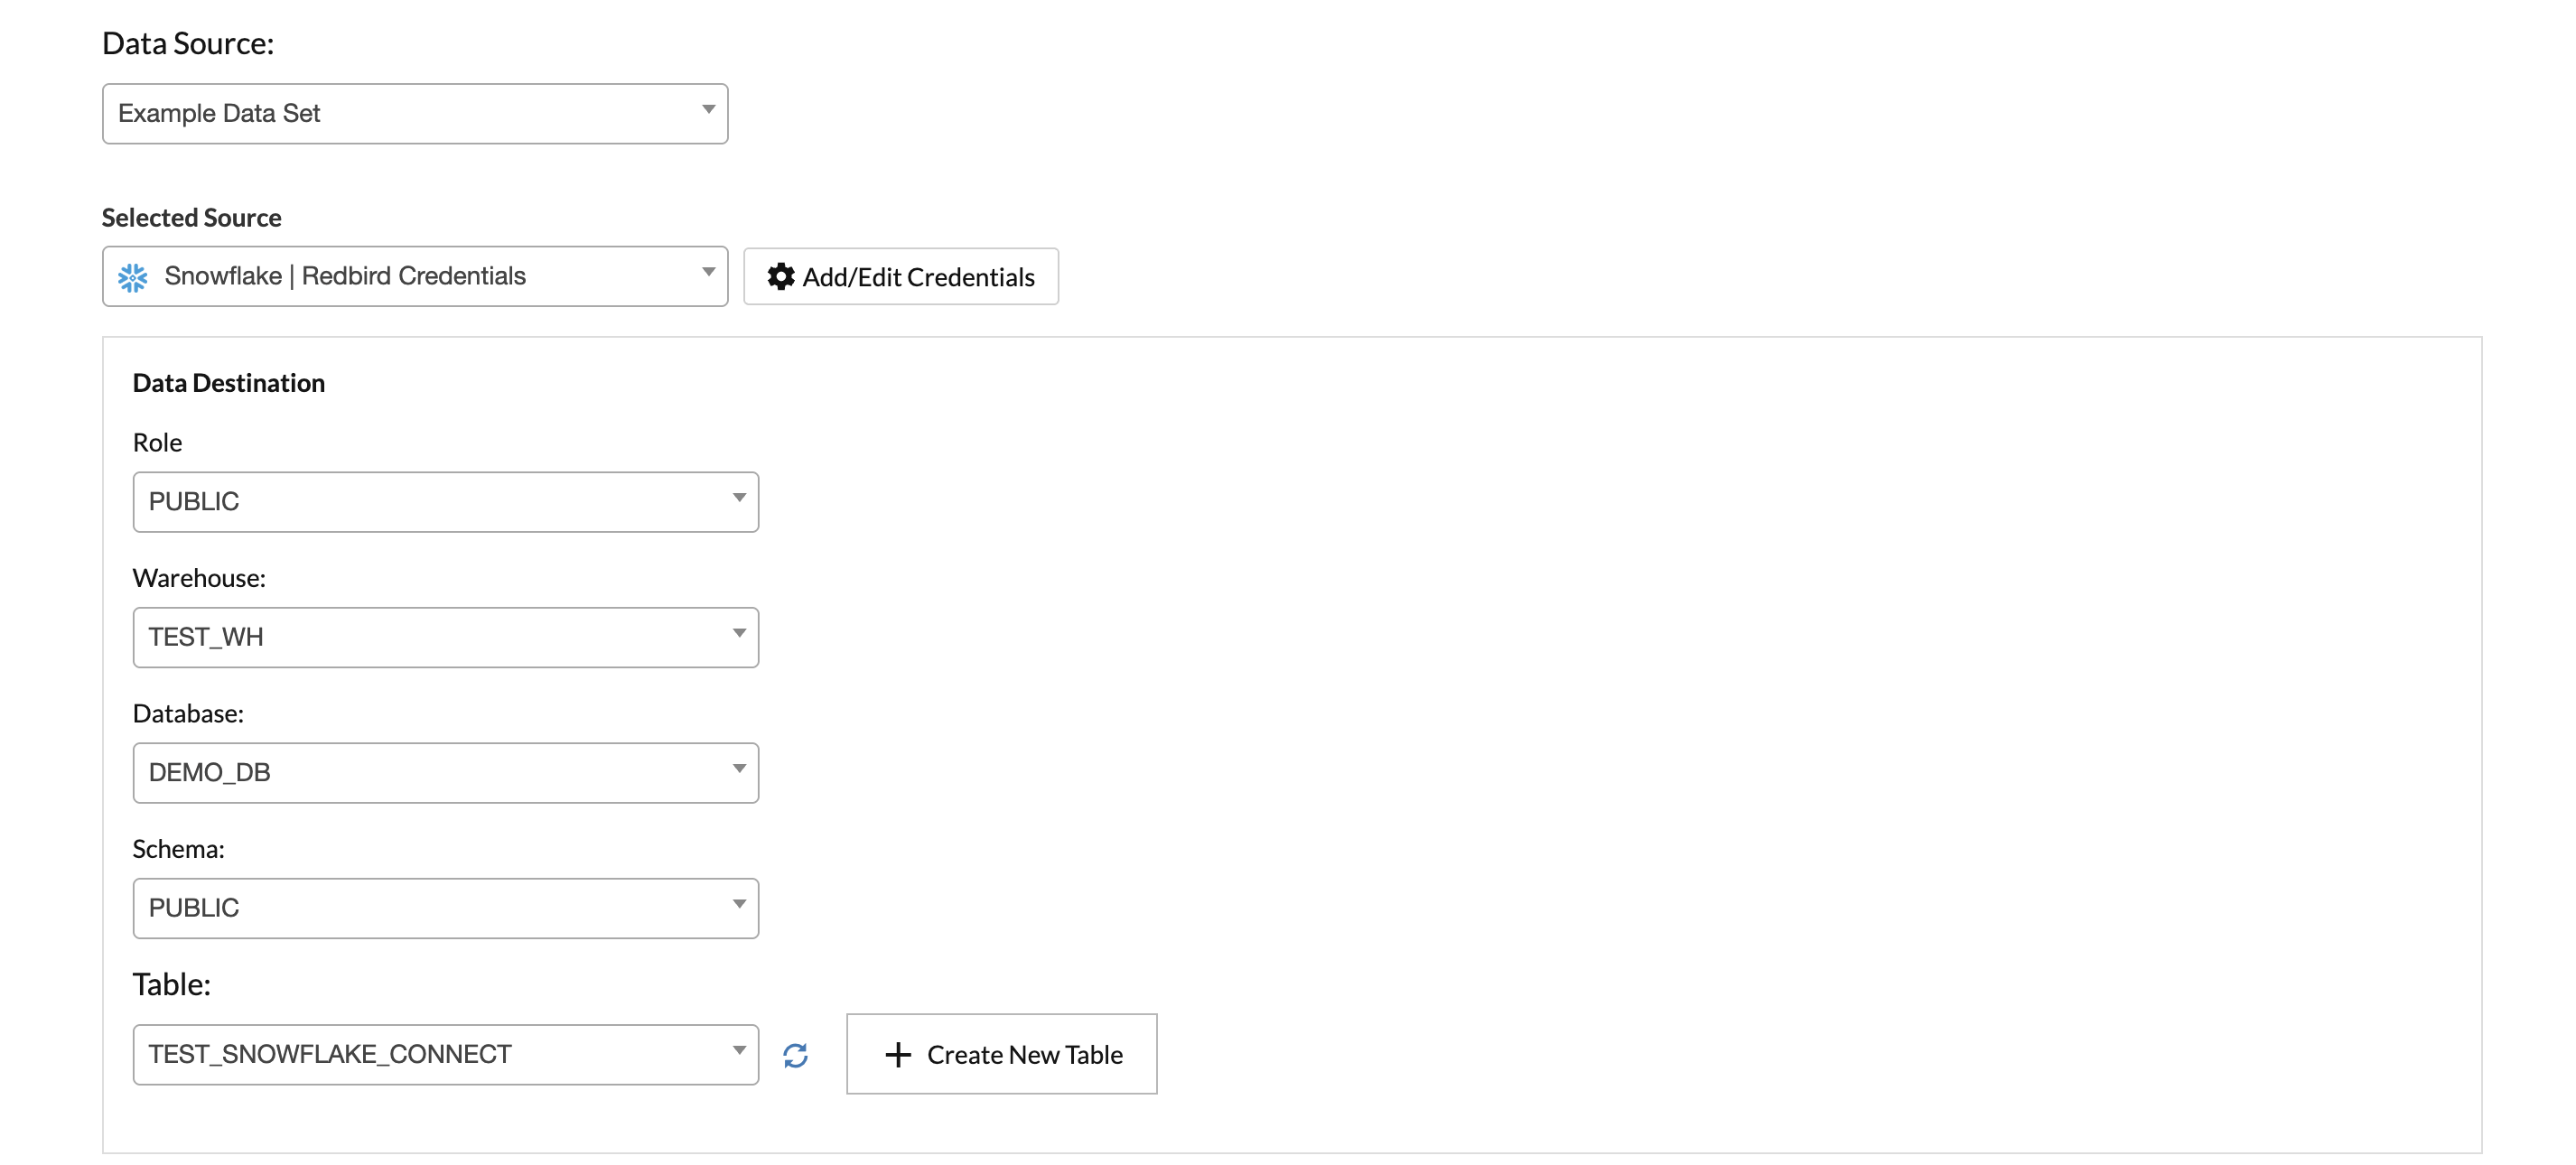
- If credentials have already been added to Redbird, they will appear in the Selected Source dropdown. Simply choose the ones you want to use. (If only one set exists, it will be selected automatically.) To add new credentials or edit existing ones, click Add/Edit Credentials.
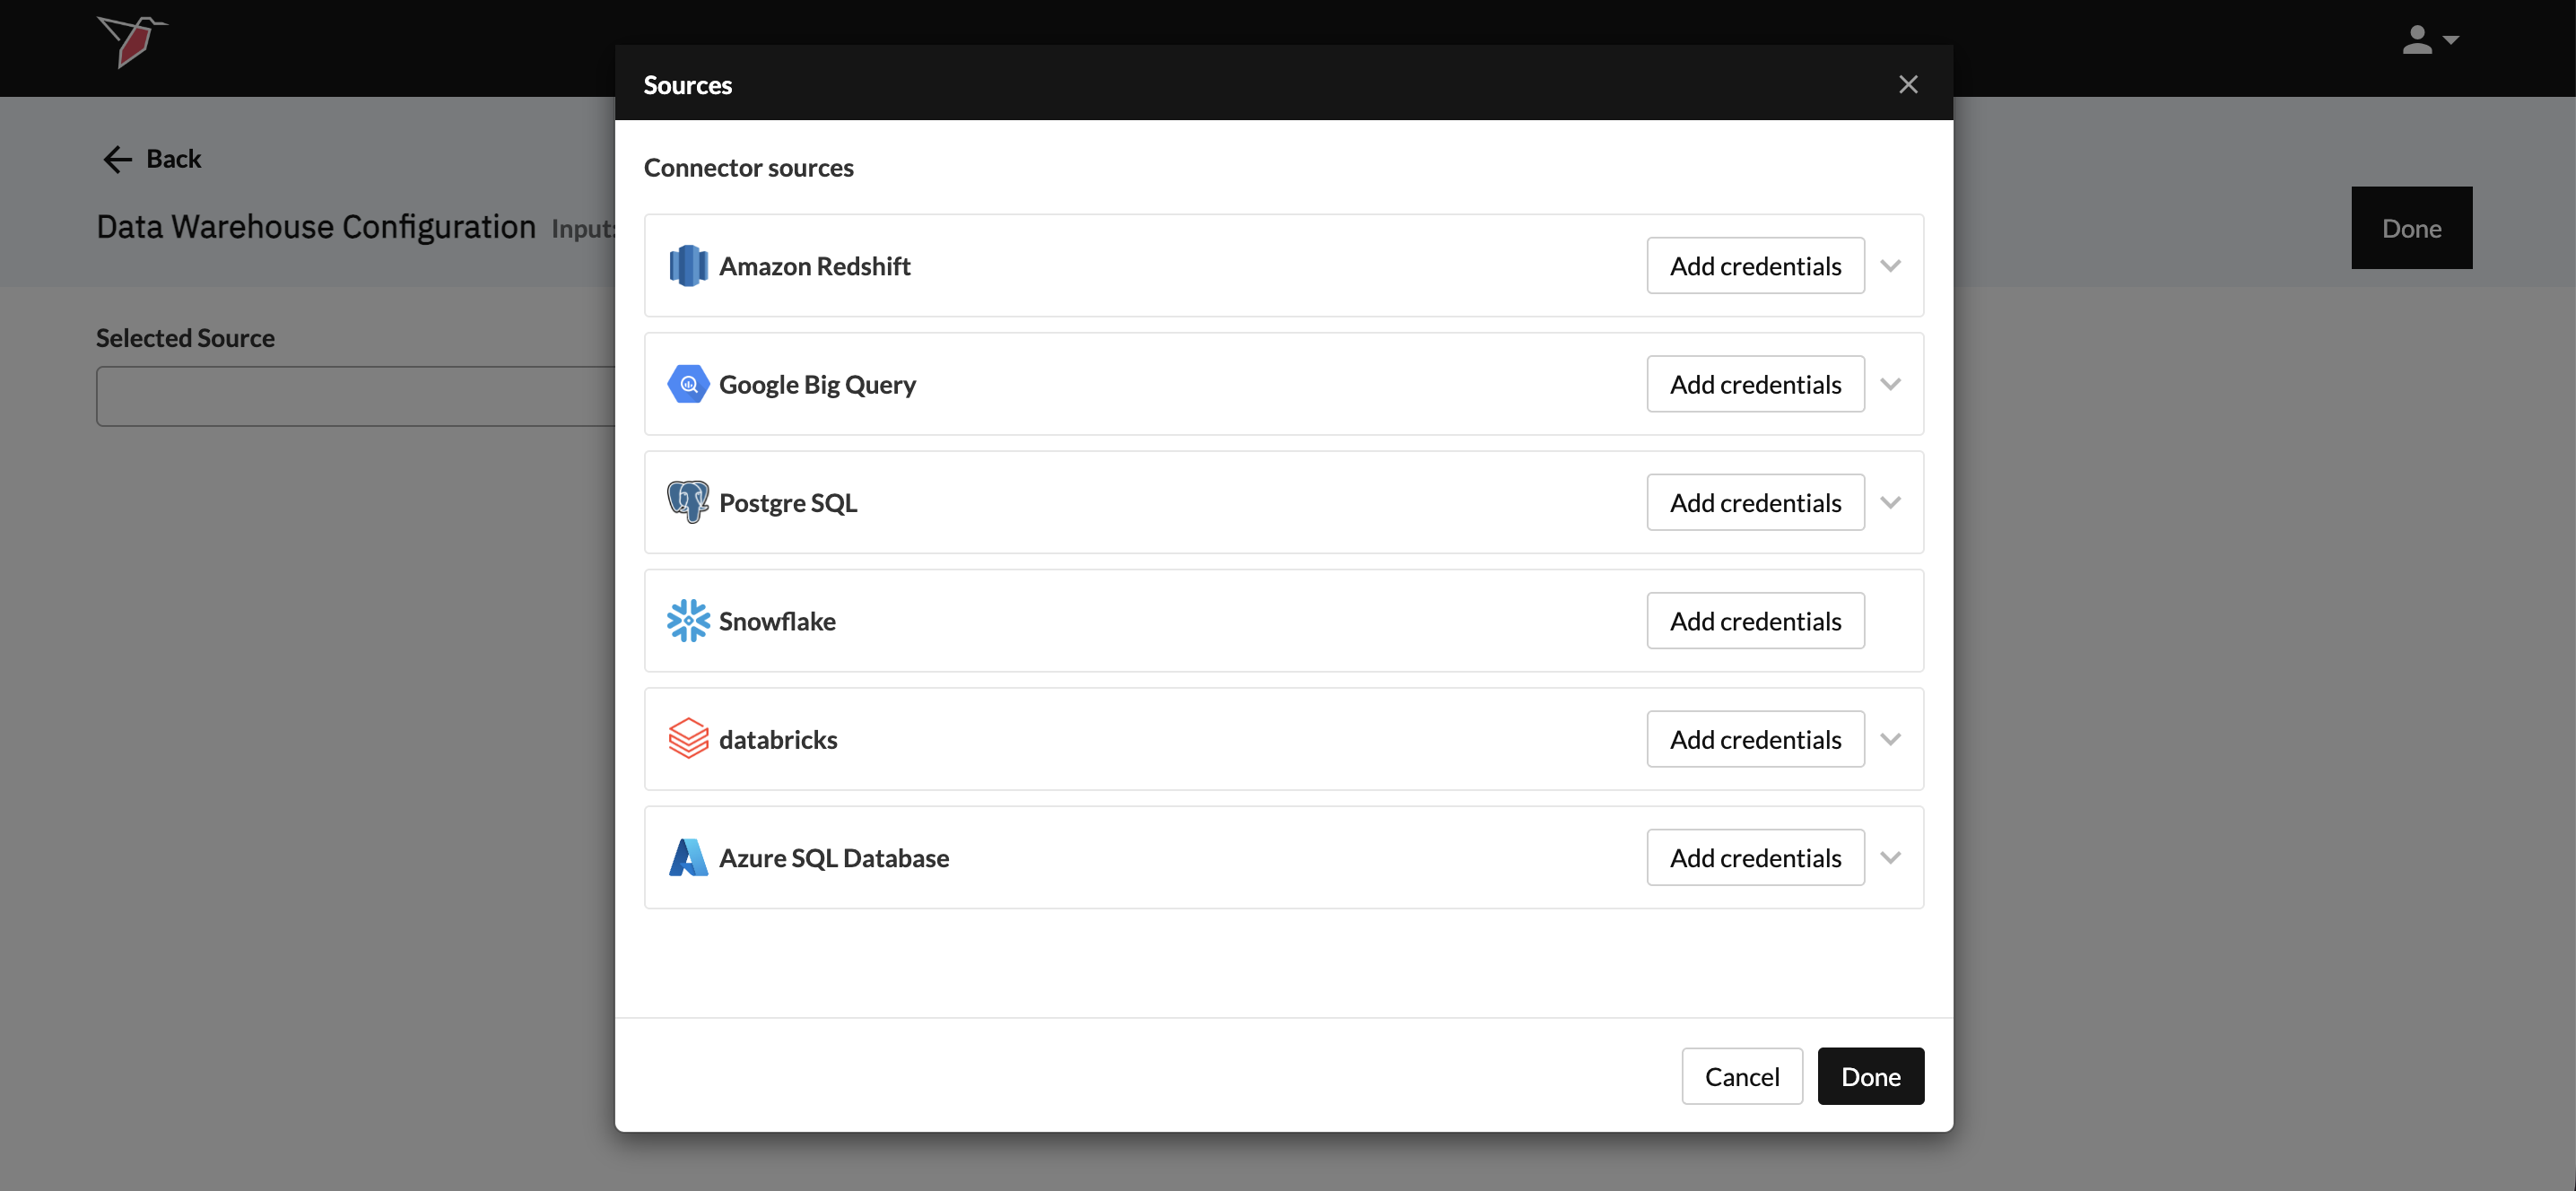
- From the Sources modal, click Add credentials on the Data Warehouse you wish to use.
- You can refer to the guides below on the requirements needed for each of the specific connectors. The first step will always be to name your credentials so that you can reference them at the end of this process.
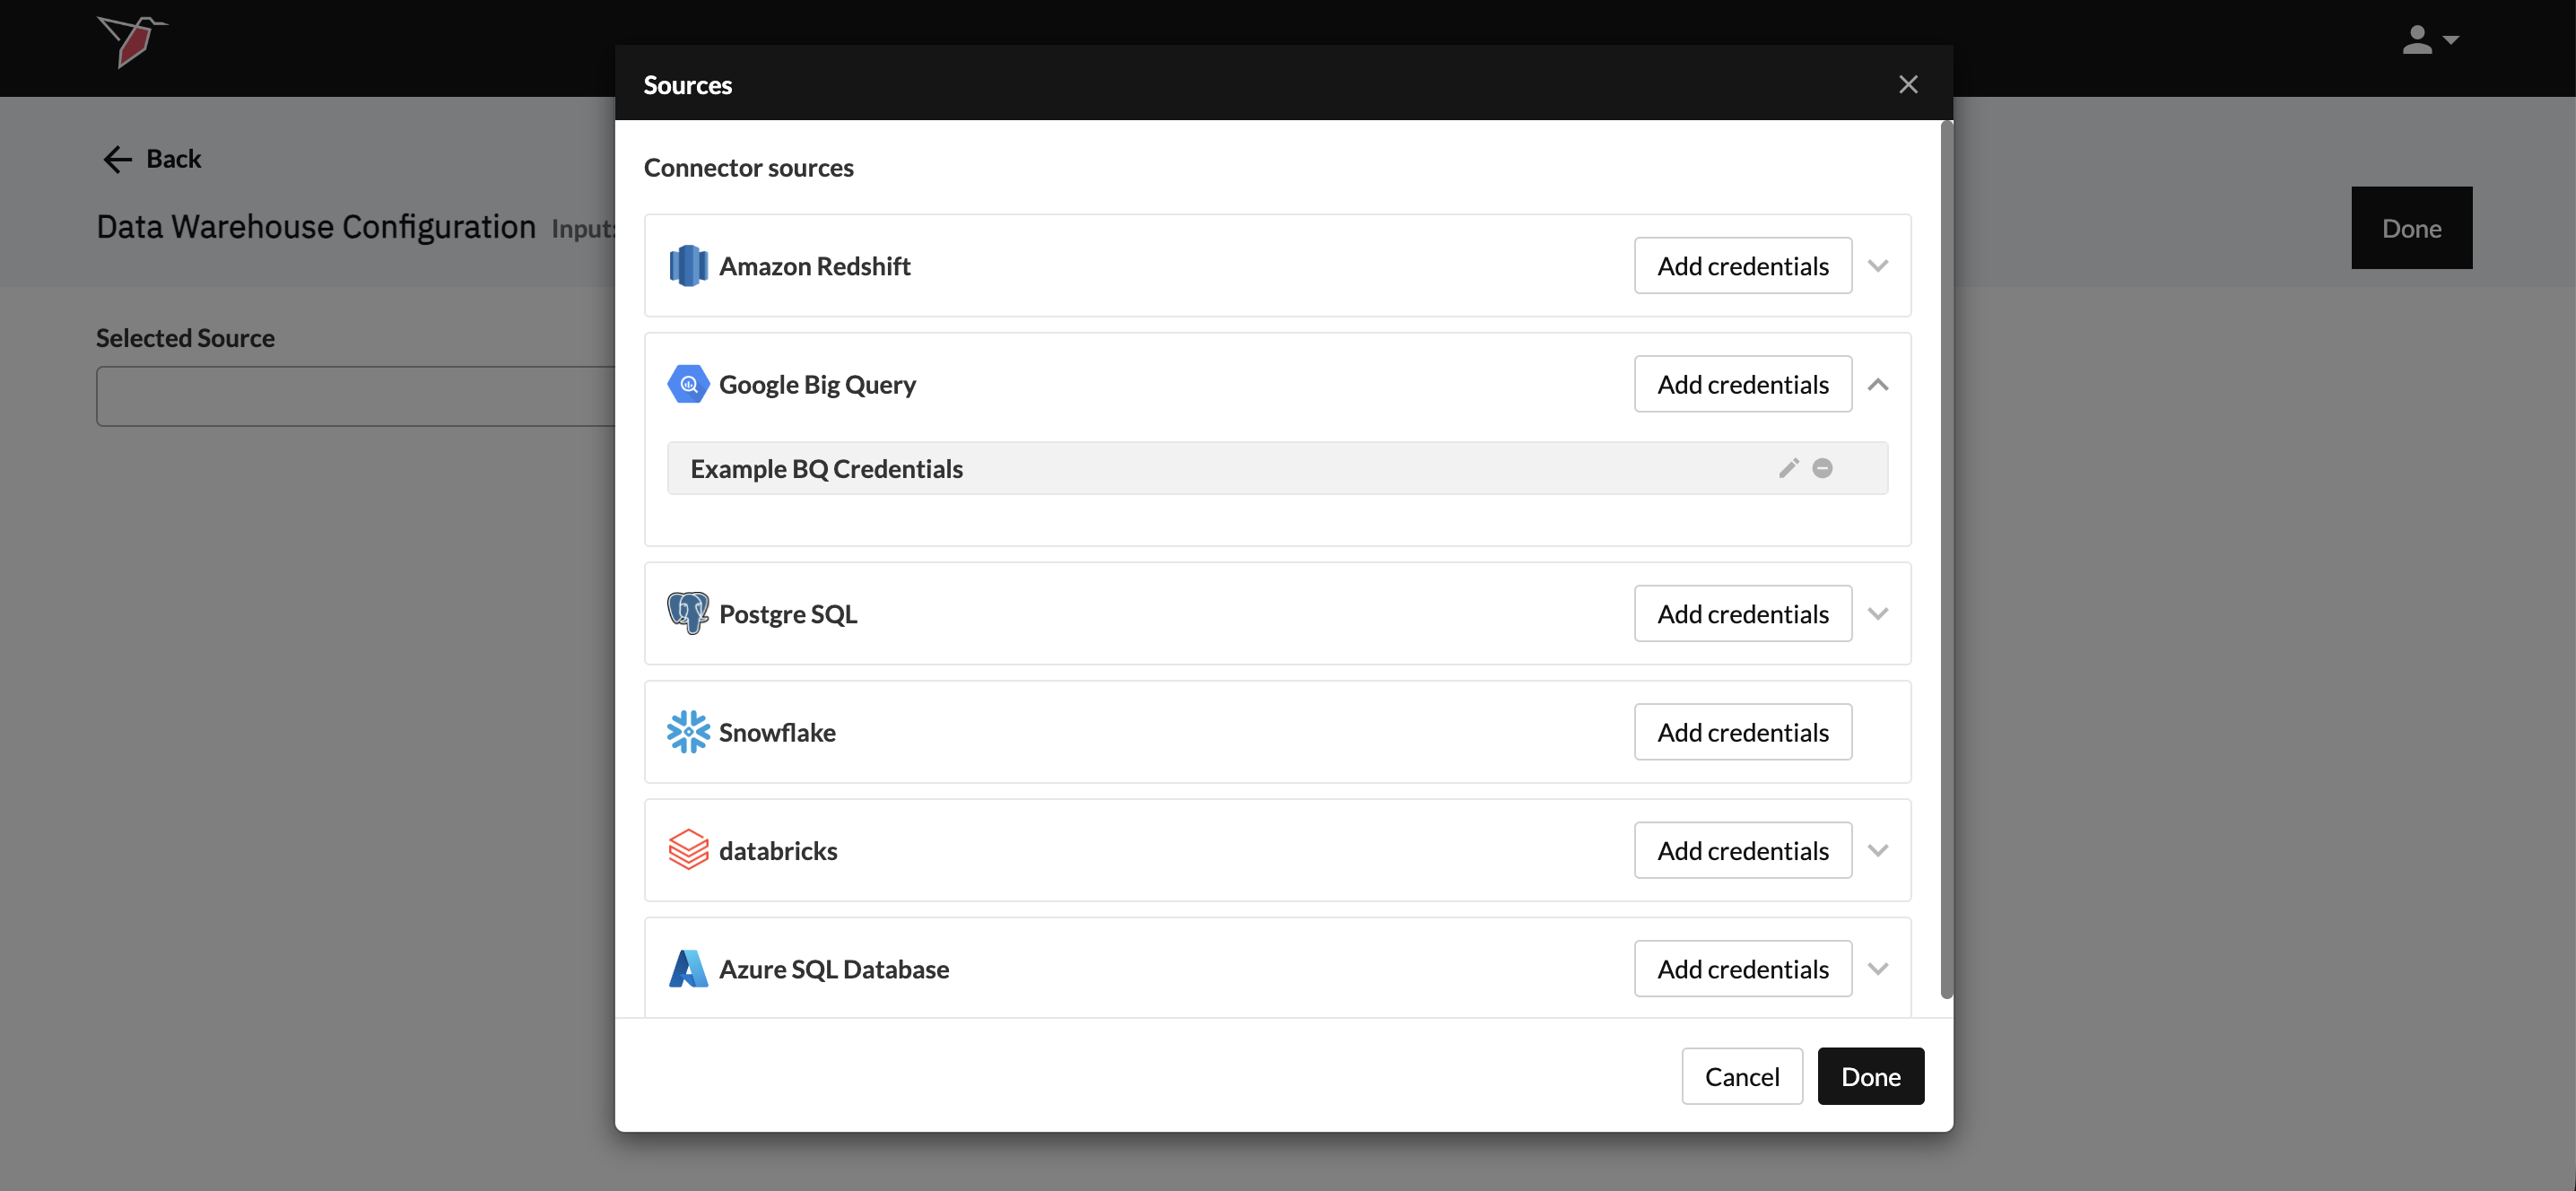
- Once credentials have been added, they will appear in a grey box beneath the respective Data Warehouse name. You can edit them by clicking the pencil icon or delete them by clicking the minus icon.
- Click Done to return to the main configuration screen
- Once credentials have been selected in the Selected Source dropdown, the Data Source dropdown will appear. It will list all datasets connected to this node. Select from the dropdown which one you want to push to your data warehouse table. You can only select one dataset per node.

- Use the dropdowns in the Data Destination section to navigate your data warehouse structure and locate the table you want to push data into. The exact path varies slightly by platform but will typically include fields such as Role, Warehouse, Database, Schema, and Table. If you are returning to edit an existing configuration, click the refresh icon next to the table dropdown to make sure you are seeing the latest list of tables.
Creating a New TableDepending on the data warehouse, you may either push data into an existing table or also have the option to create a new one. If creating a new table is supported, a Create New Table option will appear for you to click and then enter a name when prompted.
- The Advanced Settings section lets you choose whether to Append or Replace the data in your data warehouse table each time the workflow runs.
- Click Done.
Running the Data Warehouse Output Node
- Click on the Data Warehouse node that you would like to run
- Click Run on the right-side panel