Getting Started with Sheets
Introduction
Within the Redbird platform, users can generate Excel-like outputs in the Sheets Utilize app which supports both inputting data directly into the sheet and Redbird tables. These tables are driven by data collections and macro operations that users create upstream within Redbird which are all connected using Redbird's workflow functionality. The ability to create Redbird tables within the sheet allows users to collect, process, and visualize their data to be leveraged within a workflow to automate any future data processing needs. This guide walks through the basics of getting started on your first sheet within Redbird.
Key Terms and Definitions
- Table: A configurable element that enables users to display analytical outputs in the form of a table.
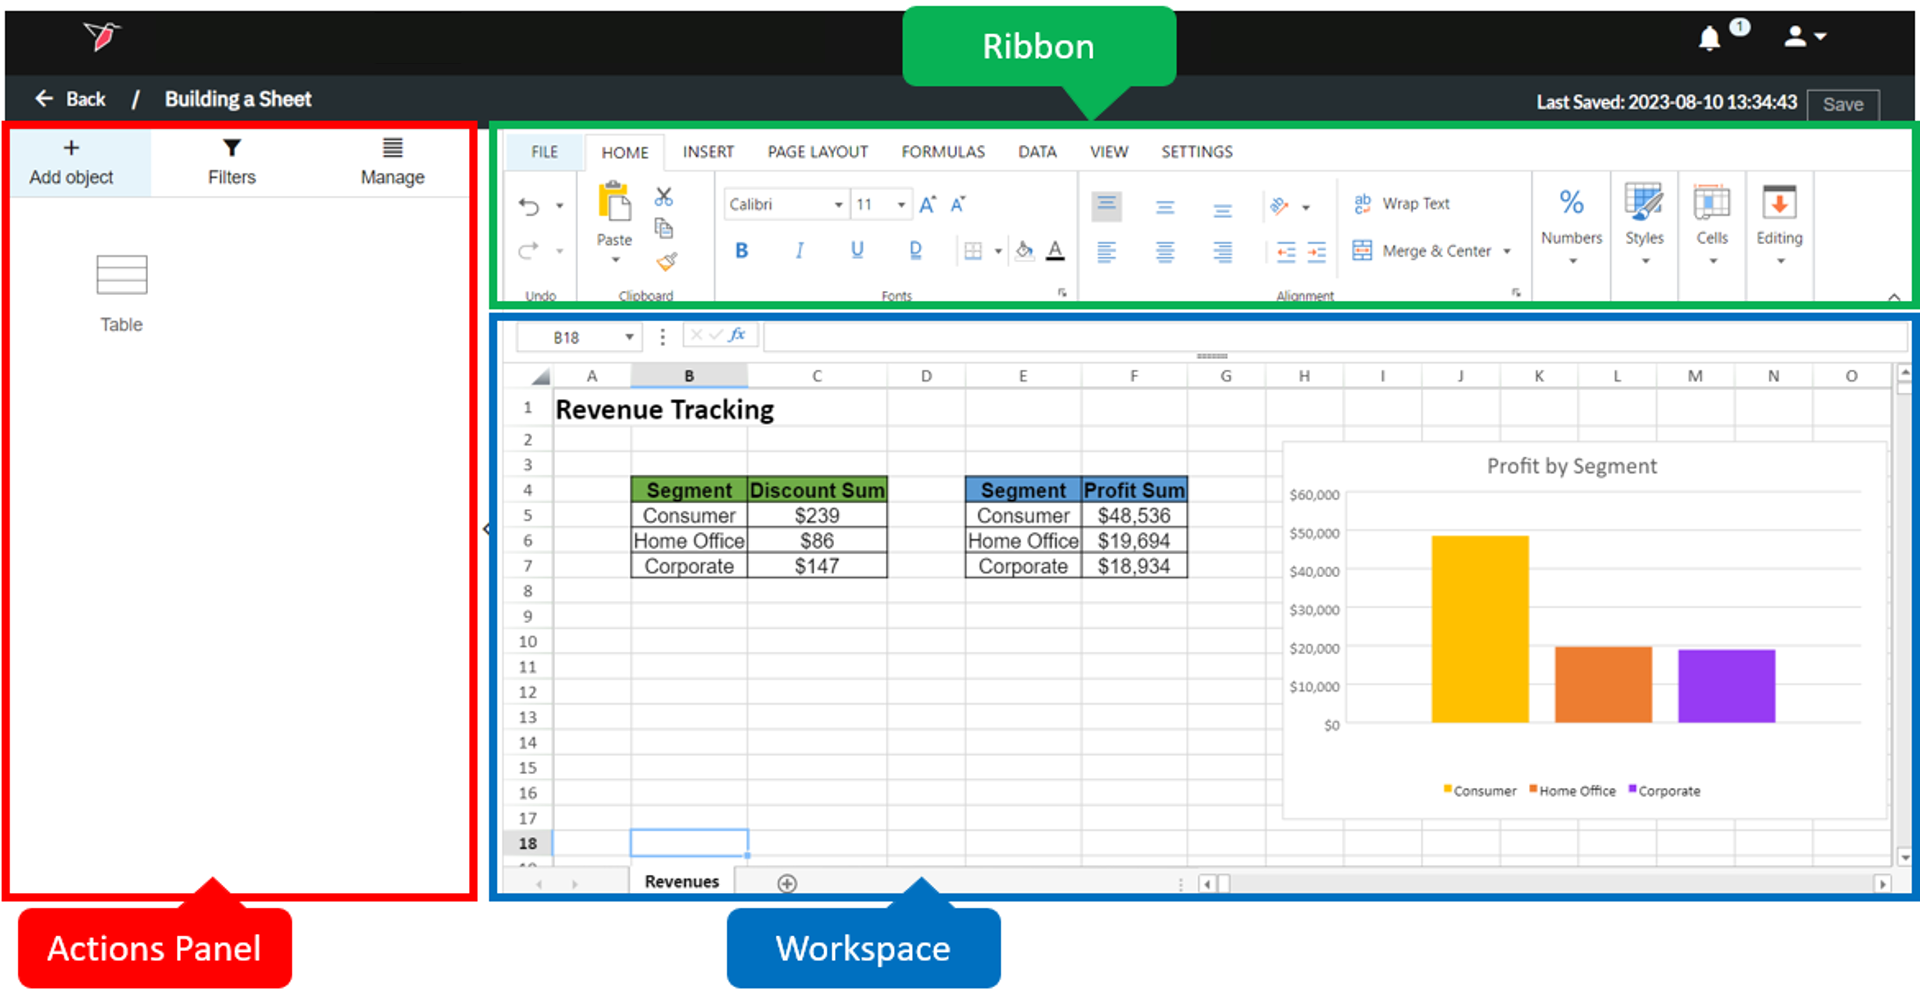
- Workspace: The sheet canvas where users create singular or multi-sheet workbooks.
- Actions Panel: The collapsable panel to the left of the workspace that allows users to add, configure, filter, replicate, and manage Redbird objects.
- Manage: A section within the Actions Panel that allows users to edit, delete or refresh Redbird tables in the sheet.
- Last Saved: An indicator in the top right of the screen that displays the last time the user selected "Save", or Redbird auto-saved the work which occurs in three-minute intervals after the last manual save.
- Replica : Allows users to copy tables that they already created in another sheet or dashboard
- Ribbon: The panel at the top of the page provides the ability to make formatting changes, create formulas, and insert charts.**
Getting Started with Sheets
There are several steps that go into building, importing existing Excels, and exporting a sheet. To create your first Redbird Sheet, follow the steps below:
- Navigate to the Workflow Canvas that you would like to add your sheets on to. Click on the plus icon to open the left-side panel, then click on the Outputs section to expand it.
- Click and drag the Sheets App Node onto the Workflow Canvas.
- Double-click the Sheets node.
- Give the Sheet a name, then click Done.
- Double-click the Sheets node again to enter it.
- Build your sheet by adding, arranging, and styling tables in your Workspace using the Actions Panel, or adding data and charts directly to the sheet. If you add Redbird tables to your Workspace, you can use filters to dynamically update the data displayed.
- The Ribbon at the top and Manage are also tools to help create and format the final output.
Note on Importing and Exporting:If you have an excel file that you would like to load into Redbird, you can click File > Import and select the file that you want to upload
You can export the Sheet to Excel by clicking File > Export.
Tip:Click Save in the top right to ensure your changes persist. The Auto-Save functionality runs every three minutes.
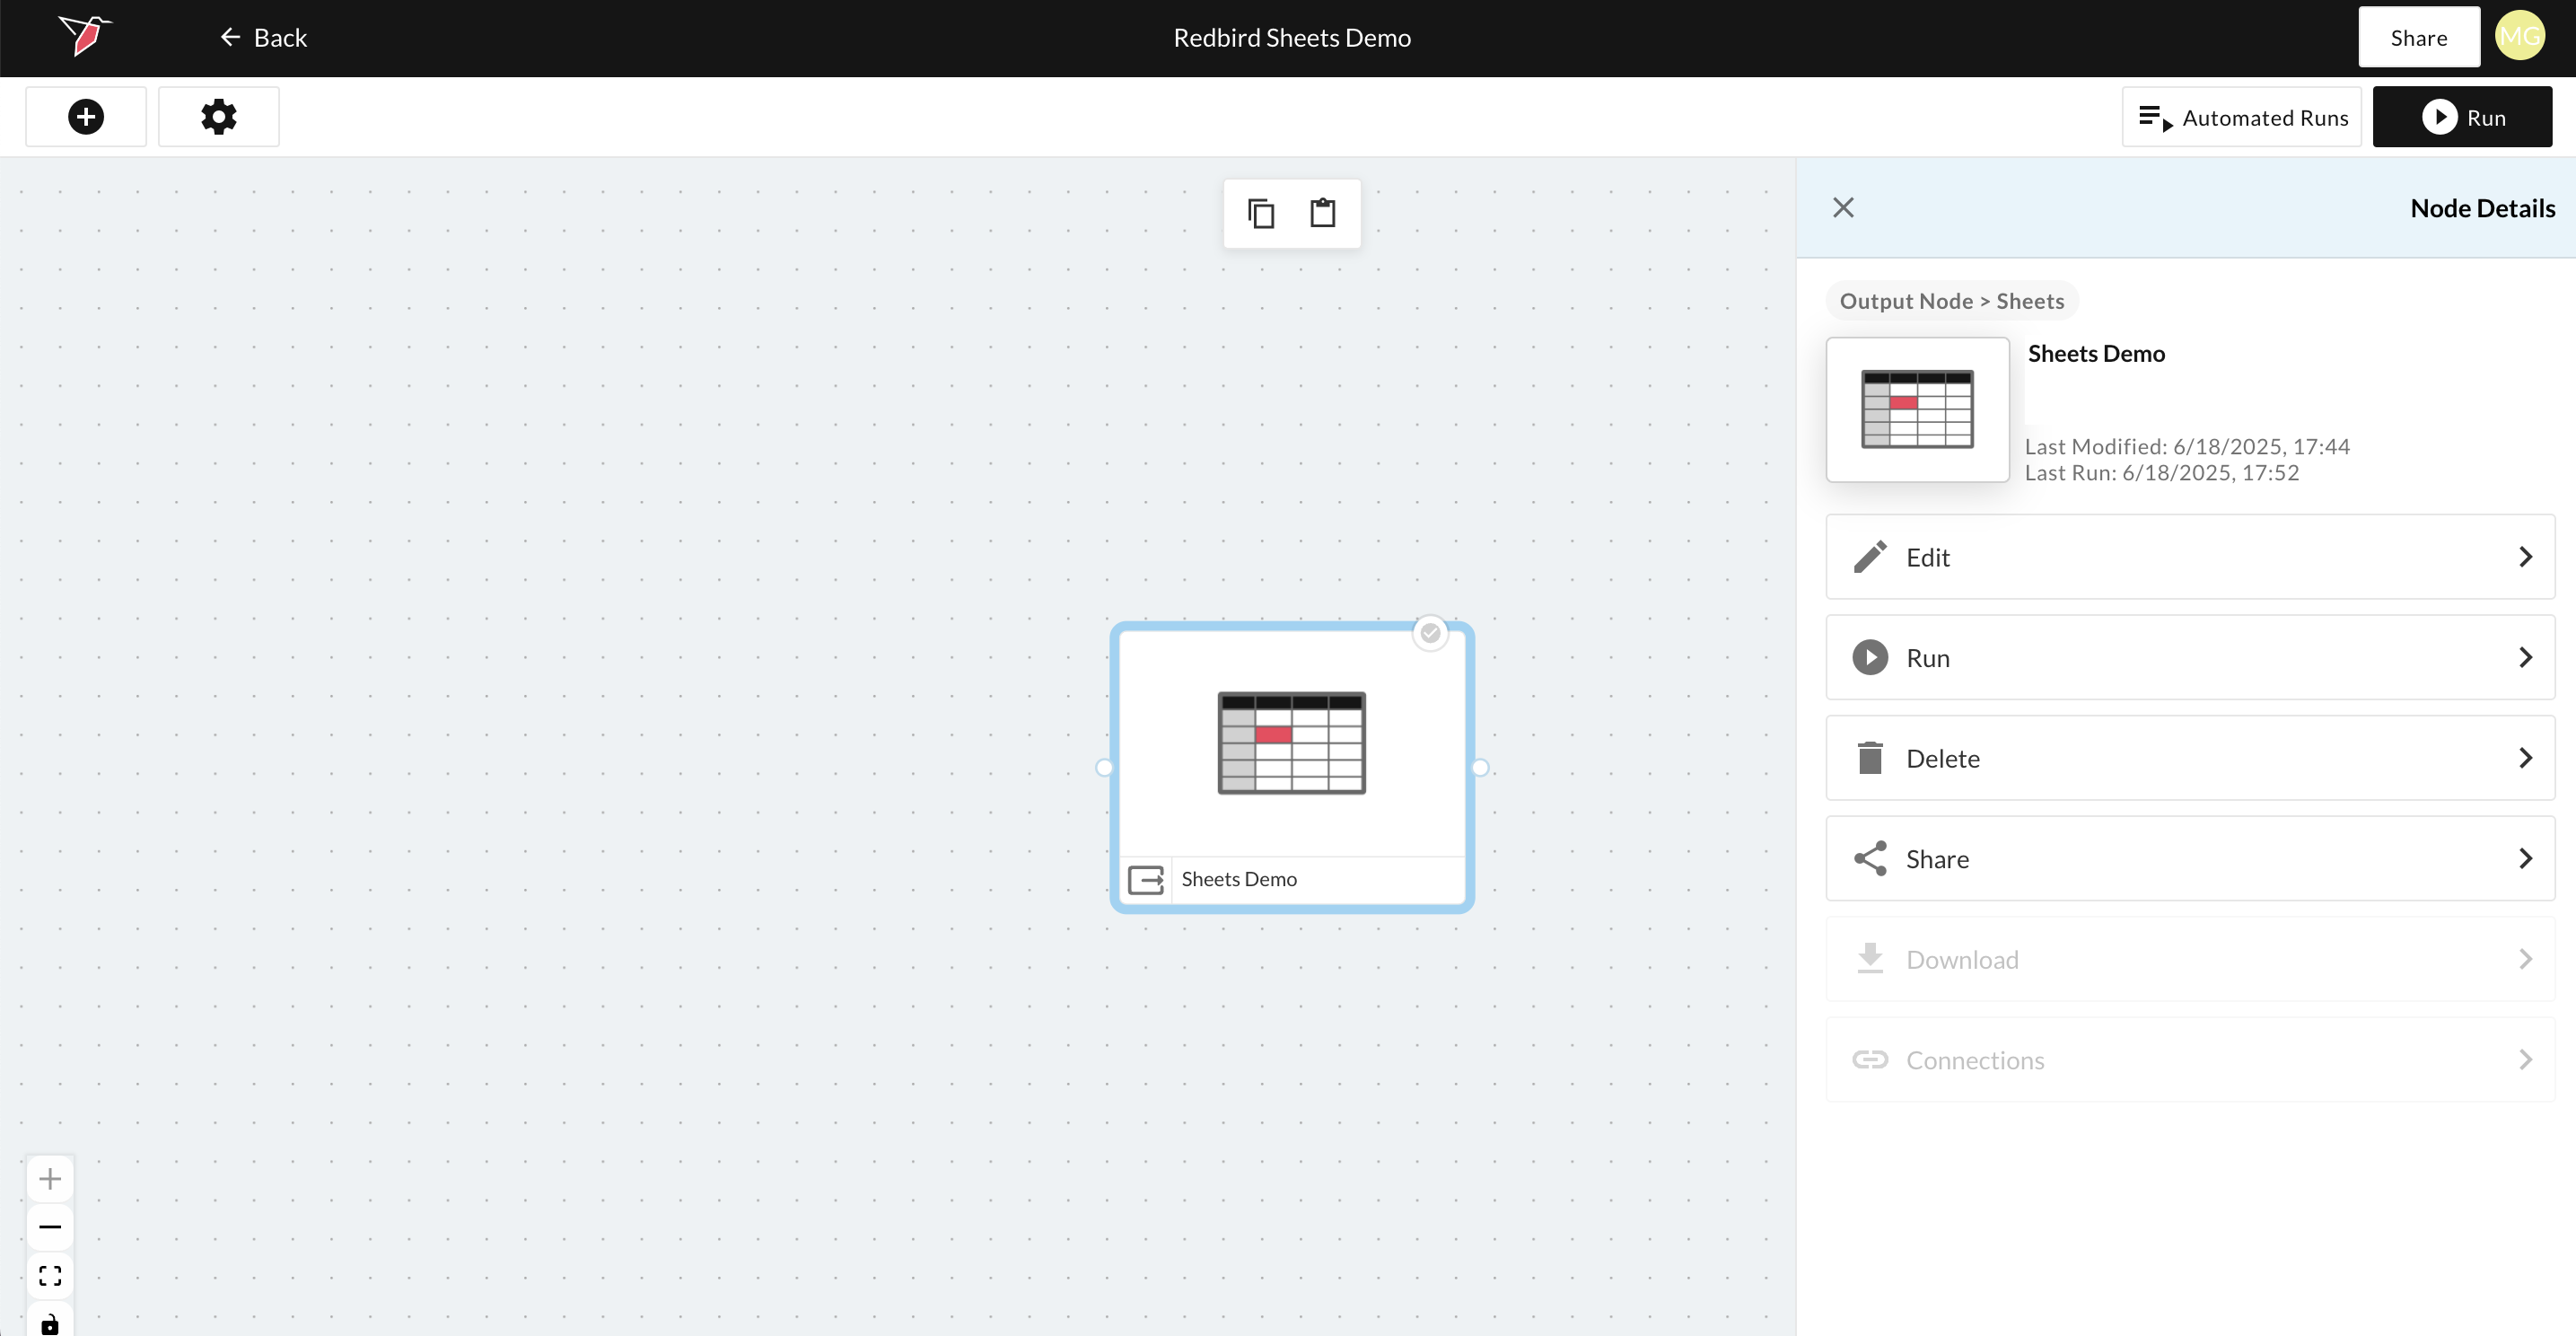
- Click Back to go return to the Workflow Project Folder. From here if you click on the Sheets node you can access the right-side panel with options to:
- Run - Here you can refresh the sheet to incorporate any new data from upstream objects as part of a Workflow run. Workflows are covered in more detail in our Building Workflows guide.
- Share to define permissioning of who has access to your Sheet, and specifically if you wish to restrict access to certain Redbird users.
- Delete to permanently delete the Sheet.