Email Forwarding
Introduction
Certain features in Redbird require you to set up email forwarding so that incoming emails are sent to a unique Redbird address. This allows their contents or attachments to be ingested as part of an automated workflow. See the guide below for instructions on setting up email forwarding. Note: refer to the relevant guide for the specific Collect app in question to find the unique email address you need to forward emails to.
Setting up Forwarding of Emails to Redbird
The forwarding process will differ depending on your email provider (client). Below are links to step-by-step guides on setting up forwarding for major email clients.
- Gmail
- Setting up forwarding in general
- Creating a filter to forward specific messages from specific addresses
- Microsoft Outlook
- Apple Mail
If your Email client isn't listed here then search for**"forwarding my emails"** in the platform's help function.
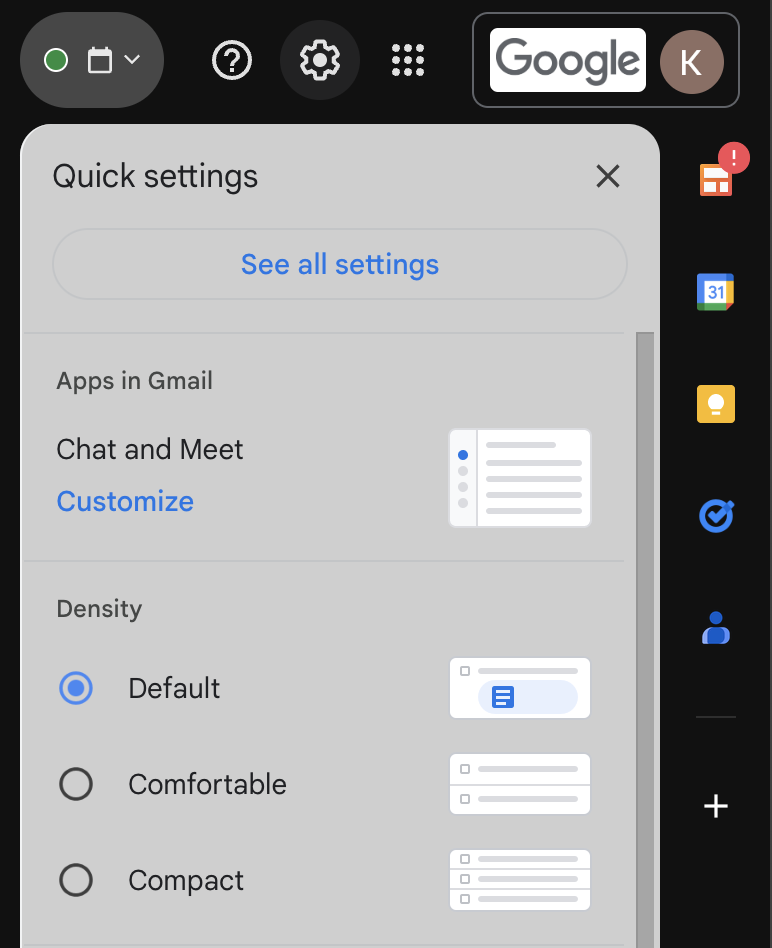
Below, we will go over the flow of adding a forwarding email via Gmail. First, navigate to the Settings Gear icon and then select See all settings.
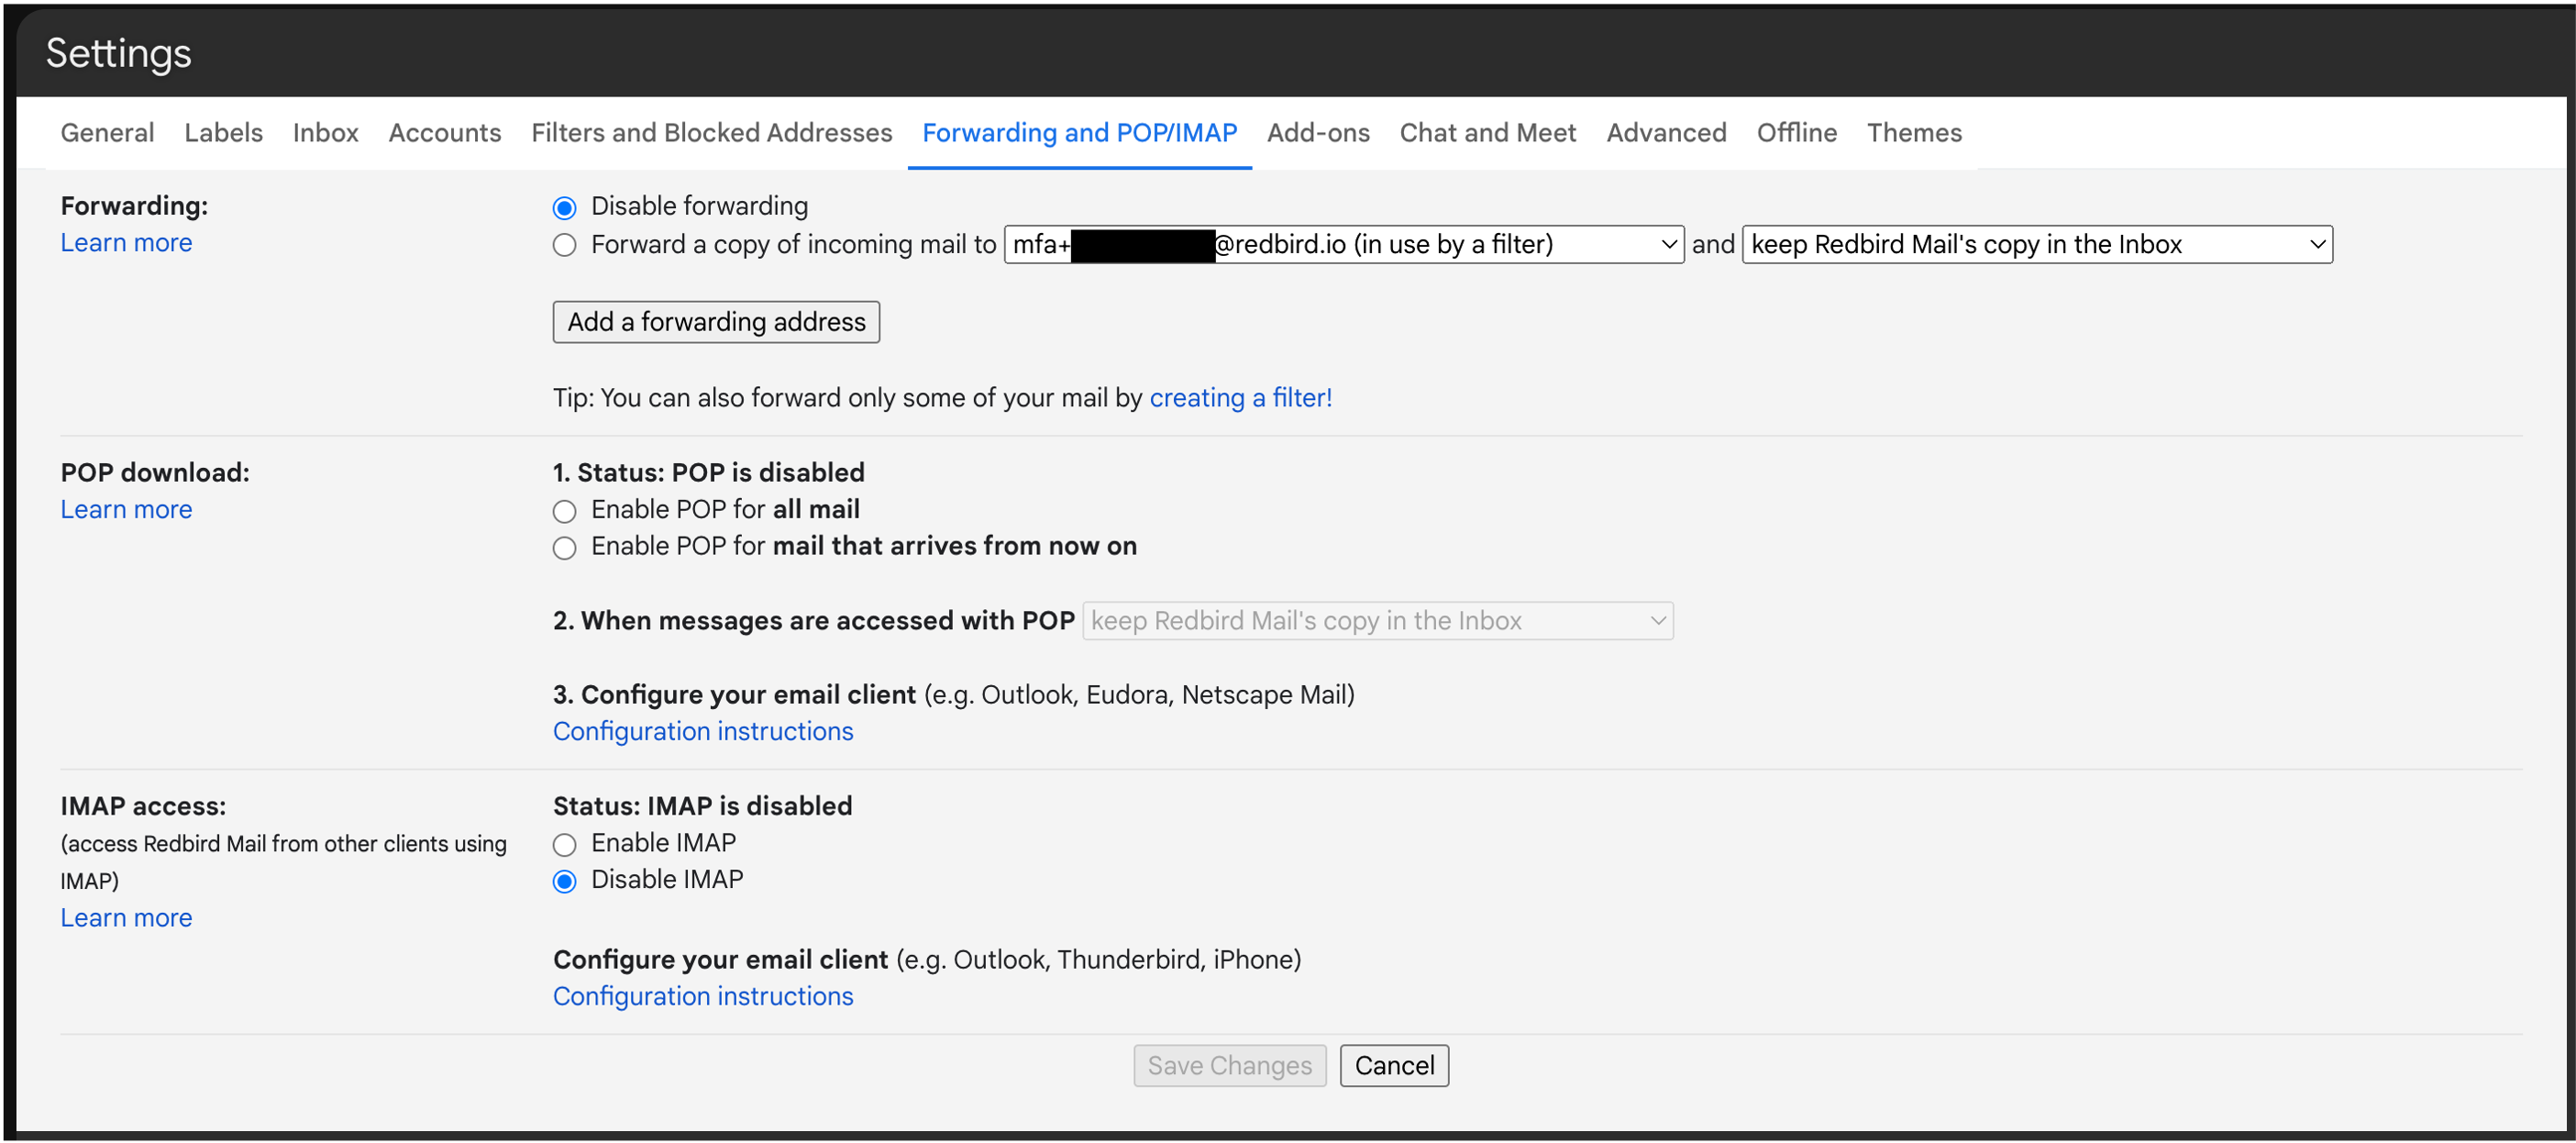
From here, navigate to the Forwarding and POP/IMAP tab and click the Add a forwarding address button.
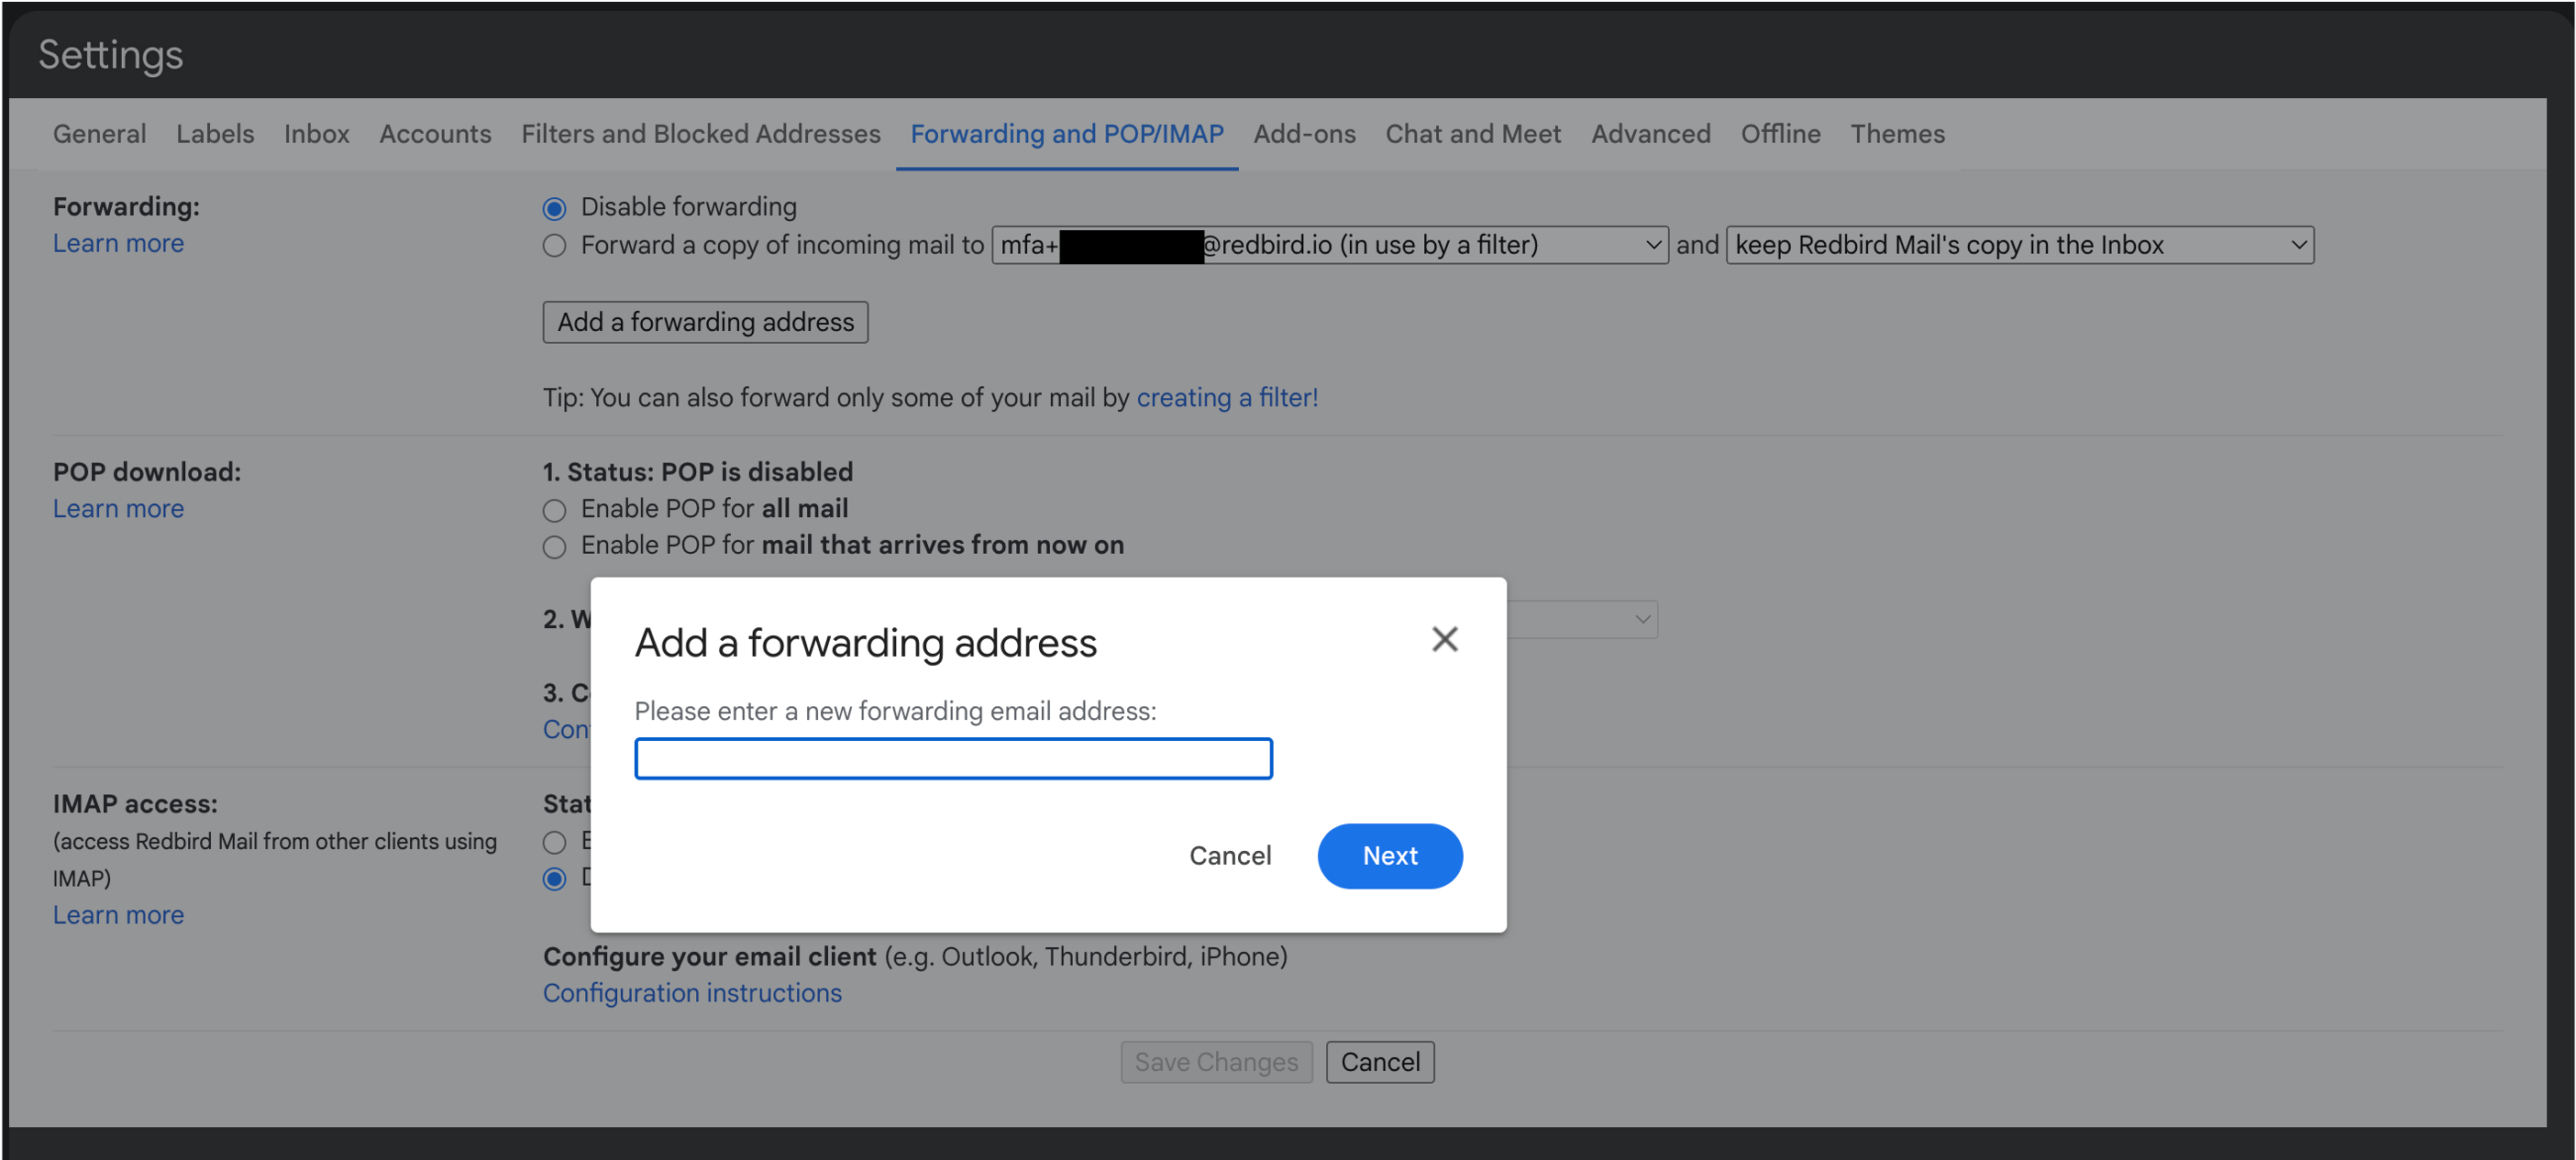
In the modal window that appears, paste the unique Redbird email address generated by the Collect app you are using. Then click Next.
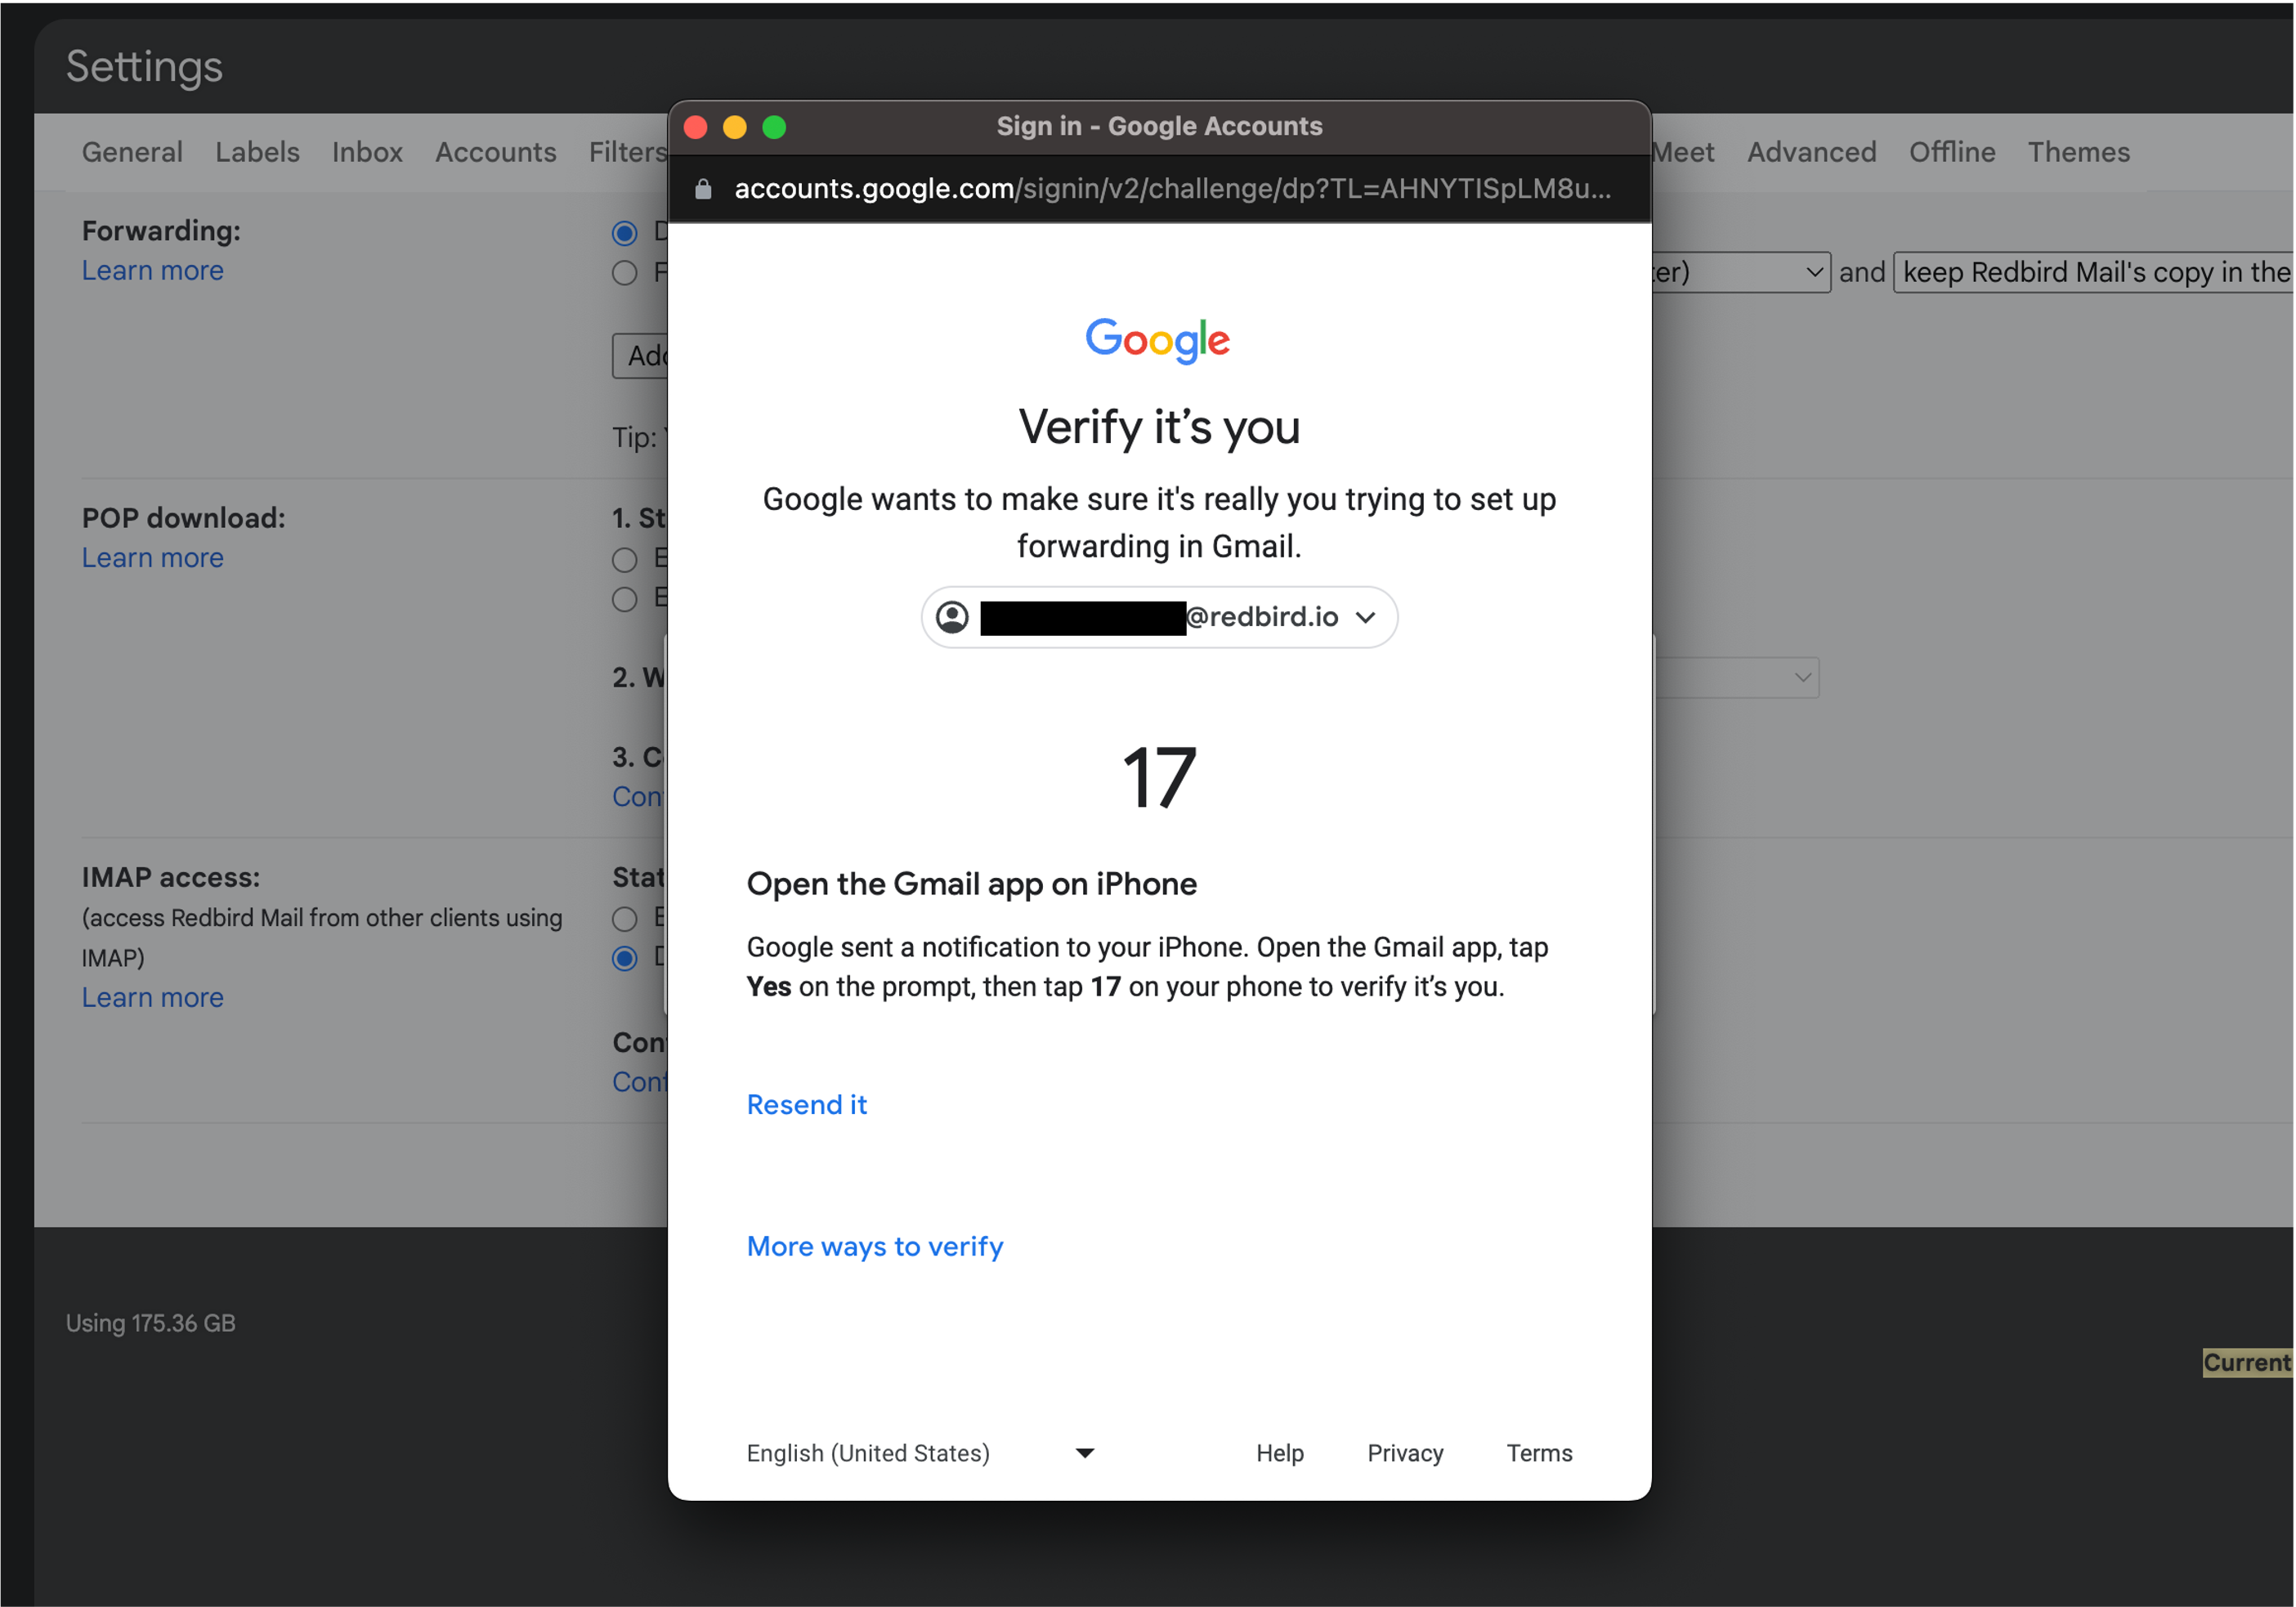
This may trigger Gmail to request you to approve this request from another device that you are logged in to the same email account on. Open your email account that you are adding a forwarding email to on whichever device the window is requesting you to do so from. It will ask you to accept the request and select the corresponding number provided on the modal.
Once the above step is complete, select Proceed in the modal window.
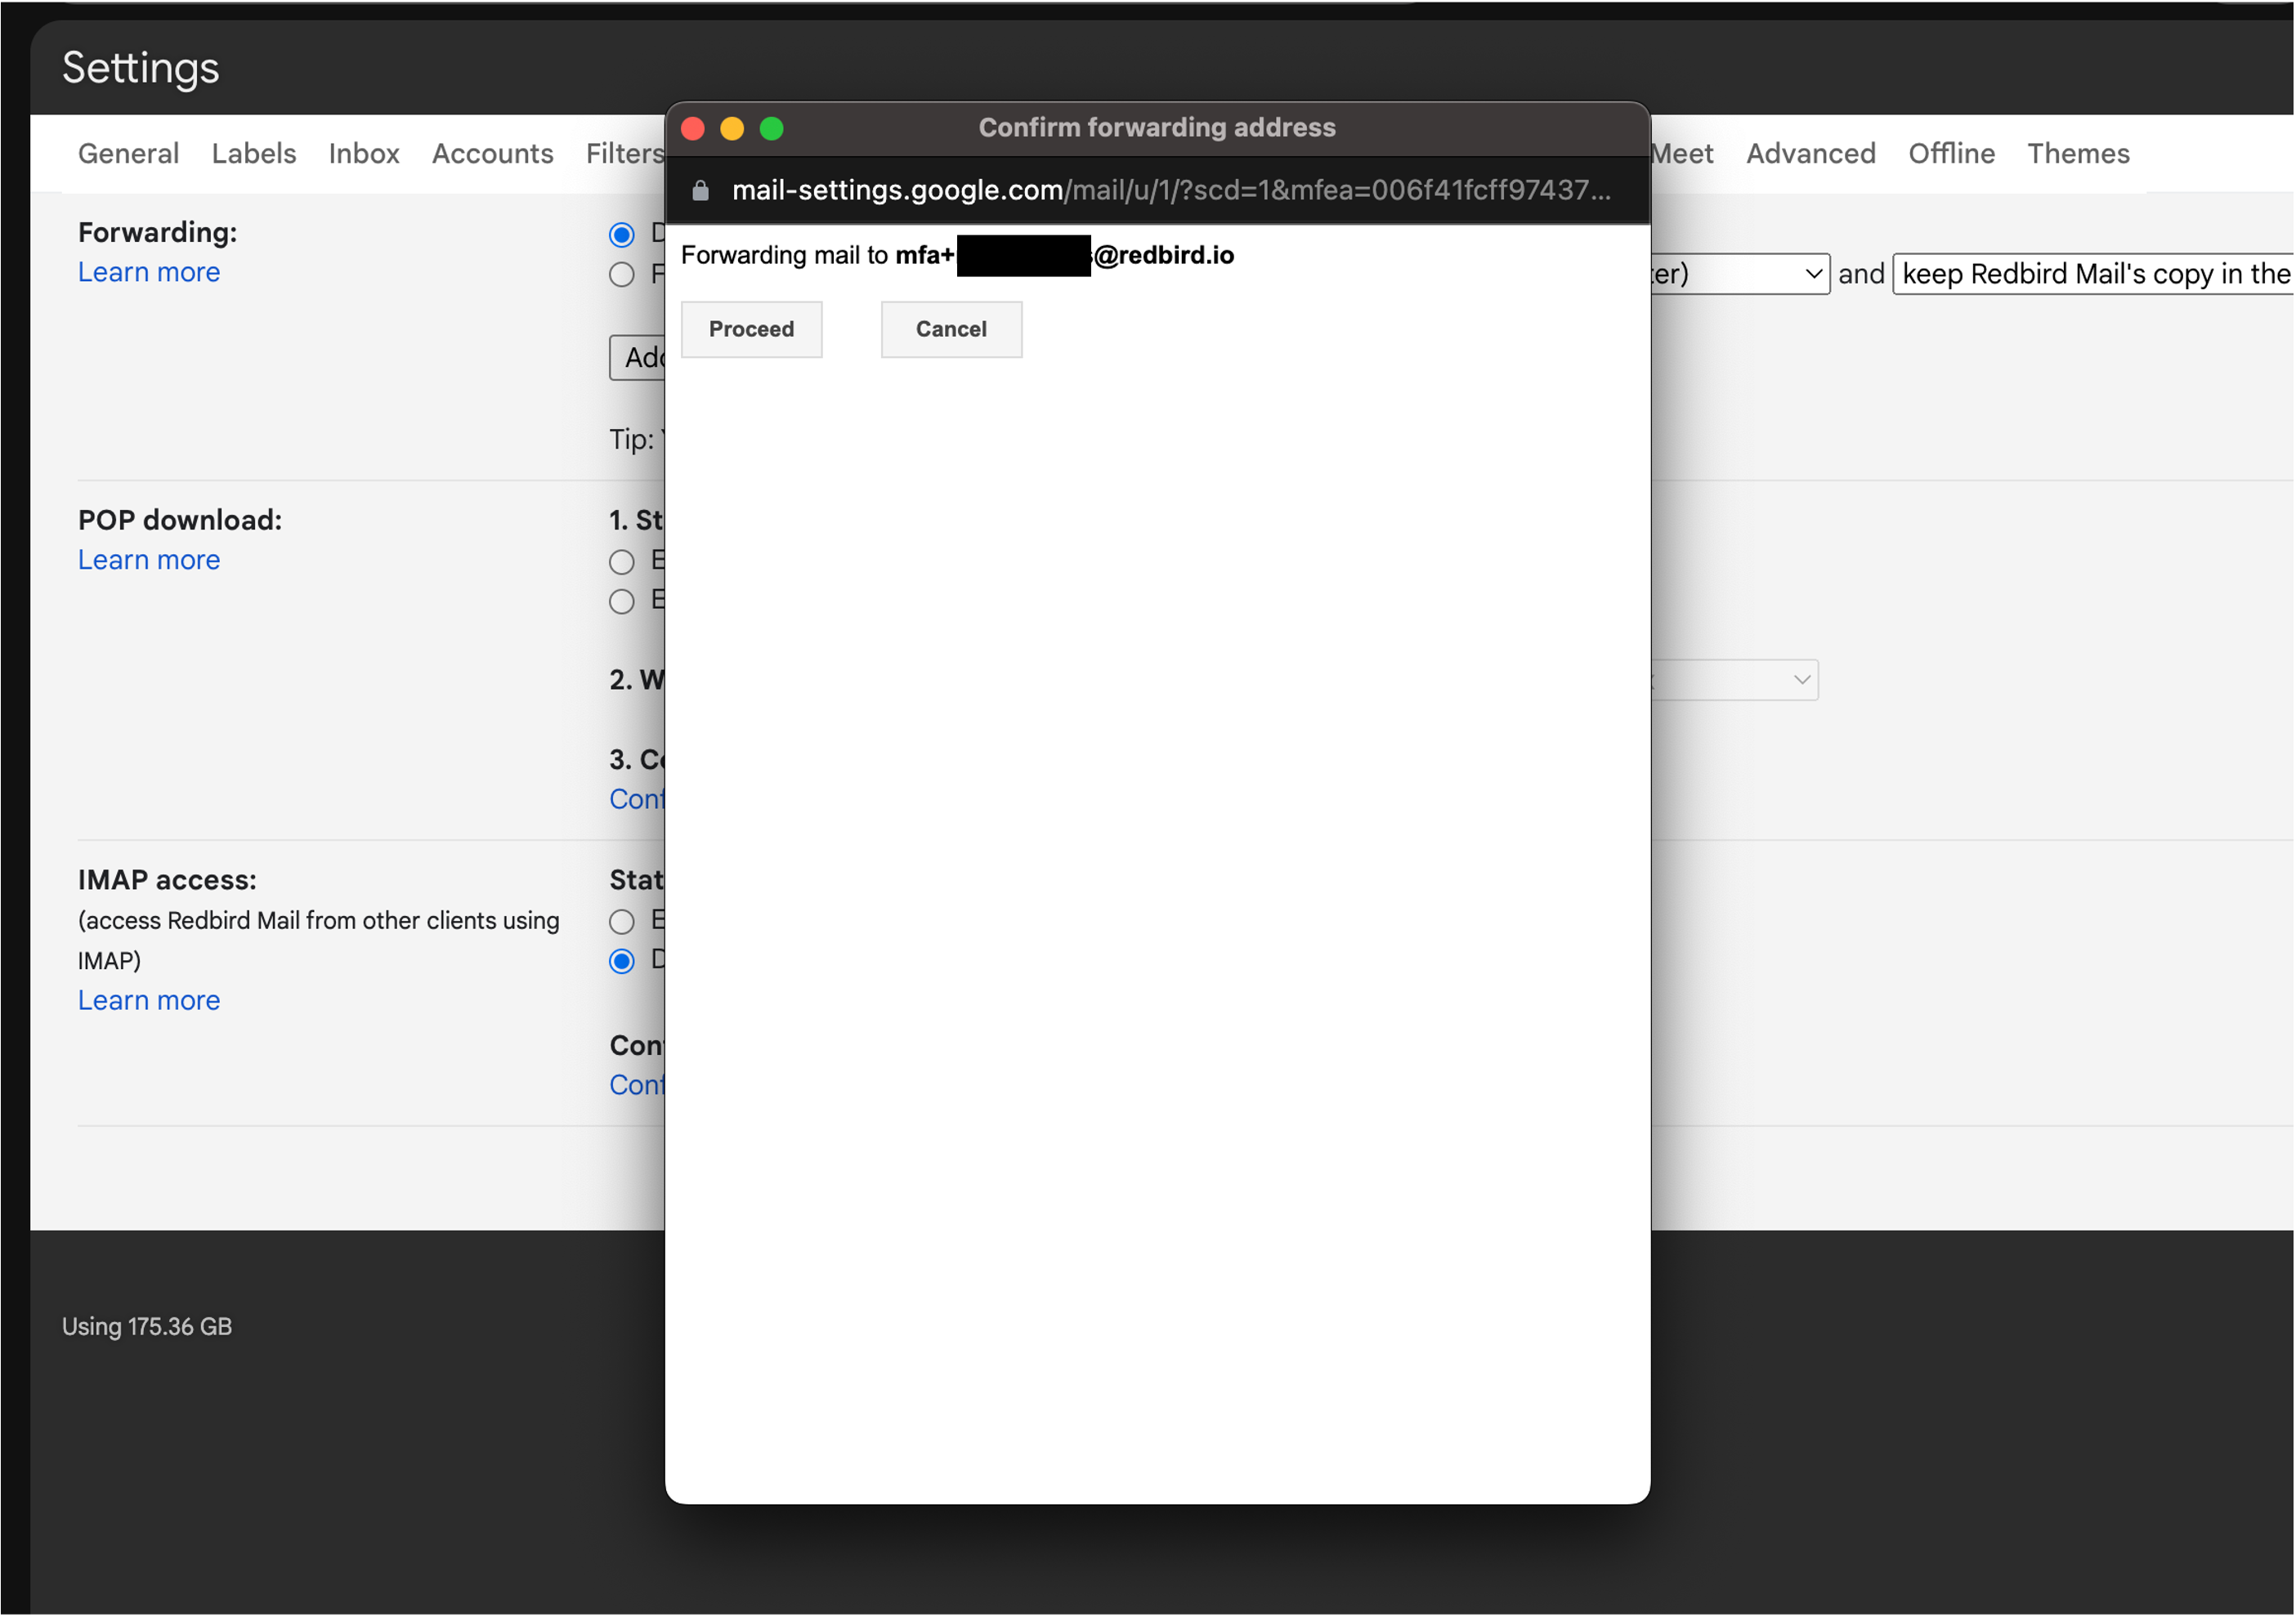
You have now successfully set up a forwarding email address within Gmail.
Setting up Filters/Rules for Email
If you are forwarding emails from an inbox that receives many other messages, we recommend creating forwarding rules based on the sender’s address and/or key terms in the subject or body, such as “report” or a provider name. This helps ensure that only the relevant emails are forwarded to the Redbird inbox.