Reassign Values Operation
Background
Once a dataset has been loaded into Redbird, you may find that it is necessary to reassign the values of certain cells to ensure that your data is consistent and accurate. You can complete this task by using Redbird’s Reassign Values operation in the Macro Builder tool.
How it Works
To demonstrate how the Reassign Values operation works, we are going to walk through an example where we analyze inventory data for a food market.
The below products and their associated data were uploaded into the Redbird platform.
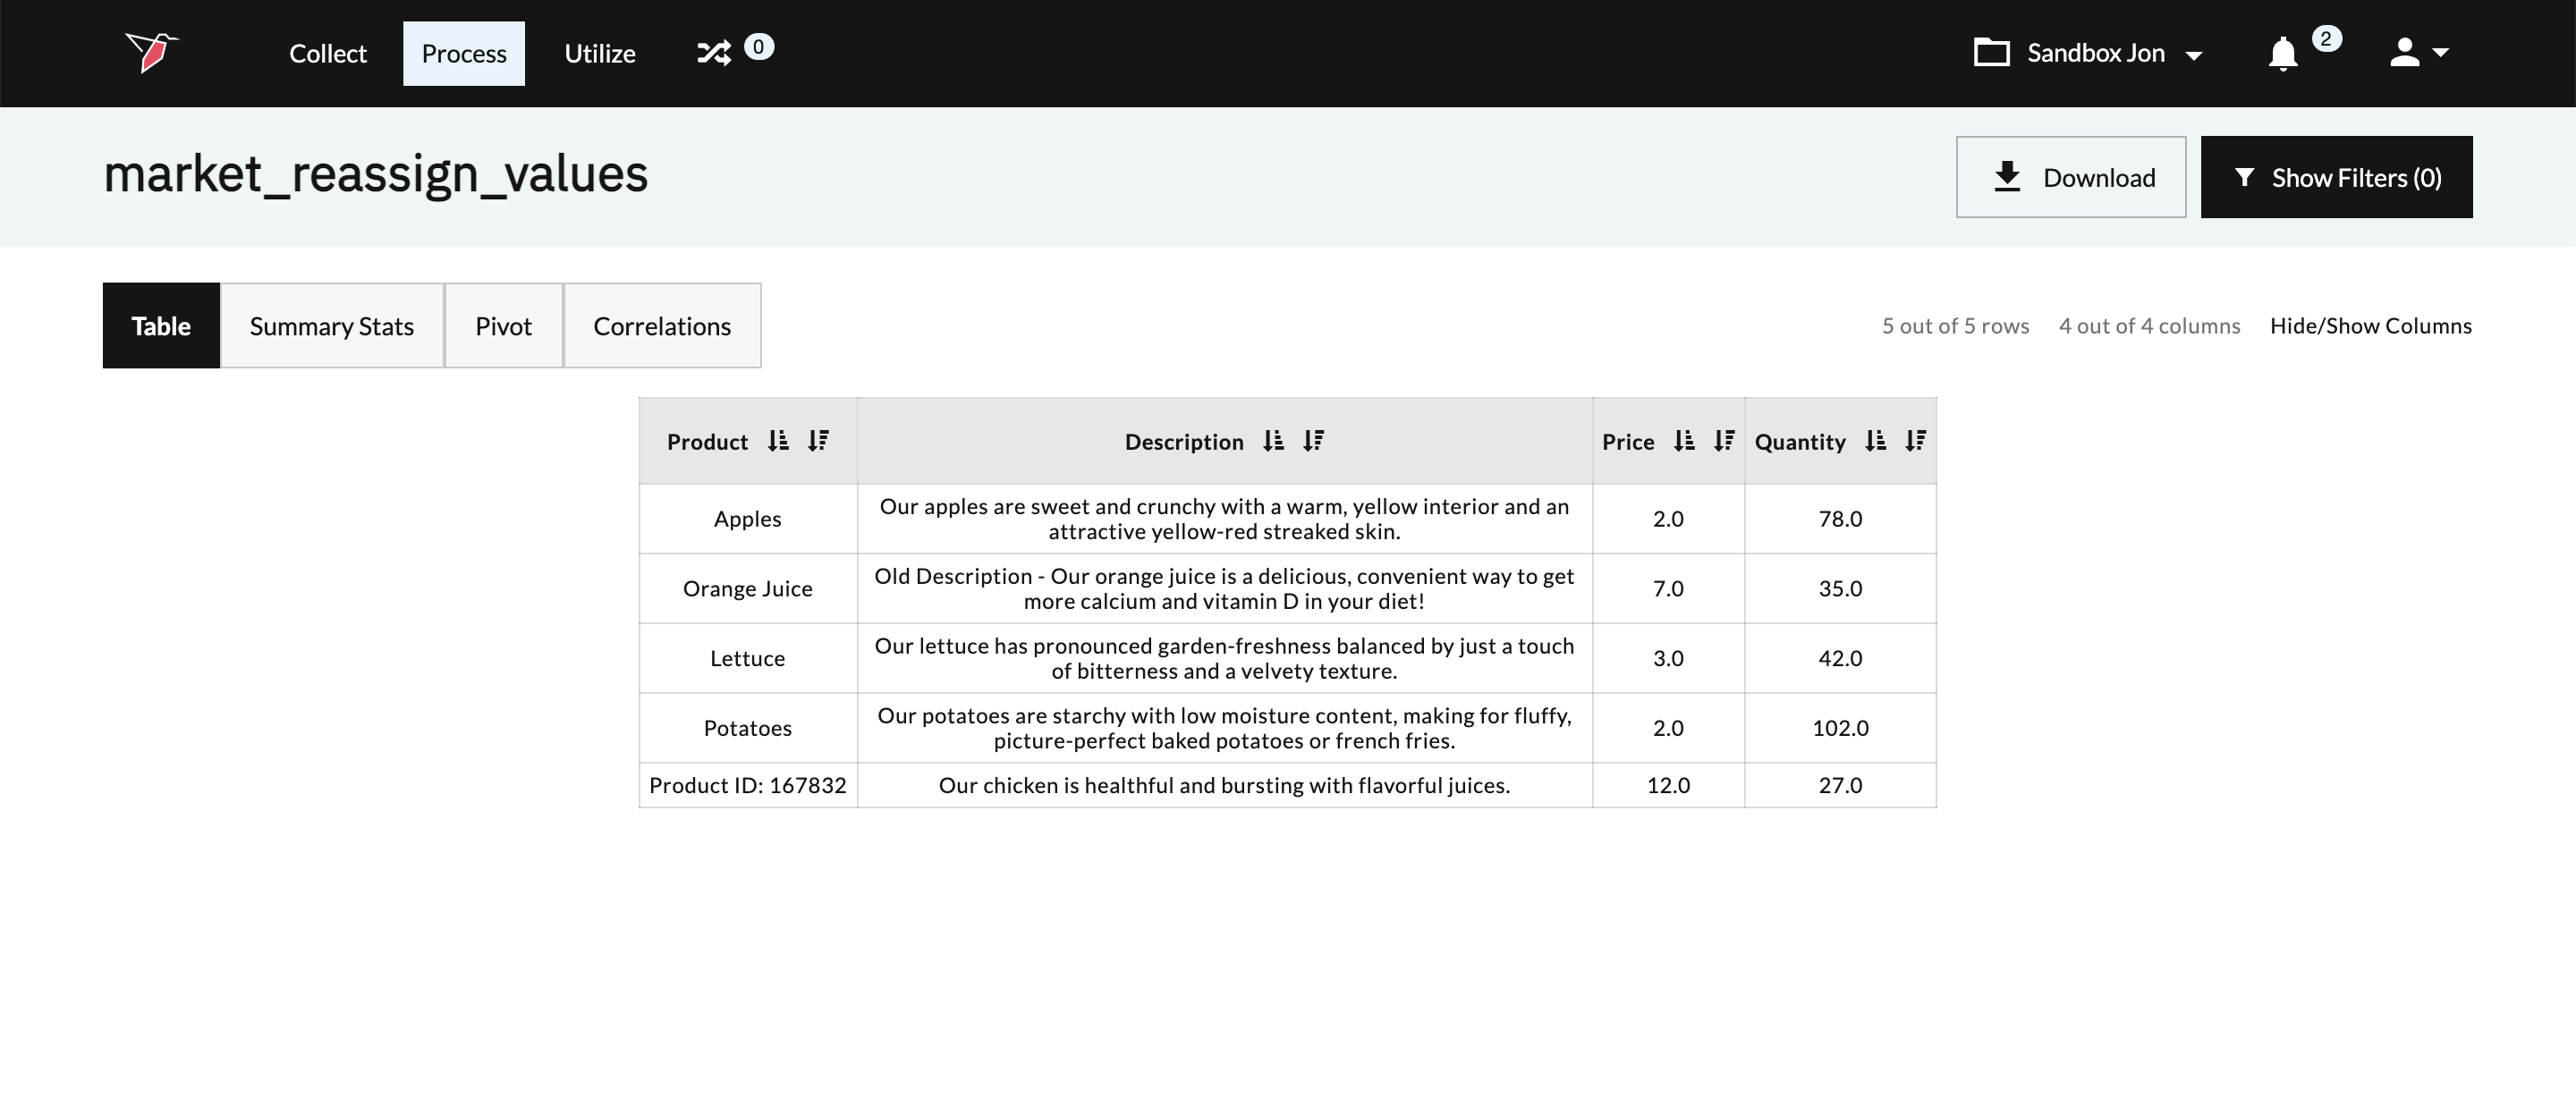
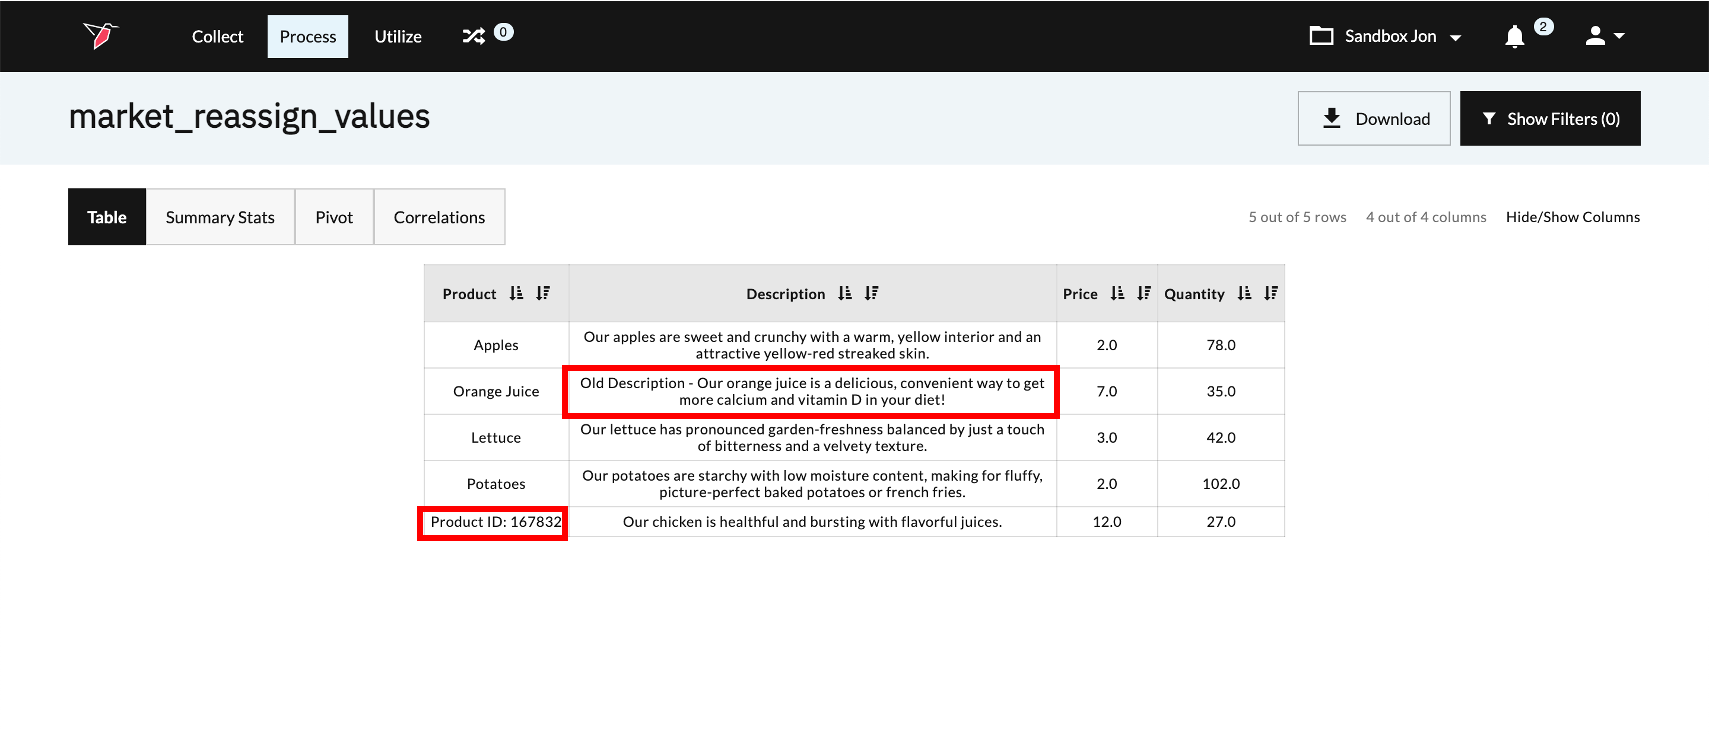
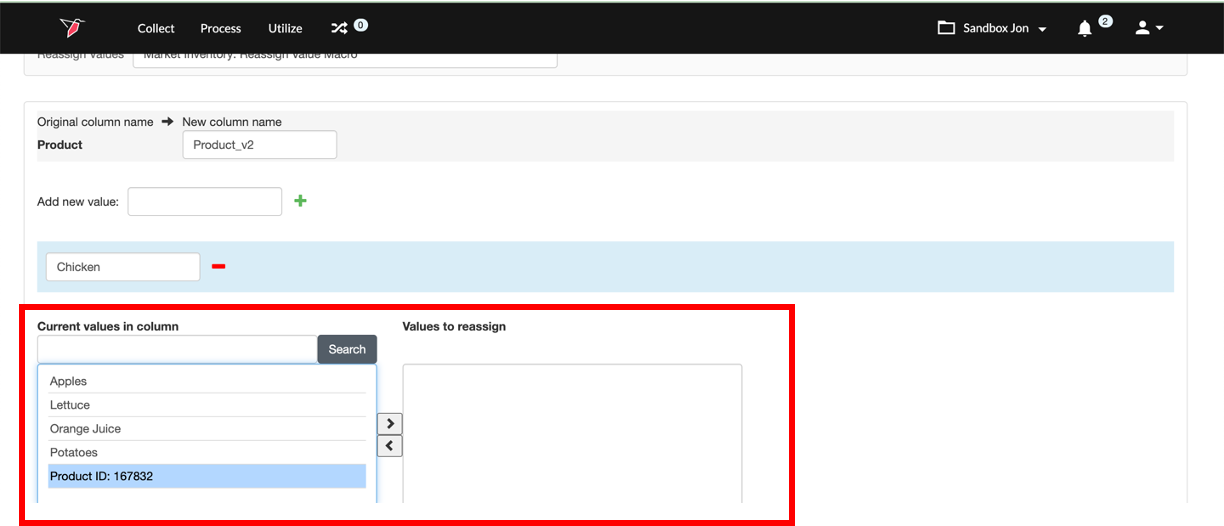
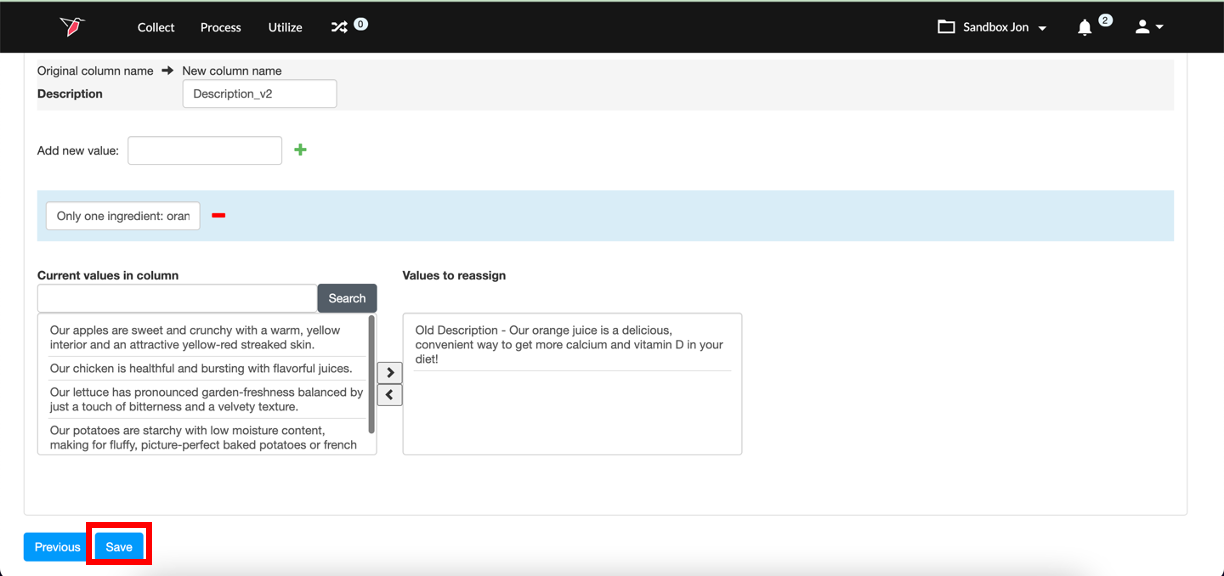
After doing an initial review of the dataset, there are two issues that need to be resolved prior to further analysis. The first issue is that one of the products, chicken, is currently listed under its product ID instead of its product name. The second issue is that orange juice is currently listed with an old description that needs to be updated. We can correct these issues by configuring the Reassign Values operation.
To configure the Reassign Values operation, we need to determine the column/cell value pairs that need to be updated. In addition, we need to provide the new cell value that should replace the original cell value. For our example, we have identified the necessary inputs for the configuration below.
Problem One
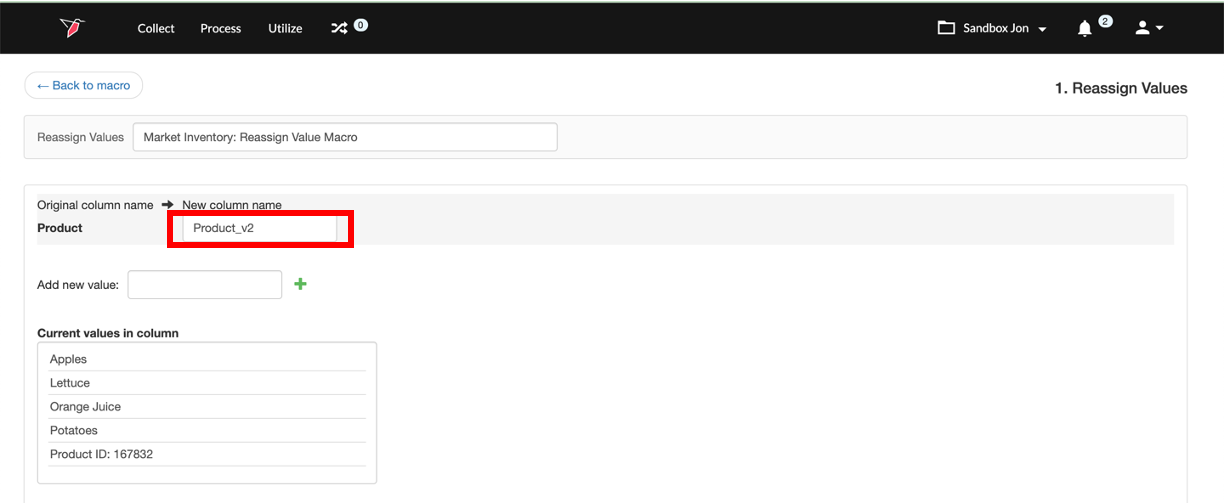
- Column = Product
- Original Cell Value = Product ID: 167832
- New Cell Value = Chicken
Problem Two
- Column = Description
- Original Cell Value = Old Description - “Our orange juice is a delicious, convenient way to get more calcium and vitamin D in your diet!”
- New Cell Value = “Only one ingredient: oranges. Squeezed fresh in small batches and clean label; no preservatives, no added sugar, no concentrates, no GMOS.”
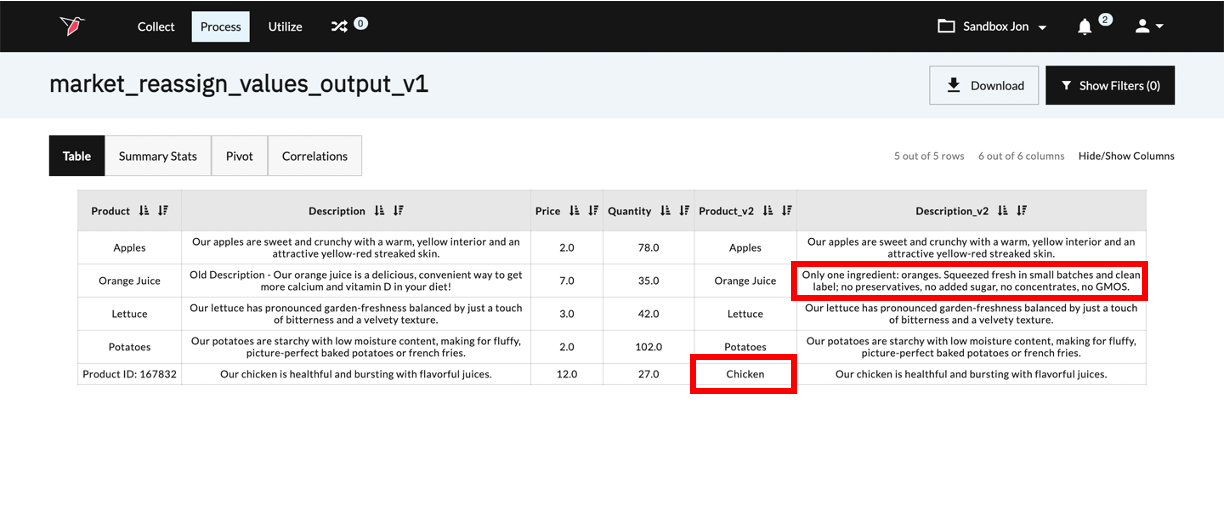
When we run the Reassign Values operation, Redbird will analyze the columns we specified (Product & Description) and review each cell value. If the cell value does not meet our configuration criteria, it will return the original value. If the cell value does meet our configuration criteria, it will return the new cell value.
Below is an example of the output that is created when we run the Reassign Values operation. The correct cell values are now listed in the newly created Product_v2 and Description_v2 columns.
Configure a Reassign Values Operation
To configure the Reassign Values operation, please follow the below steps.
- Provide your configuration with a description for future reference. This description will be associated with the operation and will be visible within the Macro Builder.
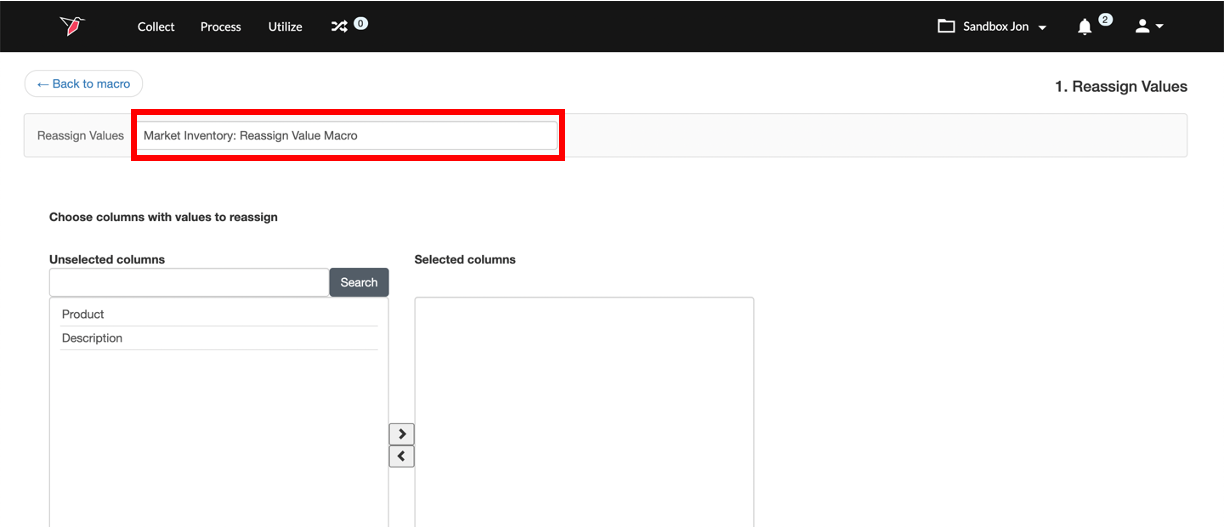
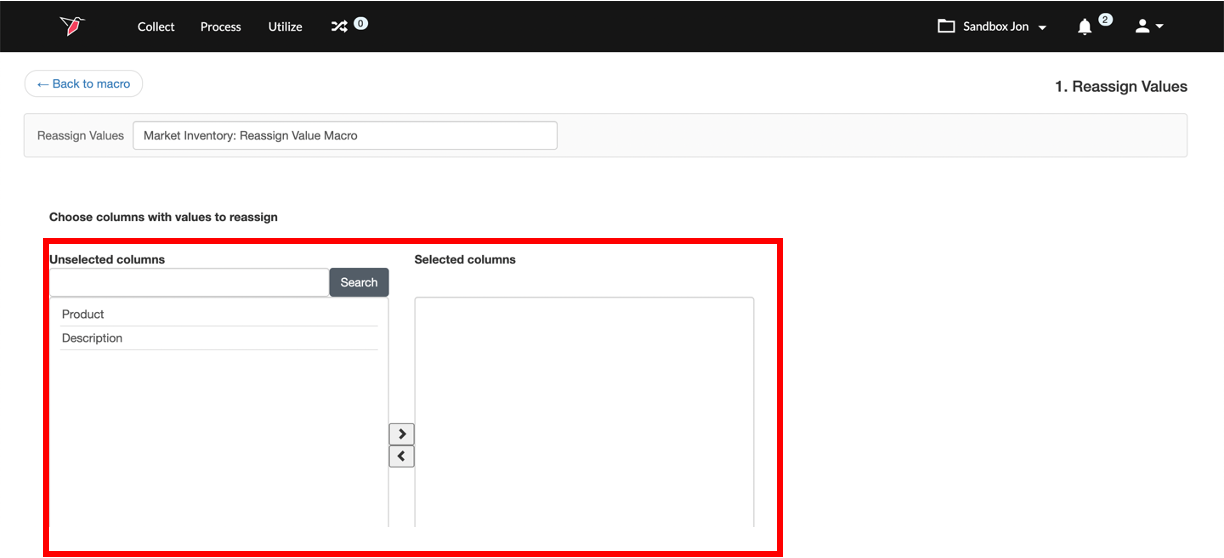
- Select the columns that include the cell values that you want to reassign by clicking on the relevant columns in the Unselected Columns list and using the icon to move them to the Selected Columns list.
Note:Only columns that have been configured with the Text, Binary, or Date data types can have their cell values reassigned. Columns associated with the Number data type are not eligible.
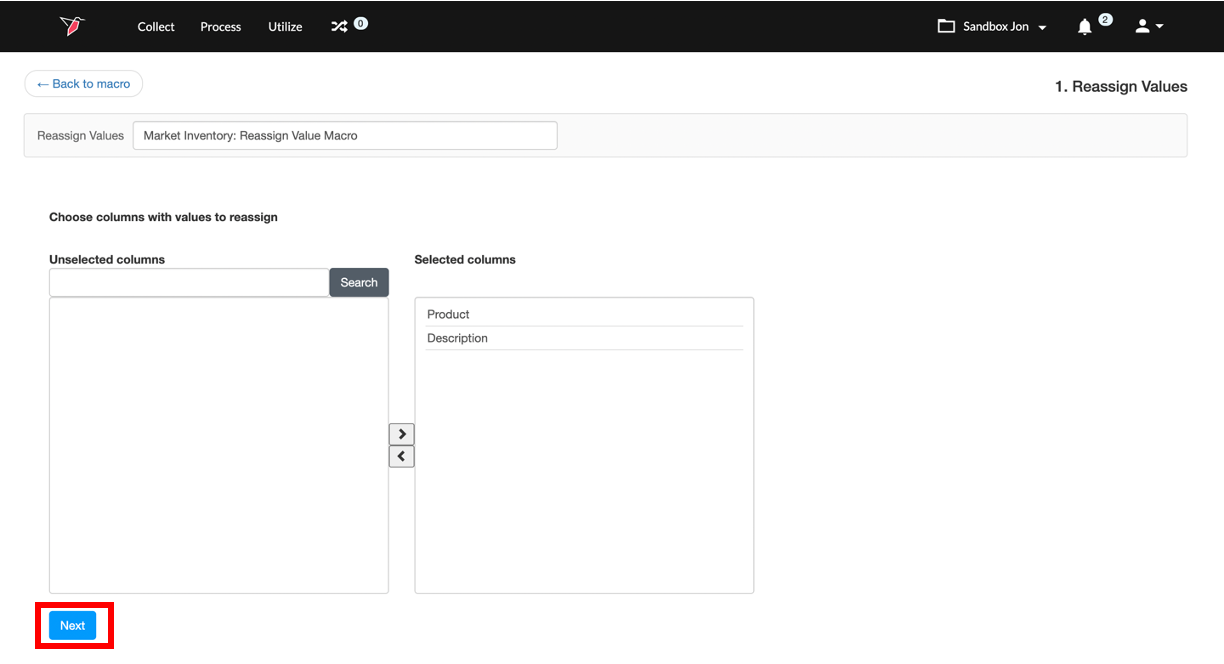
- Click Next at the bottom of the page to proceed with the configuration process. This will bring you to a page where you will select the cell value you want to reassign and a reassignment value.
- Name the column that will be generated in the output. This is important because when the macro is run, Redbird will create a new column for each of the columns that you specified in step 3. These new columns will include the new cell values.
- Enter in the new value you want to use as a reassignment value and click the + Icon. This will enable you to select a cell value to reassign.
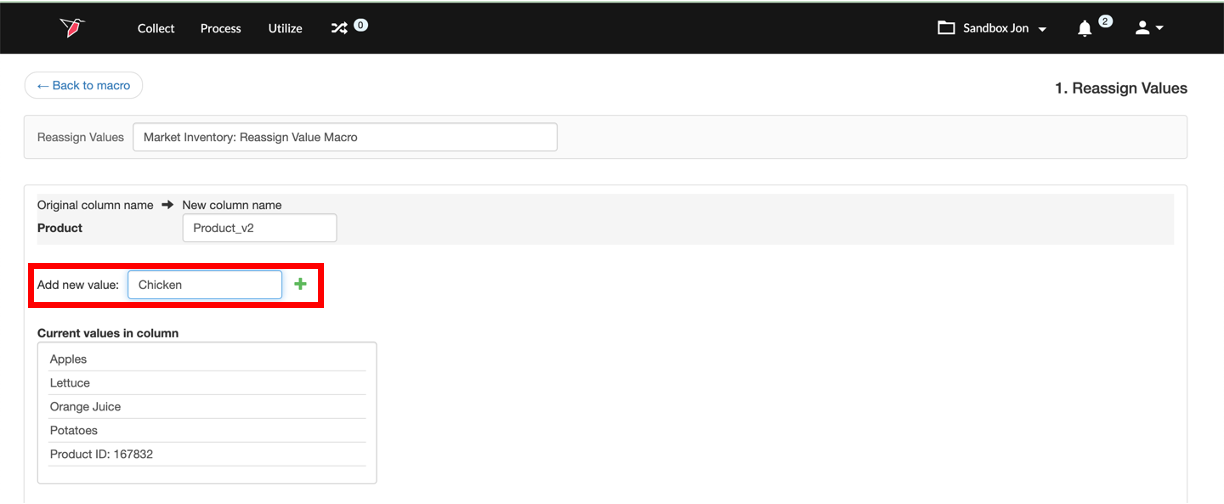
- Select the cell value you want to reassign by clicking on the relevant cell value in the Current Values in Column list and using the > icon to move it to the Values to Reassign list.
Note:• You will need to repeat steps 5 through 7 for each of the columns that you selected in step 3.
• You can reassign multiple values within a single column by repeating steps 6 and 7.
- Click Save once you have configured each of the cell values you want to reassign.
- Run the Macro.
Updated 5 months ago