Cloud Data Storage Collect
For more general information on data collection in Redbird, refer to: Getting Started With Data Collection Guide
If you cannot see the Cloud Data Storage collection app in the left-side panel on the workflow canvas, refer to: Enabling Collection Apps Guide
Overview
Redbird Cloud Data Storage offers a simple and flexible way to bring your files from cloud storage into the Redbird platform for use in reports, dashboards, and data analysis. You can either extract file contents when they are in tabular format, or build a library of unstructured documents to use across the platform. Supported sources include Google Drive, Amazon S3, FTP, and SharePoint.
Create a Collection and Entering Credentials
- Double-click the node to enter configuration mode.
- Name your data collection by clicking the gray pencil at the top of your screen.
- If credentials have already been added to Redbird, they will appear in the Selected Source dropdown. Simply choose the ones you want to use. (If only one set exists, it will be selected automatically.) To add new credentials or edit existing ones, click Add/Edit Credentials.
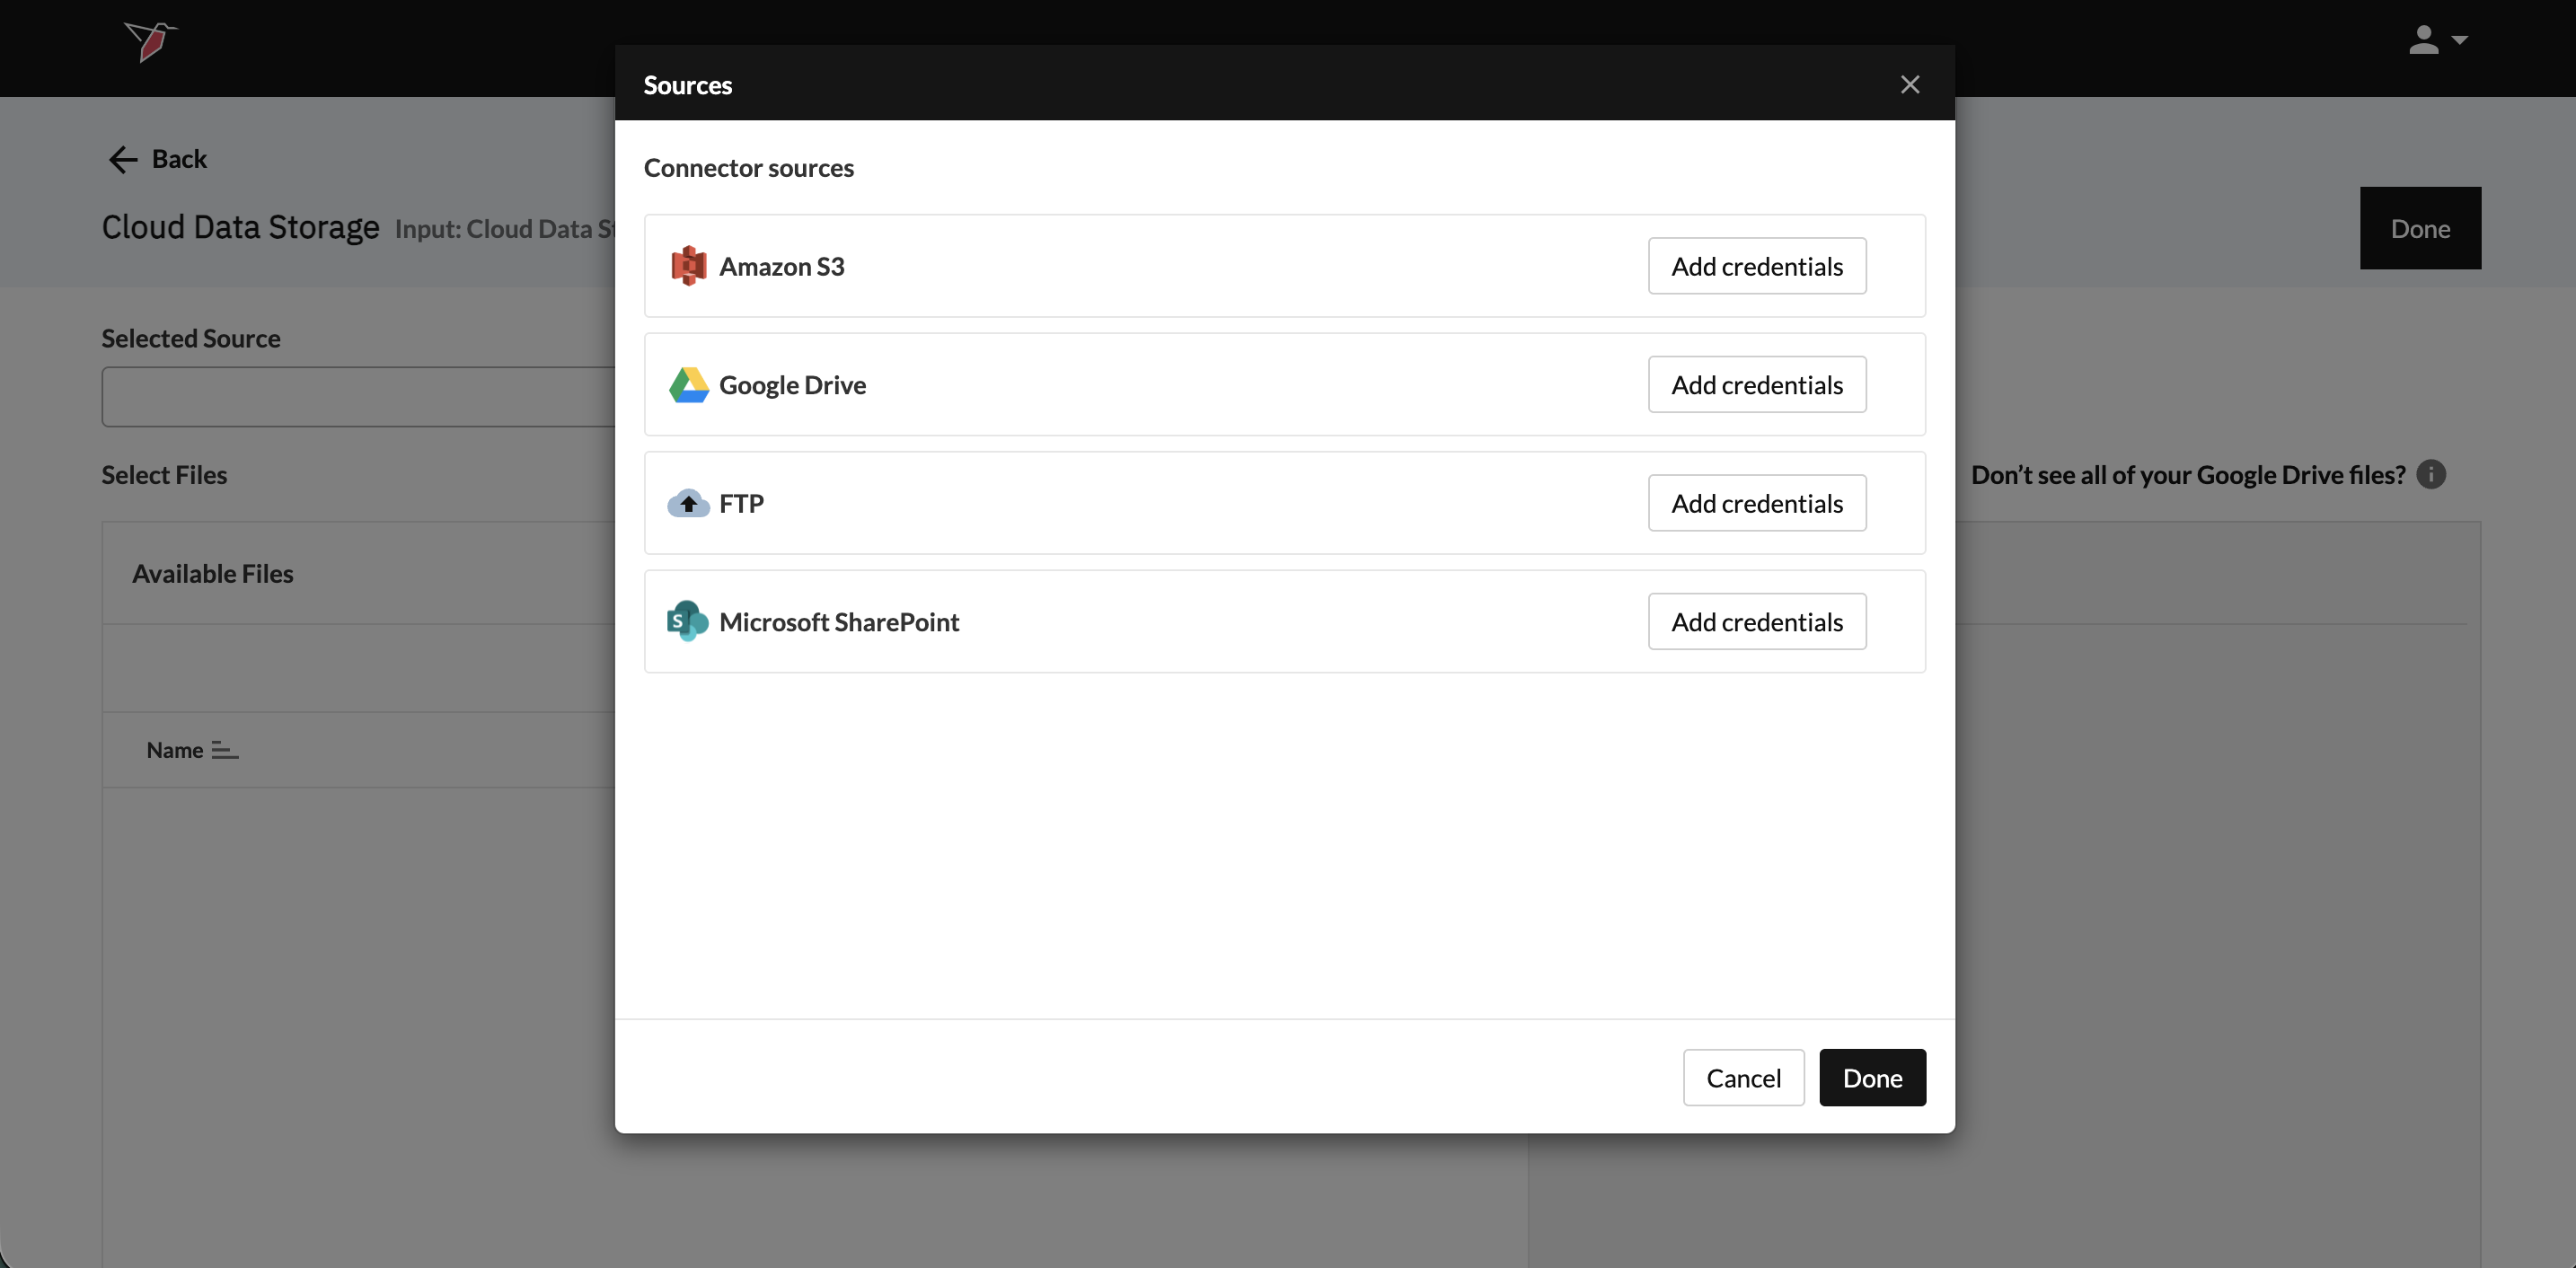
- From the Sources modal, click Add credentials on the Cloud Data Storage Platform you wish to use.
- You can refer to the guides below on the requirements needed for each of the specific platforms. The first step will always be to name your credentials so that you can reference them at the end of this process.
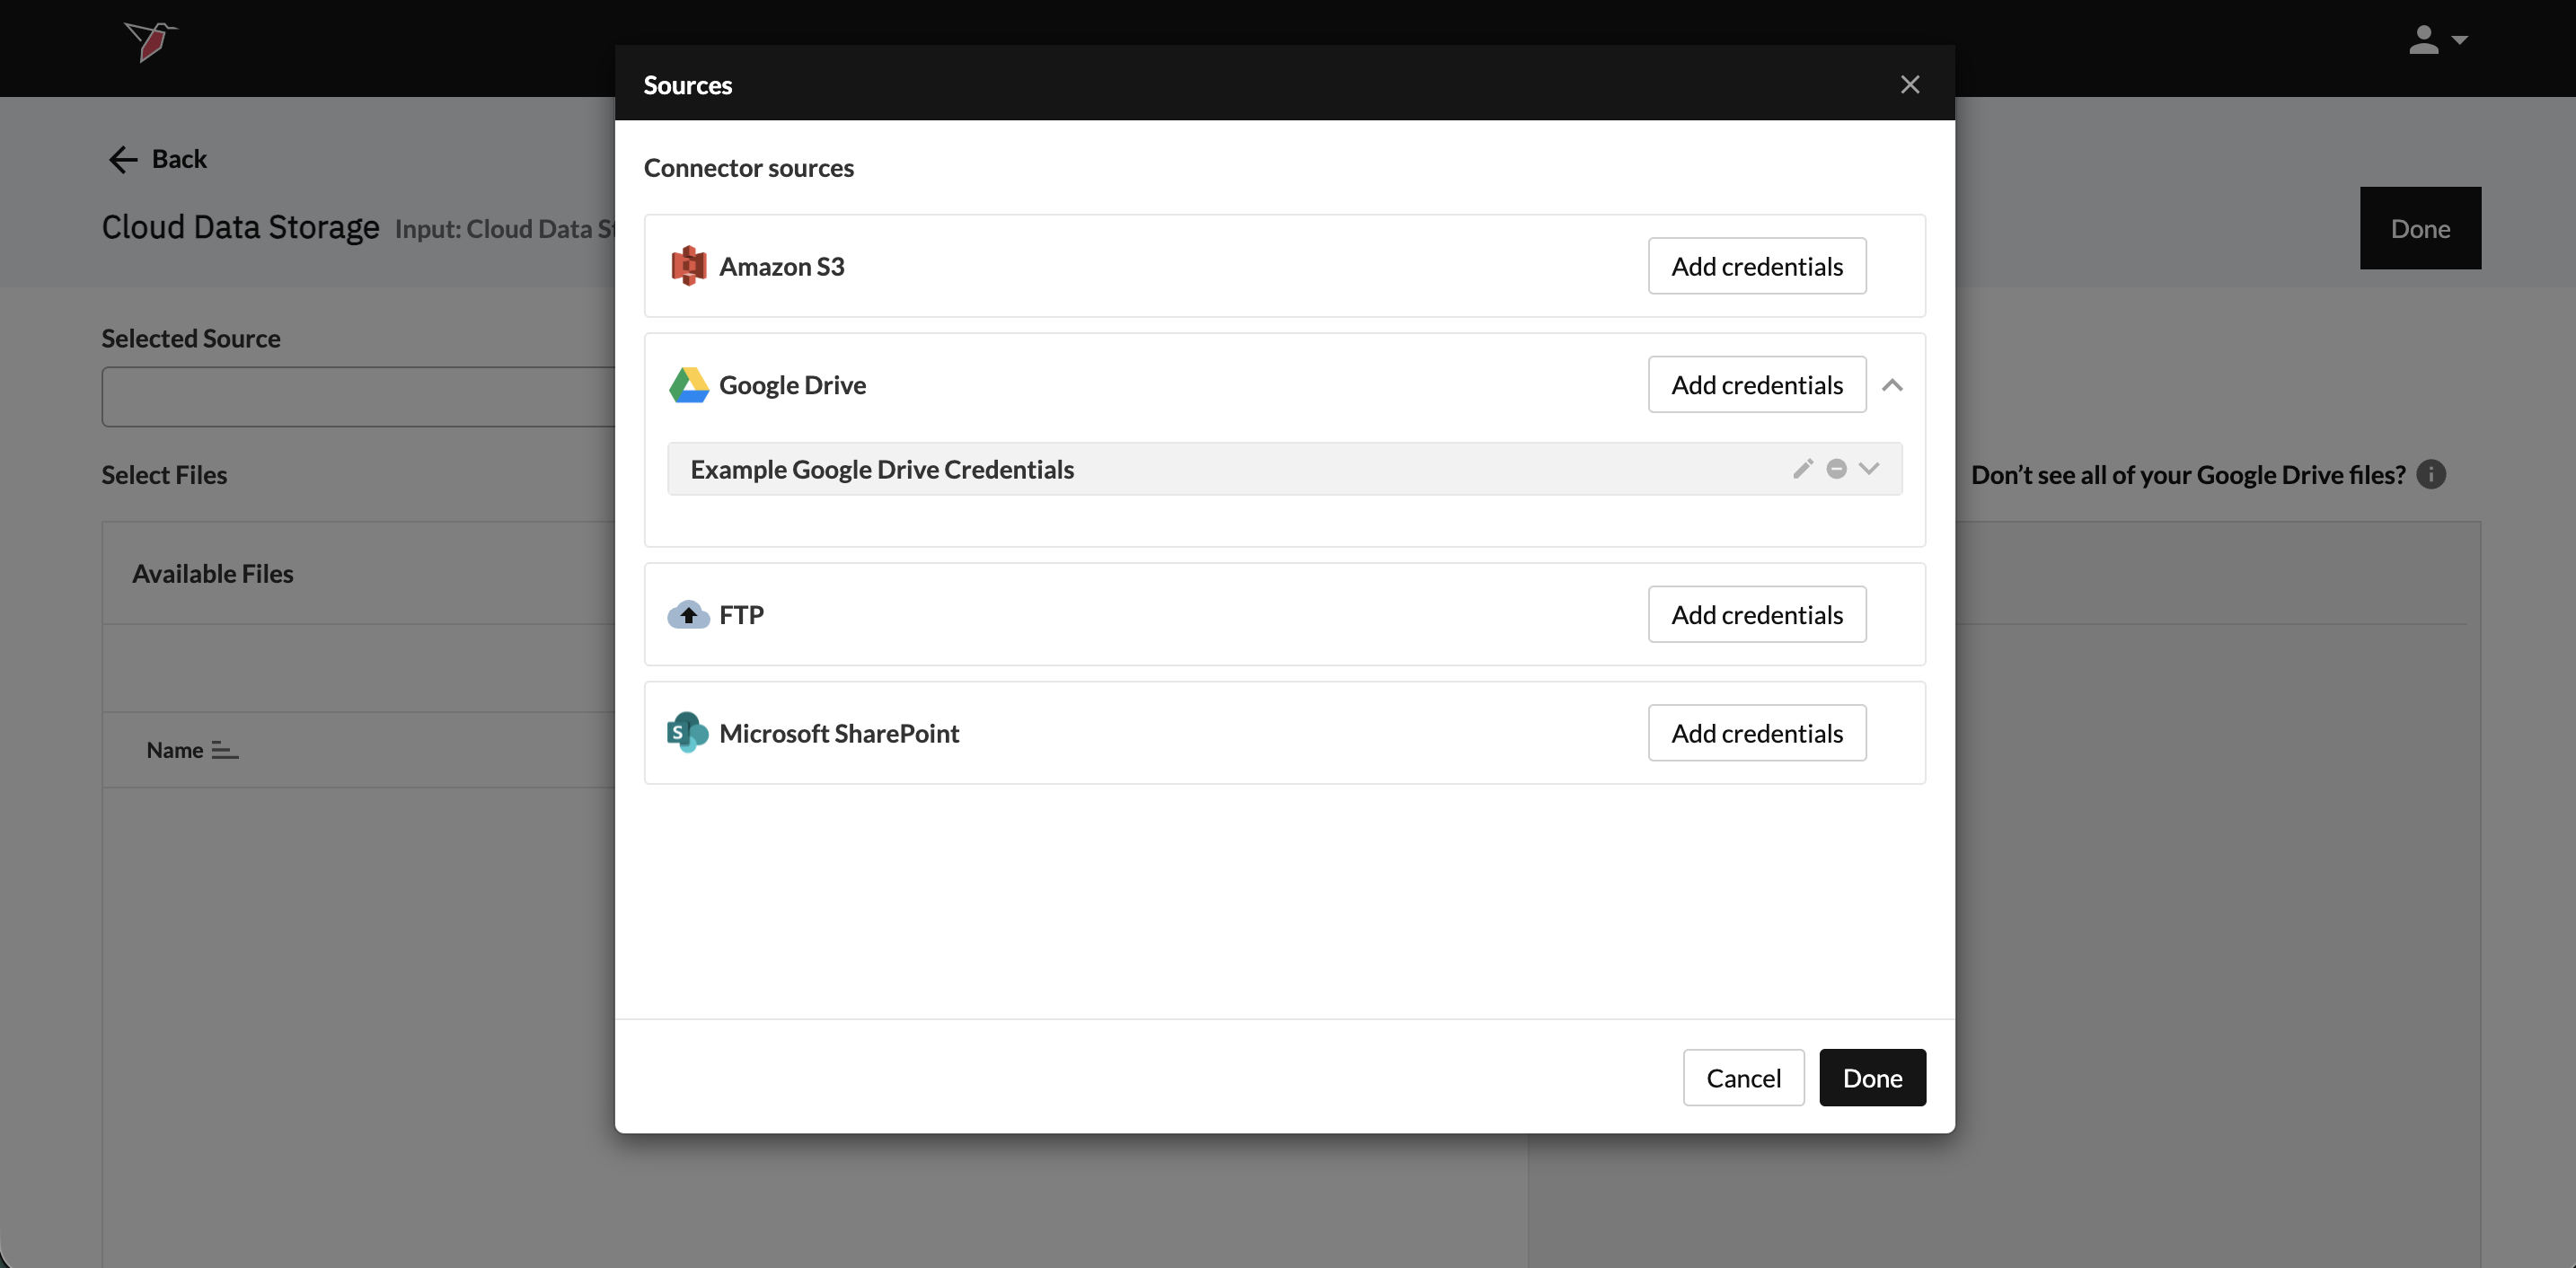
- Once credentials have been added, they will appear in a grey box beneath the respective Cloud Data Storage Platform name. You can edit them by clicking the pencil icon or delete them by clicking the minus icon.
- Click Done to return to the main configuration screen.
Collecting Your Data
- Once connected, navigate your cloud folder structure and select one or more files to add. You can use the search box to help you locate your files if needed.
- To select multiple files, hold Control (Windows) or Command (Mac) and click each file individually. To select all files in a folder, press Control/Command + A.
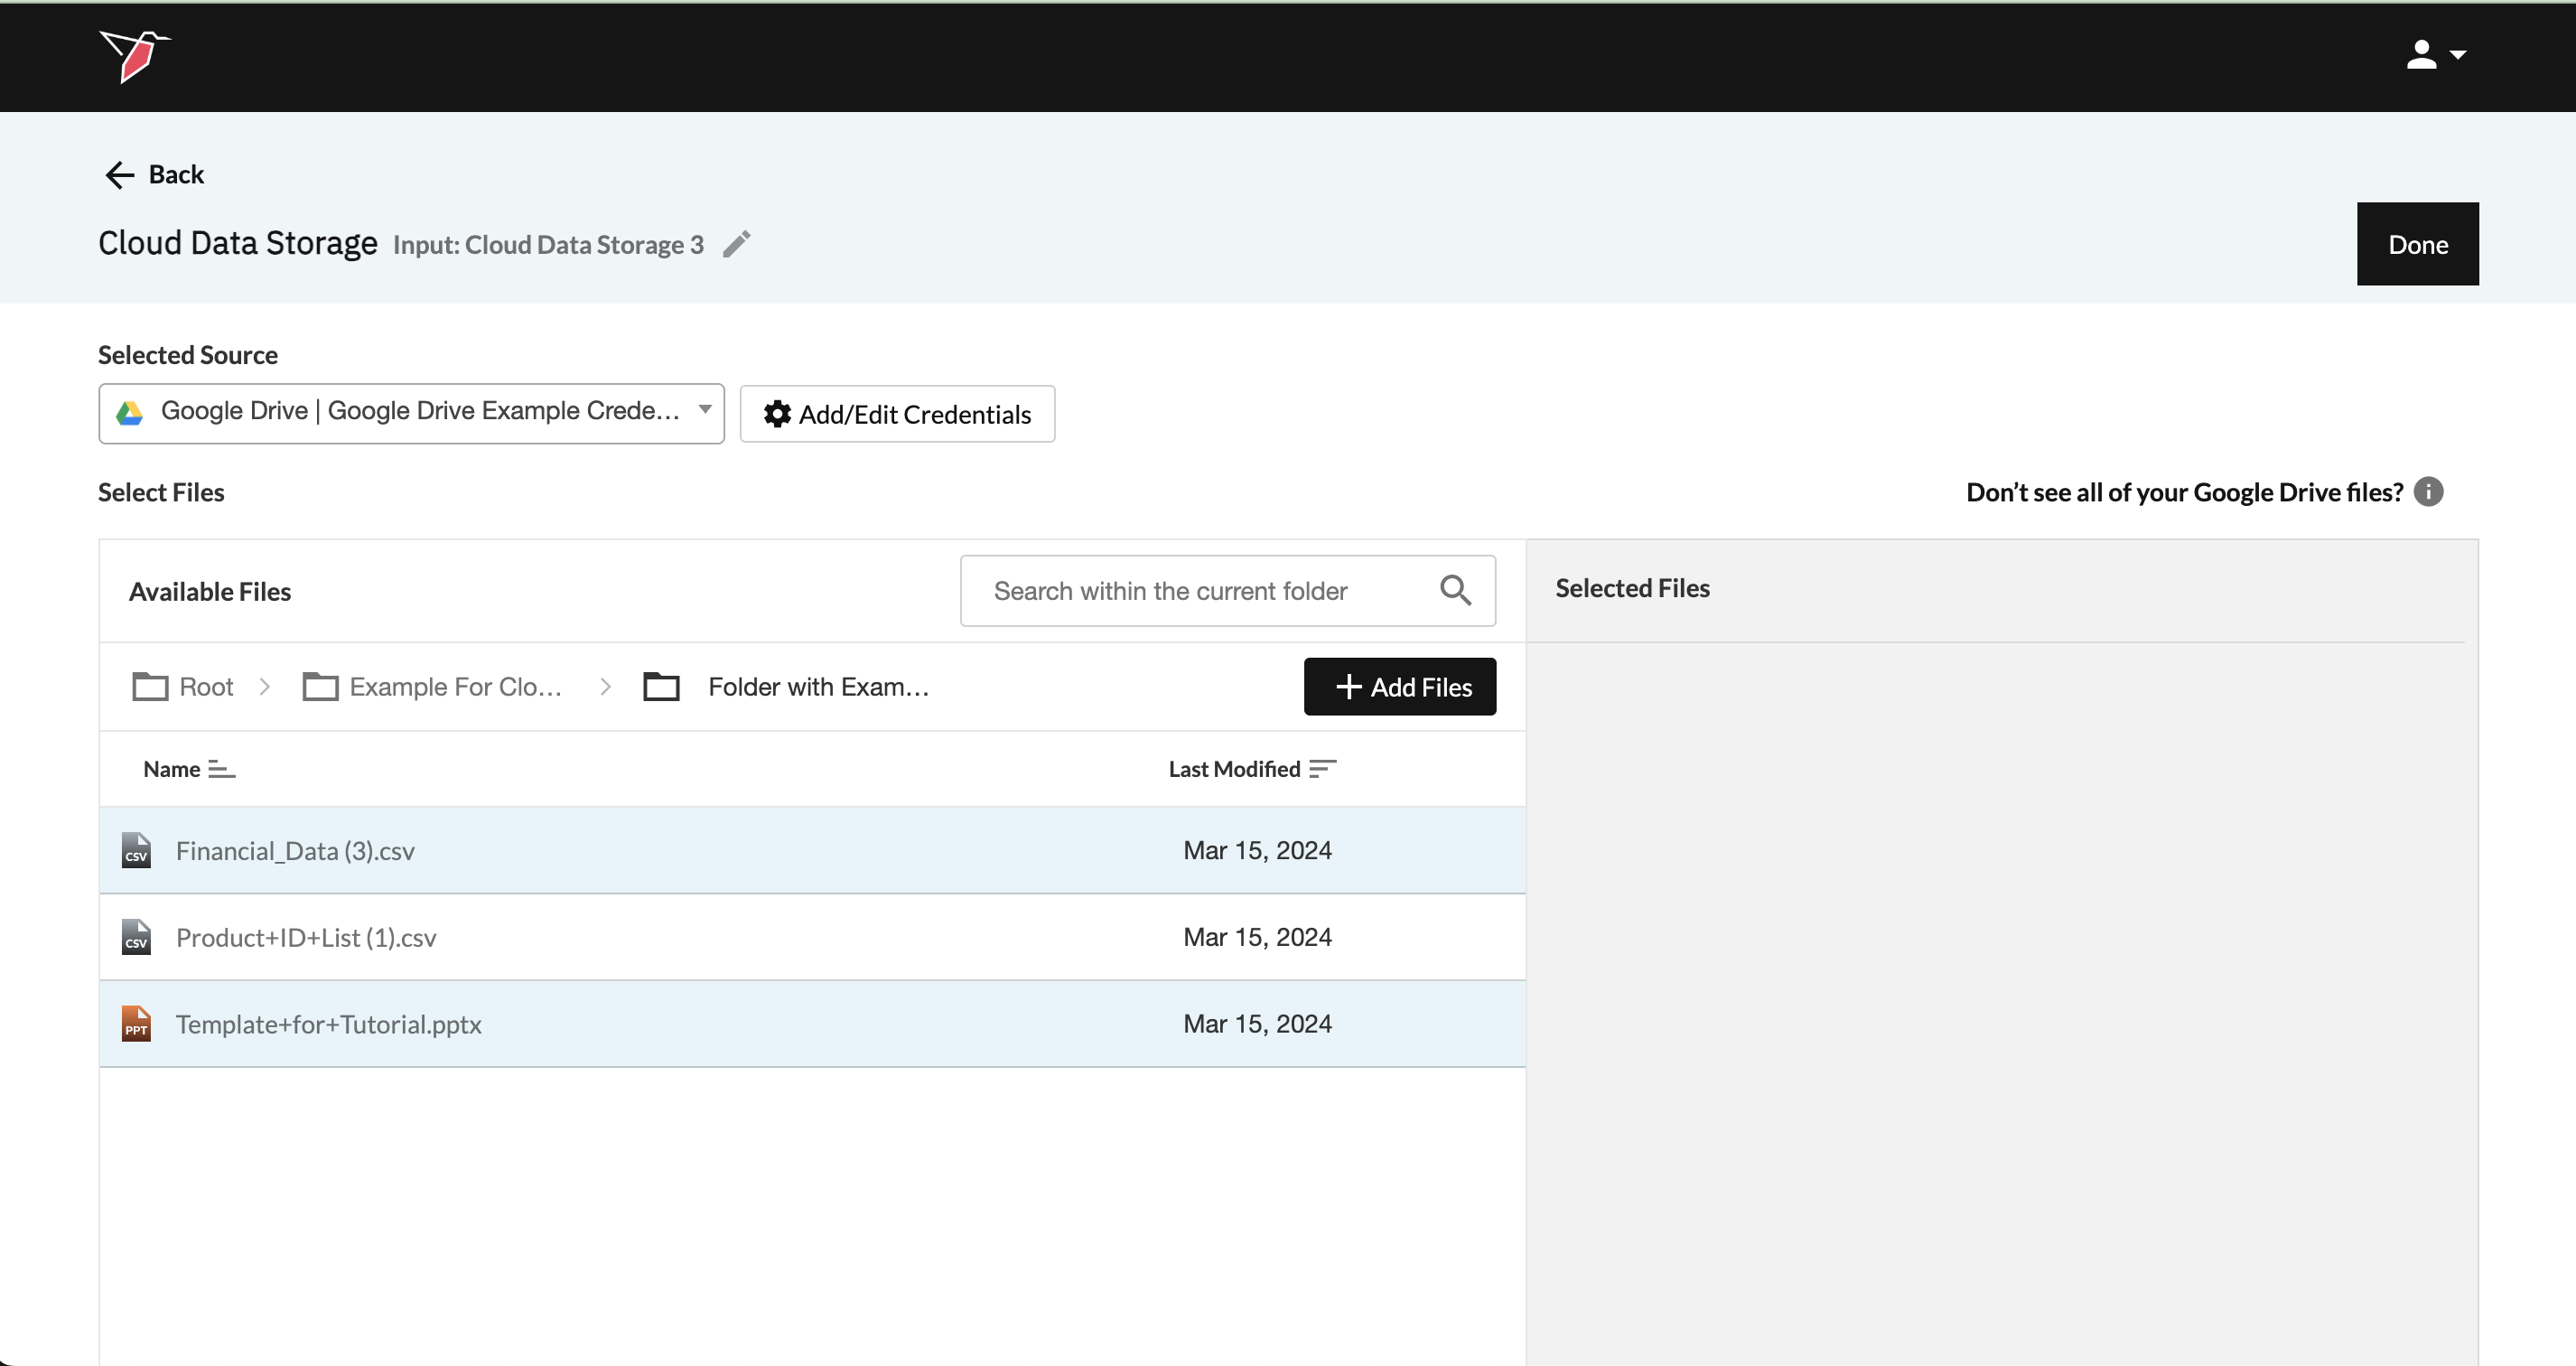
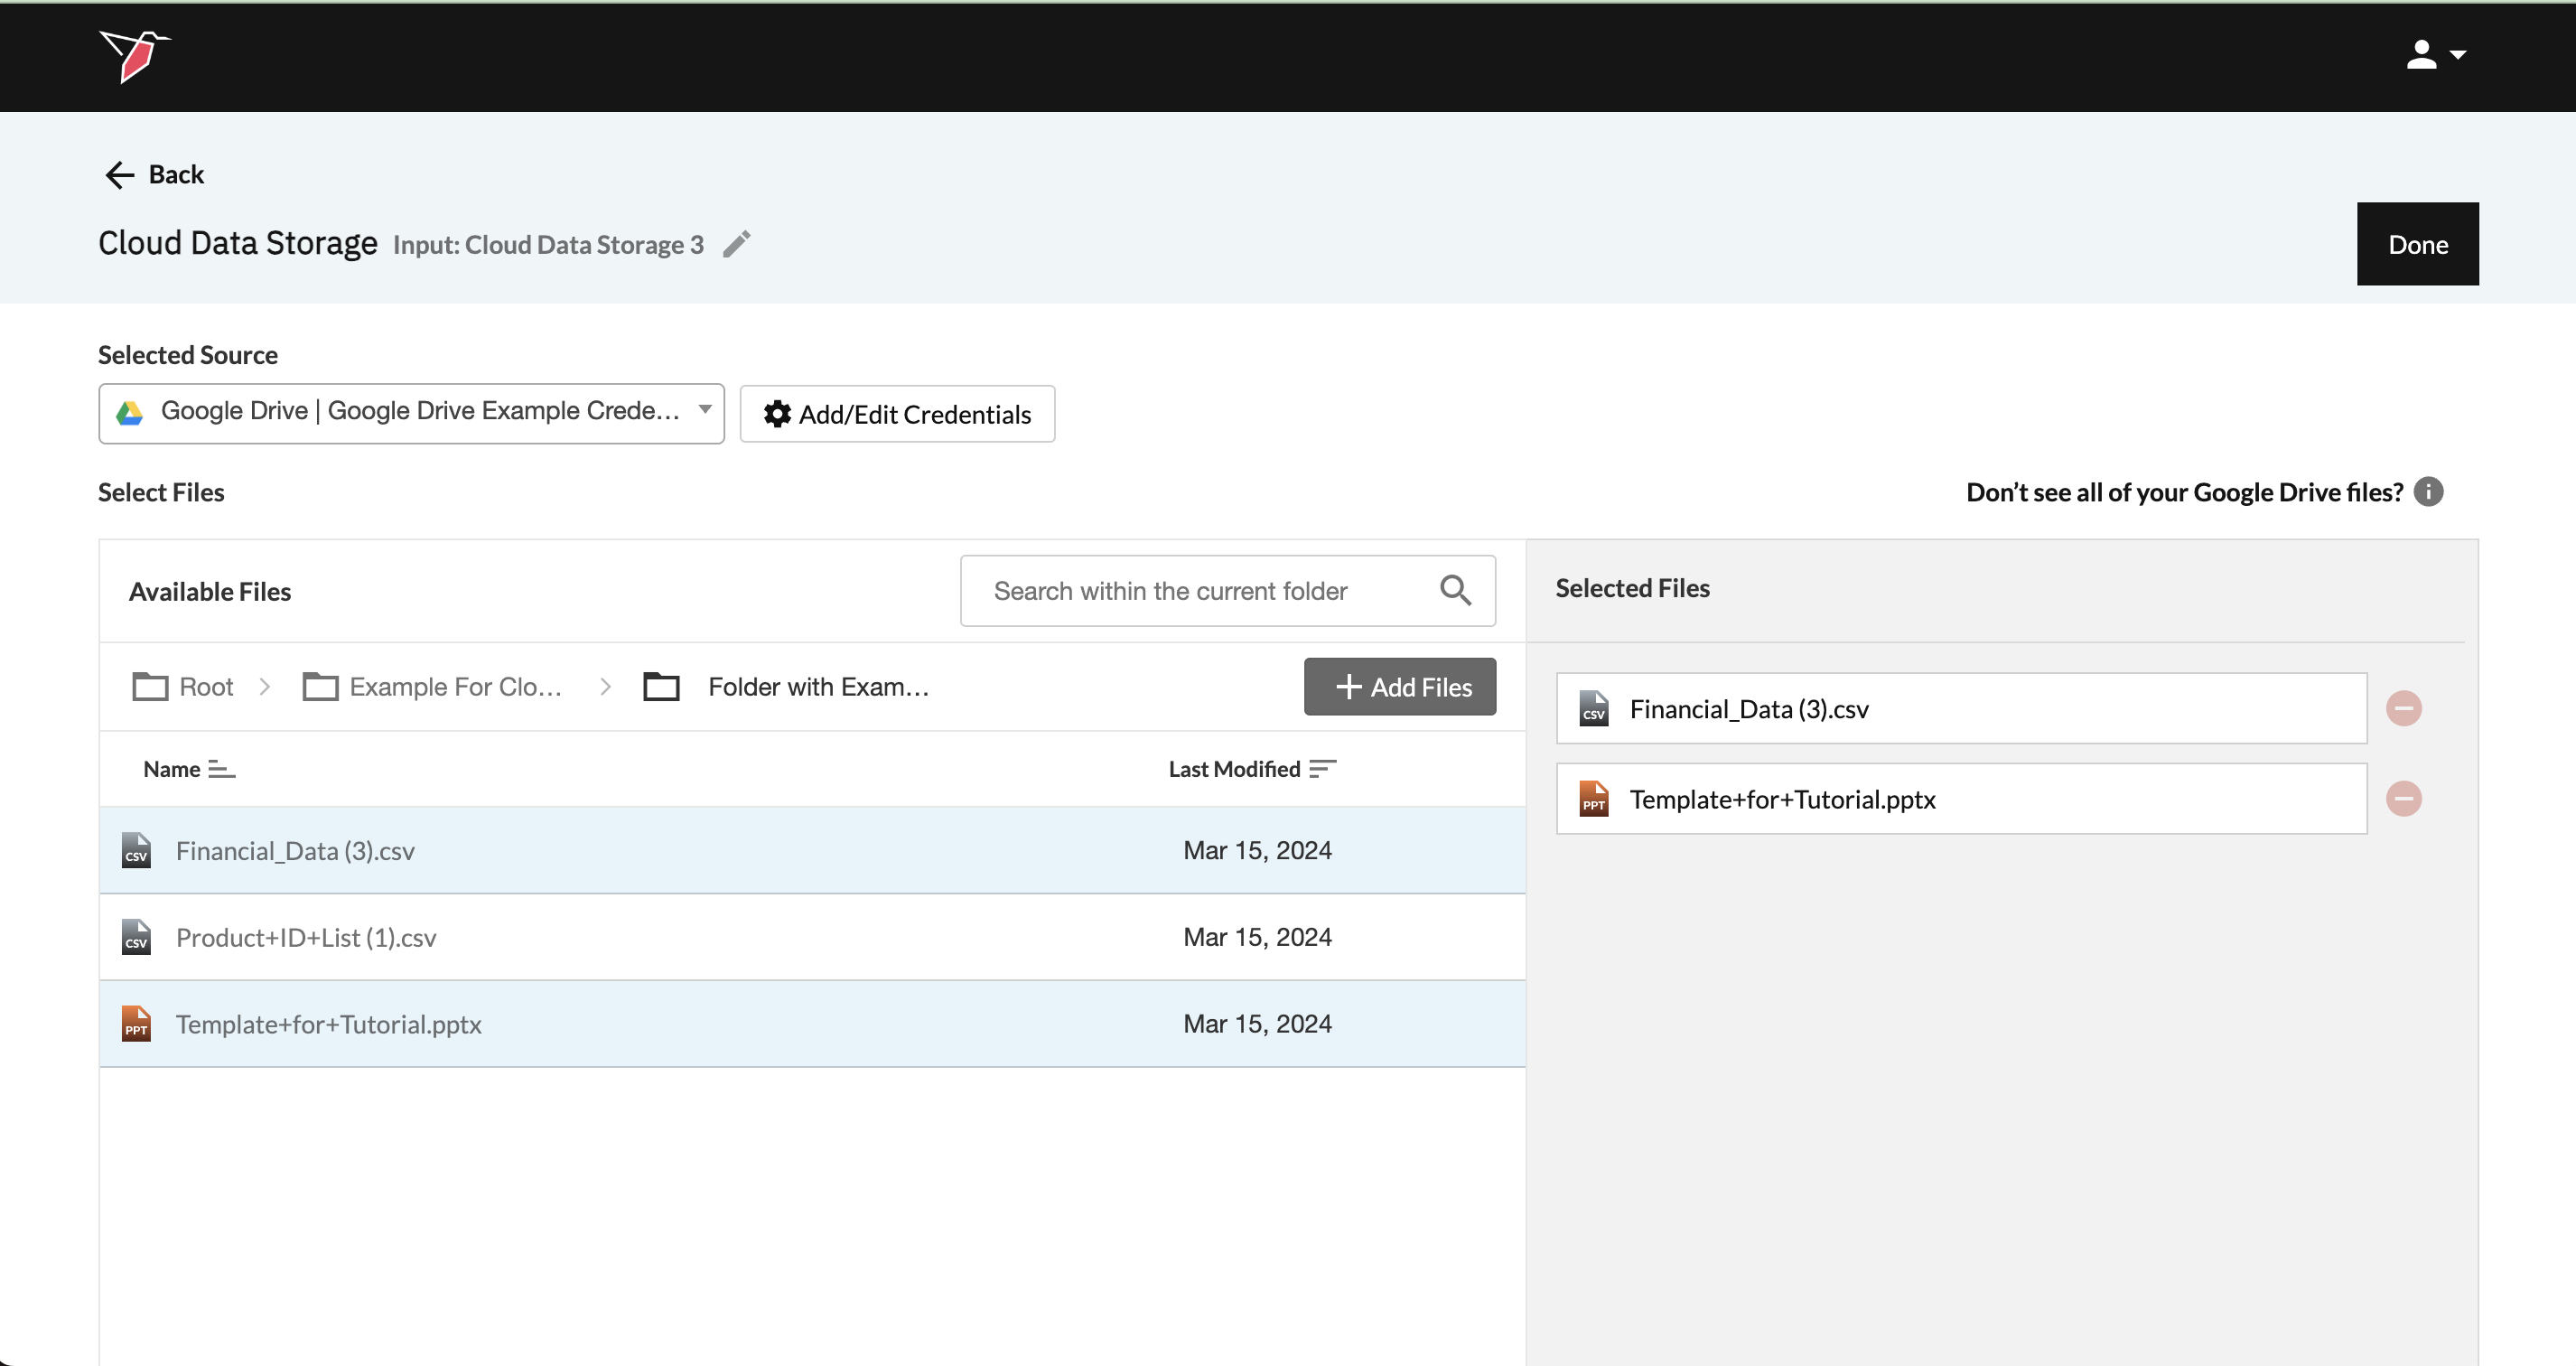
- After selecting the desired files, click + Add Files to move them into the Selected Files pane.
- You can add files from multiple folders by repeating these steps.
- To remove files, click the red minus icon next to an individual file.
Note on Dataset Types (Regular Dataset vs. File Collection)If you upload a CSV, Google Sheet, or Excel file containing a single sheet, and Redbird recognizes it as a well-defined structured dataset (i.e., a clear tabular table), it will automatically generate a standard Redbird tabular dataset. This dataset can, for example, be connected directly to a dashboard.
If you upload multiple files, or if the uploaded file is unstructured, Redbird will instead create a File Collection node. In this context, an unstructured file is one that does not contain a single clean tabular dataset in standard cell format (e.g. a CSV file, or a single-sheet Excel document). In these scenarios, Redbird uses AI agents and computer vision to scan the documents, extract relevant information, and convert it into structured tabular format when needed.
From a File Collection node, you can preview the collected documents by double-clicking the node, or by selecting the node and clicking Explore in the right-hand side panel. Within the Explore view, click the eye icon next to each document or its subcomponents (e.g. individual Excel tabs, PDF pages, or PowerPoint slides).
These extracted components can then be referenced or transformed into structured datasets using nodes such as the AI Data Tool (see documentation here).
Note: When a File Collection node is created, only the Replace upload method is supported — Append is not available.
Advanced Settings
In the Advanced Settings section, you’ll find the following options that allow you to configure how your collection runs, including:
- The update Method allows you to select how you want your data to aggregate when you run future data pulls. Append keeps the historical data and adds the future data pulls below. Replace deletes the historical data and generates the new data in its place. Note that the Append option is not supported for file collection datasets. See the “Dataset Types” callout above for more details.
- You can also toggle the option to refresh the dataset only when new data is detected.
- Initial Data Load allows you to upload historical data in bulk as a one-off in the event that you have the data saved on your computer.
Once you have finished, Click Done.
Running a Configuration
- Click the node to expose the right-side panel.
- Click Run