

Publish a chat environment
Give others a simple, self-serve chat on top of the outputs your workflow produces
Introduction
Not everyone who needs your data needs to see your workflow. The person who builds a workflow understands its pipeline — the connections, the preparation steps, the schedules. The people who use its results usually just have questions: "which region is leading?", "how did last month compare?", "can I see that as a chart?"
Publishing a chat environment bridges the two. As a builder, you create a workflow that keeps its outputs fresh — datasets, reports, and other results that update on every run. Then you publish a chat on top of it, choosing exactly which outputs to expose. What others get is a clean, self-serve chat interface where they can investigate those outputs, ask questions, and run their own ad hoc analysis — without ever seeing (or being able to disturb) the underlying pipeline you manage. They explore the results; you keep control of how the results are made.
Publish a chat from your workflow
- Open the workflow you want to publish from, and click Publish chat at the top of the canvas.
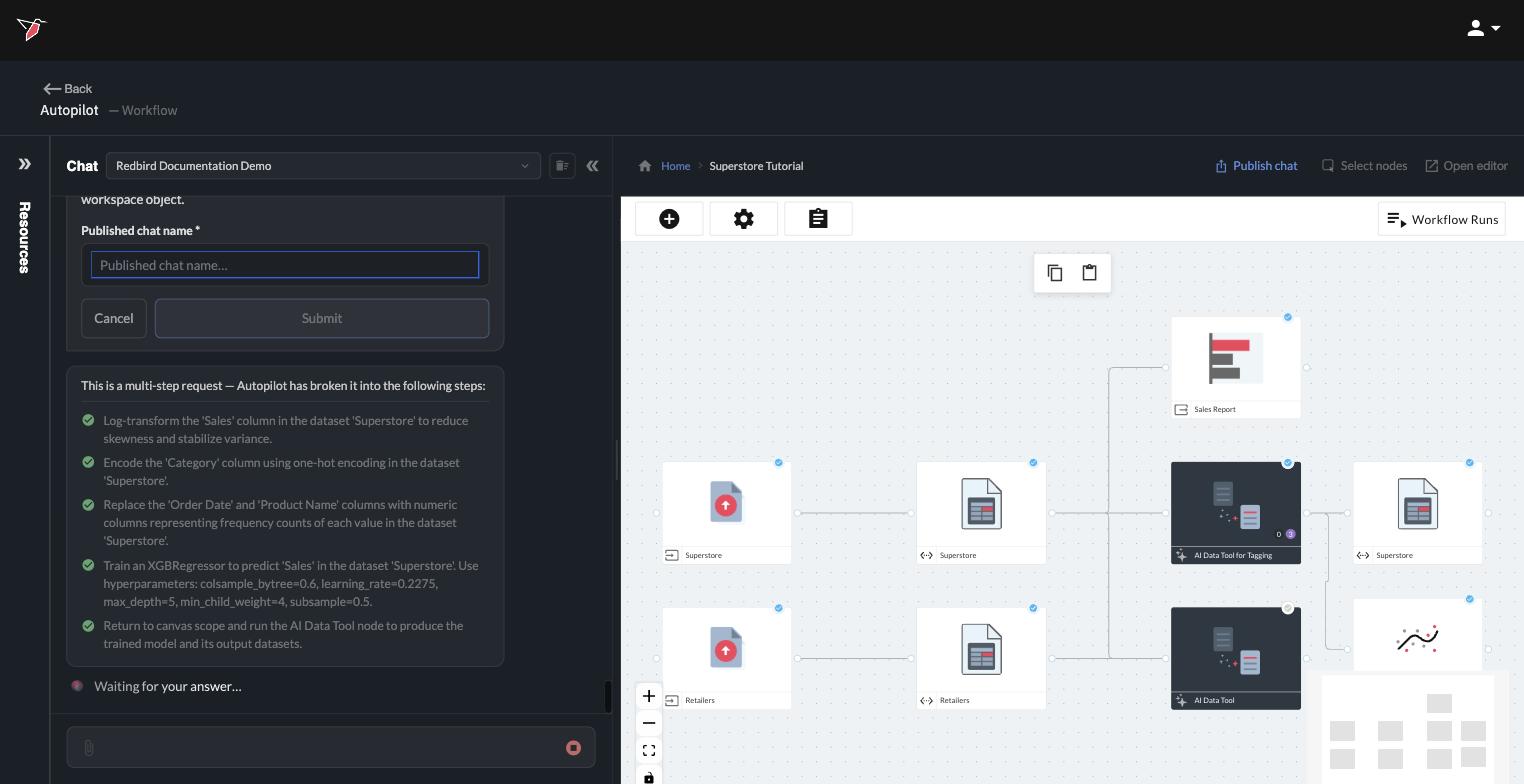
- Autopilot walks you through the setup in the chat, starting with a name. This is the name end users will see on the workspace object — choose something that describes what they can explore:
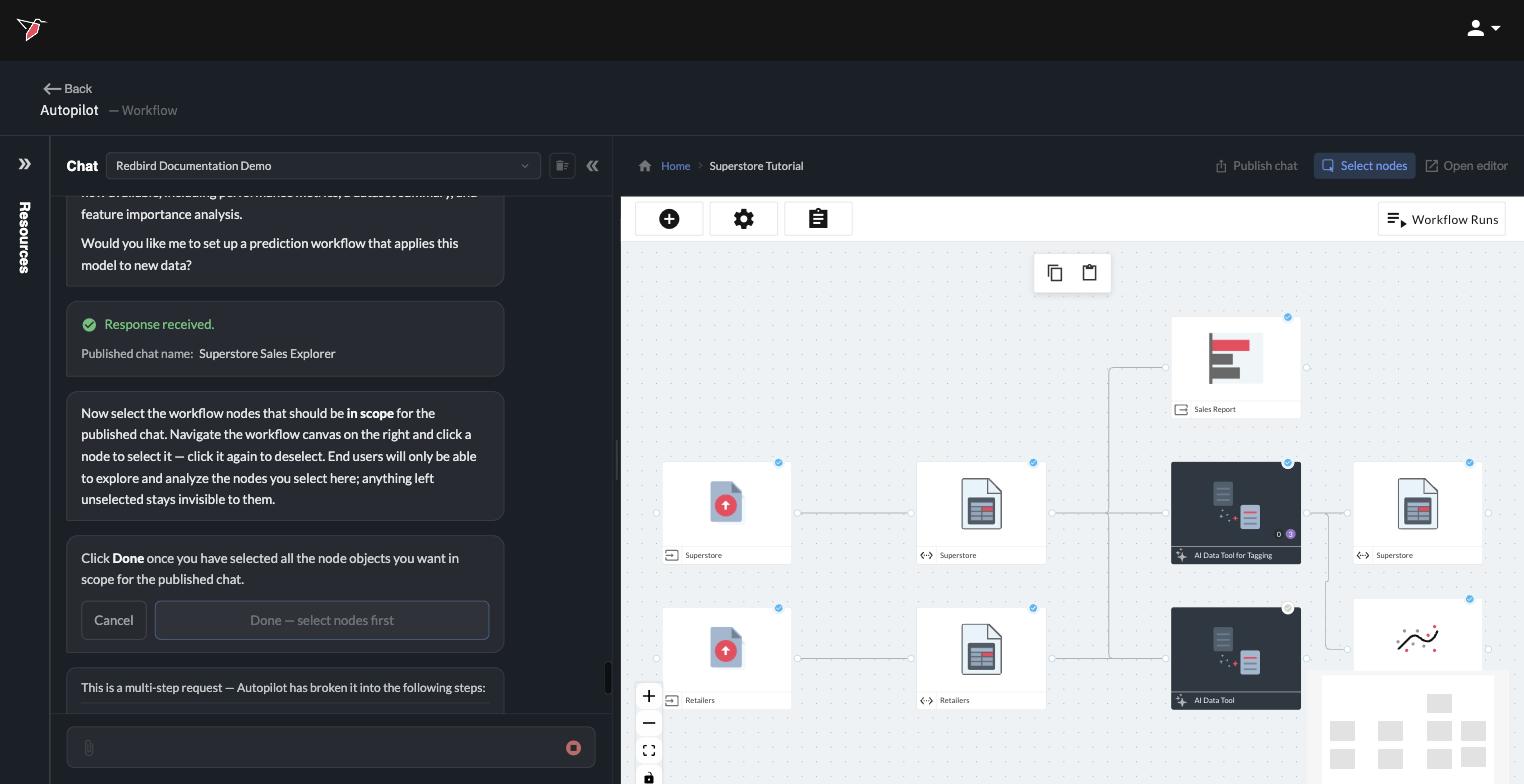
- Next, choose what's in scope. The canvas switches to selection mode: click the nodes end users should have access to — click again to deselect. Anything you leave unselected stays invisible to them. Only specific output node types can be selected as in scope for a published chat environment - Autopilot will notify you if you try to select a node that is not supported as a scope component in the published chat.
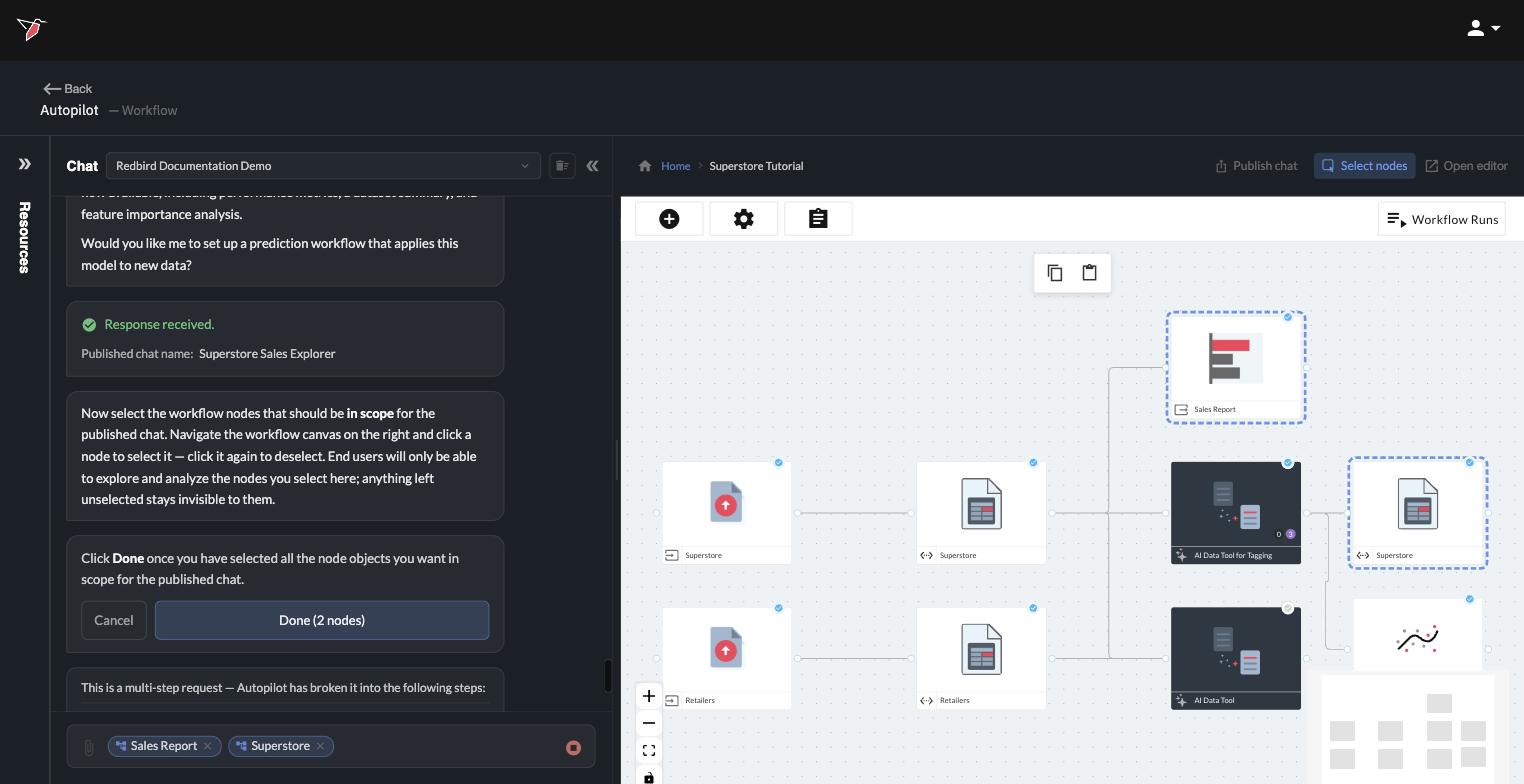
- Select your output nodes — typically the finished datasets and reports, not the raw sources or intermediate steps — and click Done.
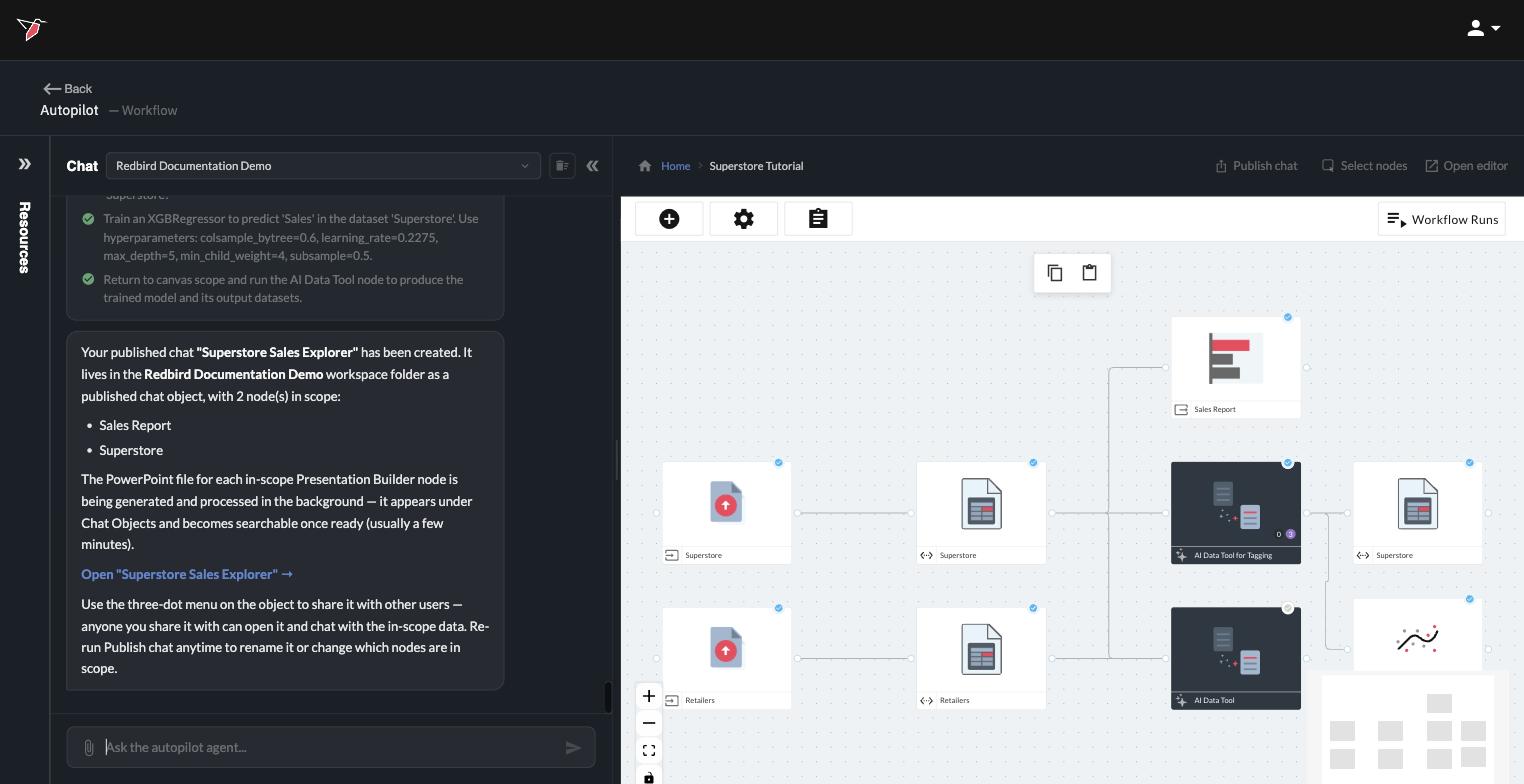
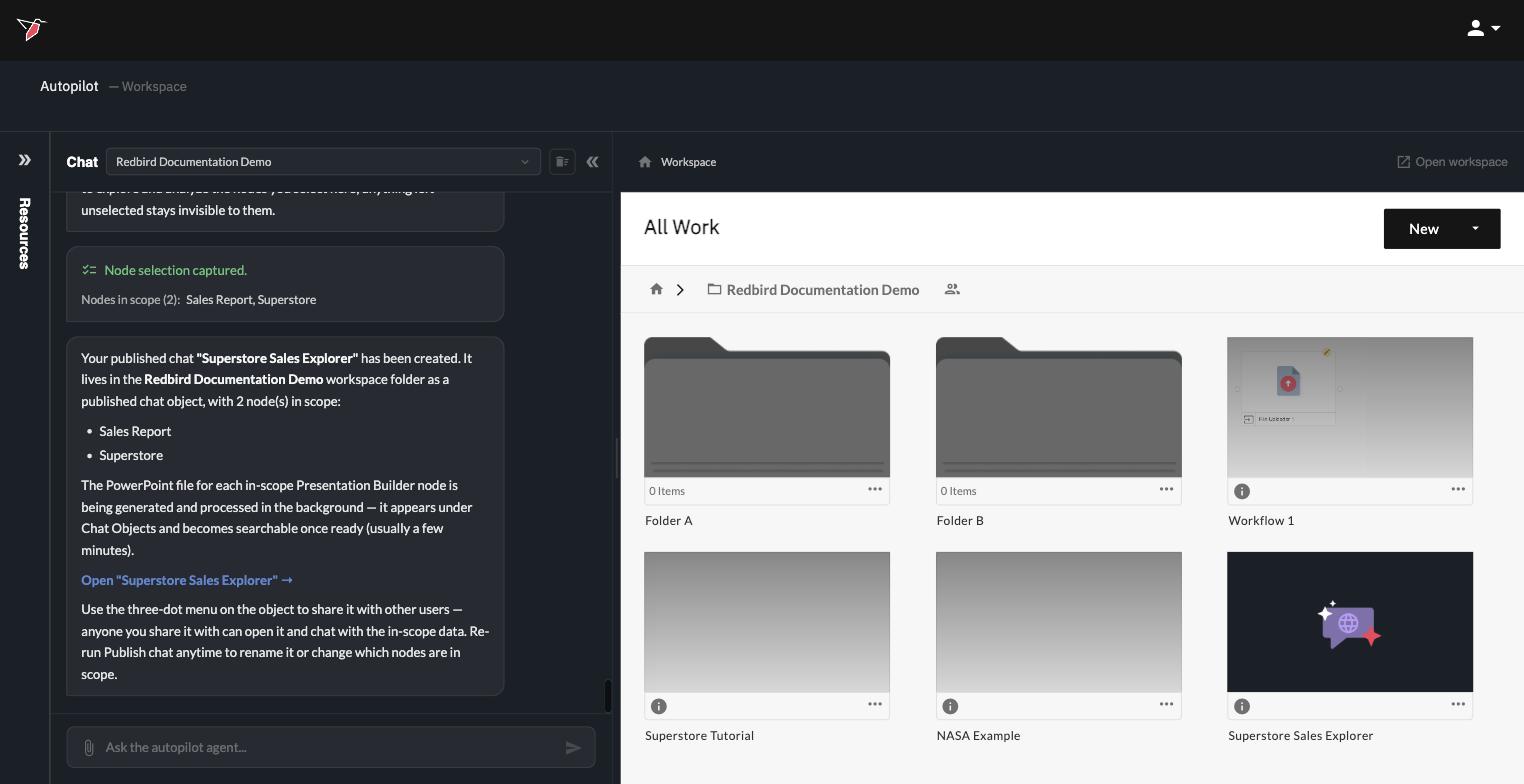
Autopilot creates the published chat and confirms where it lives, with a link to open it.
Find the published chat
Two ways to get there:
- From the confirmation — click the Open link in Autopilot's message.
- From the workspace — go to your workspace and open the folder the confirmation named. The published chat appears as its own object, with a chat-bubble icon, alongside your workflows in the same folder where the workflow it was published off of lives.
Share, rename, or delete it
Click the three-dot menu on the published chat object to manage it:
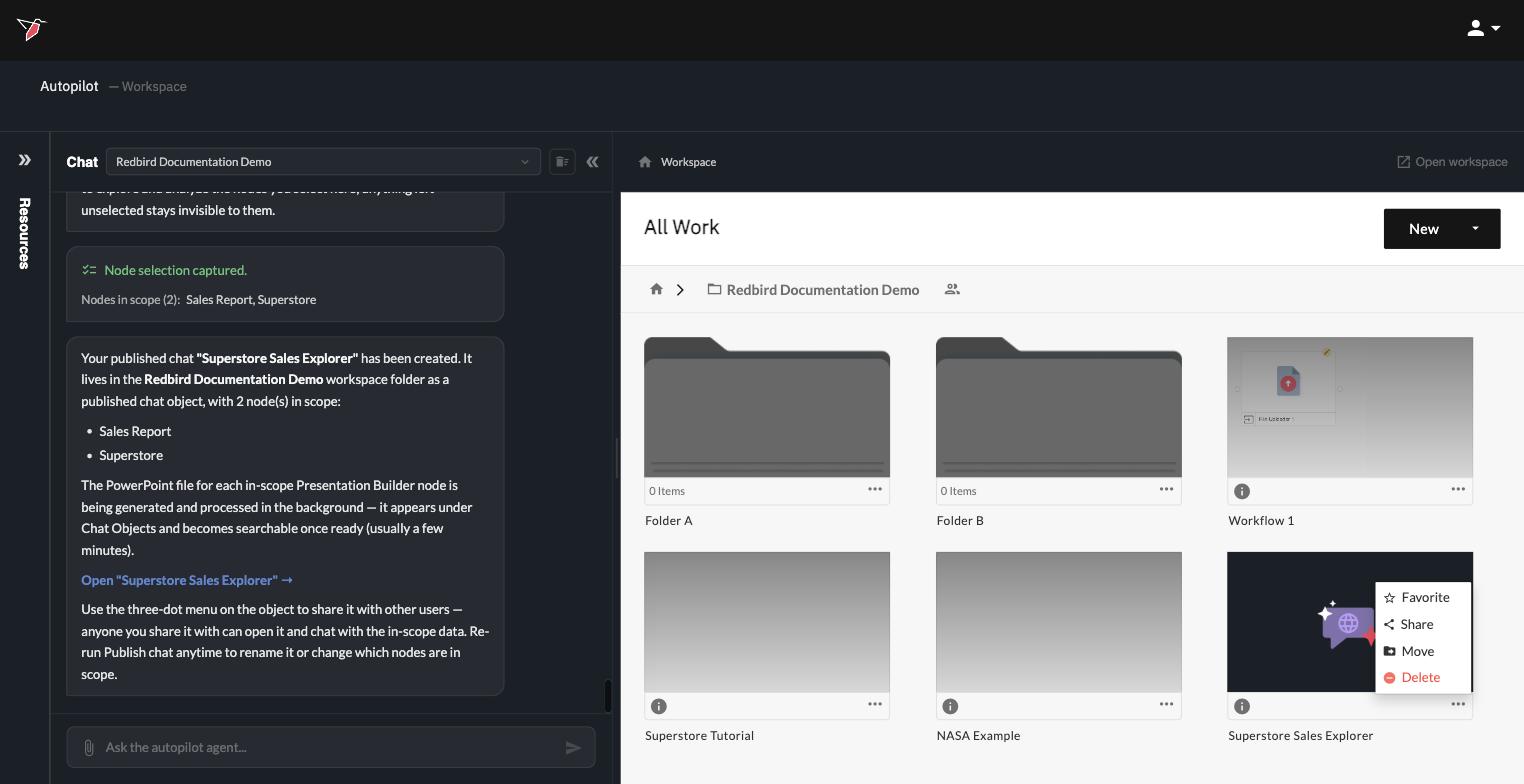
- Share — give other users access. Anyone you share it with can open the chat and work with the in-scope data.
- Move — relocate the object to another folder, and Favorite to pin it for quick access.
- Delete — remove the published chat. This doesn't touch the underlying workflow — only the published environment goes away.
To rename the published chat, click on the name below the published chat object in the workspace to activate the name edit field. If you want to publish additional chats with different nodes that are in scope, you can run Publish chat again from the workflow.
What end users can do inside
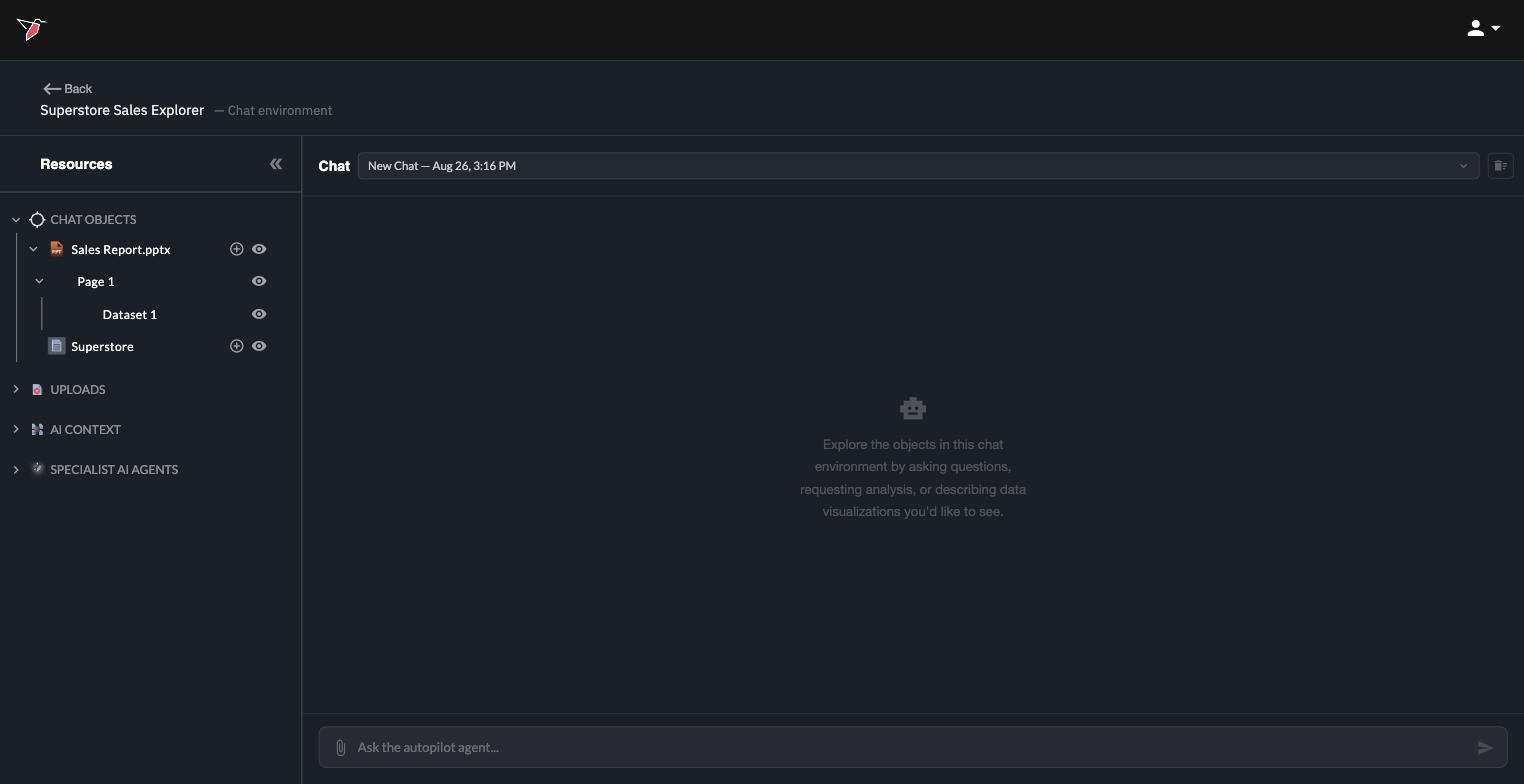
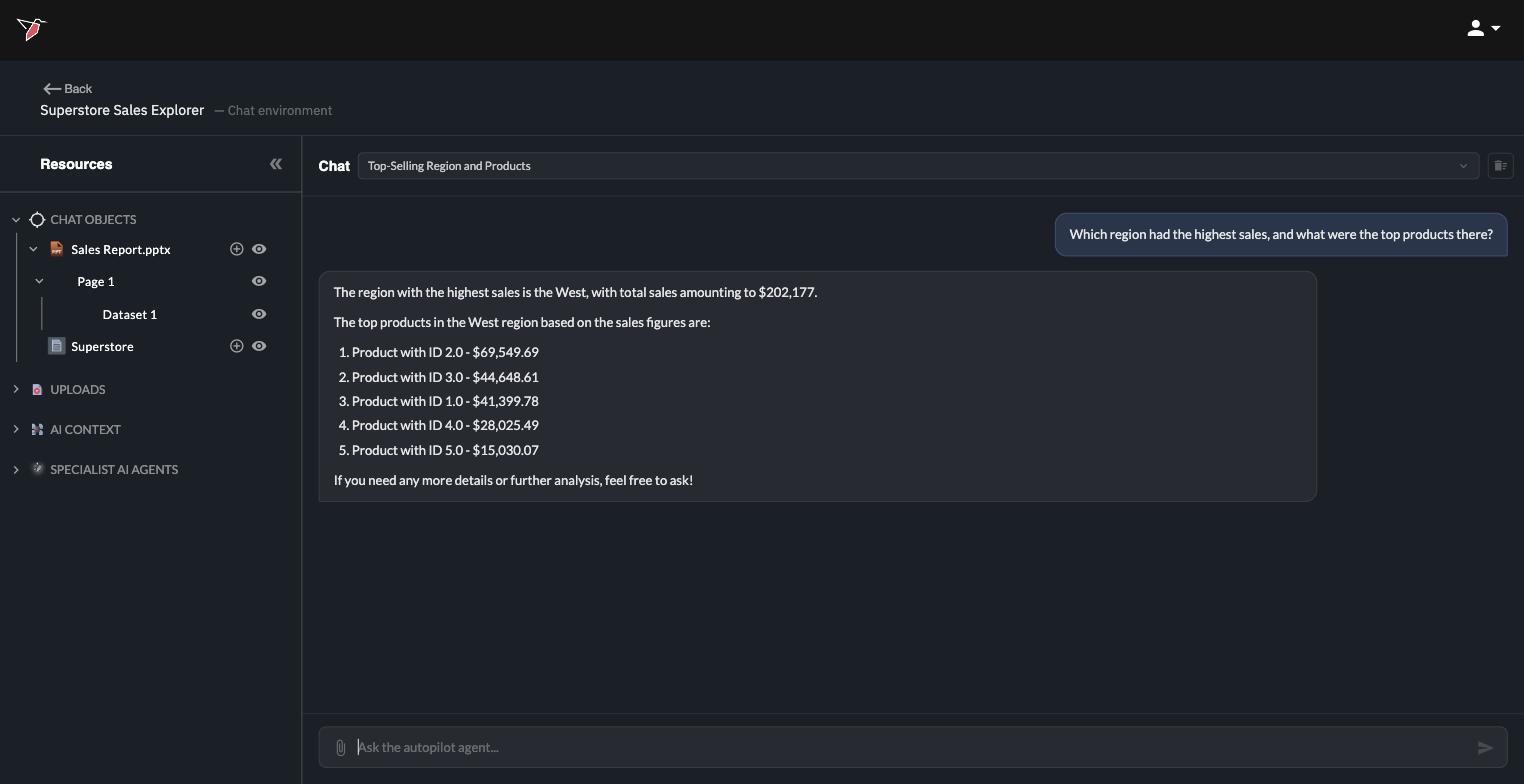
Opening the published chat lands in a clean chat environment — no canvas, no pipeline, just a conversation with the data you put in scope. Users can ask questions, request analysis, and describe charts they'd like to see, and they can organize their work into chat threads just like in Autopilot.
The Resources panel on the left shows what they have to work with:
- Chat Objects — the outputs you published: e.g. reports and datasets, each with an eye icon to preview its contents directly.
- Uploads — files the user attaches to bring into their own analysis.
- AI Context — notes and reference material for their conversations.
- Specialist AI Agents — the same focused experts available in Autopilot.
From there, it's self-serve exploration and analysis on live results:
The pipeline stays yours. End users see only the outputs you selected — never the connections, preparation steps, or schedules behind them. And because those outputs come from your workflow, every scheduled run refreshes what the published chat's users are exploring (see Build & run workflows).
Updated 4 days ago