AI Connect
Overview
AI Connect enables users to extract information from websites, web-based applications, APIs, and structured data platforms using natural language — without writing code. It is currently available within AI DT (AI Data Tool), Redbird’s natural-language data collection and transformation environment. For a full overview of AI DT, see here.
Instead of manually exporting files, building custom API integrations, or maintaining brittle scripts, users can configure connections to supported data sources directly within AI Connect using natural language instructions or point and click web browsing. Connections are powered by AI agents that adapt to structural changes and can be easily updated in natural language as endpoints, tables, or requirements evolve.
AI Connect supports:
- API-based integrations
- Web automation workflows
Once configured, connected systems become reusable resources within automated workflows.
Accessing AI Connect
AI Connect is configured within the AI DT node.
- Drag the AI DT node onto the canvas from the left-side panel and double-click to edit. Name your AI DT node using the pencil icon in the top left
- Navigate to the Resources panel.
- Click the + icon next to Resources.
- Select Connection from the Add Resource screen.

You will enter a guided configuration flow with the following stages:
- Source
- Credentials
- Verify
- Resource Selection (if applicable)
- Summary
You can use Next and Previous to move sequentially through the setup stages, or click directly on the steps listed on the left-hand side to navigate to a specific stage once it has been configured.
Configuring an API Connection
A connection is defined as a pairing of a data source and its associated credentials (where required). Credentials linked to a connection may be updated or replaced; however, the connection itself is the entity that appears in the Resources panel and is referenced within AI DT workflows.
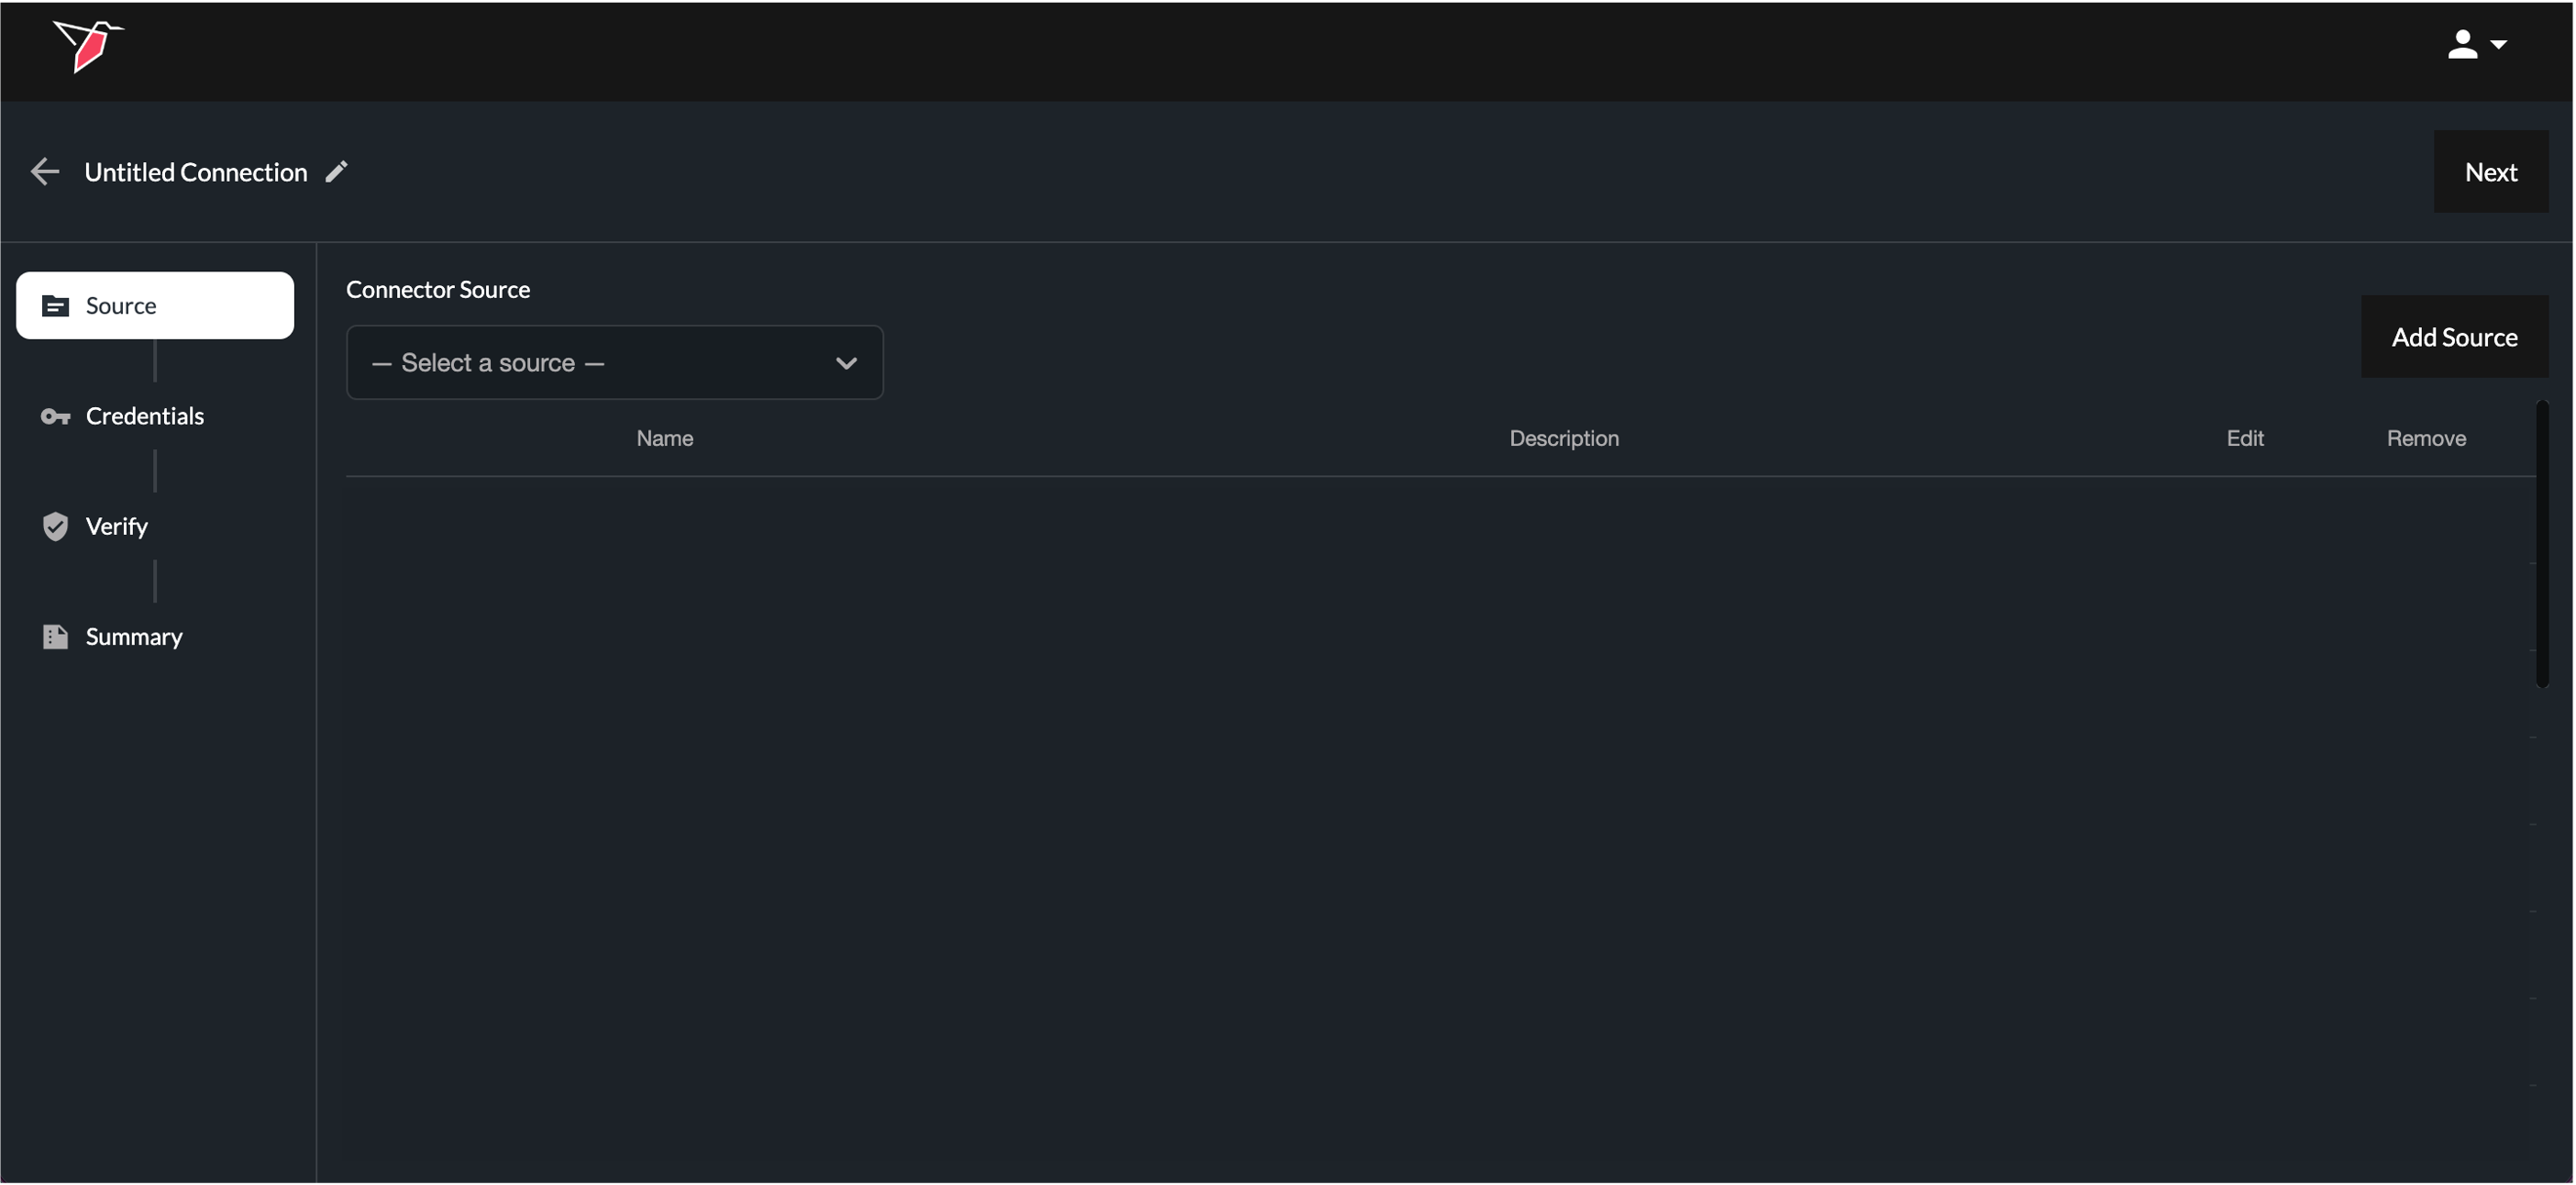
Start by assigning a name to your connection using the pencil icon in the top-left corner. This name will appear in the Resources panel, allowing you to reference it easily within AI DT prompts.
Step 1 — Choose the Source
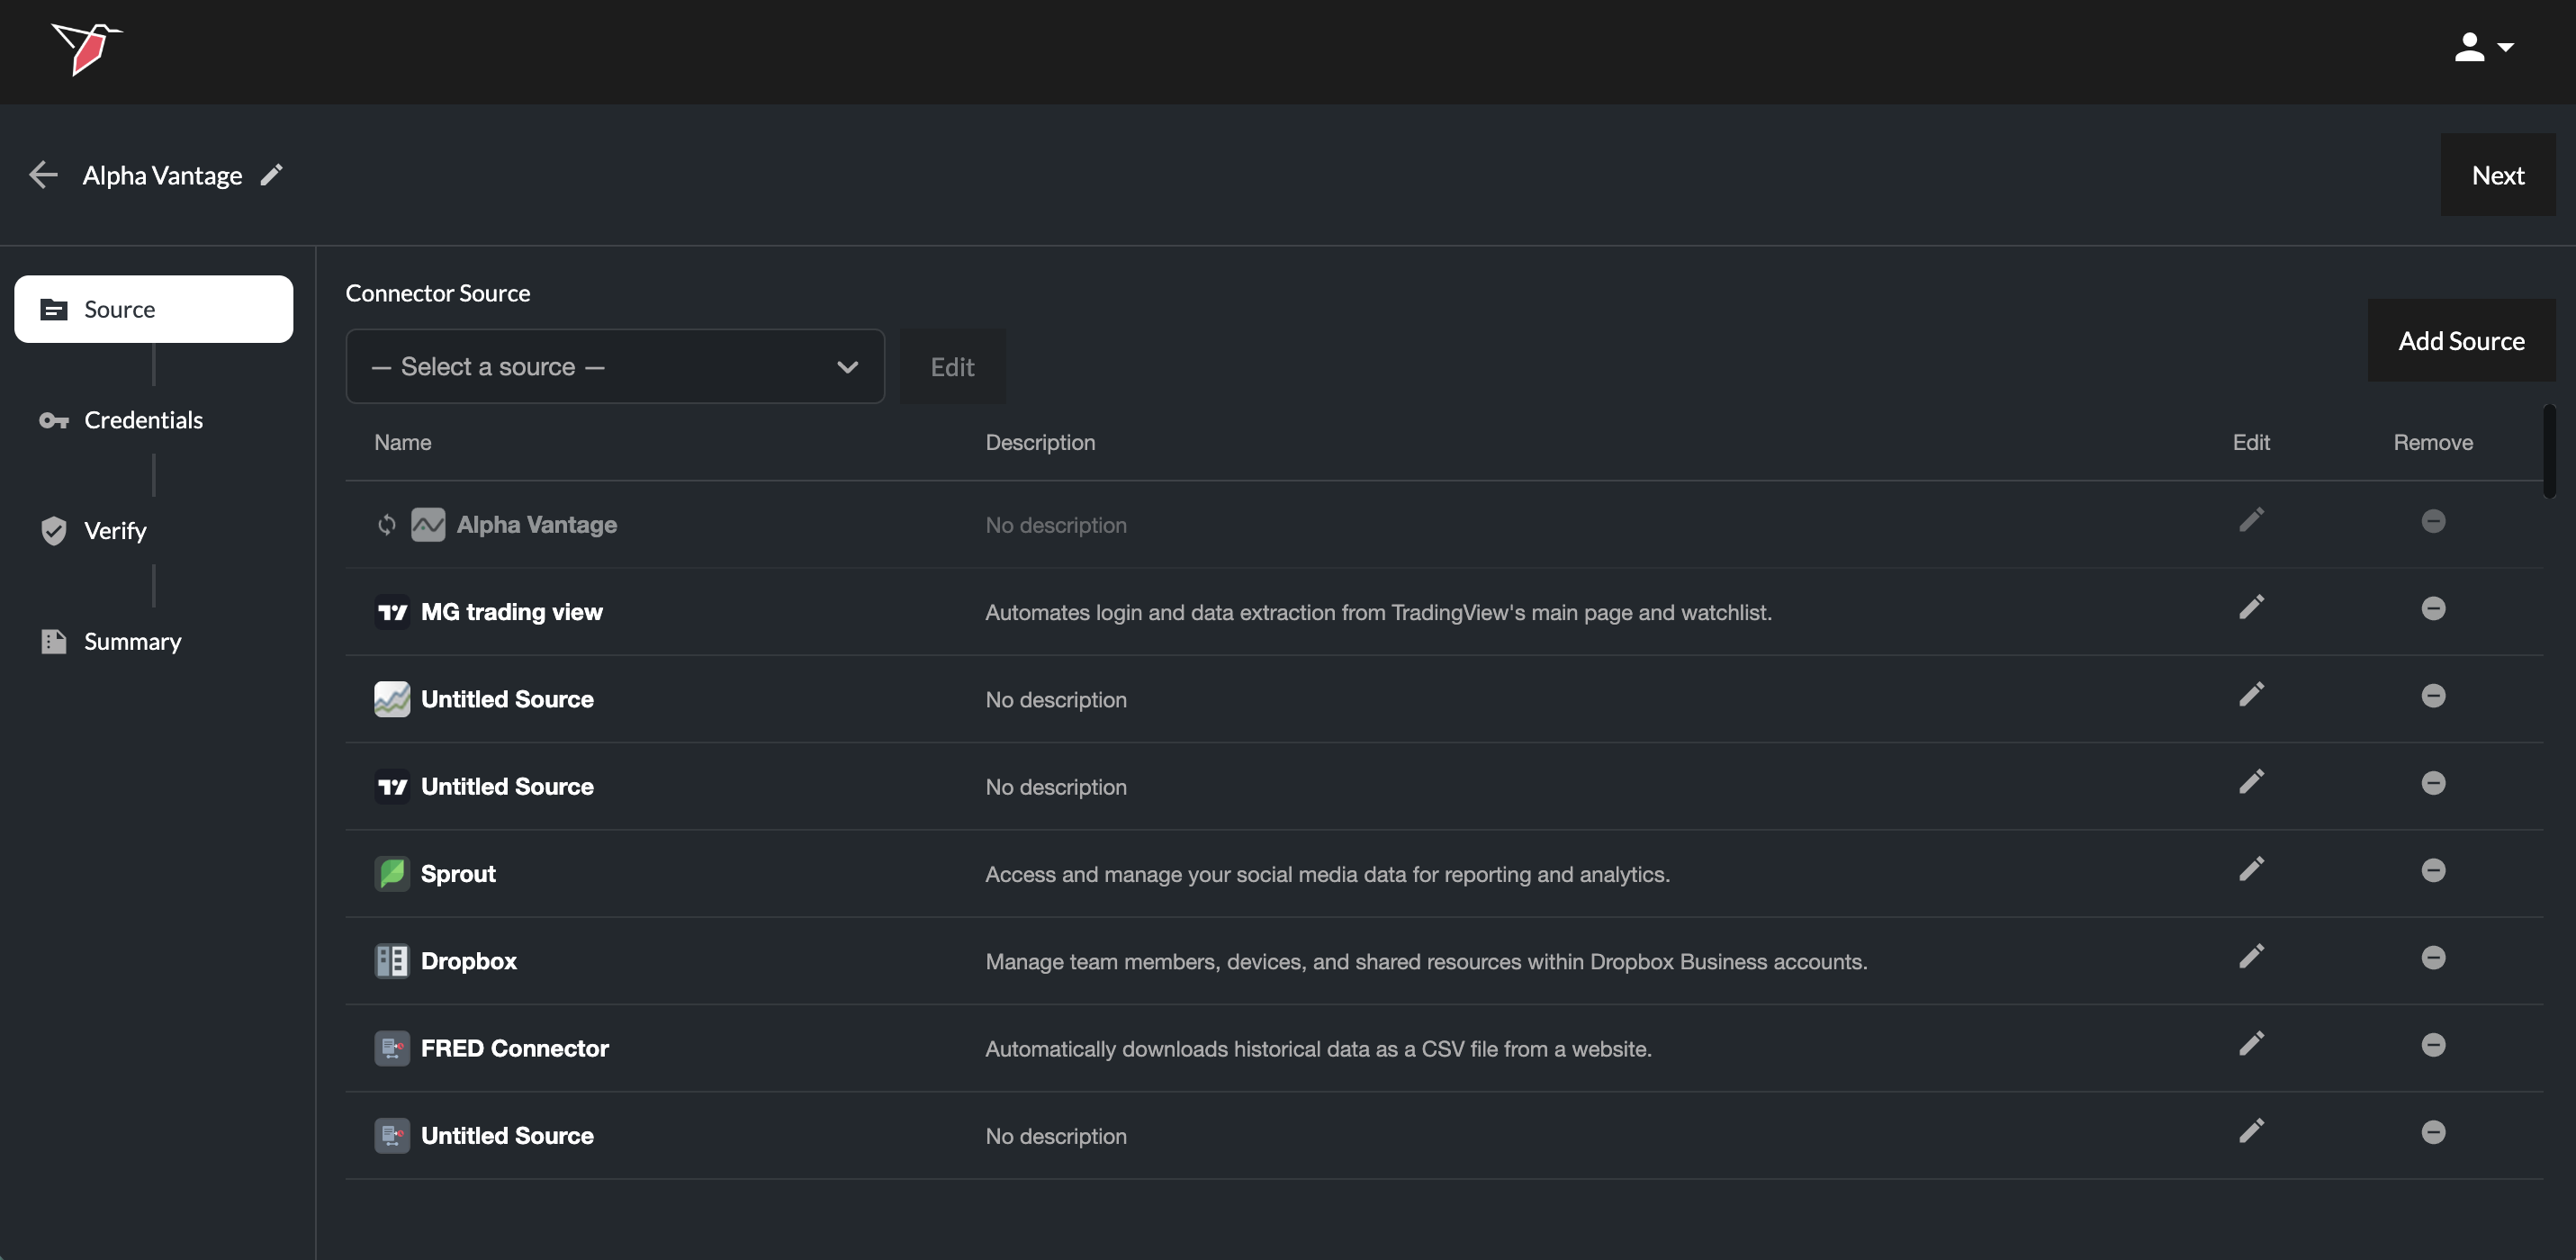
Within the Source stage:
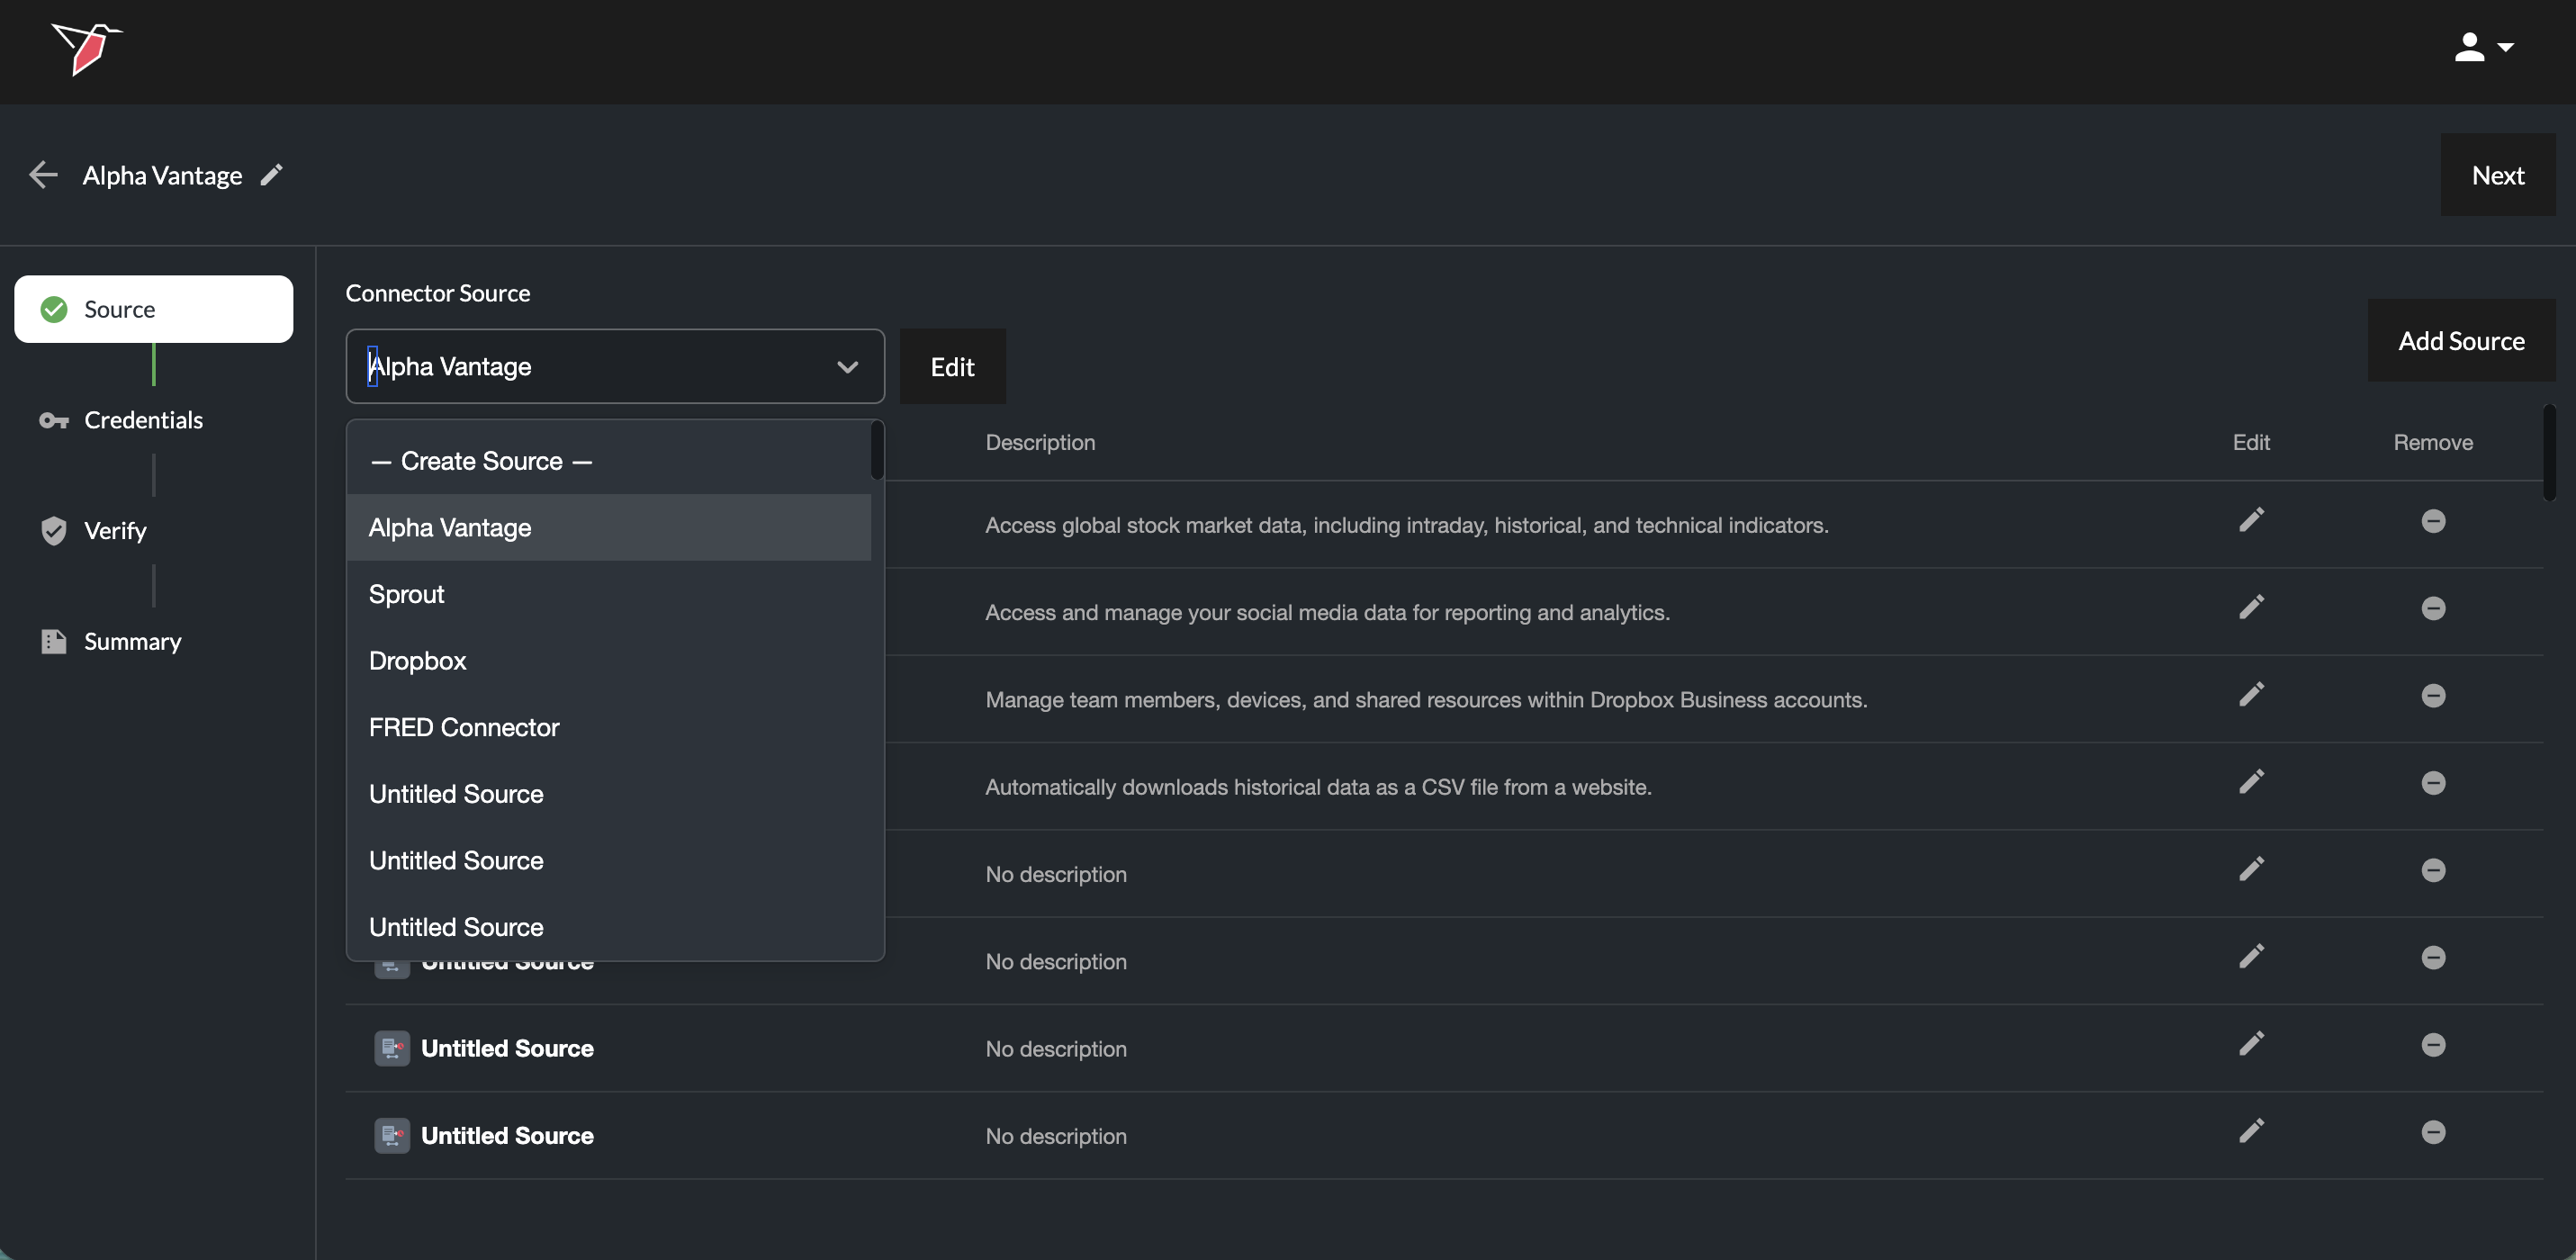
- Select an existing source from the Connector Source drop-down (if it has already been created by another Redbird user or provided as a preset by Redbird), or
- Click Create Source from the drop down or the Add Source button on the right hand side of the page to create a new one
When adding a new source:
- Select API
- Click Confirm
- Name the source using the pencil icon in the top-left corner and optionally upload an identifying image/icon by clicking on the image icon next to the source name. You can also leave this as is, and AI will automatically name the source and select the icon for you.
- To provide the relevant API documentation, you can either:
-
Provide a URL to the source's API documentation [Recommended]: Click Add, then URLs. Paste the first URL and click the add URL button to include any additional URLs relevant to this connection. Once all URLs are added, click Submit. AI agents will scrape and ingest the documentation automatically.
-
Upload the relevant API documentation (PDF, Word, Markdown, etc.): Click Add, then Files to open the upload modal. Upload files or drag and drop them in, then click Submit Files to begin processing.
A processing icon will appear on the right-hand side while the documentation is being ingested. Wait for this to complete before proceeding.
-
- Once the documentation has been ingested, click Done to proceed to the next stage.
Note: When uploading documentation, you can combine all API docs into one file or keep them separate. we currently support the following file types for documentation upload: .csv, .ppt, .pptx, .xls, .xlsx, .pdf, .docx, .txt
Once you return to the main configuration screen, your new connection will appear greyed out with a loading indicator, indicating it is being processed. During this time, Redbird analyzes the uploaded documentation or scrapes the provided URL, using AI to build a structured understanding of the API—including available endpoints and supported authentication methods.
Once processing is complete, select the newly added source from the Connector Source drop-down and you will be taken automatically to the next screen.
Step 2 — Configure Credentials
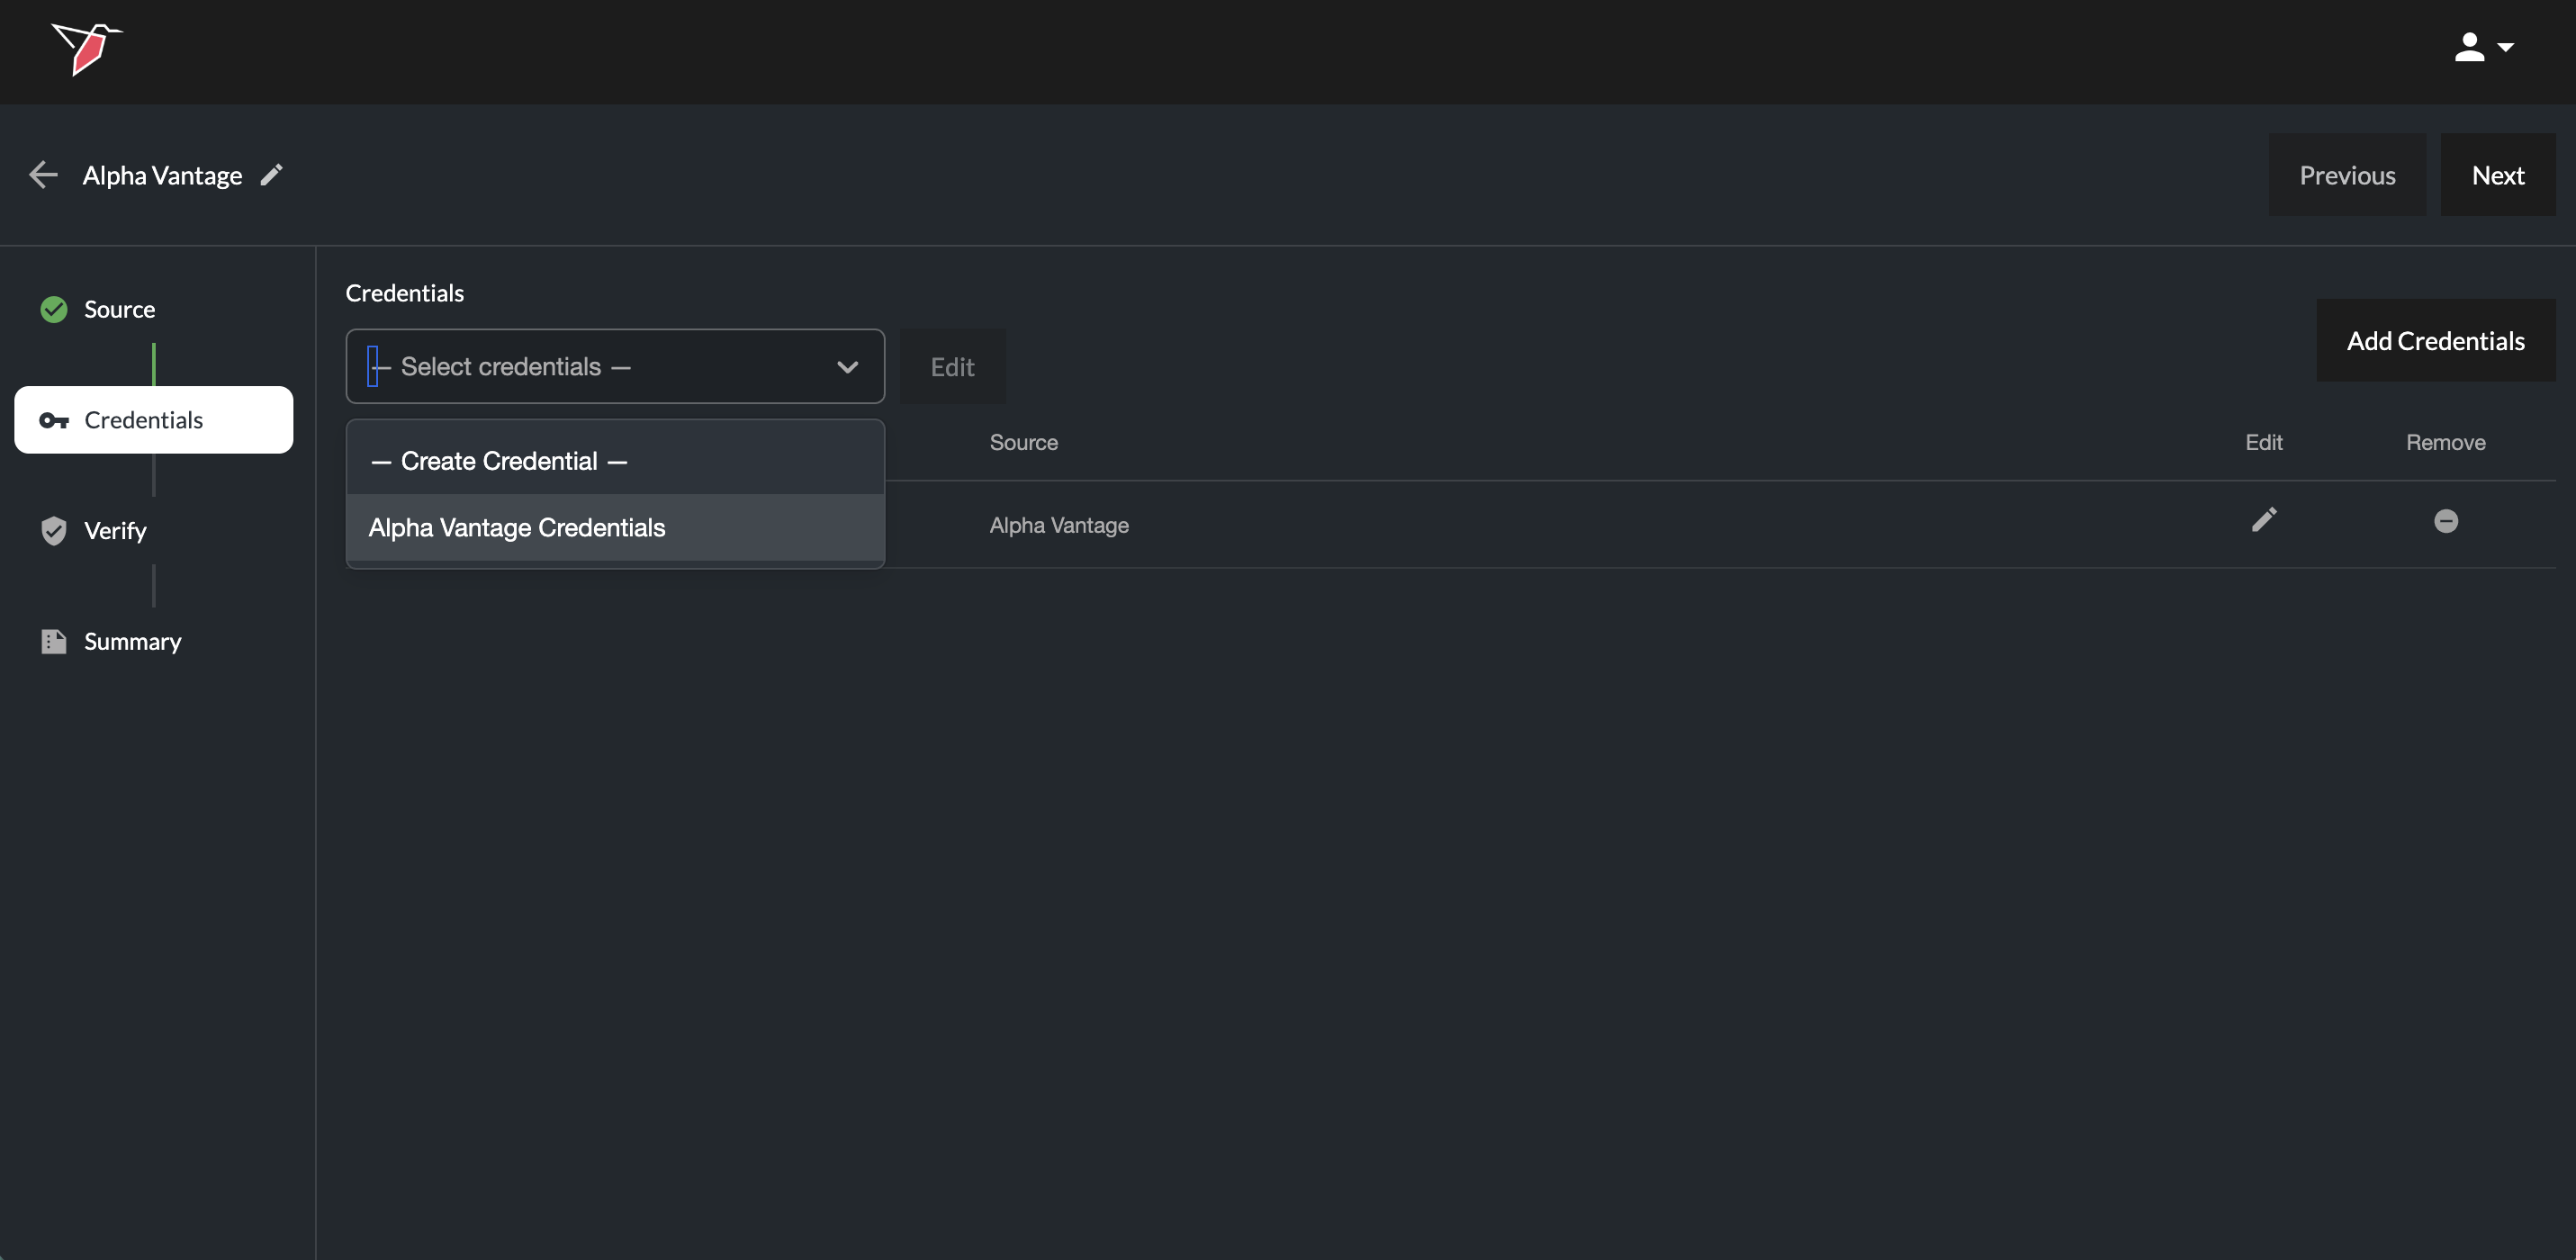
In the Credentials stage:
- Select an existing credential set if it has been created from the Credential drop-down, or
- Click Create Credentials from the drop down or the Add Credentials button on the right hand side of the page to create a new one
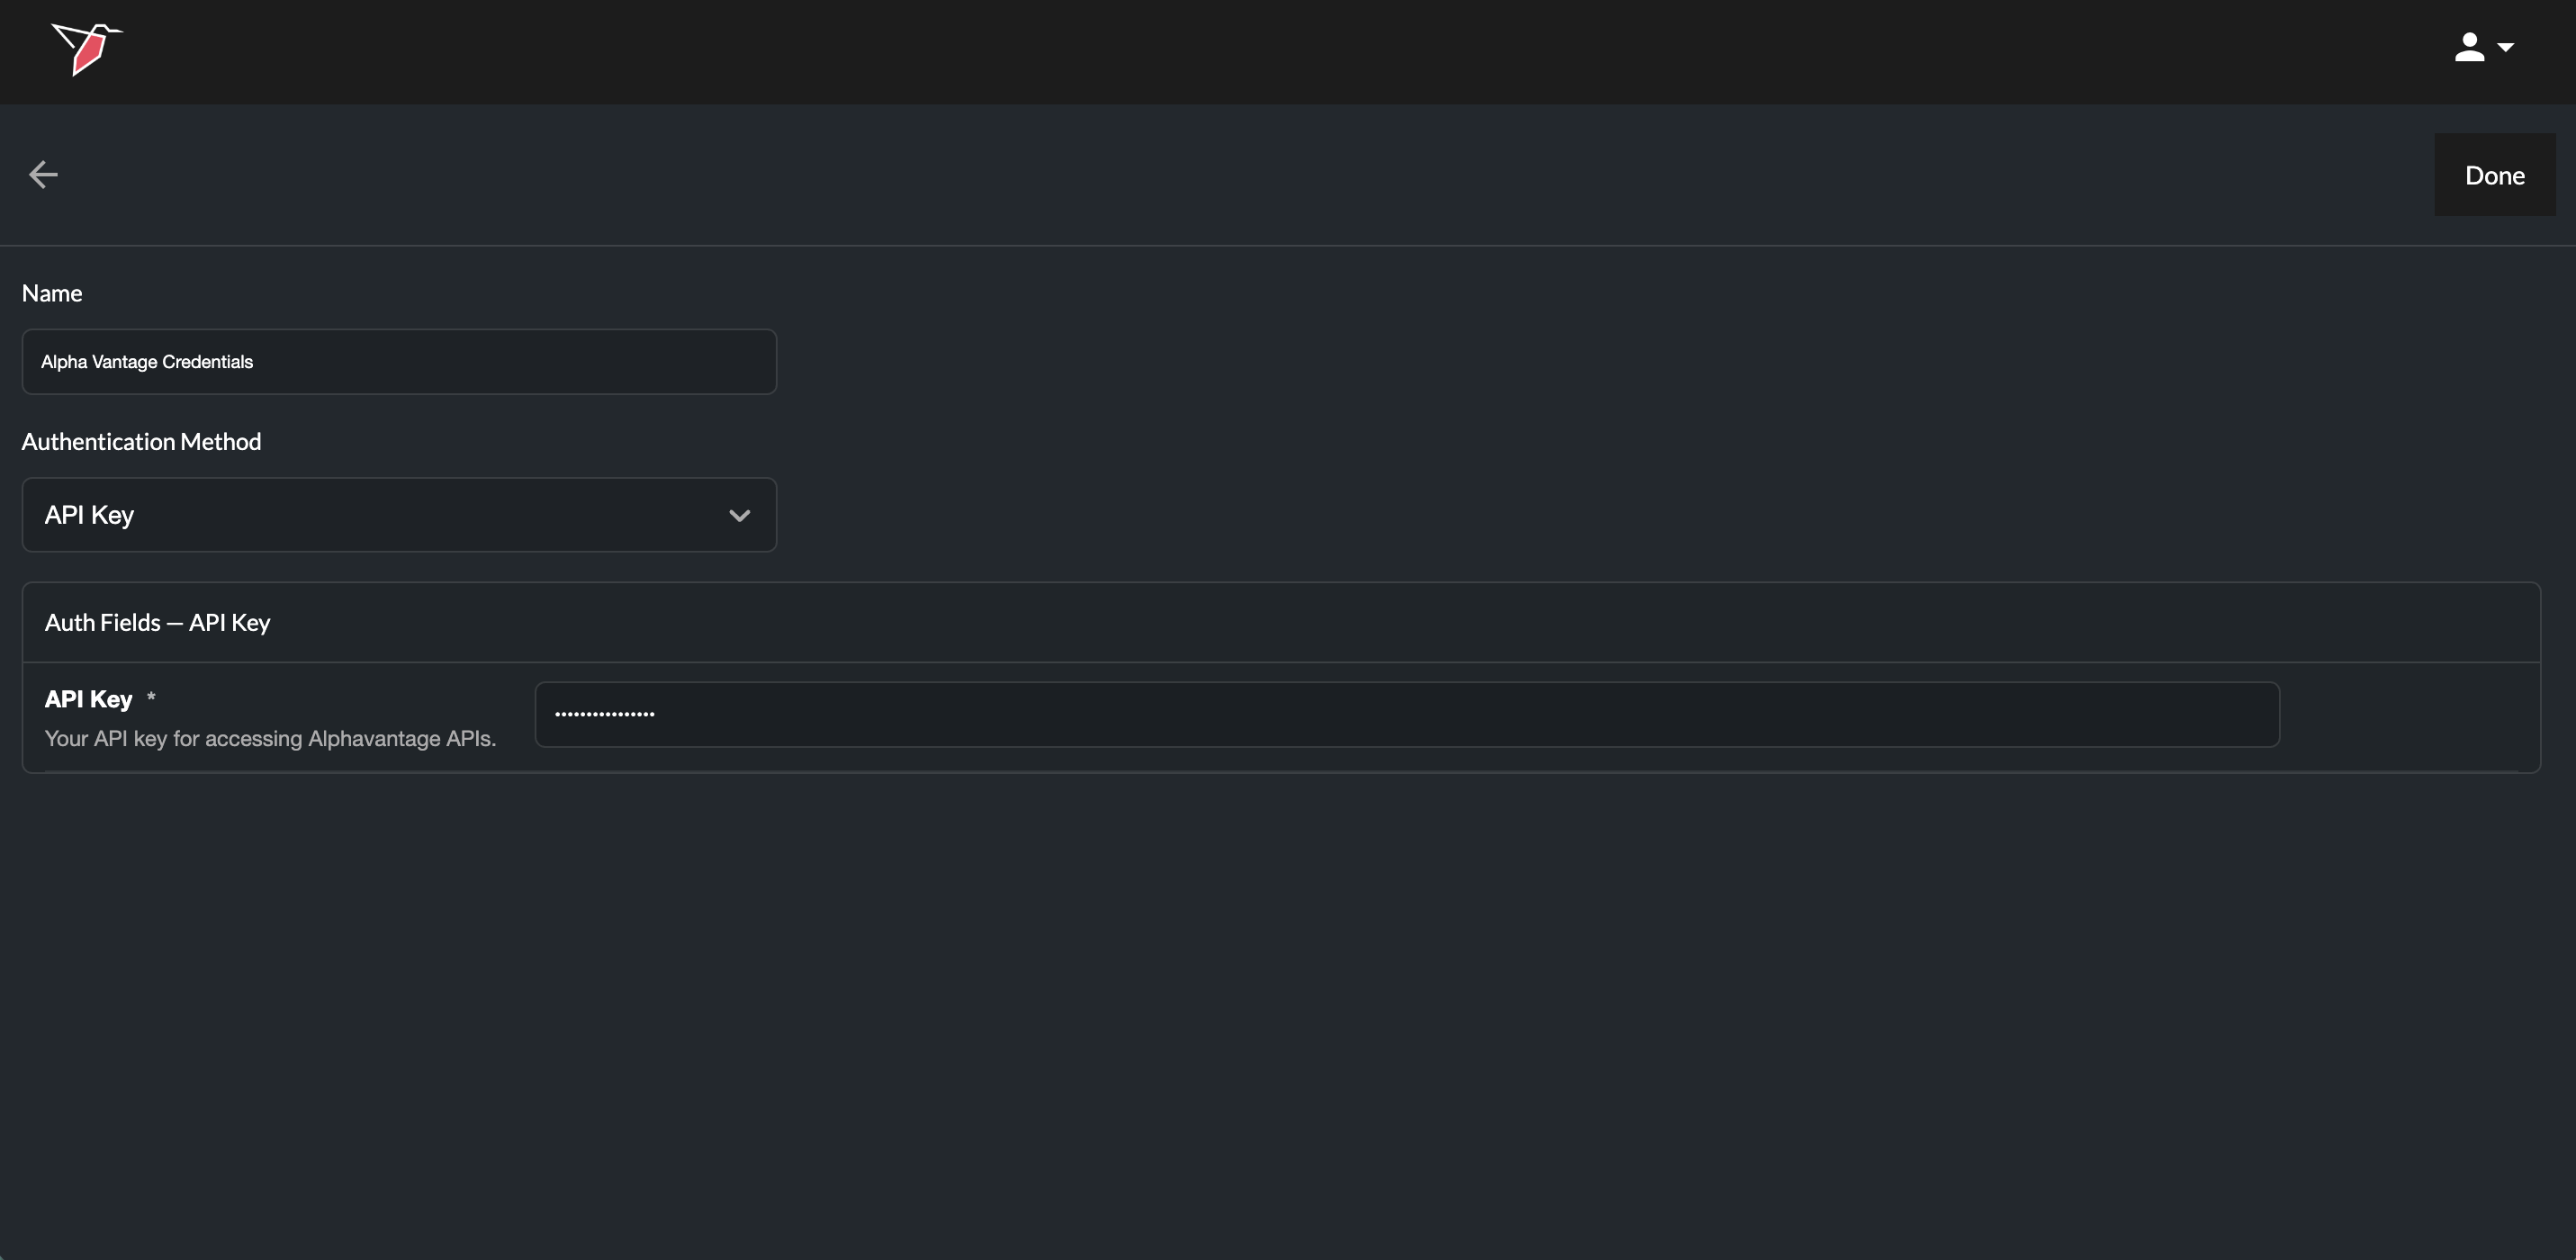
When creating credentials:
- Name the credential set
- Select the authentication method (e.g., API key, Bearer token etc.)
- Complete the dynamically generated required fields (these will be tailored to the specific requirements of the API you are trying to connect to)
Required fields vary by source and authentication method and may include:
- API Key
- Client ID
- Client Secret
- Tenant ID
- Server
- Database
- Port
- HTTP path
- etc.
- Click Done
Your newly created credentials will appear in the list of credentials (where you can edit or remove if needed).
OAuth-Based APIs
Redbird supports OAuth-based APIs. When OAuth is selected as the authentication method, fields for Client ID and Client Secret will appear, along with a Redbird redirect URL at the bottom of the page.
Enter your Client ID and Client Secret, then copy the redirect URL and paste it into the OAuth settings of the platform you are connecting to (typically found under API settings). This tells the platform where to send users back after authenticating.
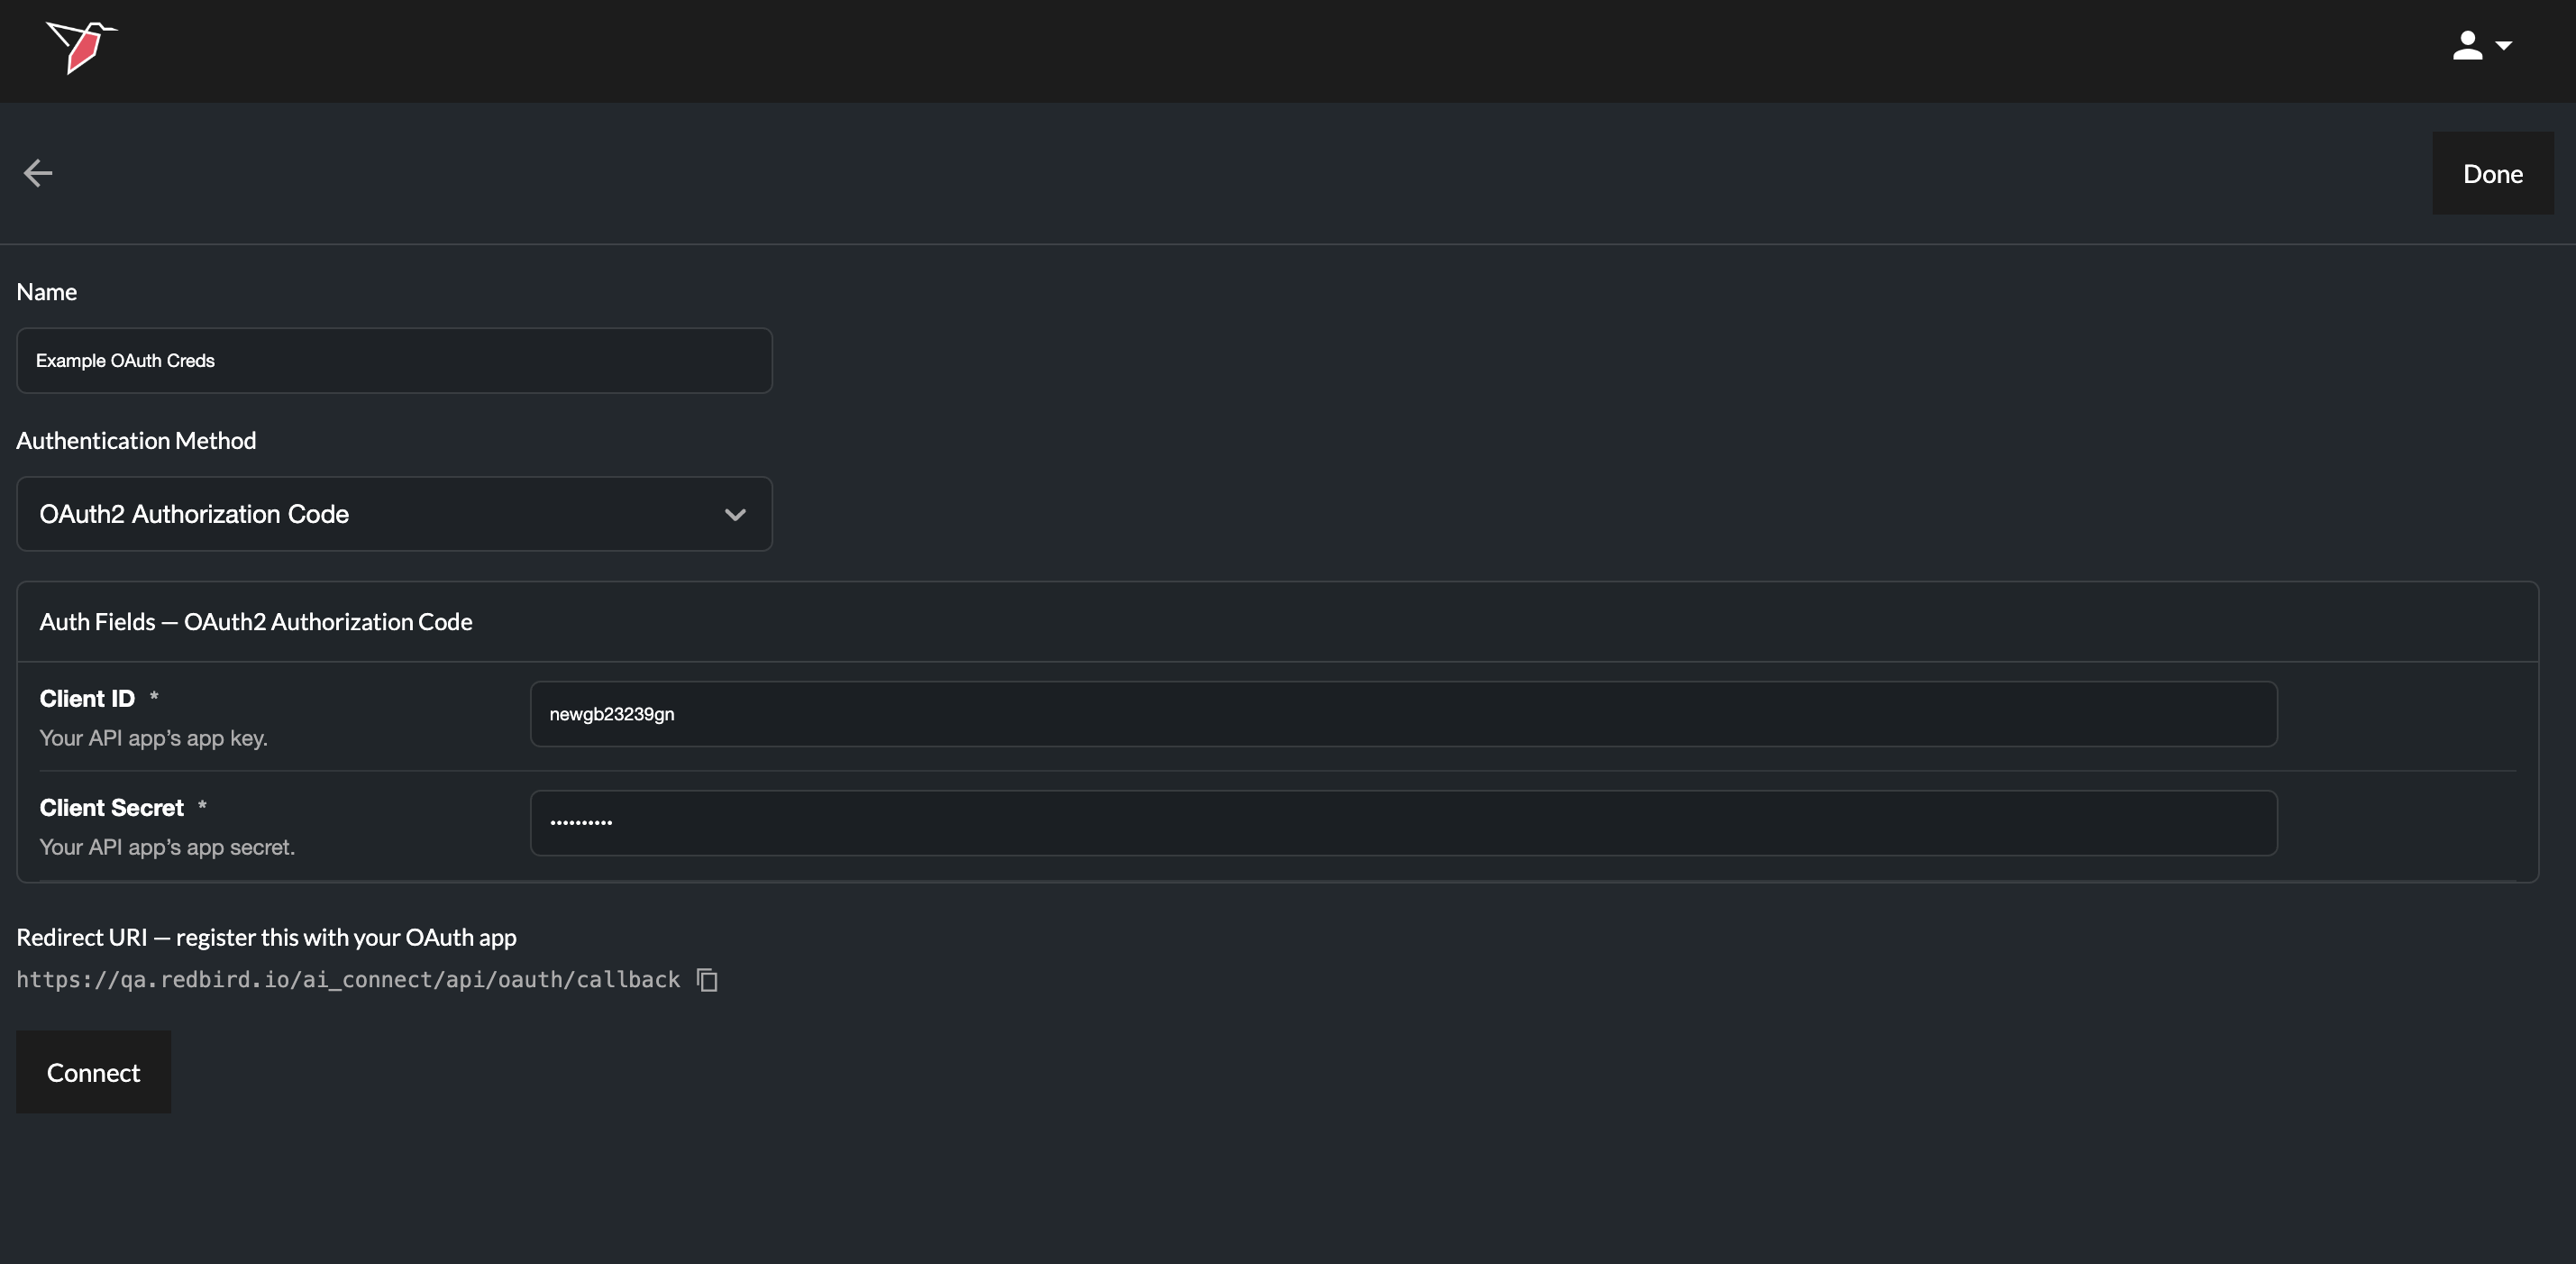
Once that's done, click Connect. You will then be taken through the platform's authorization flow, where you may be asked to confirm authorization or to trust the developer.
Once complete, you will return to the Redbird page. A green tick next to the Connect button confirms a successful connection.
- Select the newly created credential from the Credential drop-down - you will automatically be taken to the next screen.
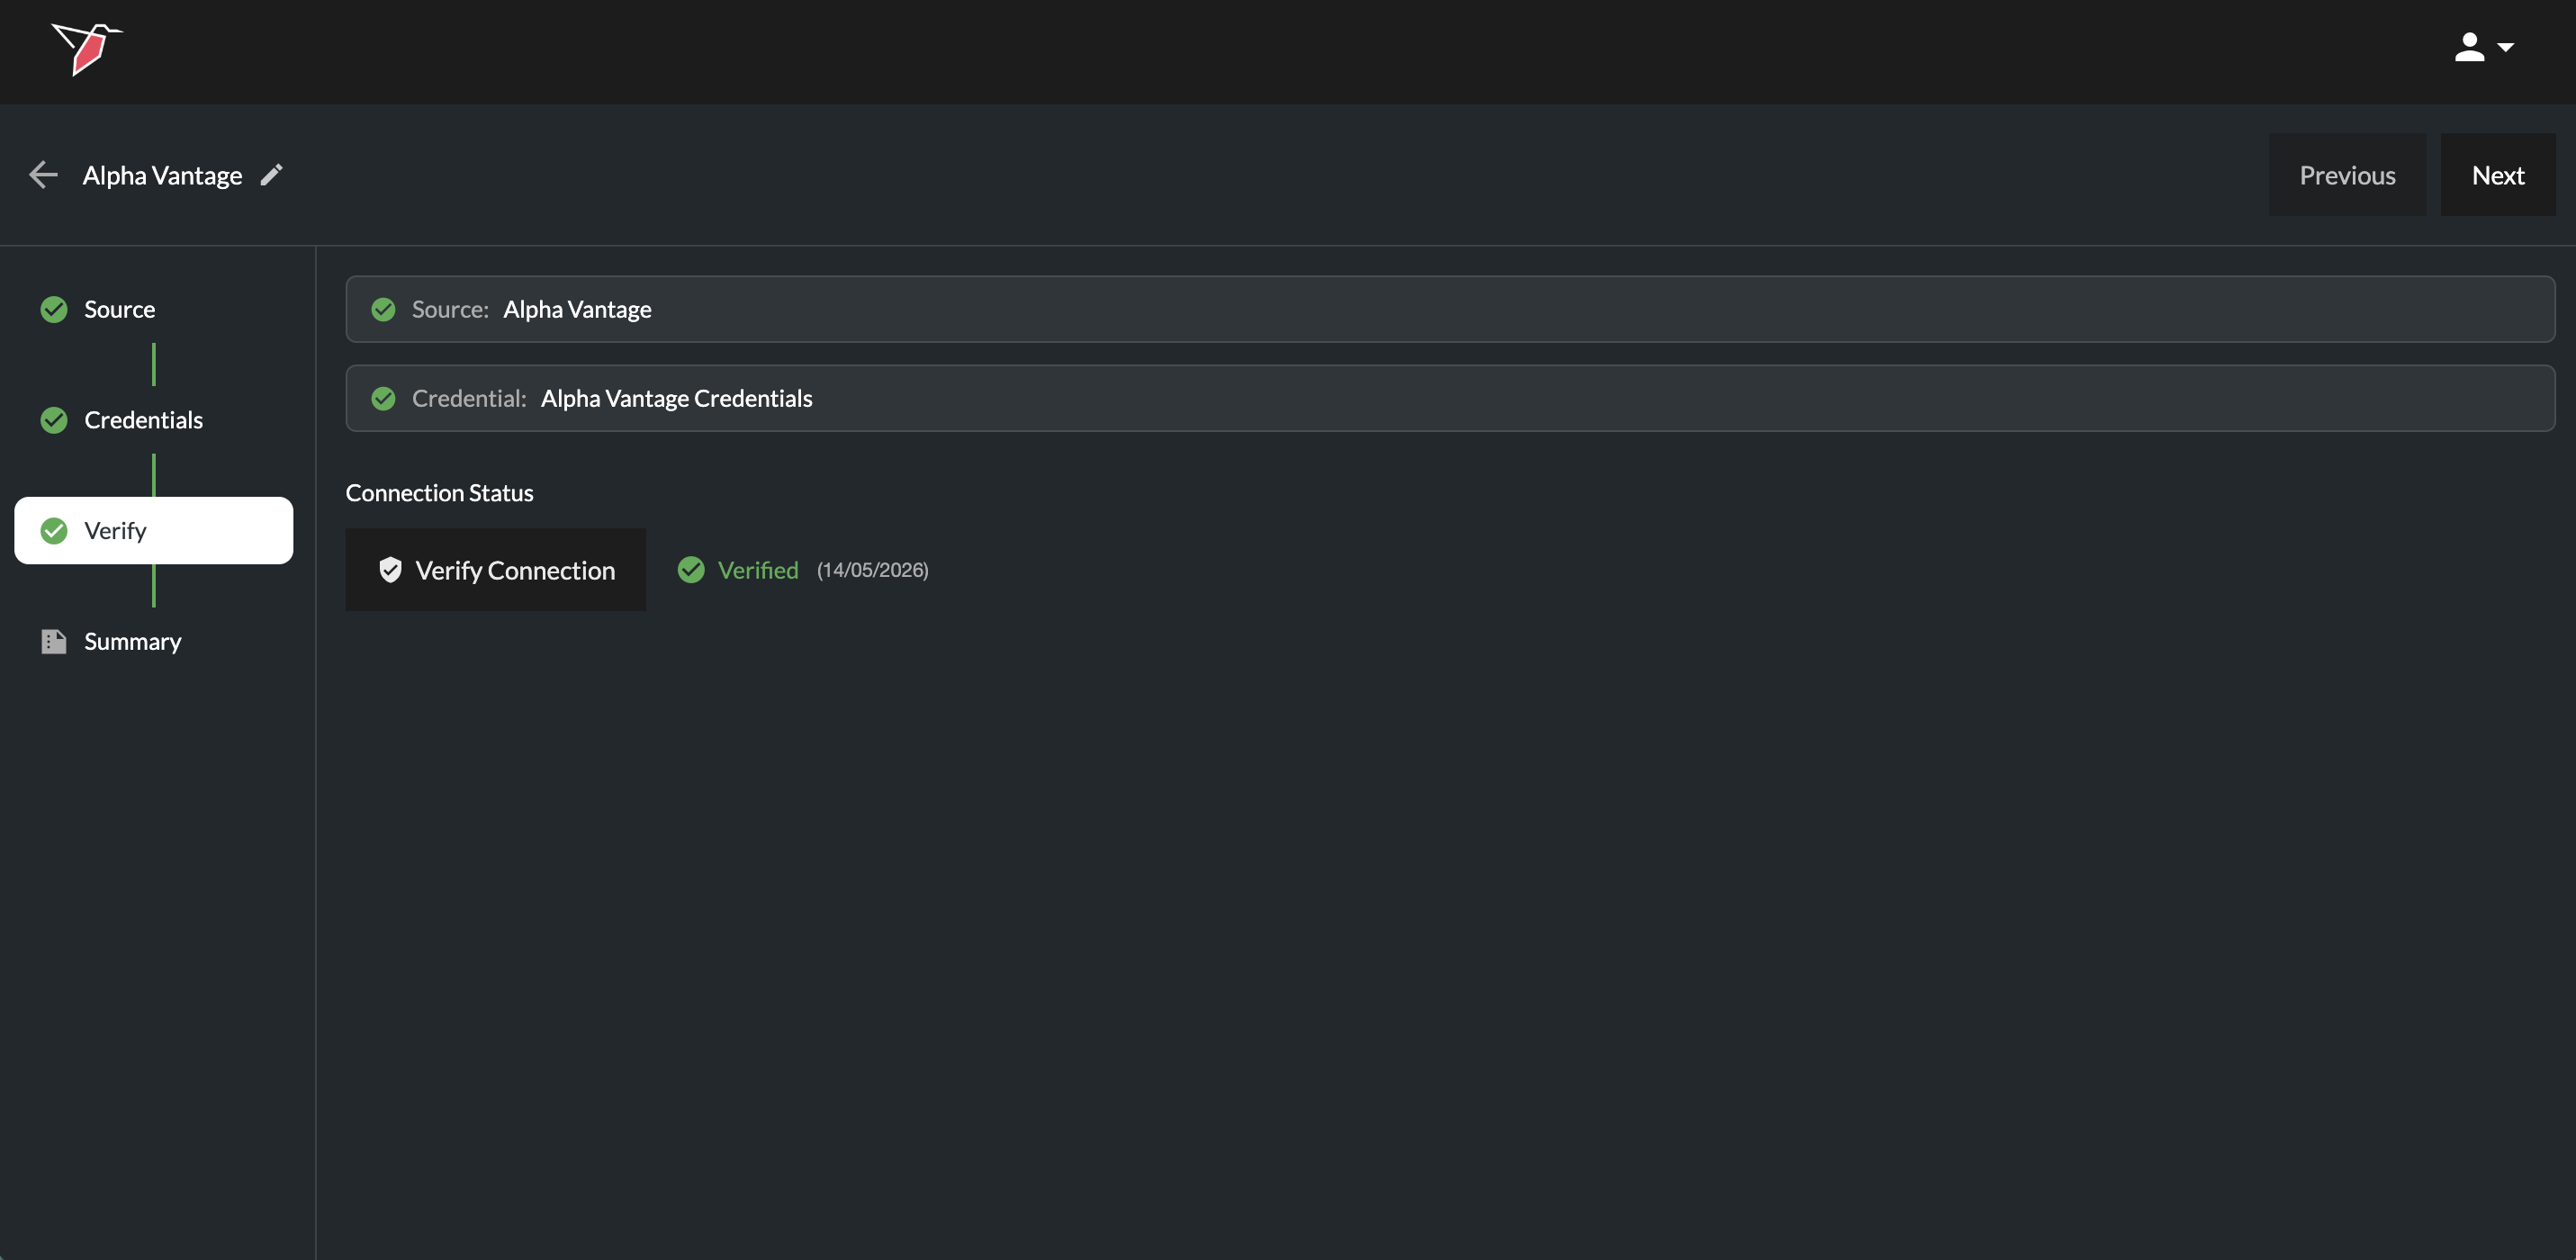
Step 3 — Verify Connection
-
Click Verify Connection.
If verification succeeds, the step will be marked as complete.
If verification fails, a message will indicate the issue so that the configuration can be corrected. You can click Previous to return to earlier stages to update credentials or revise the documentation provided, if necessary.
The interface also displays the date the connection was last verified. When reviewing an existing connection, you may choose to re-verify if there have been material changes to the API and you wish to re-establish validation.
-
Click Next once verification is successful.
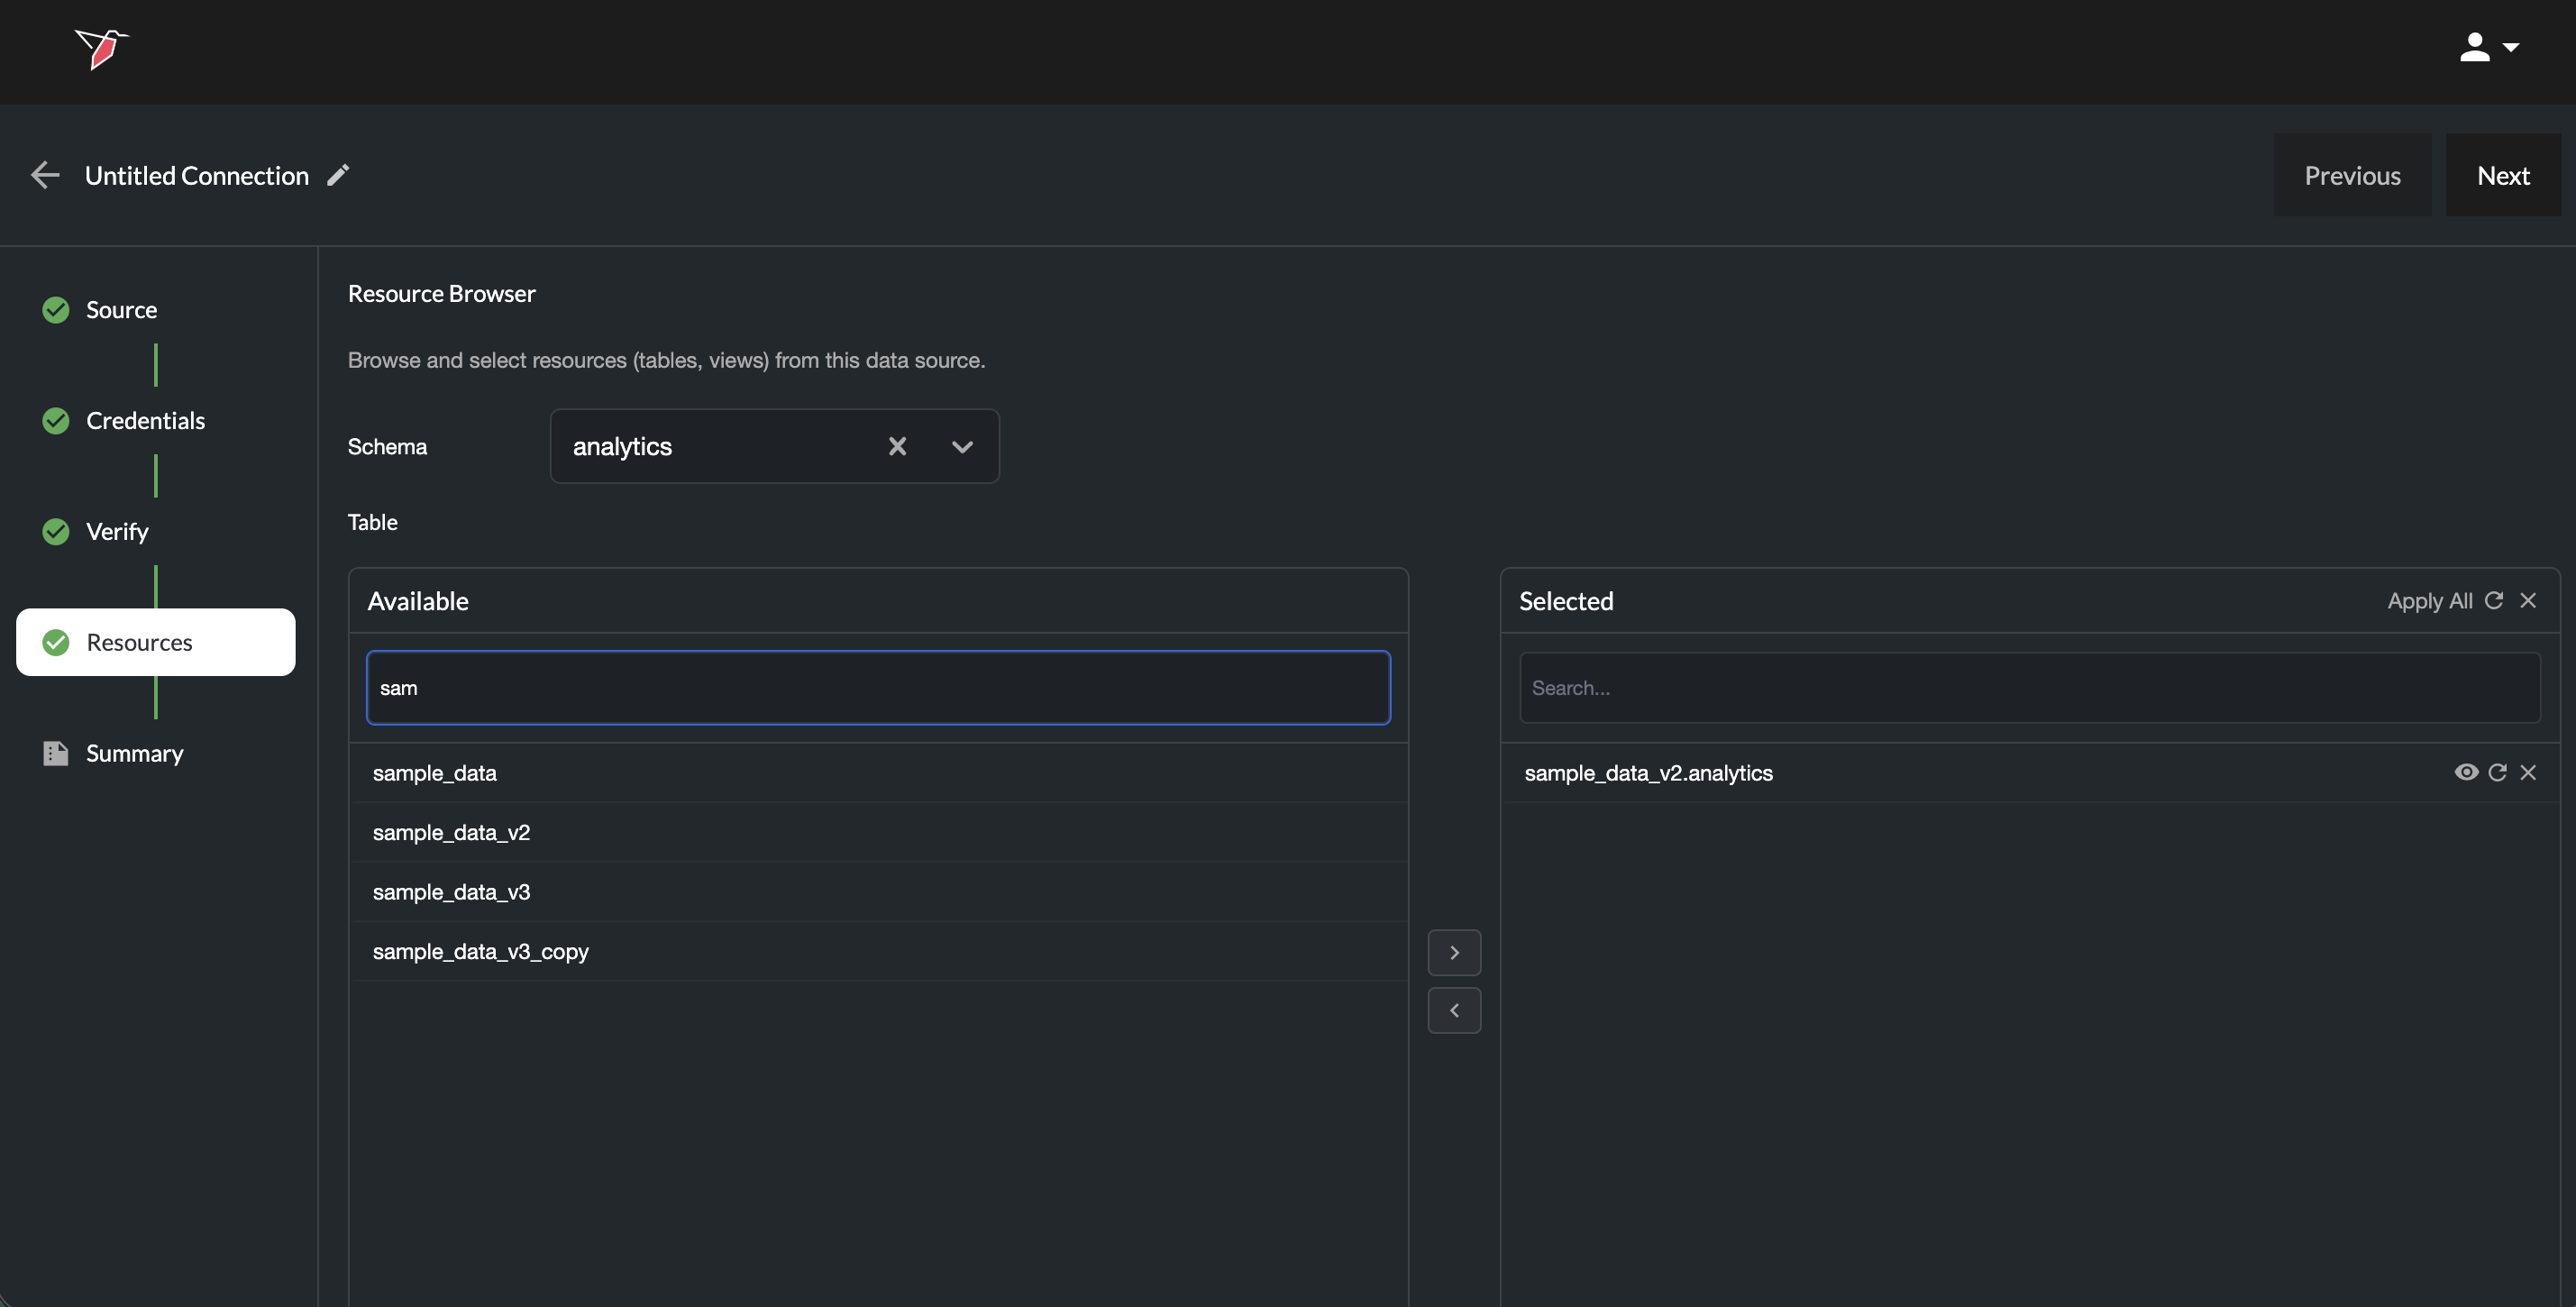
Step 4 — Resources (If Applicable)
For certain structured systems (e.g., data warehouses), you will be prompted to select specific resources (data objects) within the connection, such as:
- Schemas
- Tables
- Views
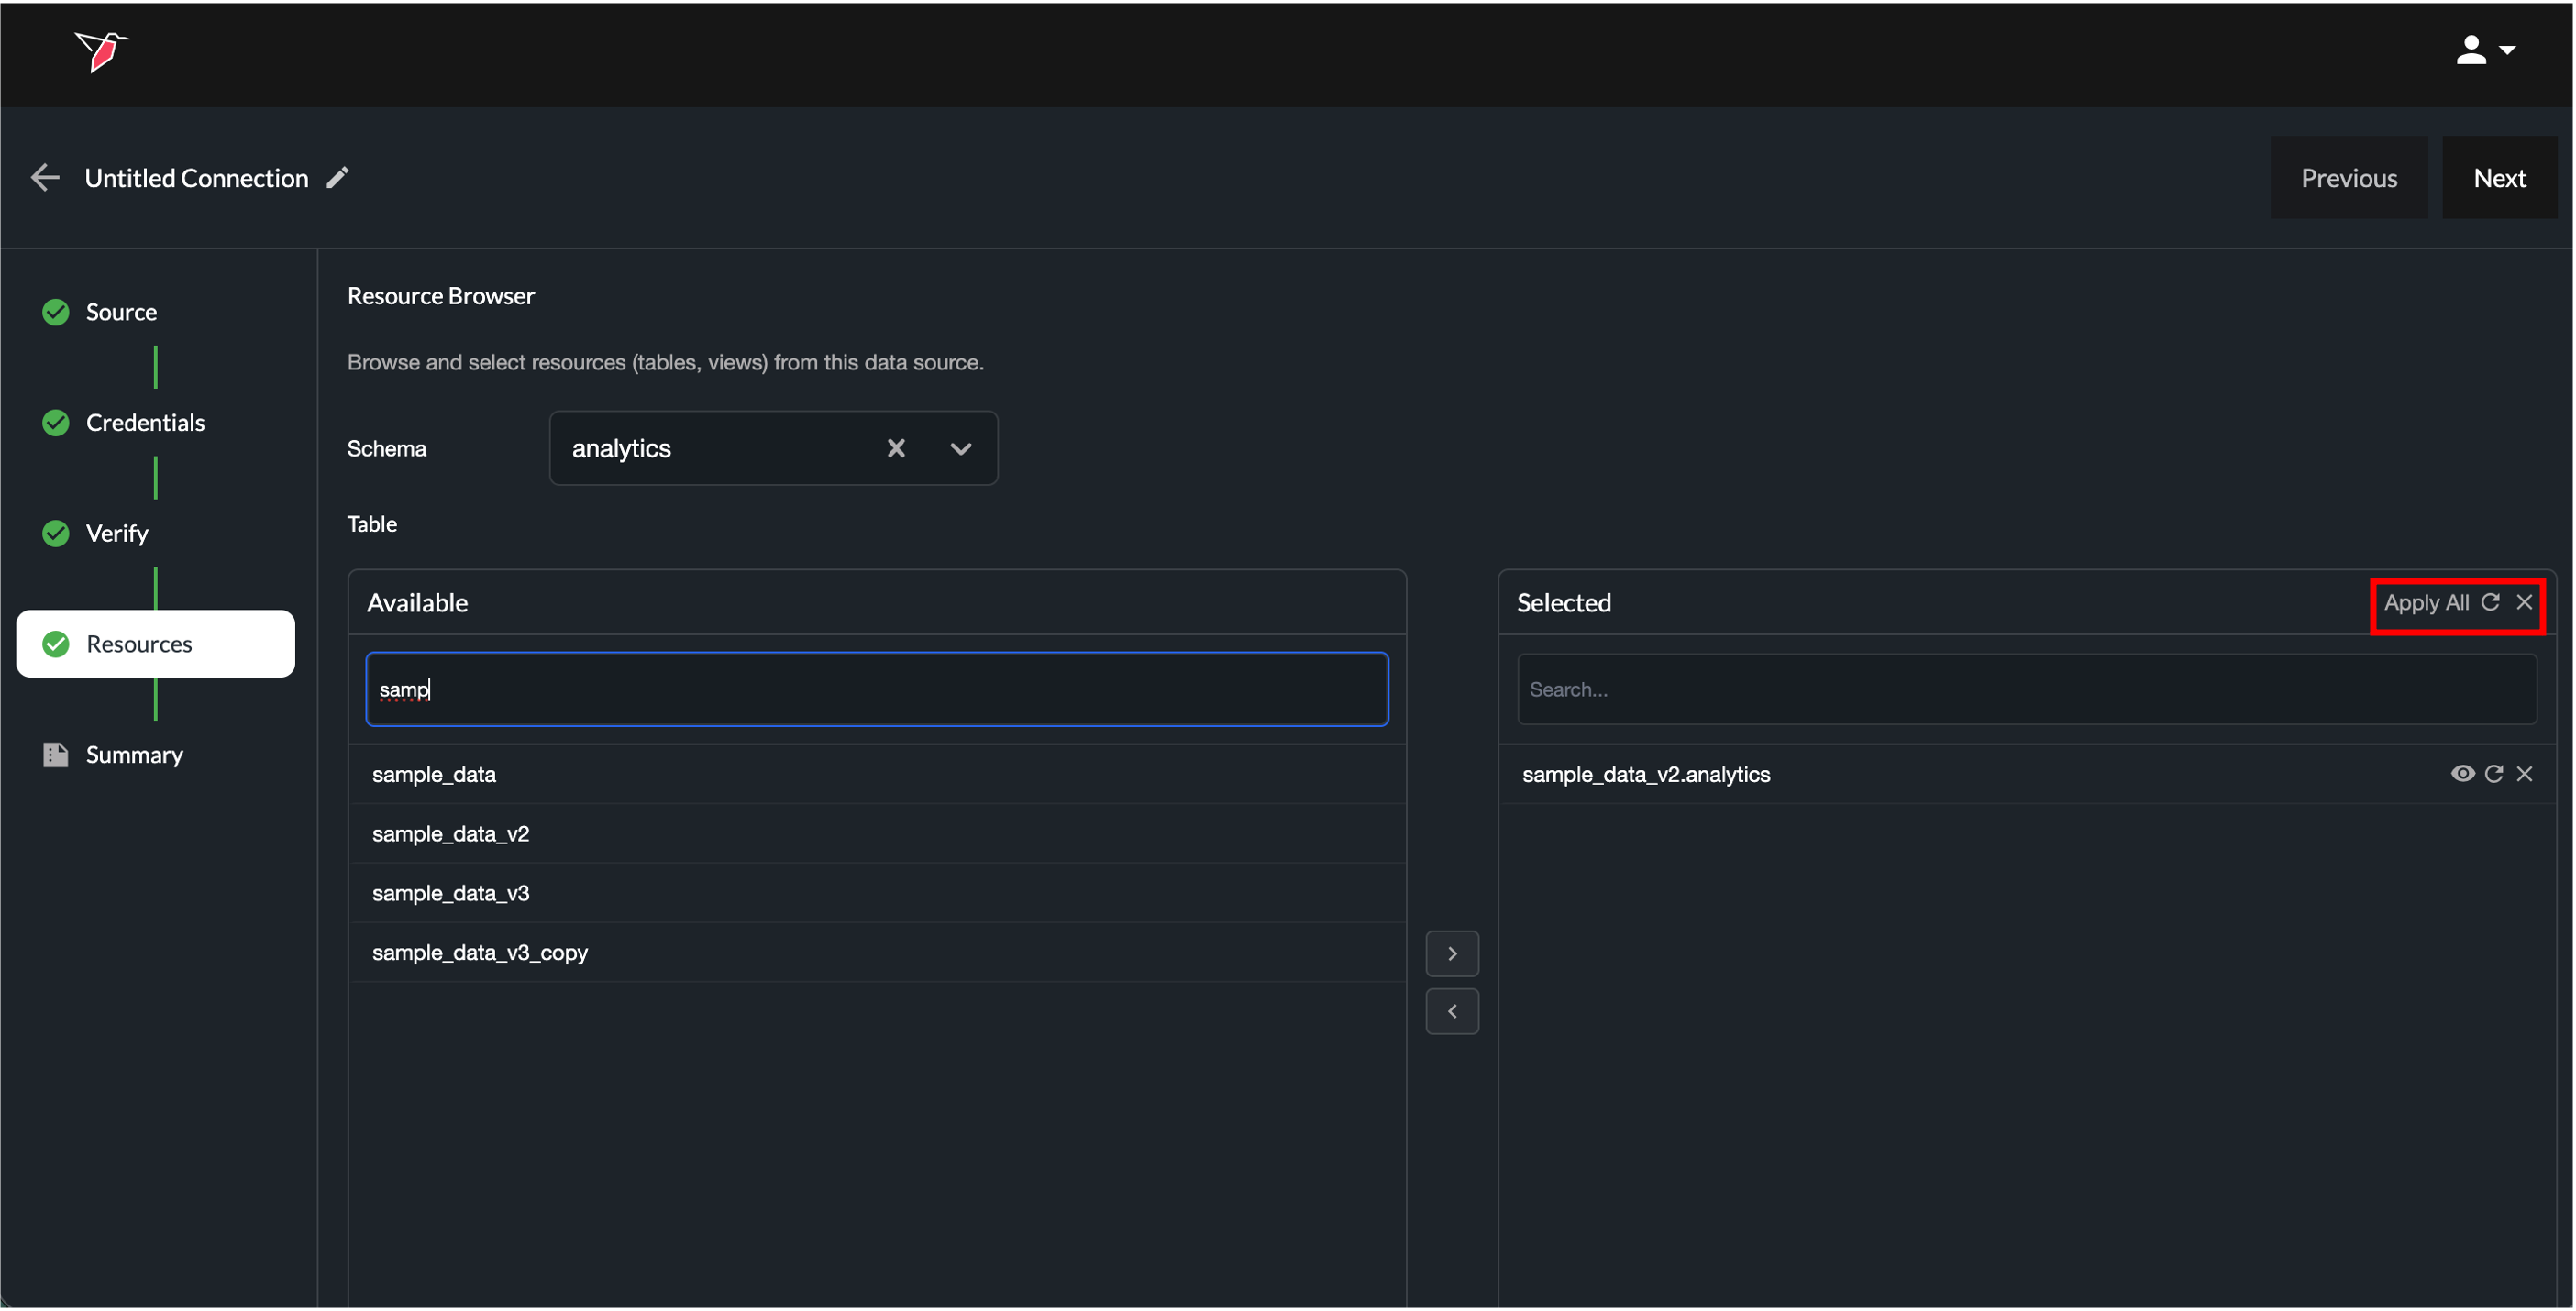
In a data warehouse setup, first select a schema from the Schema dropdown. Then choose the required tables or views from the Available list and click the right arrow to move them into the Selected list. You can use the search box if needed to identify the tables or views. You can repeat this process to select tables from multiple schemas.
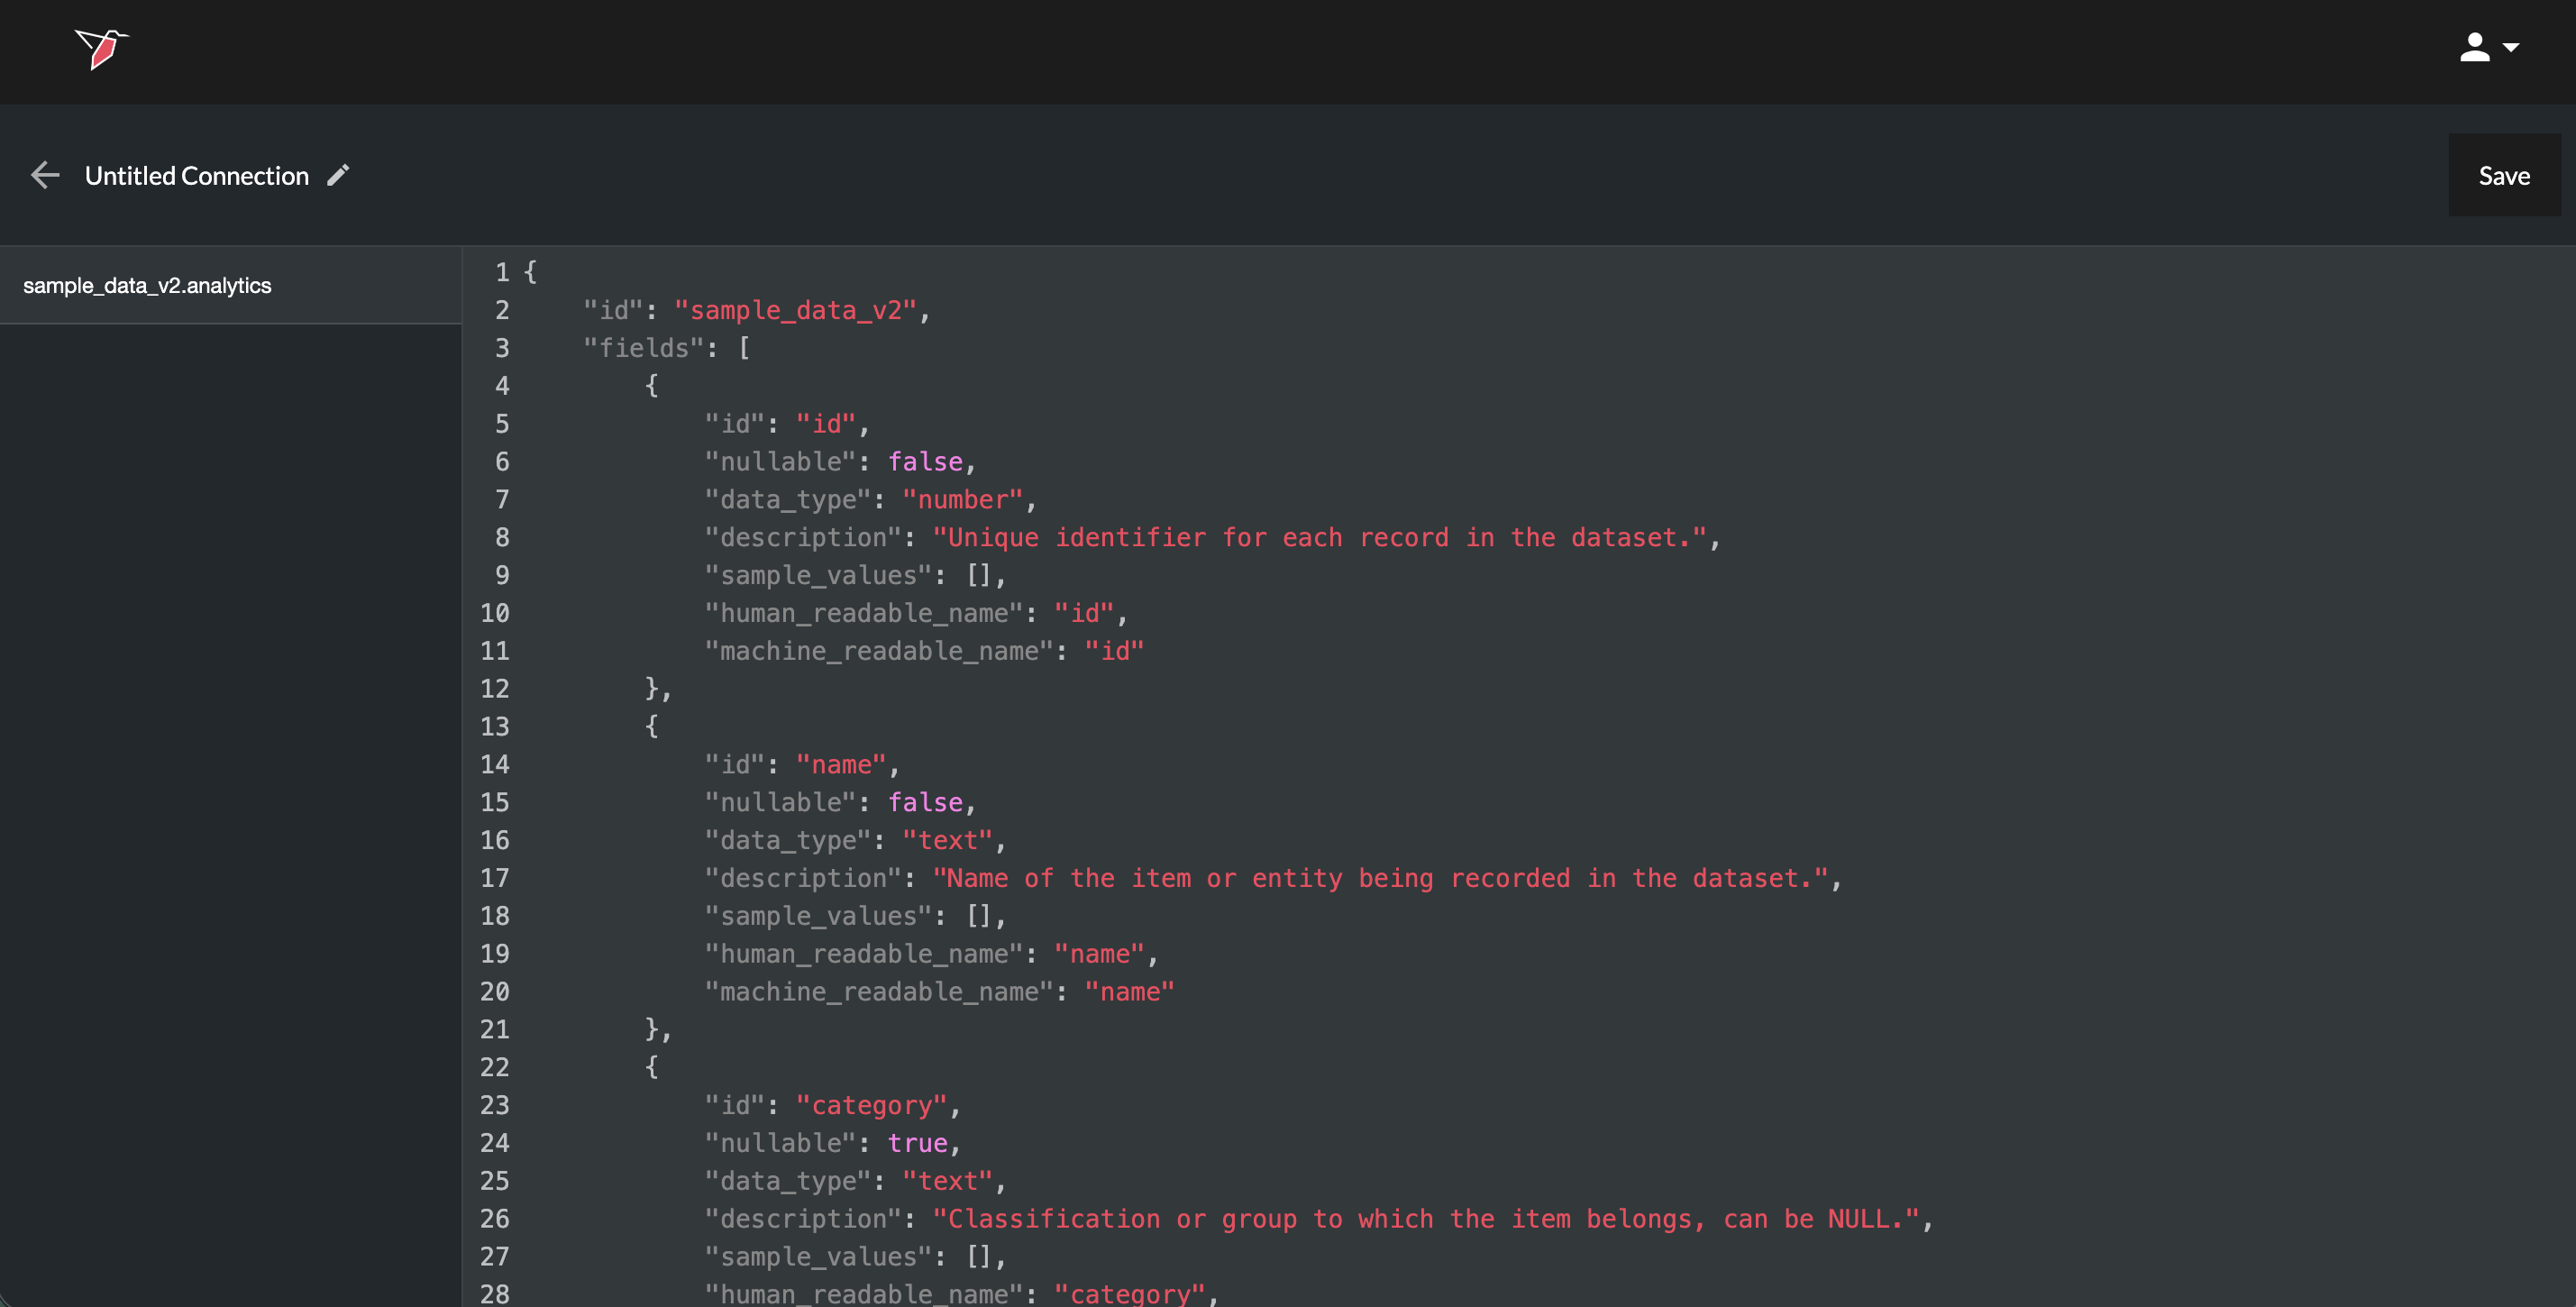
Once added to the Selected list, click the eye icon to view and edit the AI-generated metadata, then click Save. This metadata is used by AI agents to understand the tables and their contents.
You can click the refresh icon next to any table to update its metadata if the table structure has changed (e.g., column names or data types). If only the data within the table has changed (rows), no refresh is needed—this will be reflected automatically in AI DT.
To remove tables, click the X next to each table in the Selected list or select it and click the left Arrow. You can also refresh metadata or delete tables in bulk using the "Apply All" controls at the top of the Selected section.
Once you have selected all the resource required, click Next.
Step 4/5 — Review Summary
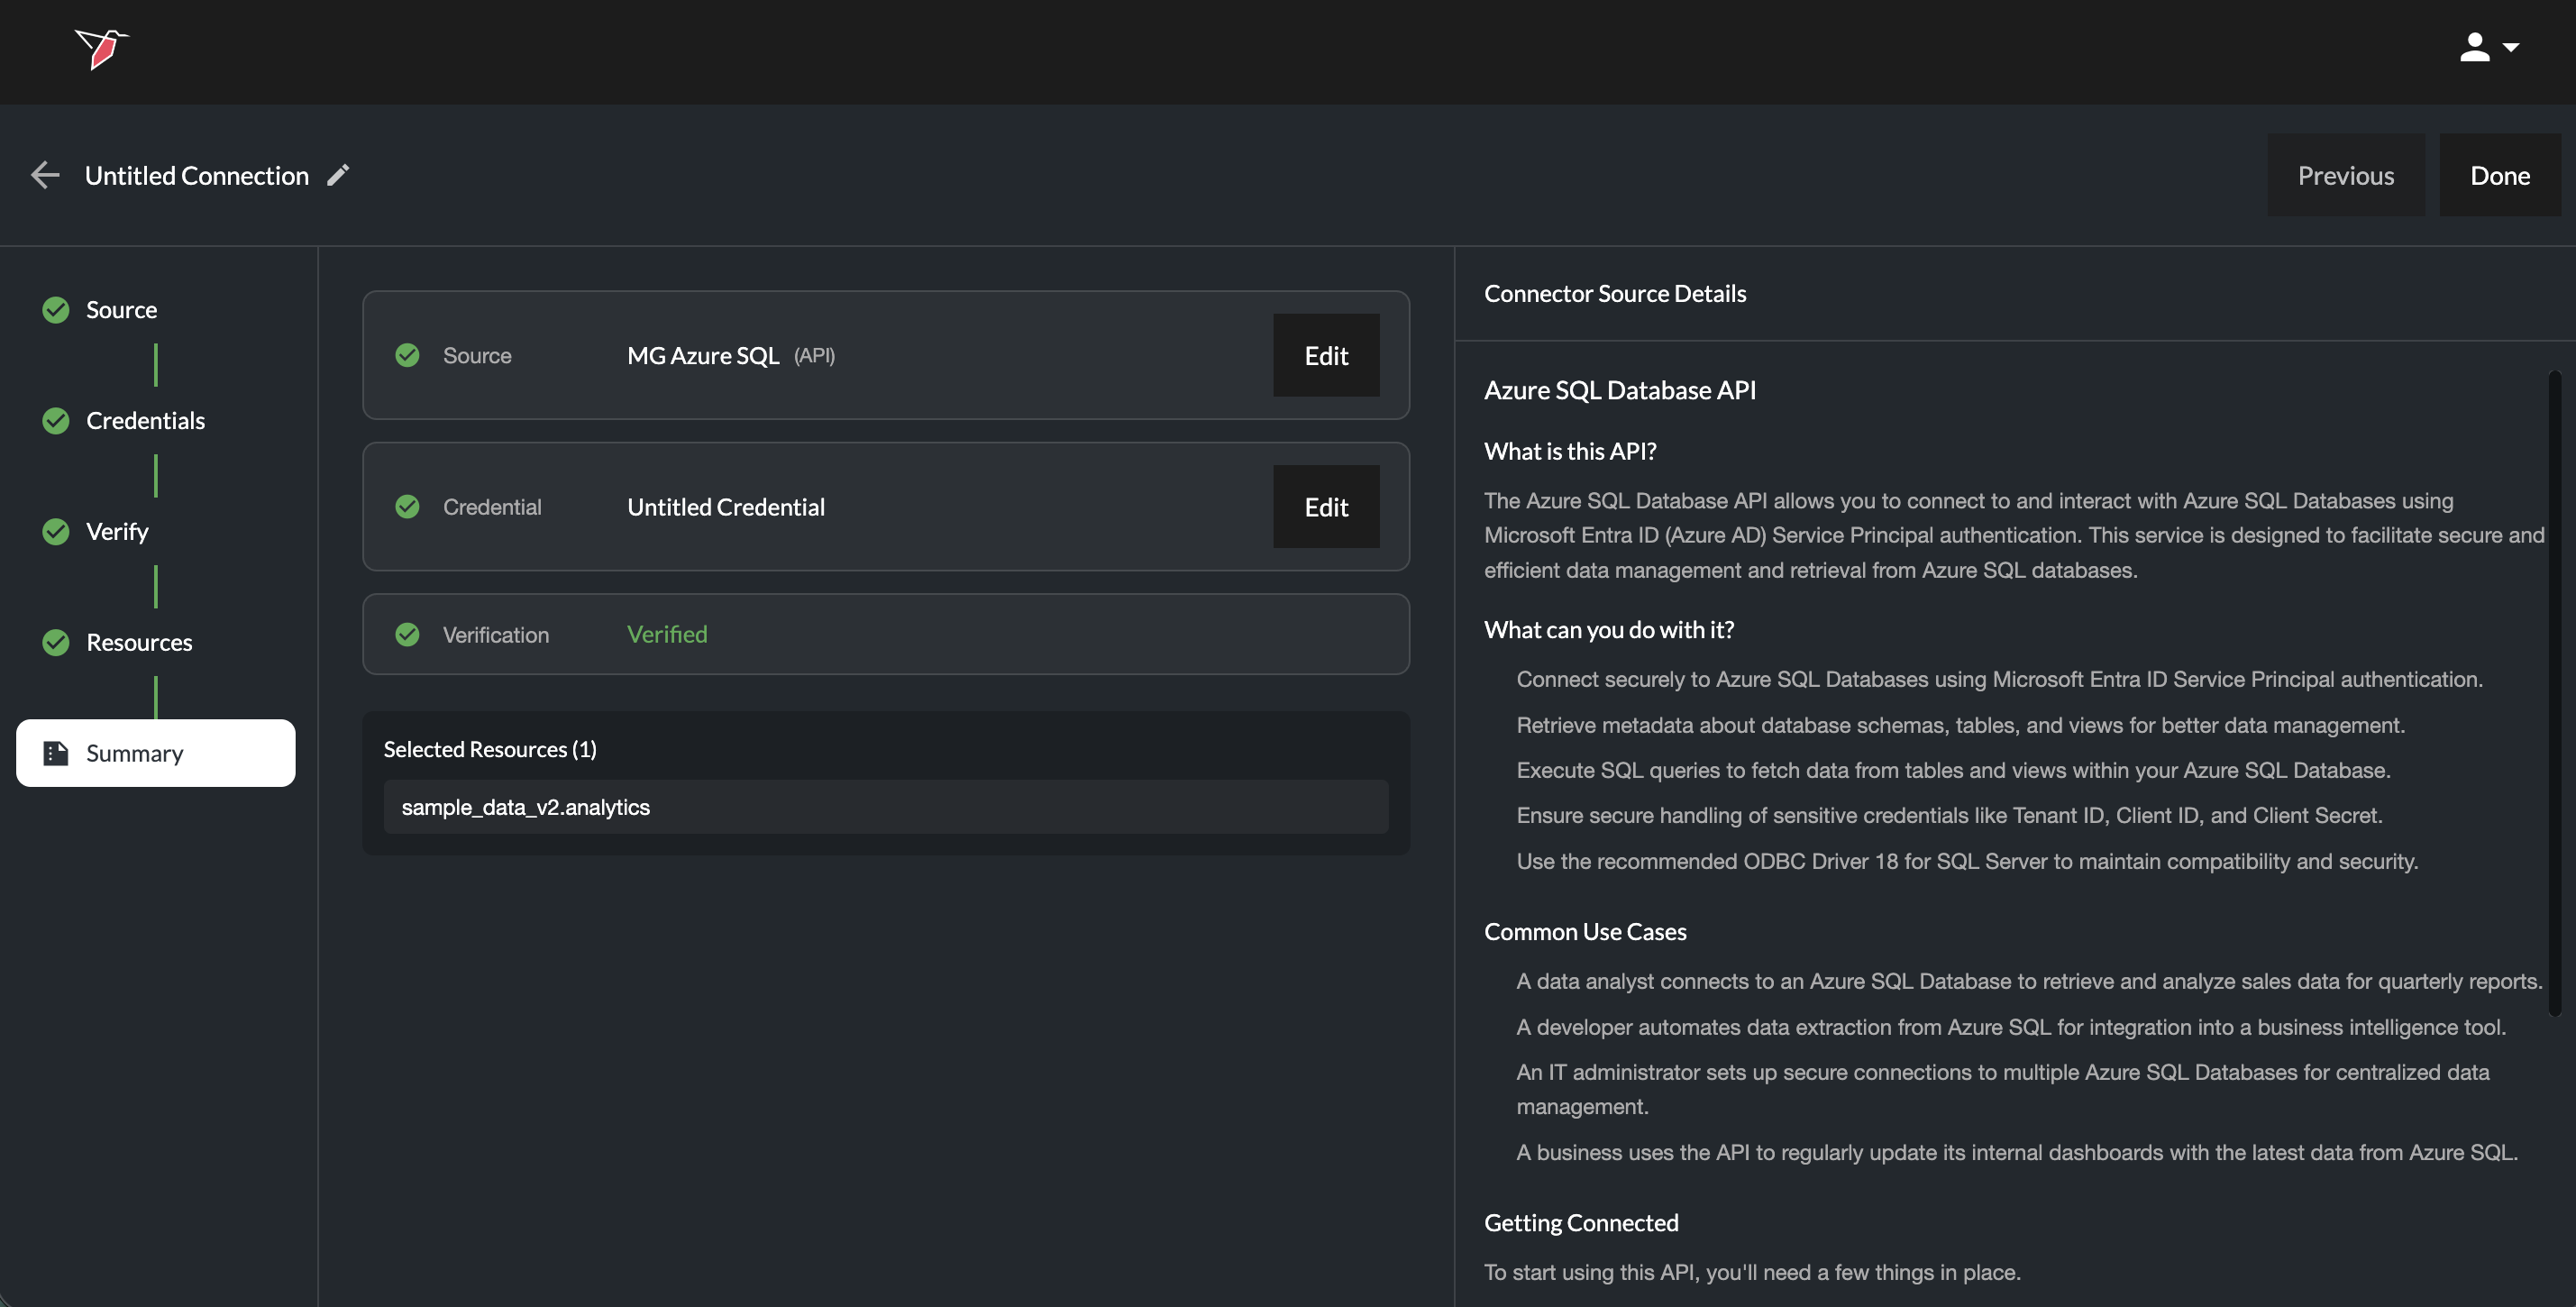
The Summary stage displays:
- Selected source
- Selected credentials
- Verification status
- Selected Resources (if relevant)
- Connector Source Details — An AI-generated summary outlining what the API is, what it enables, common use cases, connection requirements, and key considerations.
You can click the Edit buttons in the Source or Credential sections to directly edit those.
Click Done to finalize the connection.
The source is now ready to be used in the AI DT. See the section below for more information.
Creating a Connection Using Web Automation
Web Automation enables you to automate workflows performed on web-based applications using AI agents. Instead of relying on APIs, you can record interactions with a website, such as logging in, navigating pages, extracting data, or downloading files, and turn them into reusable, automated workflows.
This is particularly useful when APIs are unavailable or when workflows require interaction with a user interface.
What You Can Automate
Web automation supports a wide range of browser-based tasks, including:
- Logging into platforms (including credential handling)
- Navigating across pages and menus
- Searching and filtering content
- Extracting structured or unstructured data
- Iterating through lists (e.g., products, pages, results)
- Downloading files
- Repeating multi-step workflows
AI agents can also interpret higher-level instructions (e.g., “iterate through all pages” or “extract all product details”) and dynamically adapt to changes in website structure.
Creating a Web Automation Workflow
There are two ways to create a web automation workflow:
Chrome Extension (Recommended) - A visual, interactive way to record workflows by point-and-clicking through a real browser session, with the option to add natural language prompts alongside. Best for most workflows, especially those involving complex navigation or multiple steps.
Directly in AI Connect - Build a workflow inside AI Connect using only natural language prompts, without a live browser view. Best for simple flows or quick edits.
We recommend starting with the Chrome extension for most use cases.
1. Creating a Web Recording Using Chrome Extension (Recommended)
The Chrome extension provides a visual and interactive way to record workflows.
Setup
Before recording, the Redbird Chrome Extension must be installed and configured. See Chrome Extension Setup for installation instructions.
Starting a Recording
- If the workflow involves logging into a website, open a new incognito window in Chrome. Recording from incognito ensures the captured flow runs without cookies, matching the fresh browser session Redbird uses when running the workflow later. As an alternative, you can clear your cookies in your normal Chrome window before making the recording. If there's no login involved, you can use your normal Chrome window.
- Click the Redbird icon in the Chrome toolbar to open the extension. Log in to the extension using your Redbird credentials if you haven't already.
- Click New Recording → AI Recording.
- Enter:
- A name for the recording
- A starting URL (use the dropdown next to the field to select http or https)
- Click Start Recording. The starting URL will load in the tab you last had active, ready for you to begin recording in that tab.
Managing Recordings
From the first page of the extension after logging in, you will see two options:
- New Recording: Create a new web recording
- View Recordings: View, replay, or delete existing web recordings. (Note - first toggle to the AI Recordings tab within view recordings. Standard is for legacy recordings that didn't leverage AI)
Recordings can also be played back through AI Connect once imported as a source.
Recording Actions
You can define actions in two ways: natural language prompts and point-and-click interactions. These two methods can be combined freely within the same recording. For example, you might point and click to navigate to a search page, then use a prompt to instruct the AI to "search for laptops and sort by price low to high".
a) Natural language prompts
- Enter step-by-step instructions (e.g., "click Movies in the header", "Select Latest Releases from the dropdown", "click download").
- Each step should be a discrete action or a related set of actions.
- To submit a prompt, click the arrow button or press Enter.
- Iterating within the prompt: These steps can be multistep prompts. They can also be nested iteration descriptions such as: “For every account in the dropdown and for every channel in the channel dropdown download the monthly finance report.” or “For every movie on the page click the link to the movie details on the next page extract the directors name”
b) Point-and-click interactions
-
Navigate the site manually and the system records your actions automatically.
-
Related clicks are grouped together into a single step. After 5 seconds of inactivity, the AI closes out the current step and codifies it into a prompt summary describing what the step does.
-
A new step is automatically created when you navigate to a different page (e.g., by clicking a link or submitting a form that loads a new URL).
-
Before a step is closed out, you can review and clean up the recorded sub-actions:
- Each individual interaction (clicks, typing) is shown as a row within the step.
- A preview image of the page is displayed alongside.
- Use the red minus buttons next to any row to remove sub-steps that were done in error or aren't needed.
-
Once a step has been closed out, the sub-actions are codified into a prompt summary. This prompt cannot be edited within the Chrome extension, but it can be reviewed and edited later when the workflow is opened through AI Connect. In both cases, each step appears in the right-hand panel. You can:
- Review generated actions
- Rename a step by clicking directly on the step label
- Delete steps using the trash icon
Grouping Steps for Iteration
You can group multiple steps together to create an iteration loop. This is useful when you need to repeat the same sequence of actions across multiple items, pages, or records (e.g., downloading a file from each page of a paginated list).
Creating a group
- At the top of the extension, click Group Steps.
- Select the steps you want to include in the group using the checkboxes.
- Click Create Group.
- Provide:
- Instructions describing what to iterate over and when to stop (e.g., "Repeat for every page until there are no more pages", or "Iterate through each item in the search results")
- Max Items to specify how many iterations to run. Leave blank to iterate over all items.
- Click Save Group.
Example
If you want to download a file from every page of a paginated list, you might group the following two steps:
- Download the file
- Click the Next Page button Then provide instructions like "Repeat for every page" and set Max Items to
10to process the first 10 pages.
Editing a group
Once a group is created, it appears as a labeled grouping at the top of the affected steps. To edit:
- Click Edit on the group label.
- Adjust the instructions, Max Items, or included steps.
- Click Save Group to save your changes. At runtime
When the recording is executed, the grouped steps will run in a loop according to the instructions and Max Items value you provided.
Handling Credentials
If the workflow involves logging in to a website, save your credentials before recording the login step.
- Click the key icon at the top of the extension.
- Click Add New and provide:
- A name
- Username and password
- If the login requires MFA, toggle on MFA beneath the username/password fields and select one of the two options below.
Option A: Email
Use this when the platform sends MFA codes via email.
- Select Email and click Add. You will be taken to the forwarding setup step.
- Redbird generates a unique forwarding address for this credential. Copy it using the clipboard icon.
- Set up forwarding from your email inbox so that any MFA code email from the target platform is automatically forwarded to this address. (See forwarding setup guide)
- To validate the forwarding setup, log in to the target platform from a separate browser window to trigger a real MFA email. You don't need to complete the login - once the email has been received and forwarded, you can close that browser. The status in Redbird will change from Pending (orange) to Received (green).
- Click Done. The credential will appear in your list, ready to use.
Option B: TOTP
Use this when the platform supports authenticator-app MFA (e.g., Google Authenticator, Authy).
- Select TOTP.
- Paste the TOTP secret key into the field. This is the long alphanumeric code shown by the target platform when setting up MFA, typically offered as an alternative to scanning a QR code.
- Click Add. The credential will appear in your list, ready to use.
Using saved credentials in a recording
To record a login step using saved credentials:
- Once you are on the login page
- In the step input area at the bottom of the extension, toggle from Prompt to Login.
- Select the saved credentials from the list.
- The extension will execute the full login flow automatically, including MFA where configured. Once you have finished recording the web automation flow using the Redbird Chrome Extension, click Save.
Using a Web Automation in AI Connect
To use any web automation workflow, you must first configure it as a source within AI Connect.
- Add an AI DT node to the canvas.
- Click the plus icon next to resources.
- Click add connection.
- Select a source:
- Choose an existing web automation source, or
- Click Add Source → Web Automation → Confirm At this point, you have two options:
- Import a recording created via the Chrome extension
- Create a new workflow directly in AI Connect using prompts.
Once configured and saved, the web automation will appear in your source list and can be selected like any other connection.
Importing a Recording into AI Connect
If you created a workflow using the Chrome extension, you can import it into a source in AI Connect:
- In the source setup flow, click Import.
- Select a recording from your saved recordings.
- Click Import. The recording will be added to the source as a sequence of steps, including all prompts, actions, and login steps.
Creating a Workflow Directly in AI Connect
Alternatively, you can build a web automation workflow directly within the source setup:
- Enter a starting URL.
- Add steps using natural language prompts.
- Build the workflow step-by-step. Be sure to click Run after you enter/edit each prompt to update the flow.
Note:
- You will not see a live browser view.
- Point-and-click recording is not available.
This approach is best for simple flows or making adjustments after import.
Reviewing and Editing Workflows
Within AI Connect, you can:
- See whether each step is a prompt or login action (toggle at the top of each step) just as you can do in the Redbird Chrome Extension.
- Execute individual steps using the Run button to validate behavior in isolation.
- Add new steps using the + button or the Cmd/Ctrl + A shortcut.
- See step status indicators:
- Green = step executed successfully
- Orange = step still to be run
- Red = issue or error in the step
- Each step also includes visual validation:
- Before screenshot: the state of the page prior to the step
- After screenshot: the result after the step executes
- Toggle between before/after to understand how the workflow progresses. This allows you to debug and refine workflows step-by-step.
You can also:
-
Edit prompts and adjust logic
-
Modify or remove steps
-
Refine navigation, extraction, or interaction behavior
Finalizing the Connection
Once reviewed:
- Click Done to finalize the source.
- The web automation becomes a reusable connection.
Using Connections in AI DT
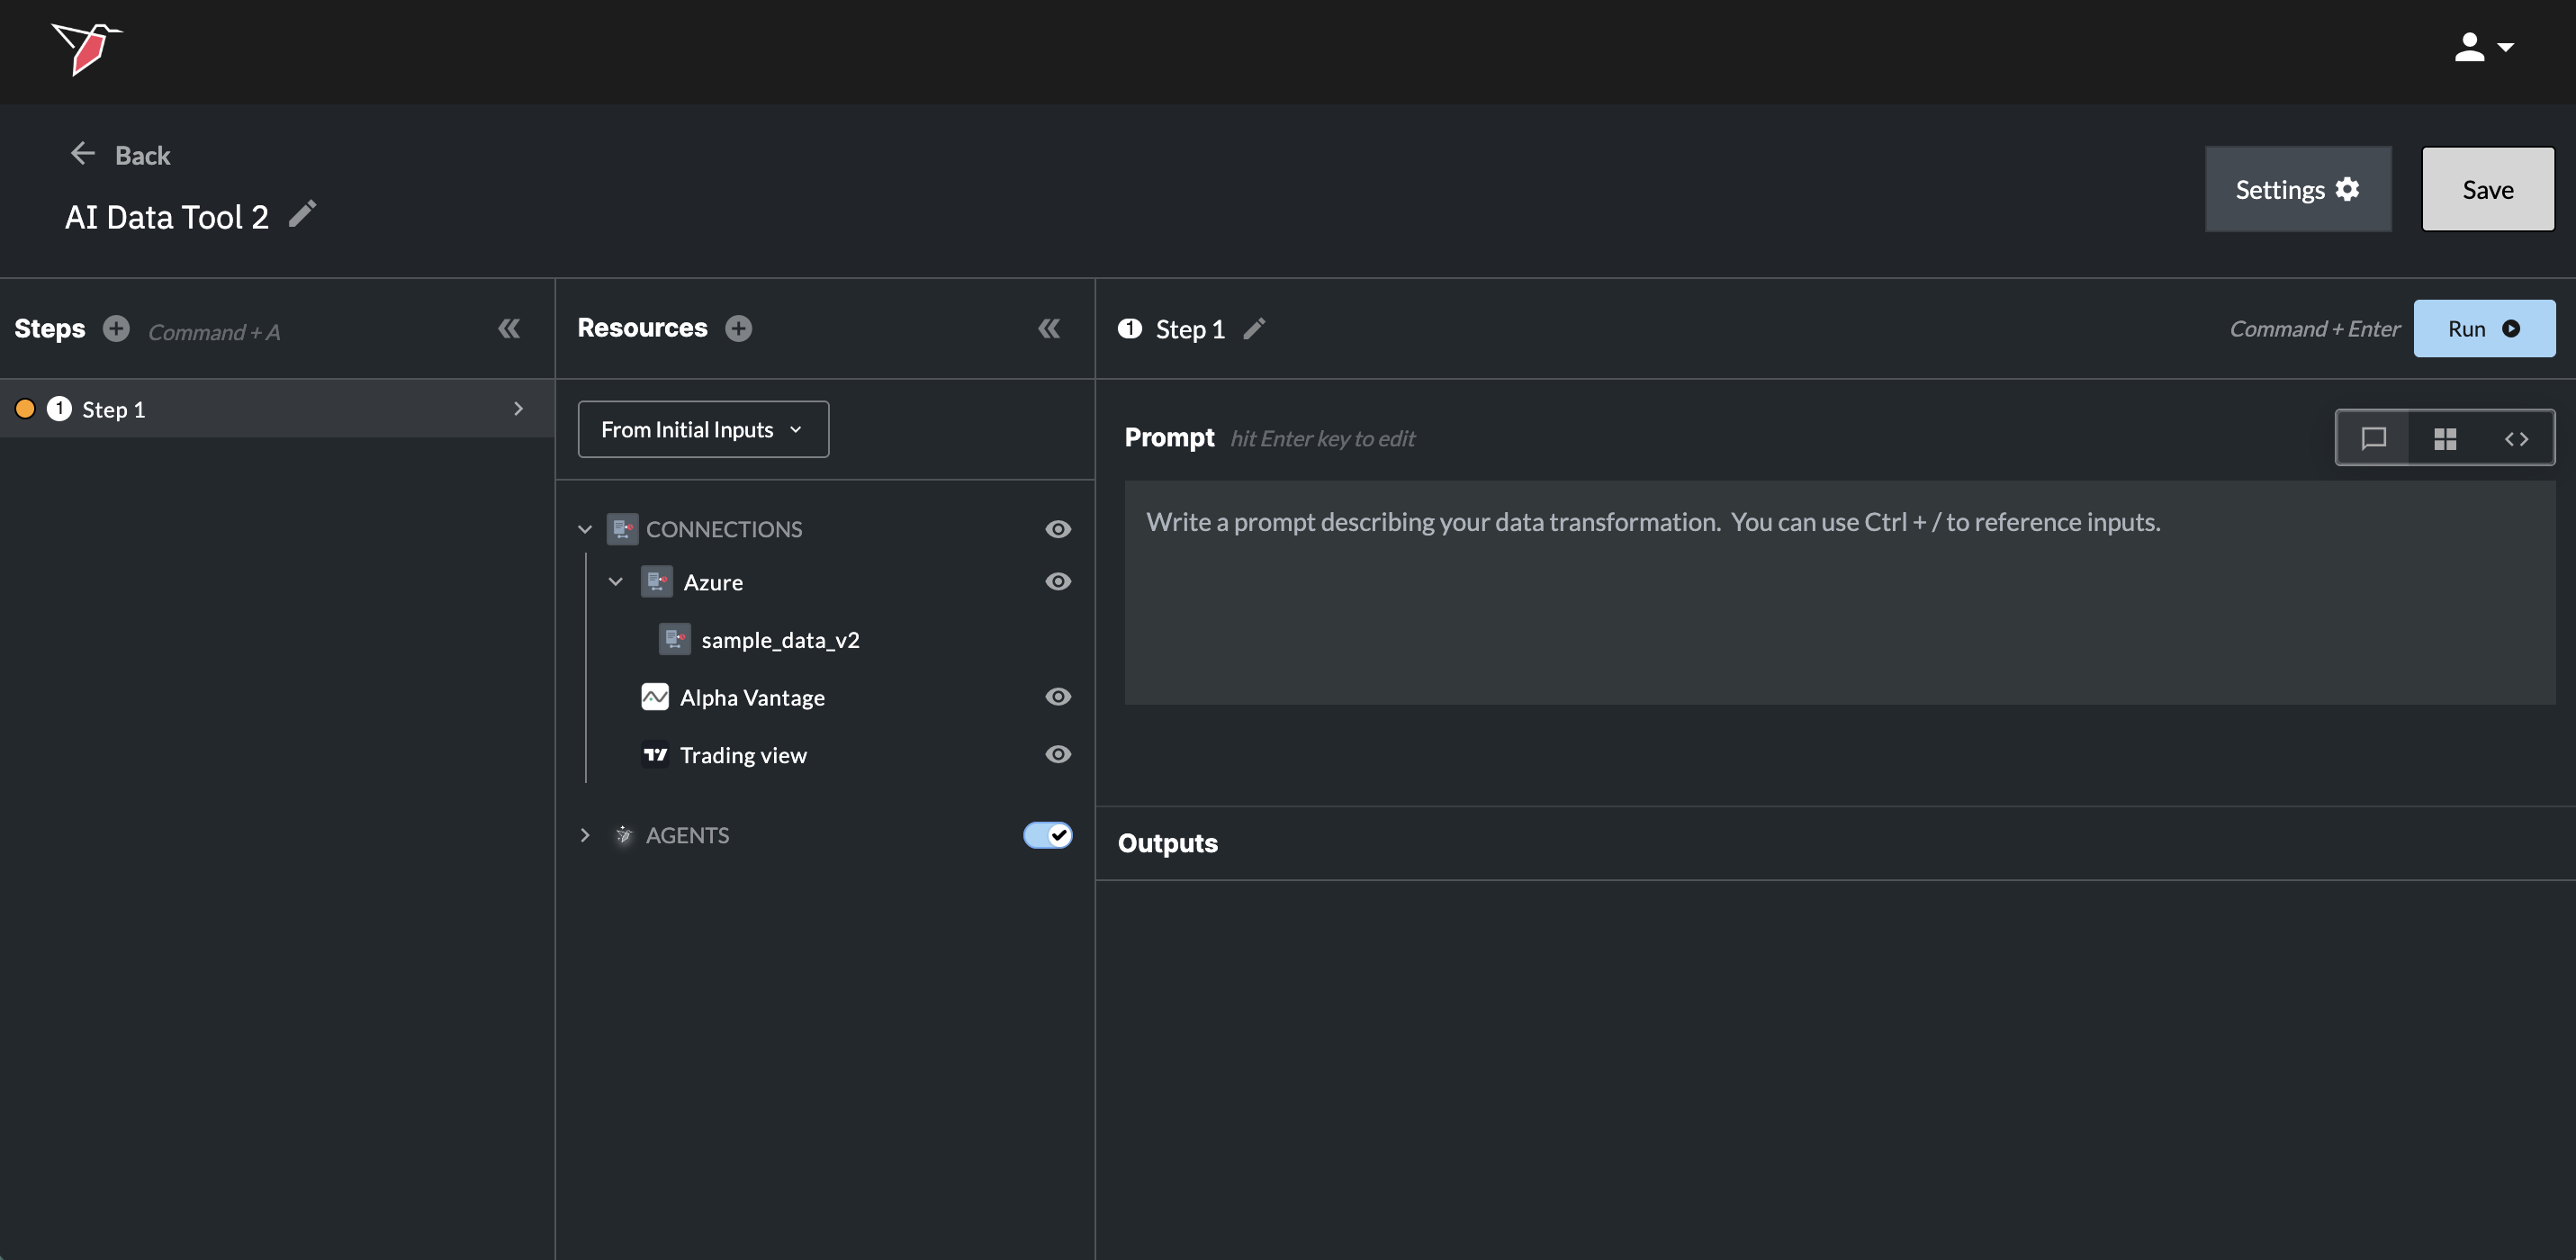
Once configured, connections appear under:
AI DT → Resources → Connections
Depending on the source type:
- API connections and Web Automations generally appear as a single resource item
- Structured systems (e.g., warehouses) may appear expandable with selected tables listed beneath
Reviewing Connections
Clicking the eye icon next to Connections displays a list of all available connections and allows you to either edit them by re-entering the guided configuration flow or remove them.
Clicking the eye icon next to a specific connection opens its Summary page, where you can review the configuration details or make edits if required.
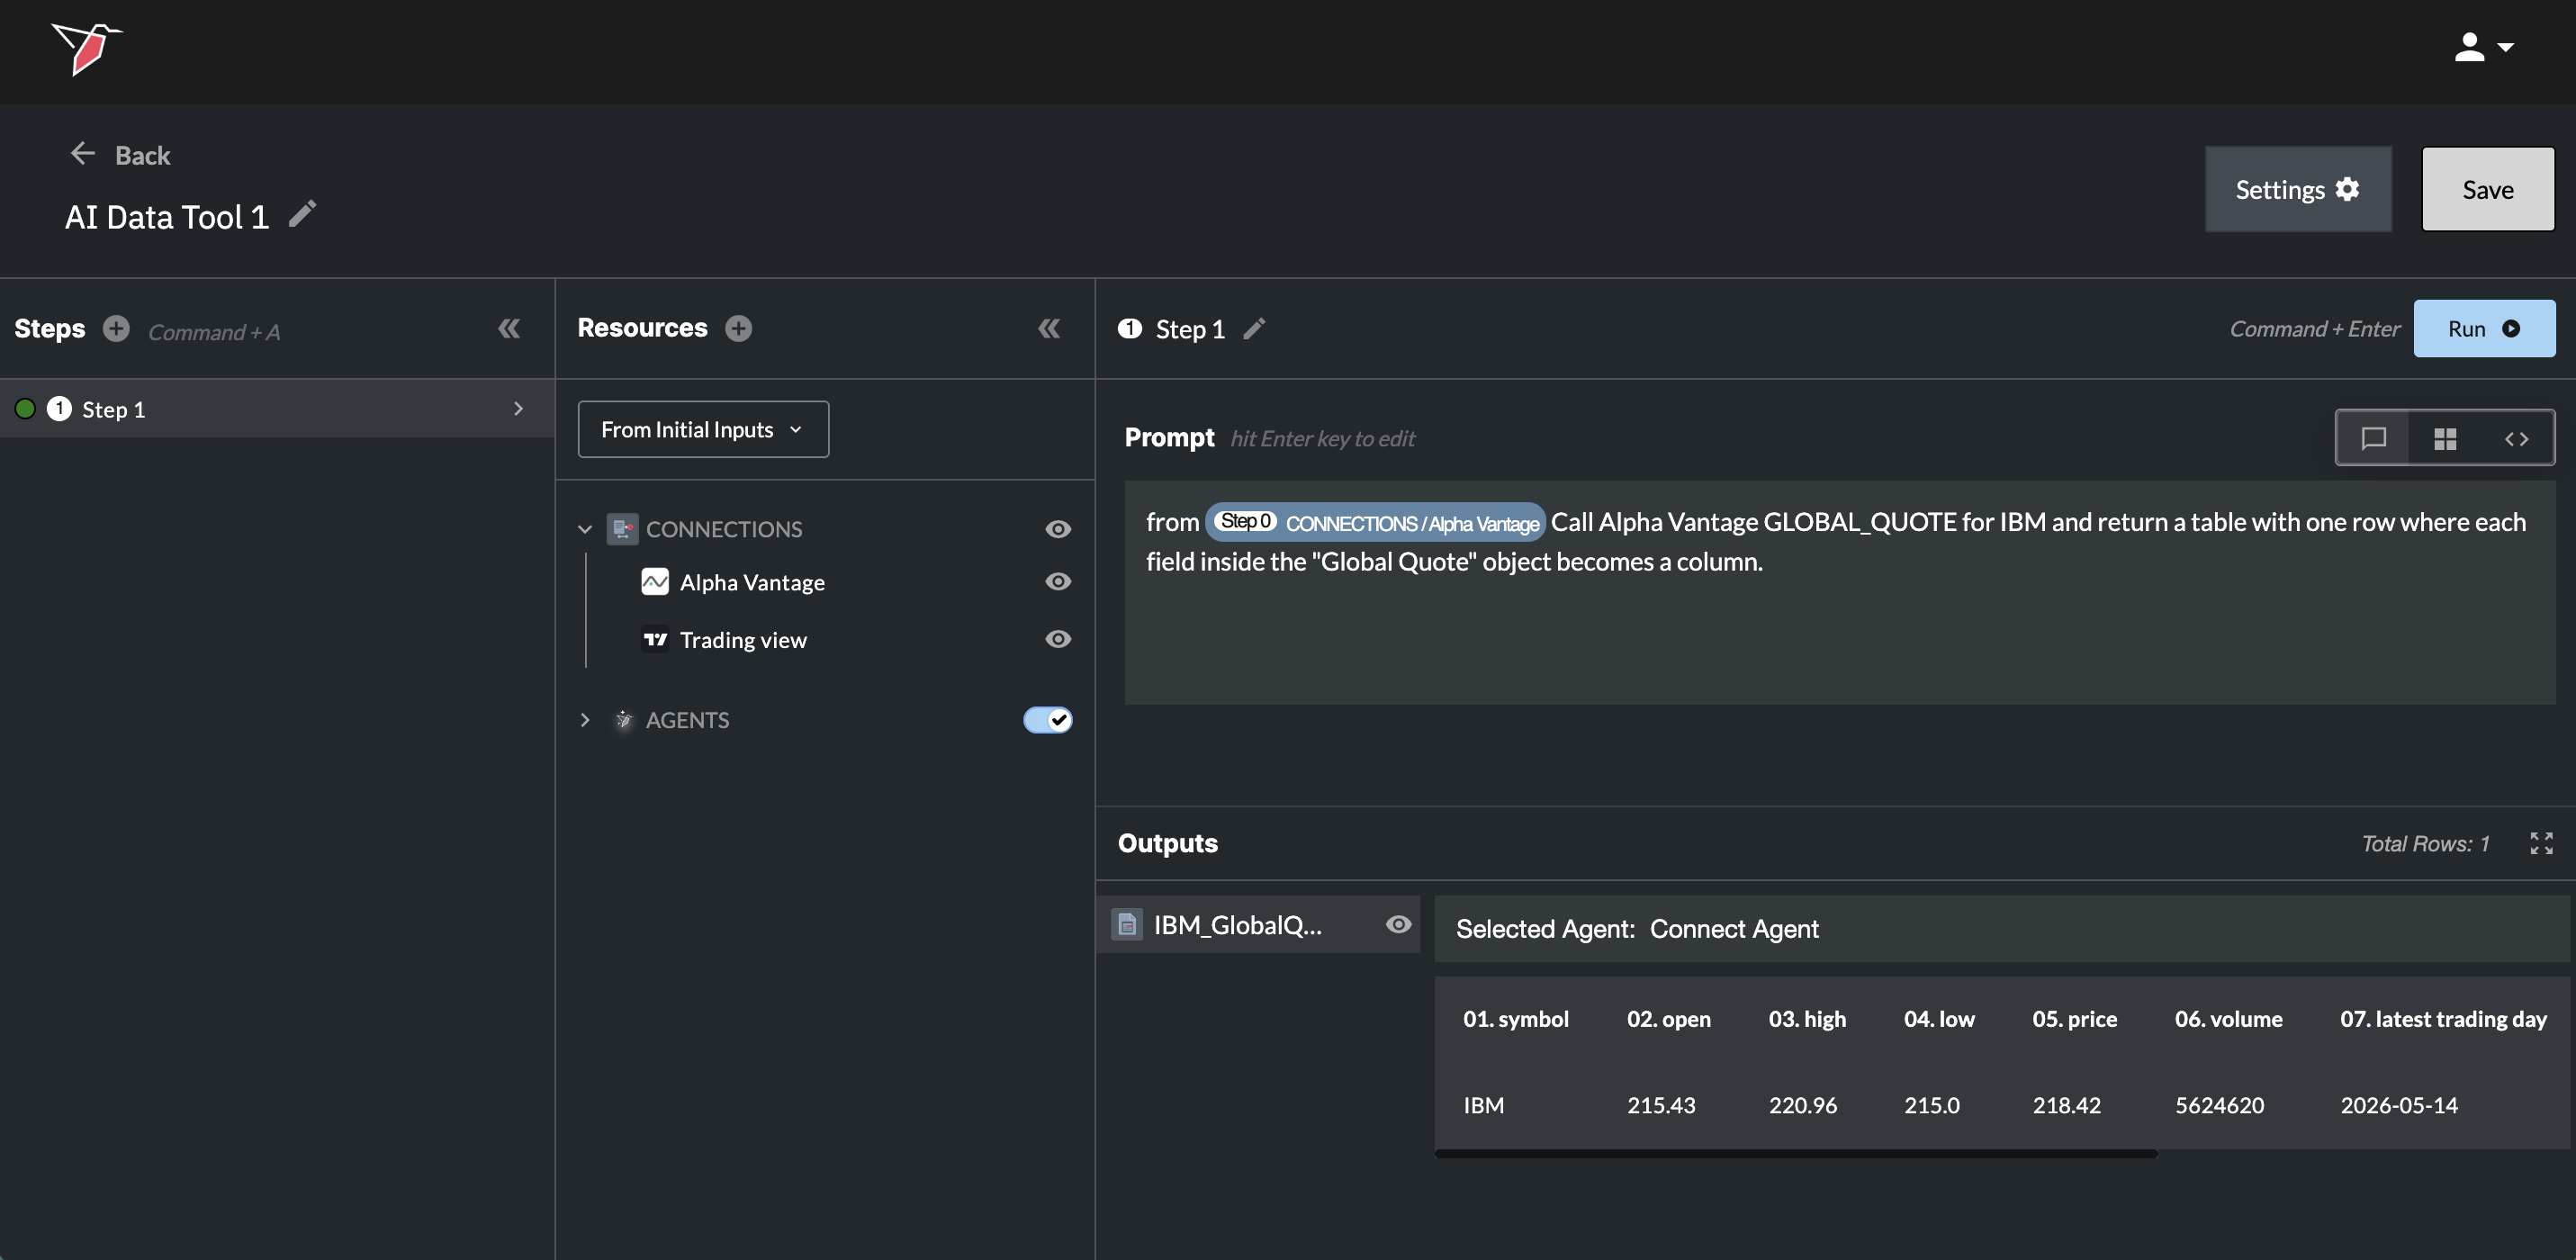
Using Connections to Extract Data
Within an AI DT prompt:
- Refer to the connection in natural language, or use the Command (Mac) / Control (Windows) + / shortcut to display a list of available objects and select the desired connection.
- Provide your instruction in natural language, specifying the data to be extracted.
- Run that step and you will see the data appear in the outputs pane.
Some example prompts:
- “Pull all rows from the Finance Warehouse transactions table.”
- “Pull the last year of data from the Customers table, filtered to the high-value customer segment.”
- “Fetch the last 7 days of data from the /Google Analytics API.”
- "Extract data using [Web Automation connection name]”
Note - Currently, each AI DT prompt can reference one connection resource at a time. If multiple tables are required, extract them in separate steps and combine downstream within AI DT.