AI Data Warehouse Collect
Introduction
The AI Data Warehouse app lets you configure access to tables in your organization’s data warehouses and connect a live link to those tables as input to an AI Chat or AI Email environment. Redbird AI will scan the tables you select and generate an understanding of their contents and business significance, which Redbird’s AI Agents can use to select the appropriate data to answer user questions submitted in AI Chat or AI Email environments.
Additionally, the platform generates a comprehensive set of metadata to help Redbird AI better understand the content and business significance of your tables. This metadata can also be customized to provide a more accurate description of your data.
Getting Started
- Add an AI Data Warehouse node to the canvas by clicking on the Add Objects ‘+’ icon > AI and dragging the 'AI Data Warehouse' node to the canvas
- Enter the edit view for the AI Data Warehouse node by double-clicking on the AI Data Warehouse node or single clicking to select the node, then clicking on the ‘Edit’ option on the right side panel
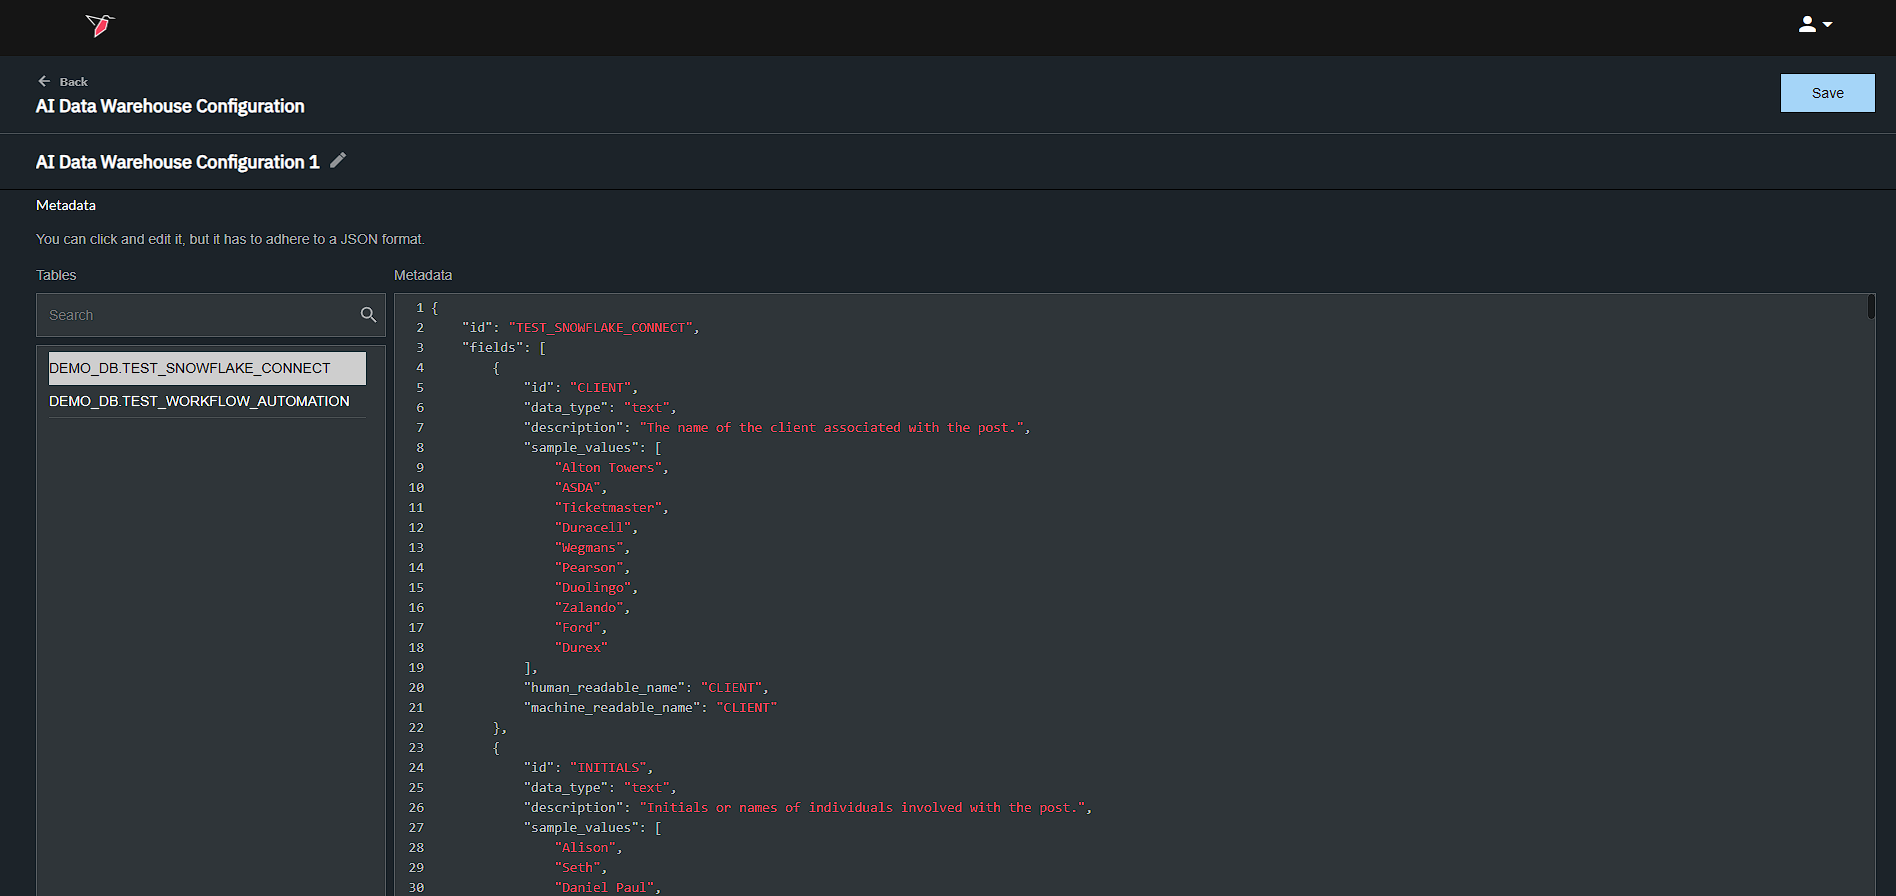
Configuring the AI Data Warehouse Node
Within the AI Data Warehouse node, you can connect to a data warehouse, select the tables you want to make available to the AI environment, and generate / edit metadata from Redbird AI’s scan of the tables. See below for guidance on how to do each of these steps:
- Enter the credentials you would like to connect with or choose from existing credentials that have already been configured. For a first time connection to a data warehouse, just click on the blue Add/Edit Credentials button. You will see a "Sources" modal appear with a section for each of the Data Warehouses available for connection.
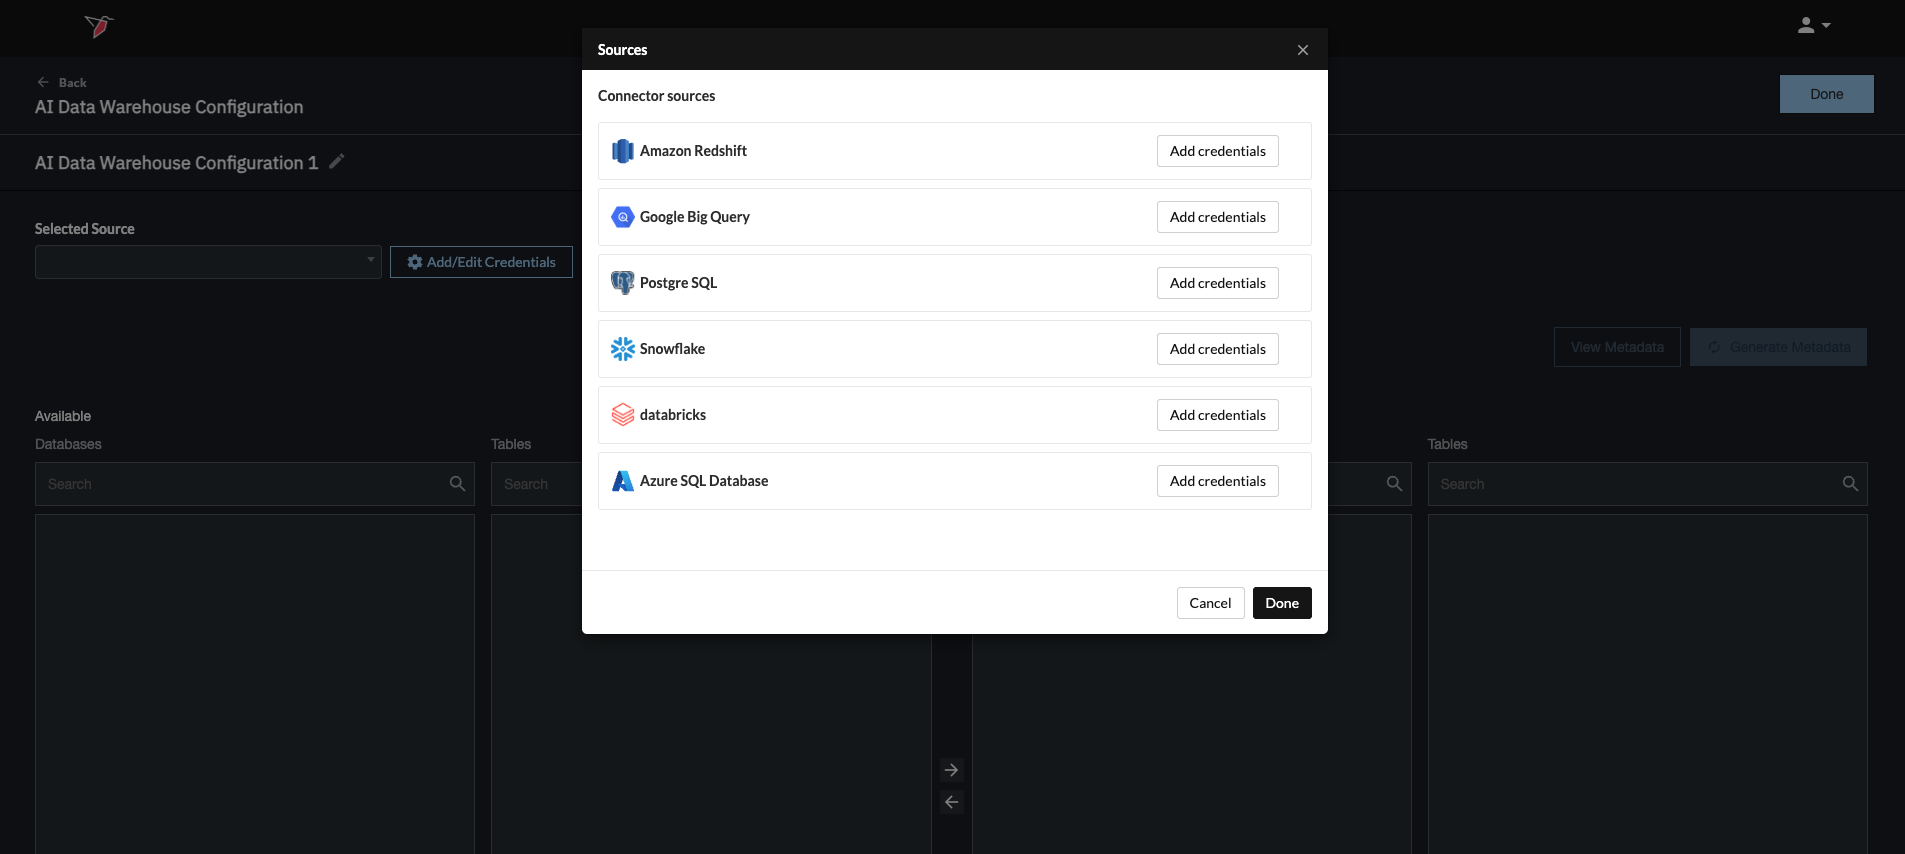
- To view the credentials that have been set up for each individual data warehouse, click on the corresponding ⌄ button. You can edit these credentials by clicking the pencil icon or delete them by using the minus icon.
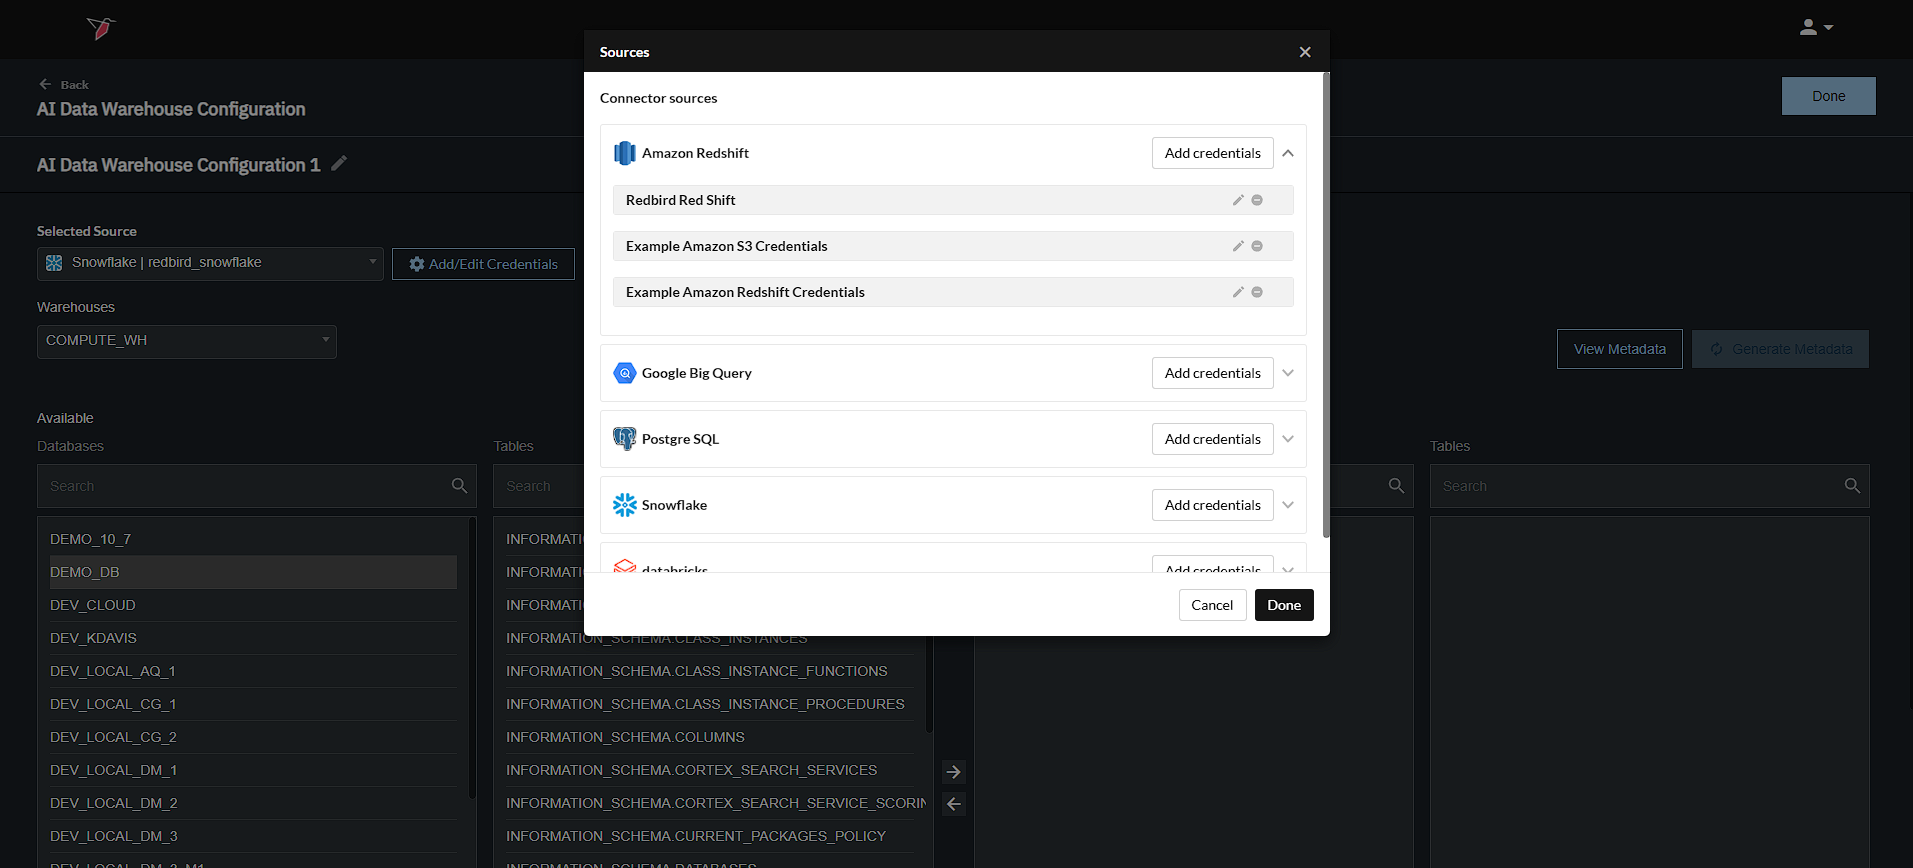
- To add new credentials, click on the corresponding Add Credentials button. For help on setting up your credentials, refer to the guides in the General and Administration section.
- Once you have selected an active source, select a specific scope from the available dropdowns (warehouse, catalog, etc.)
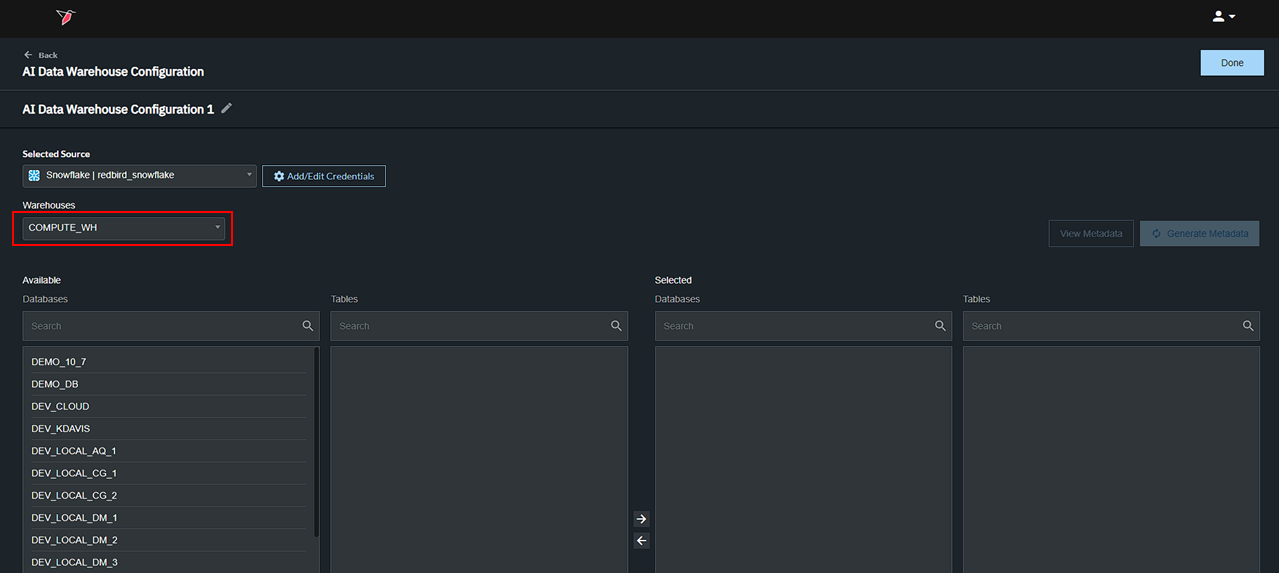
- Pick your database tables by using the right to left picker. You can select multiple tables.
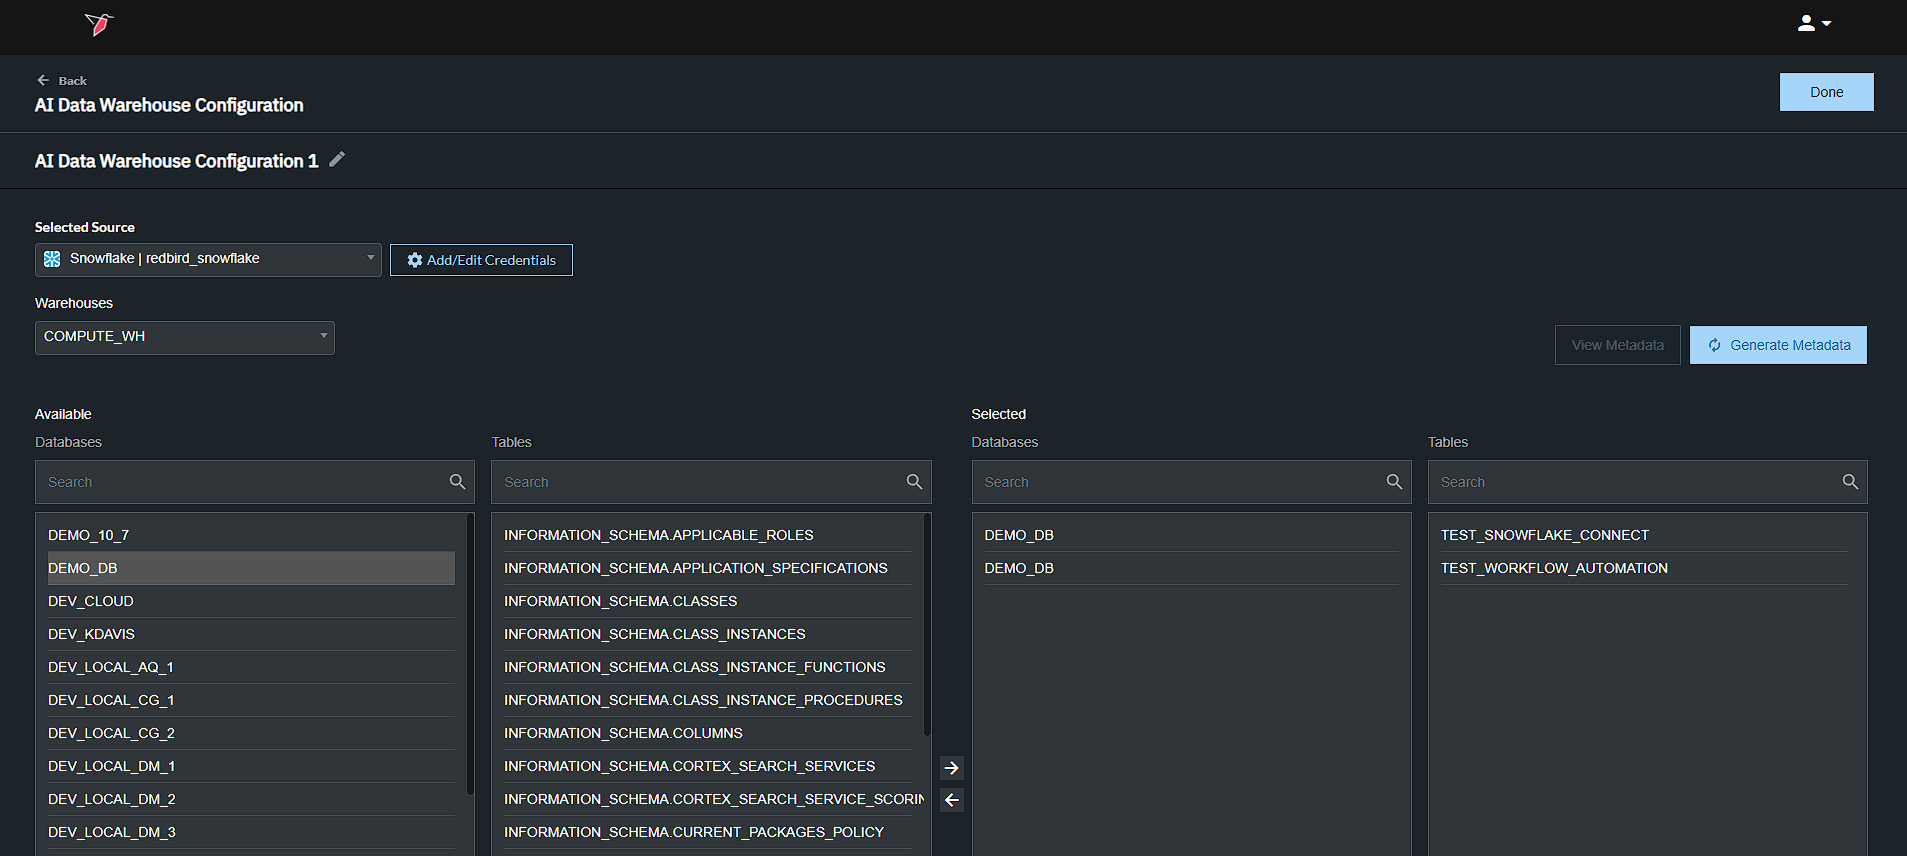
- Next, click the blue "Generate Metadata" button to the top right of the table selection area. This action will generate metadata for the tables, providing context for the data and helping Redbird AI deliver accurate responses.
- NOTE: On the metadata view, you can select individual tables and review / edit the metadata (in JSON format) that Redbird AI generated based on scanning that table. Clicking into the metadata window will activate edit mode where you can modify the metadata to make it more descriptive or accurate based on your understanding of the table. This metadata will help Redbird’s AI Agents better work with the table.
- Click 'Save' then 'Done' on the next screen to finalize your configuration.