Sharing Workflows
Workflow sharing makes it easy to collaborate with the rest of your team on your projects and workflows and set different levels of permissions. Below are the different levels of sharing you can control within Redbird.
Navigation Level
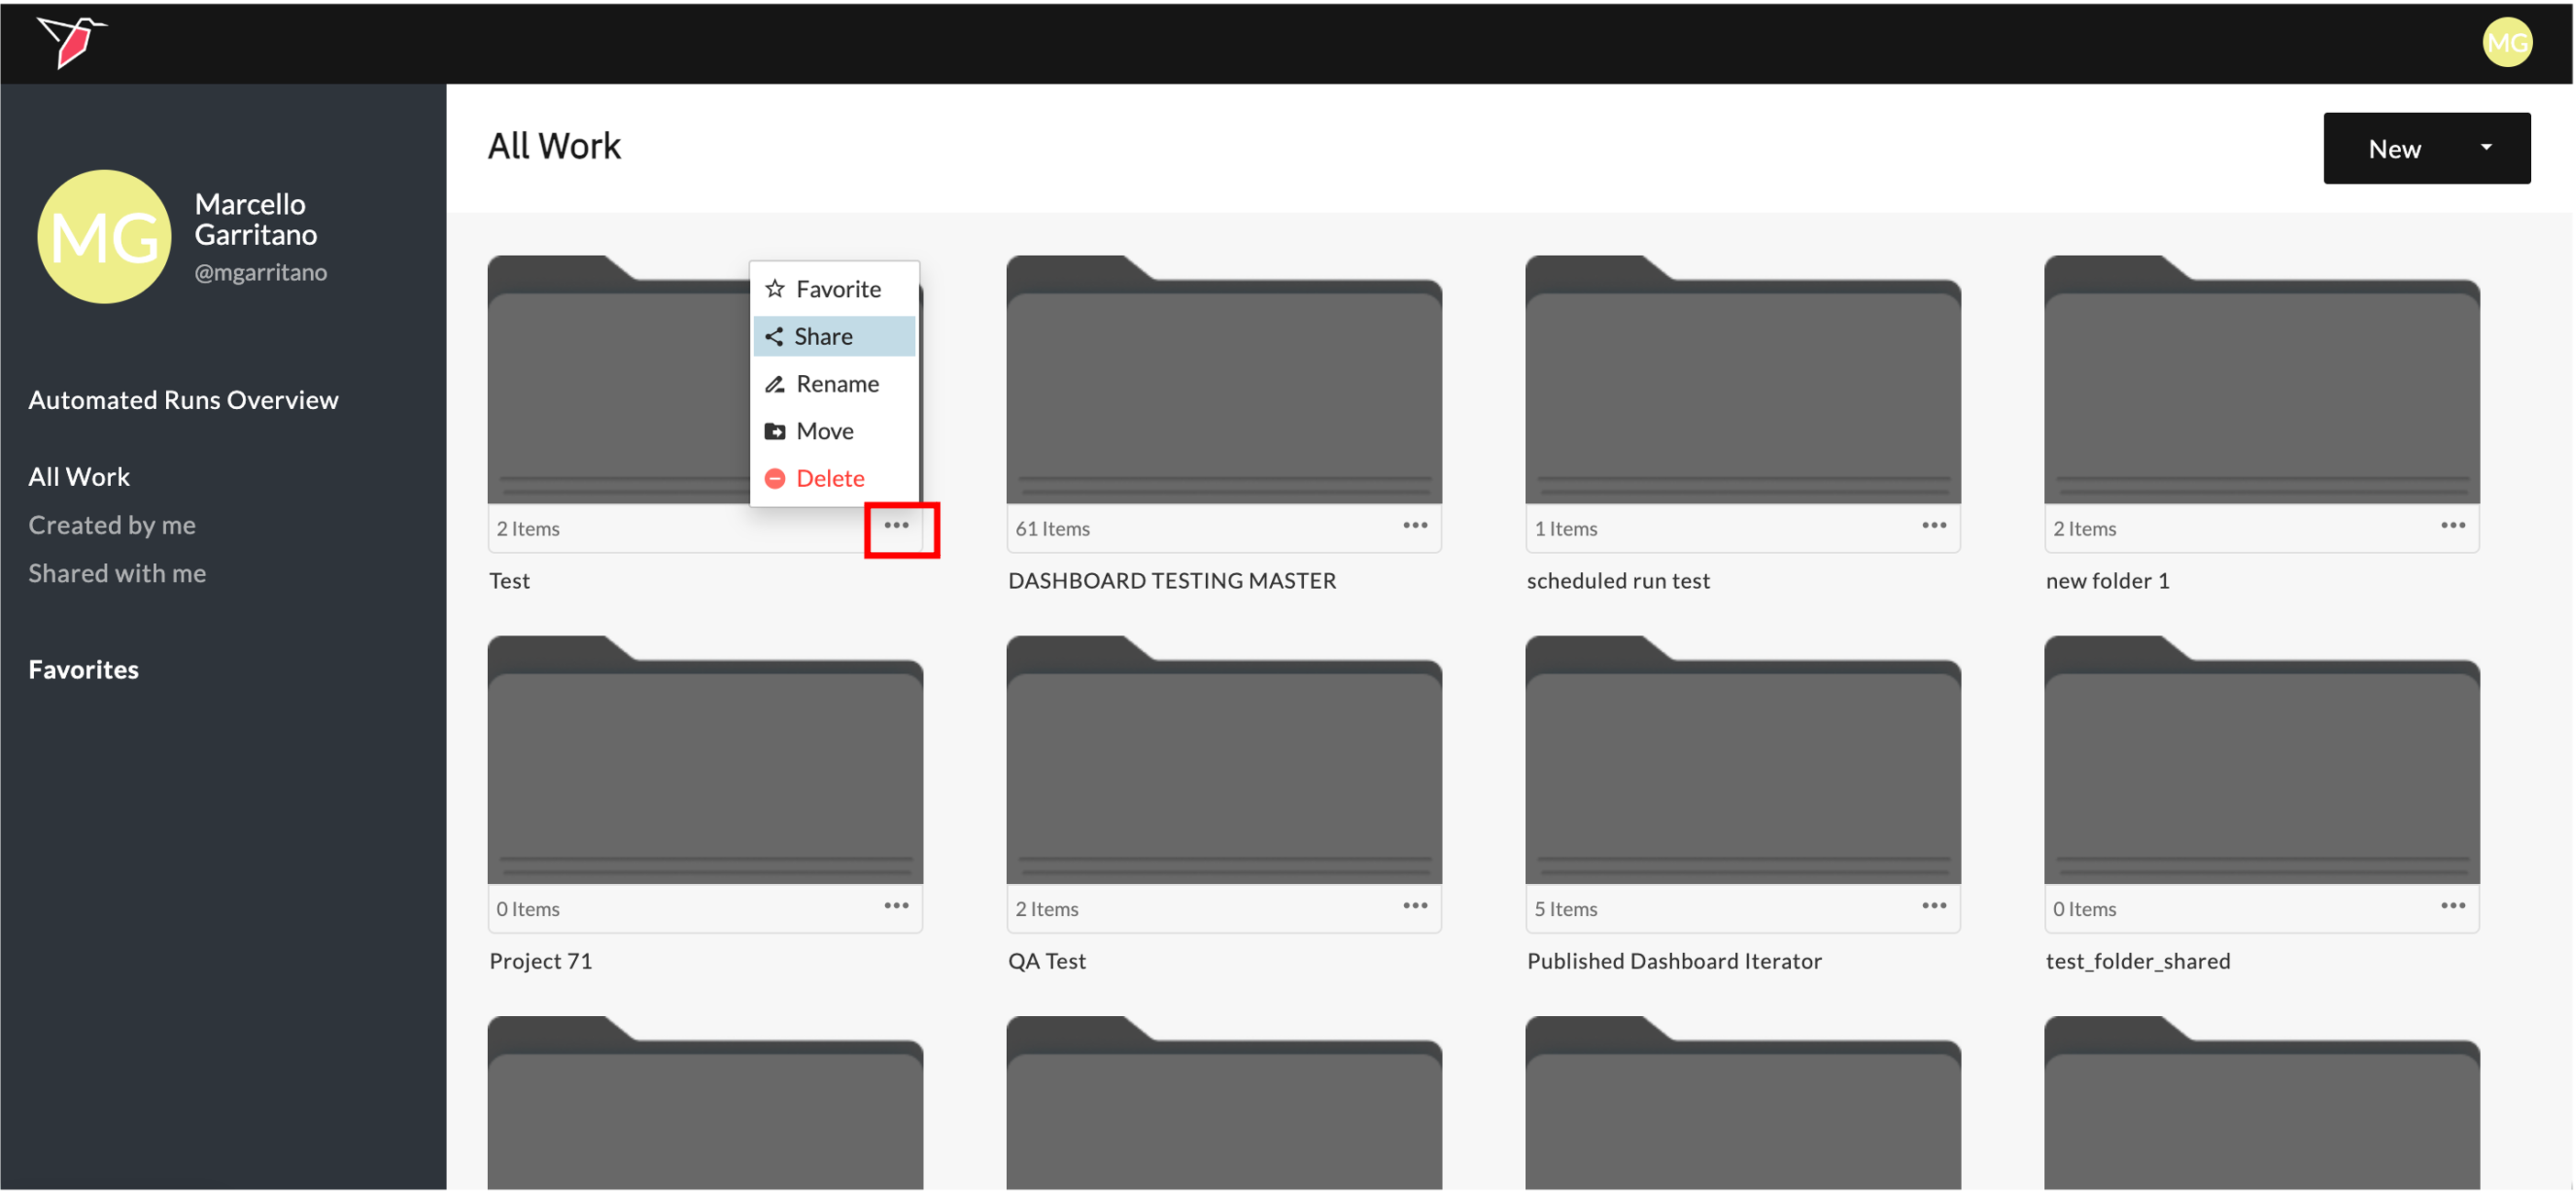
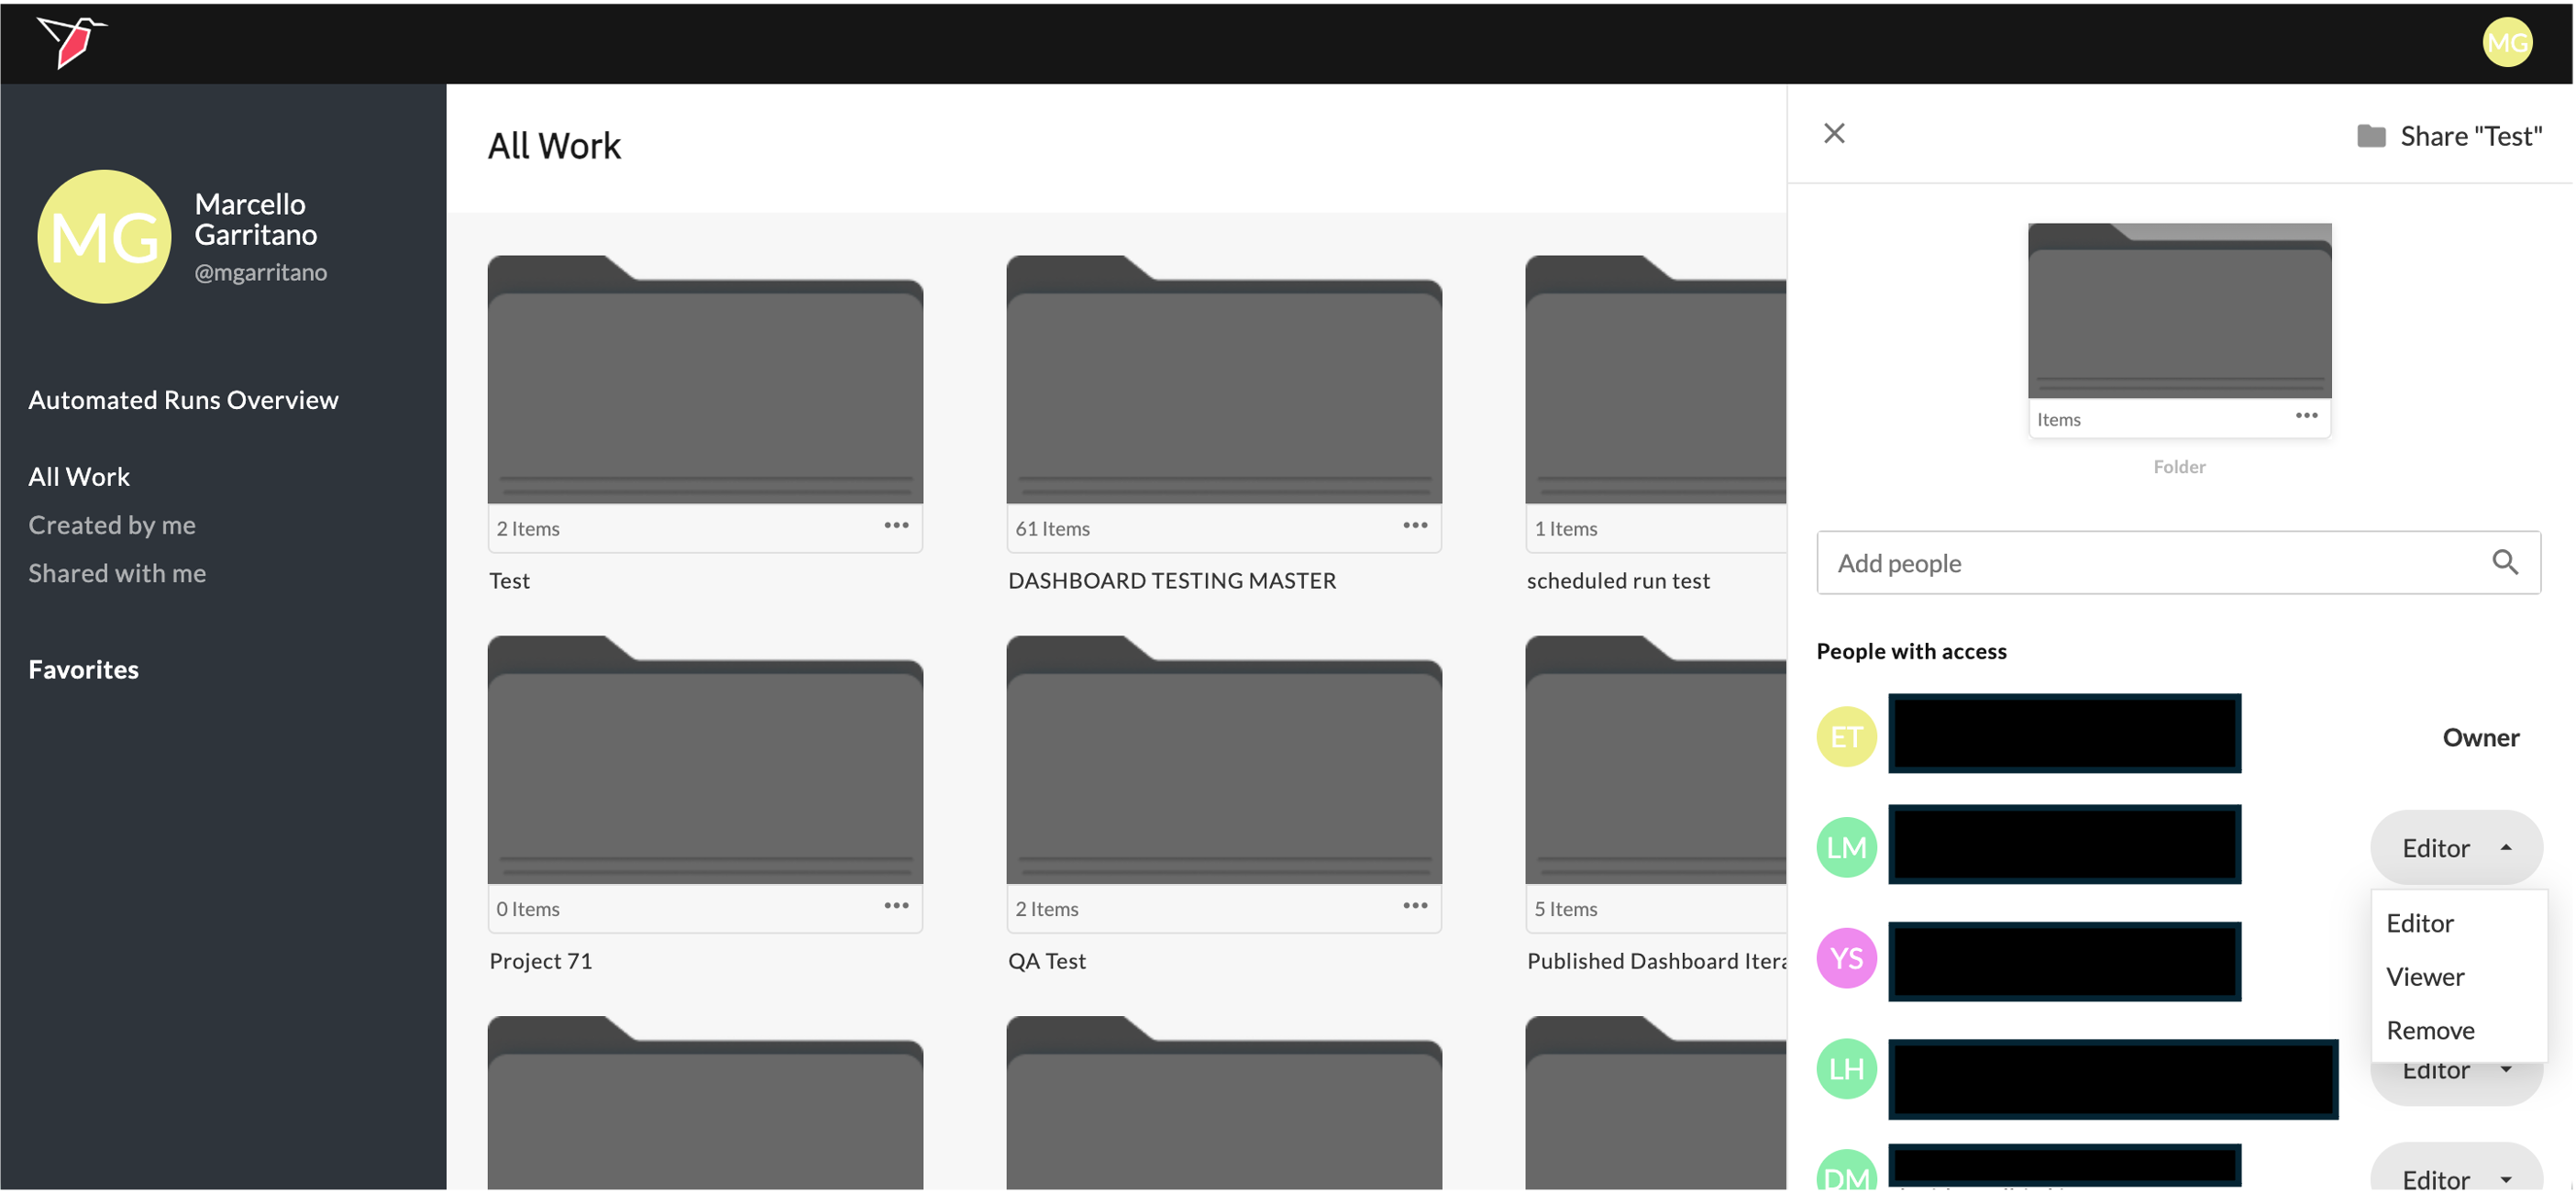
- Click on the folder or workflow you want to edit sharing for
- In the right side panel, add users through the search box or edit users by clicking on the dropdown next to their name
Workflow Level
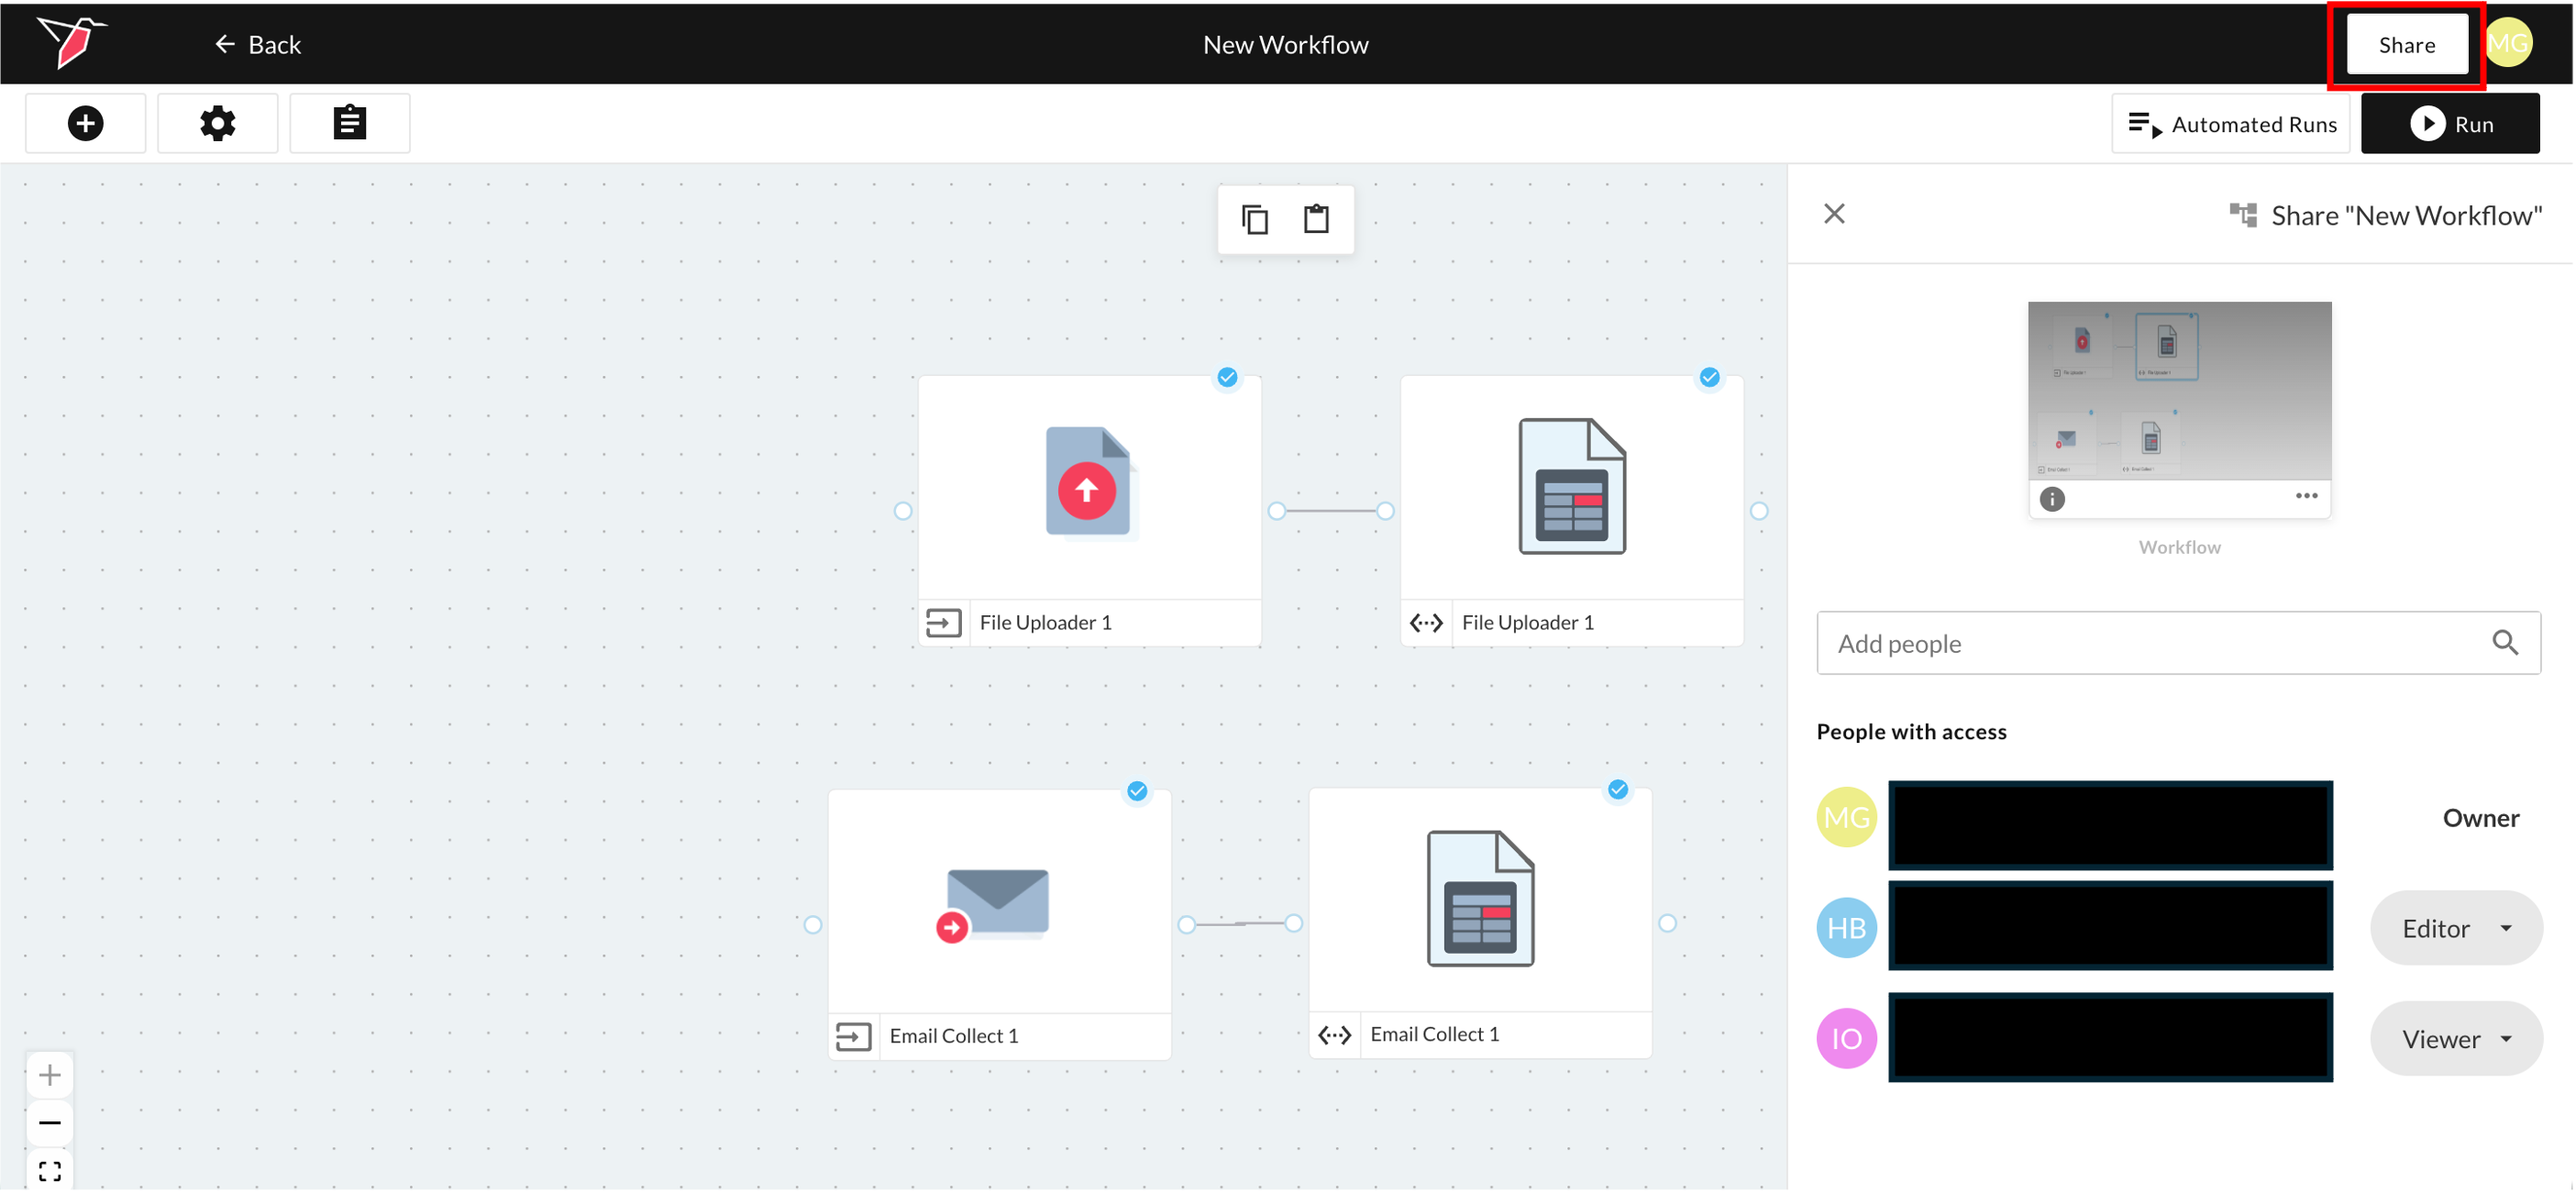
- From within the workflow canvas view, click the share button at the top right of the screen in the navigation bar
- This will set the sharing settings for the overall workflow
- In the right side panel, add users through the search box or edit users by clicking on the dropdown next to their name
Node Level
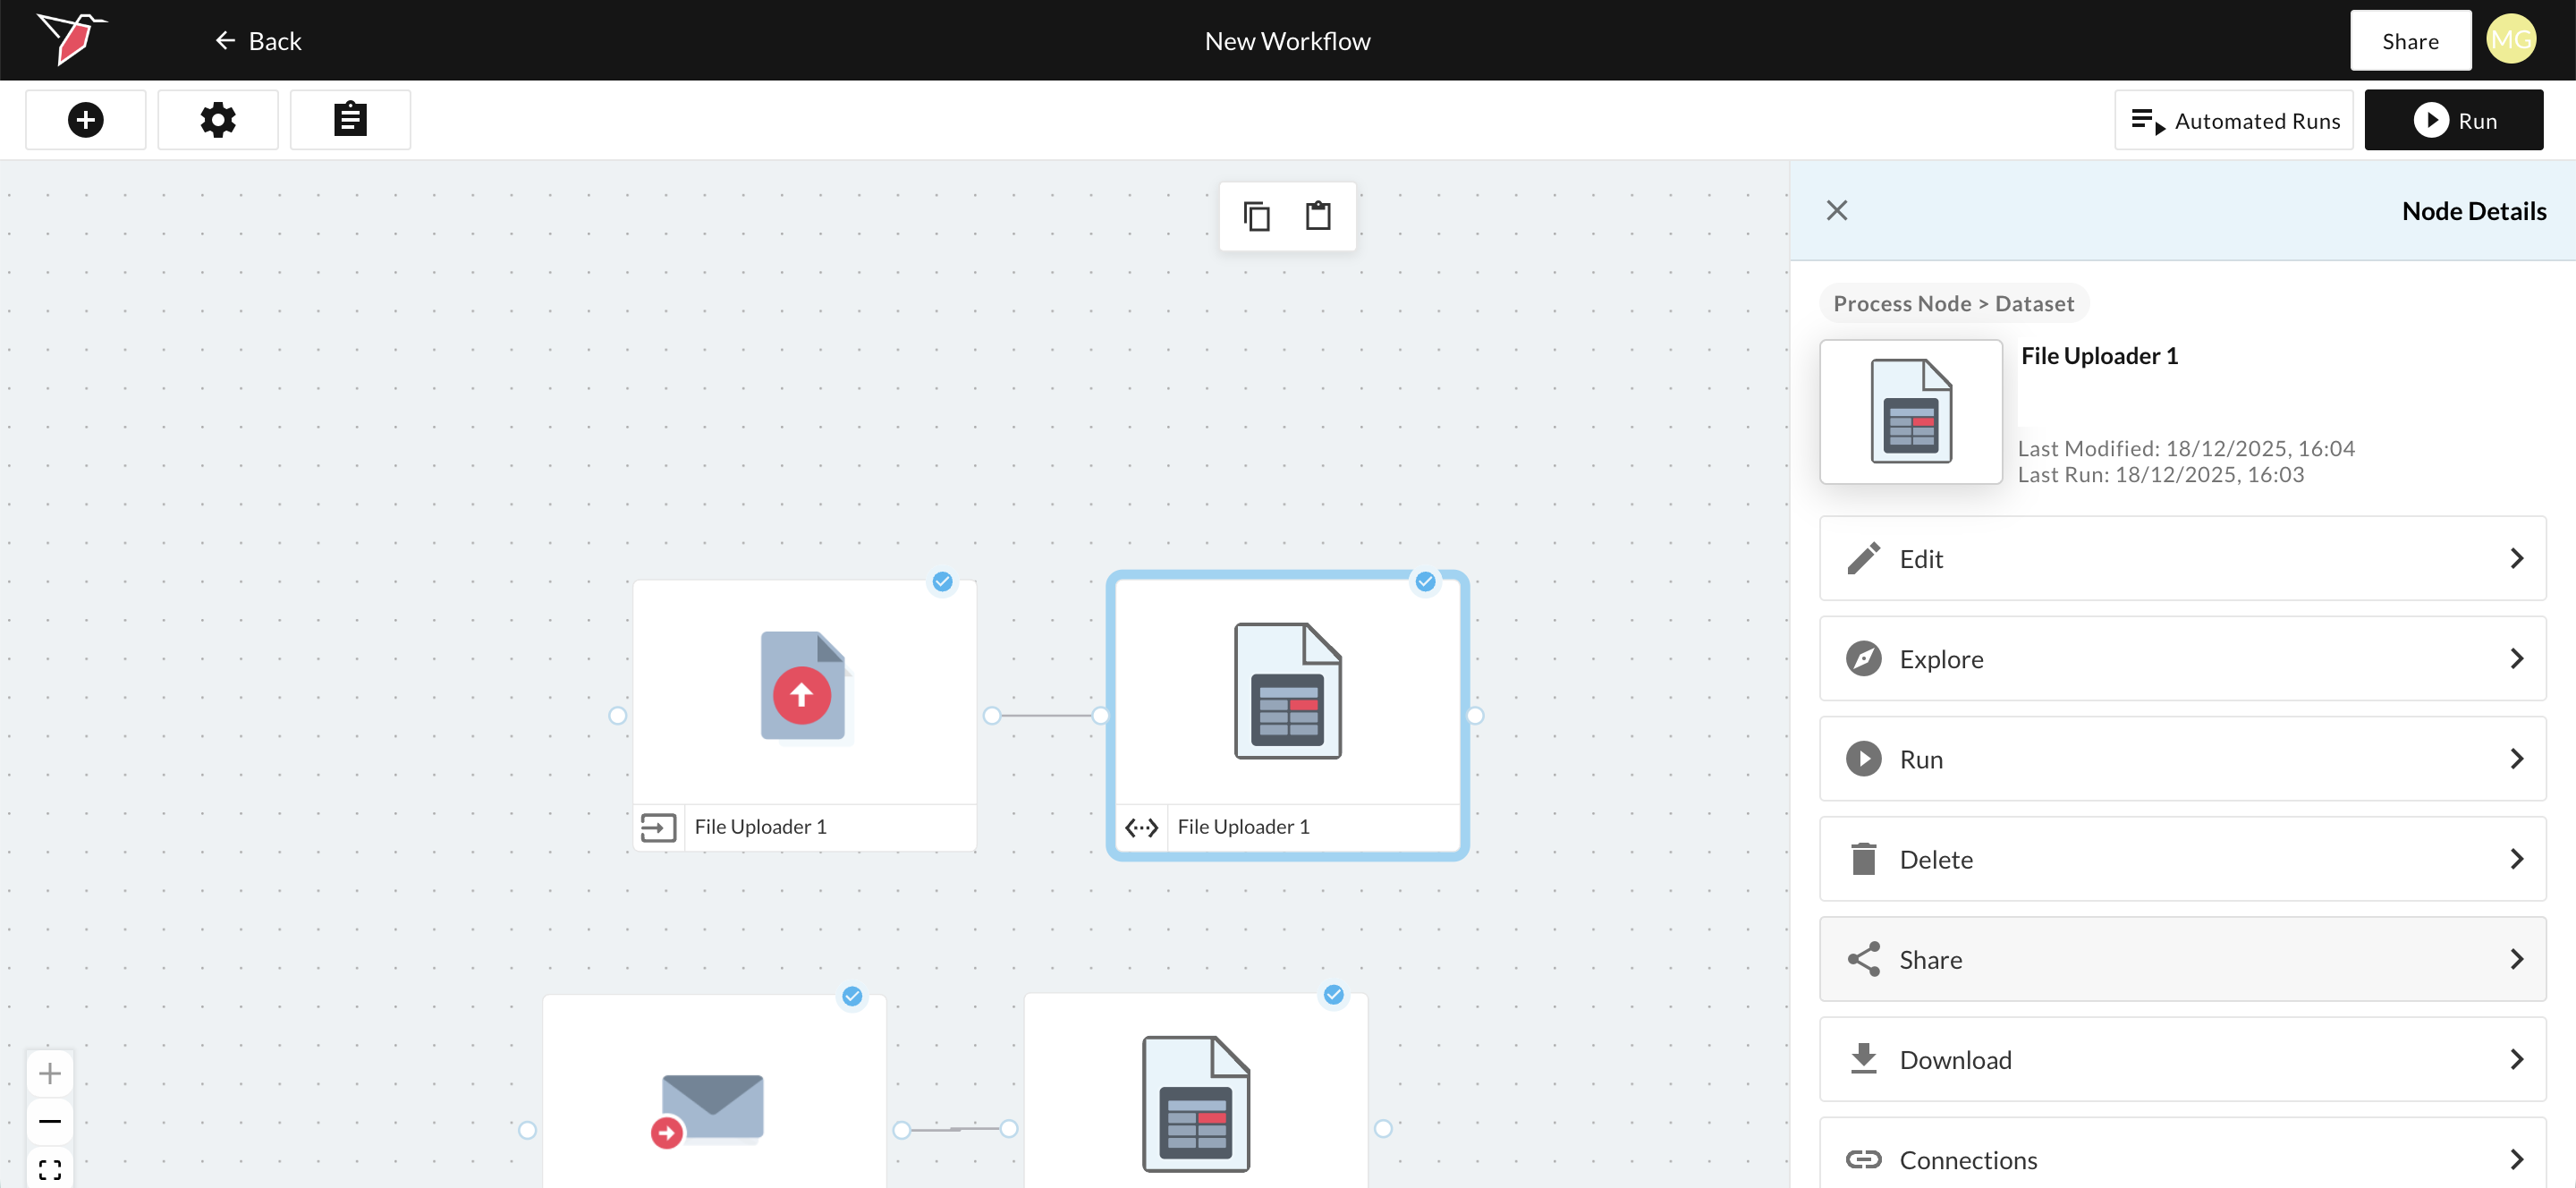
- From within the workflow canvas view, first select the node that you want to edit sharing for
- After clicking the node, in the right side panel that is activated, click the share button
- This will set the sharing settings for the specific node you have selected
- In the sharing right side panel, you can do the following:
- Choose the top level permission type for the node. By default the permission will be set to 'Same as workflow', however, you can change the top level permission for the node to 'Restricted' (which will make the node inaccessible to users unless the node is specifically shared with them)
- Add users through the search box or edit users by clicking on the dropdown next to their name


If you would like to remove a collaborator or change their permissions, locate the user within the right side panel, select the button indicating the level of access they have and make any necessary changes
If collaborators aren’t appearing in your search, either add them through your admin console, or contact [email protected] to add them if you do not have admin privileges.
Updated 5 months ago
What’s Next
Did this page help you?