AI Context Configuration
Introduction
The AI Context node allows you to provide Redbird AI tools (AI DT, AI Chat, Agent Run etc.) with custom business context, helping AI agents determine the most accurate and relevant way to do their work. This context ensures that Redbird AI analyzes your data according to your specific requirements.
This context can cover anything including general industry information, background about your business, detailed technical information, data ontologies, formulas for calculating specific metrics, or acronyms commonly used in your organization.
You can provide this context in any format—by typing directly into the node in natural language or by uploading unstructured documents such as industry reports, internal documentation, or example SQL queries.
Getting Started
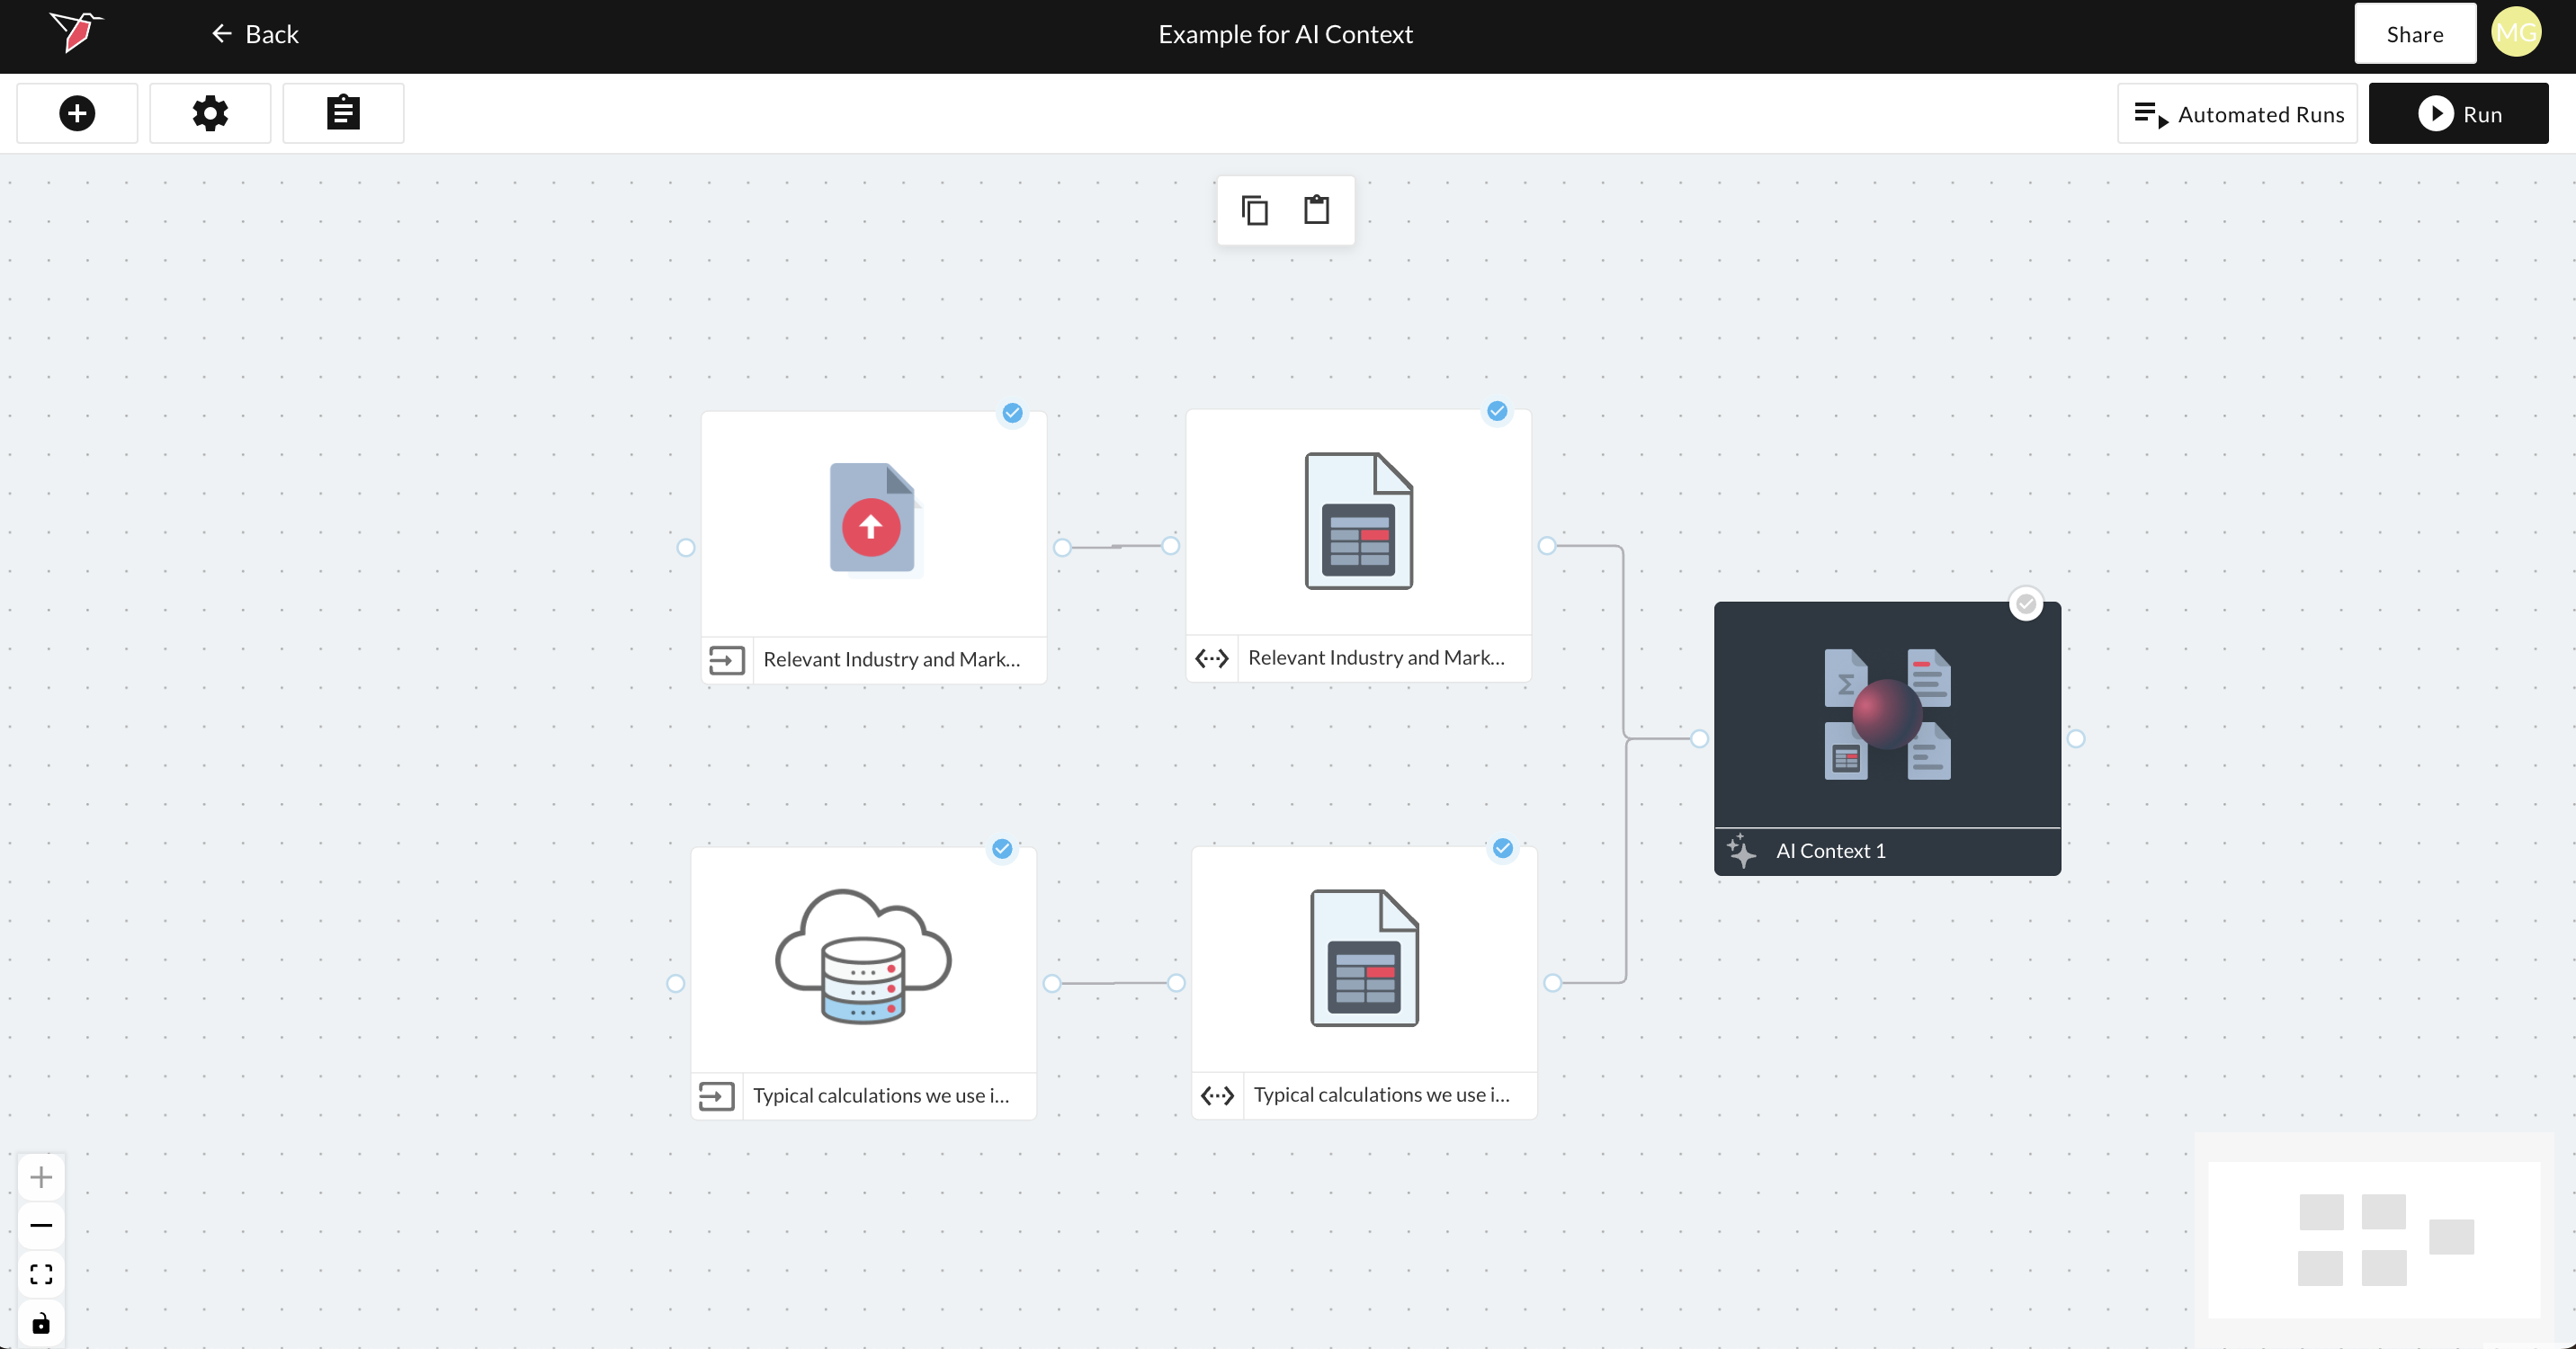
- Add an AI Context node to the canvas by clicking on the Add Objects ‘+’ icon > AI and dragging the 'AI Context' node to the canvas
- Connect any objects that you would like to use as context for the AI Context node. These can be documents uploaded via File Uploader, Cloud Storage, Email Collect, and other collect apps. See the Inputs section of Redbird Docs for more information on how to set up these collections.
Supported Sources Formats for Context Buckets
Currently we support the following formats for documents connected to buckets as context:
- PowerPoint
- Excel
- CSV
- Word
- Google Sheets
- Google Slides
- Google Docs
Other formats—including Redbird datasets—are not supported for bucket context. If you connect an unsupported source document, it will not appear in the left-side panel, or you may see the message “no valid inputs” under that source type.
- Double-click the AI Context node to edit your configuration.
- Rename the node by clicking on the pencil icon at the top of the page.
Configuring the AI Context node
How to use buckets
Within the AI Context node, you can organize your context into buckets. Buckets allow you to group multiple documents or pieces of information under the same topic or theme. This helps structure the contextual information for easier retrieval when the AI needs to use it, and it also allows you to reference one or more specific buckets downstream.
Examples of how you might use buckets include:
- a bucket containing general industry knowledge relevant to your organization,
- a bucket containing company-specific information (such as terminology, whether you operate on a fiscal vs. calendar year, etc.),
- or more granular buckets, such as semantic metadata, formulas or rules for calculating marketing metrics.
There are two ways to assign contextual information to a bucket:
- Add context directly using natural language, or
- Connect files that you have already added to the canvas and linked to the node.
Both approaches are detailed in the sections below.
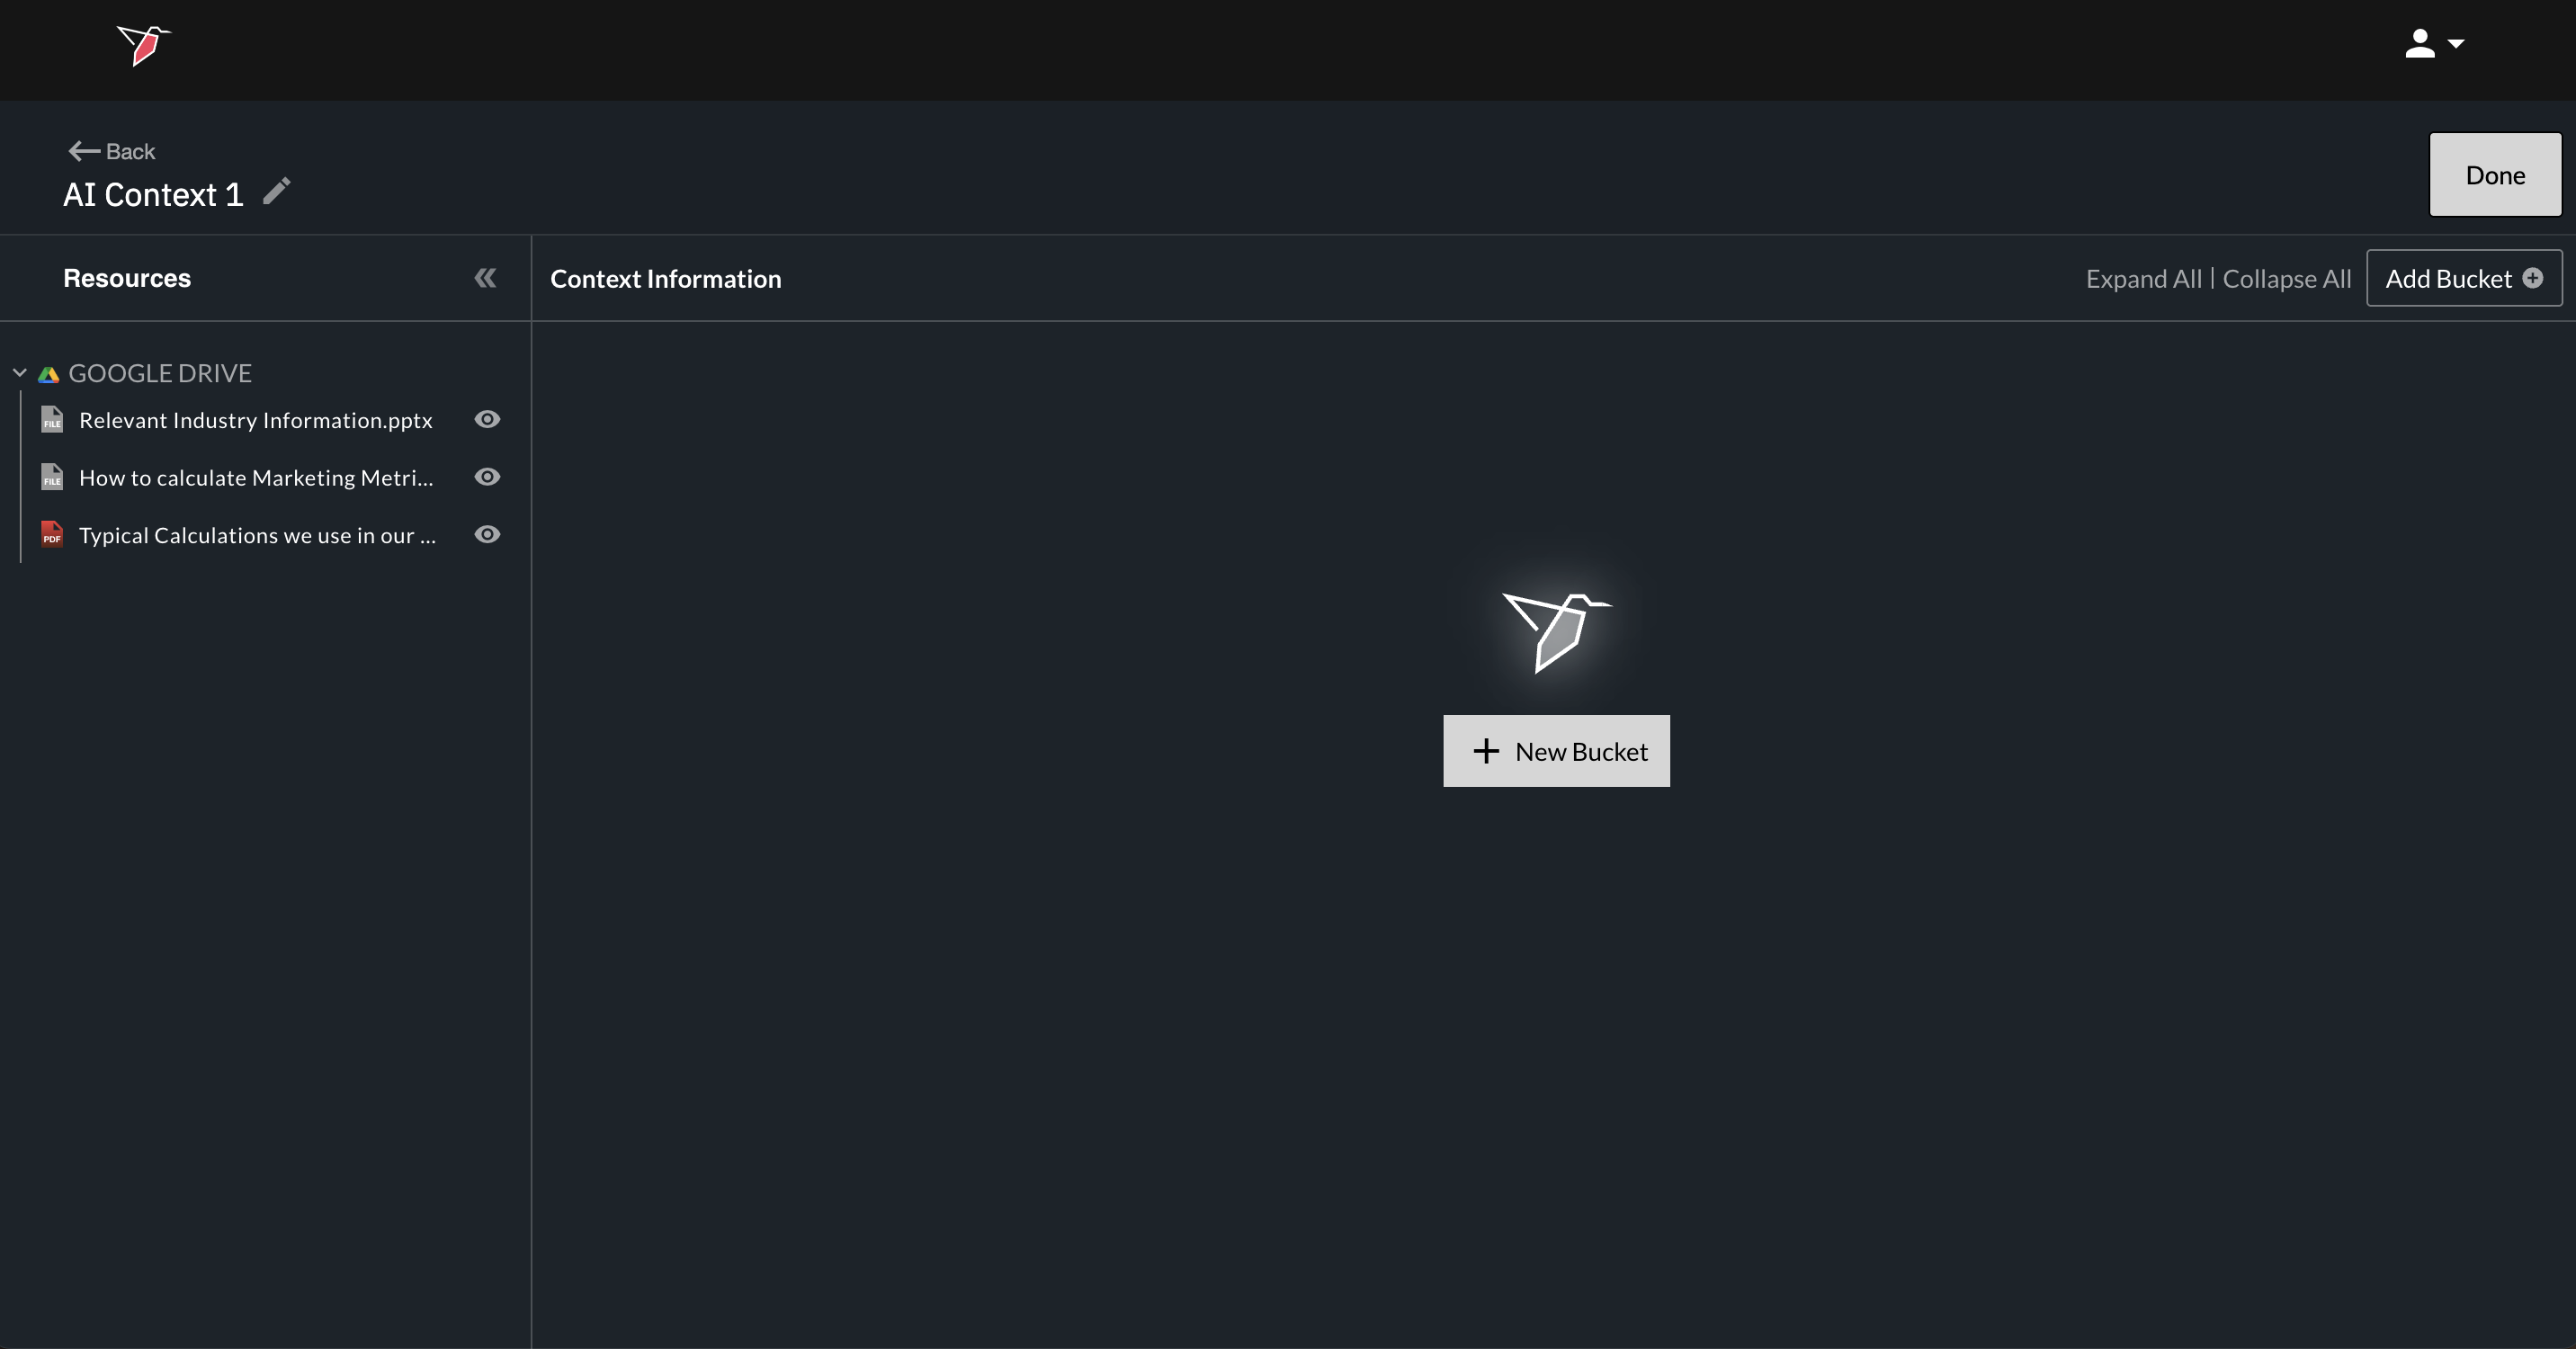
To add a bucket, click “+ New Bucket” from the empty state, or click Add Bucket in the top-right corner of the screen if buckets already exist.
Directly Adding Context to a Bucket Using Natural Language
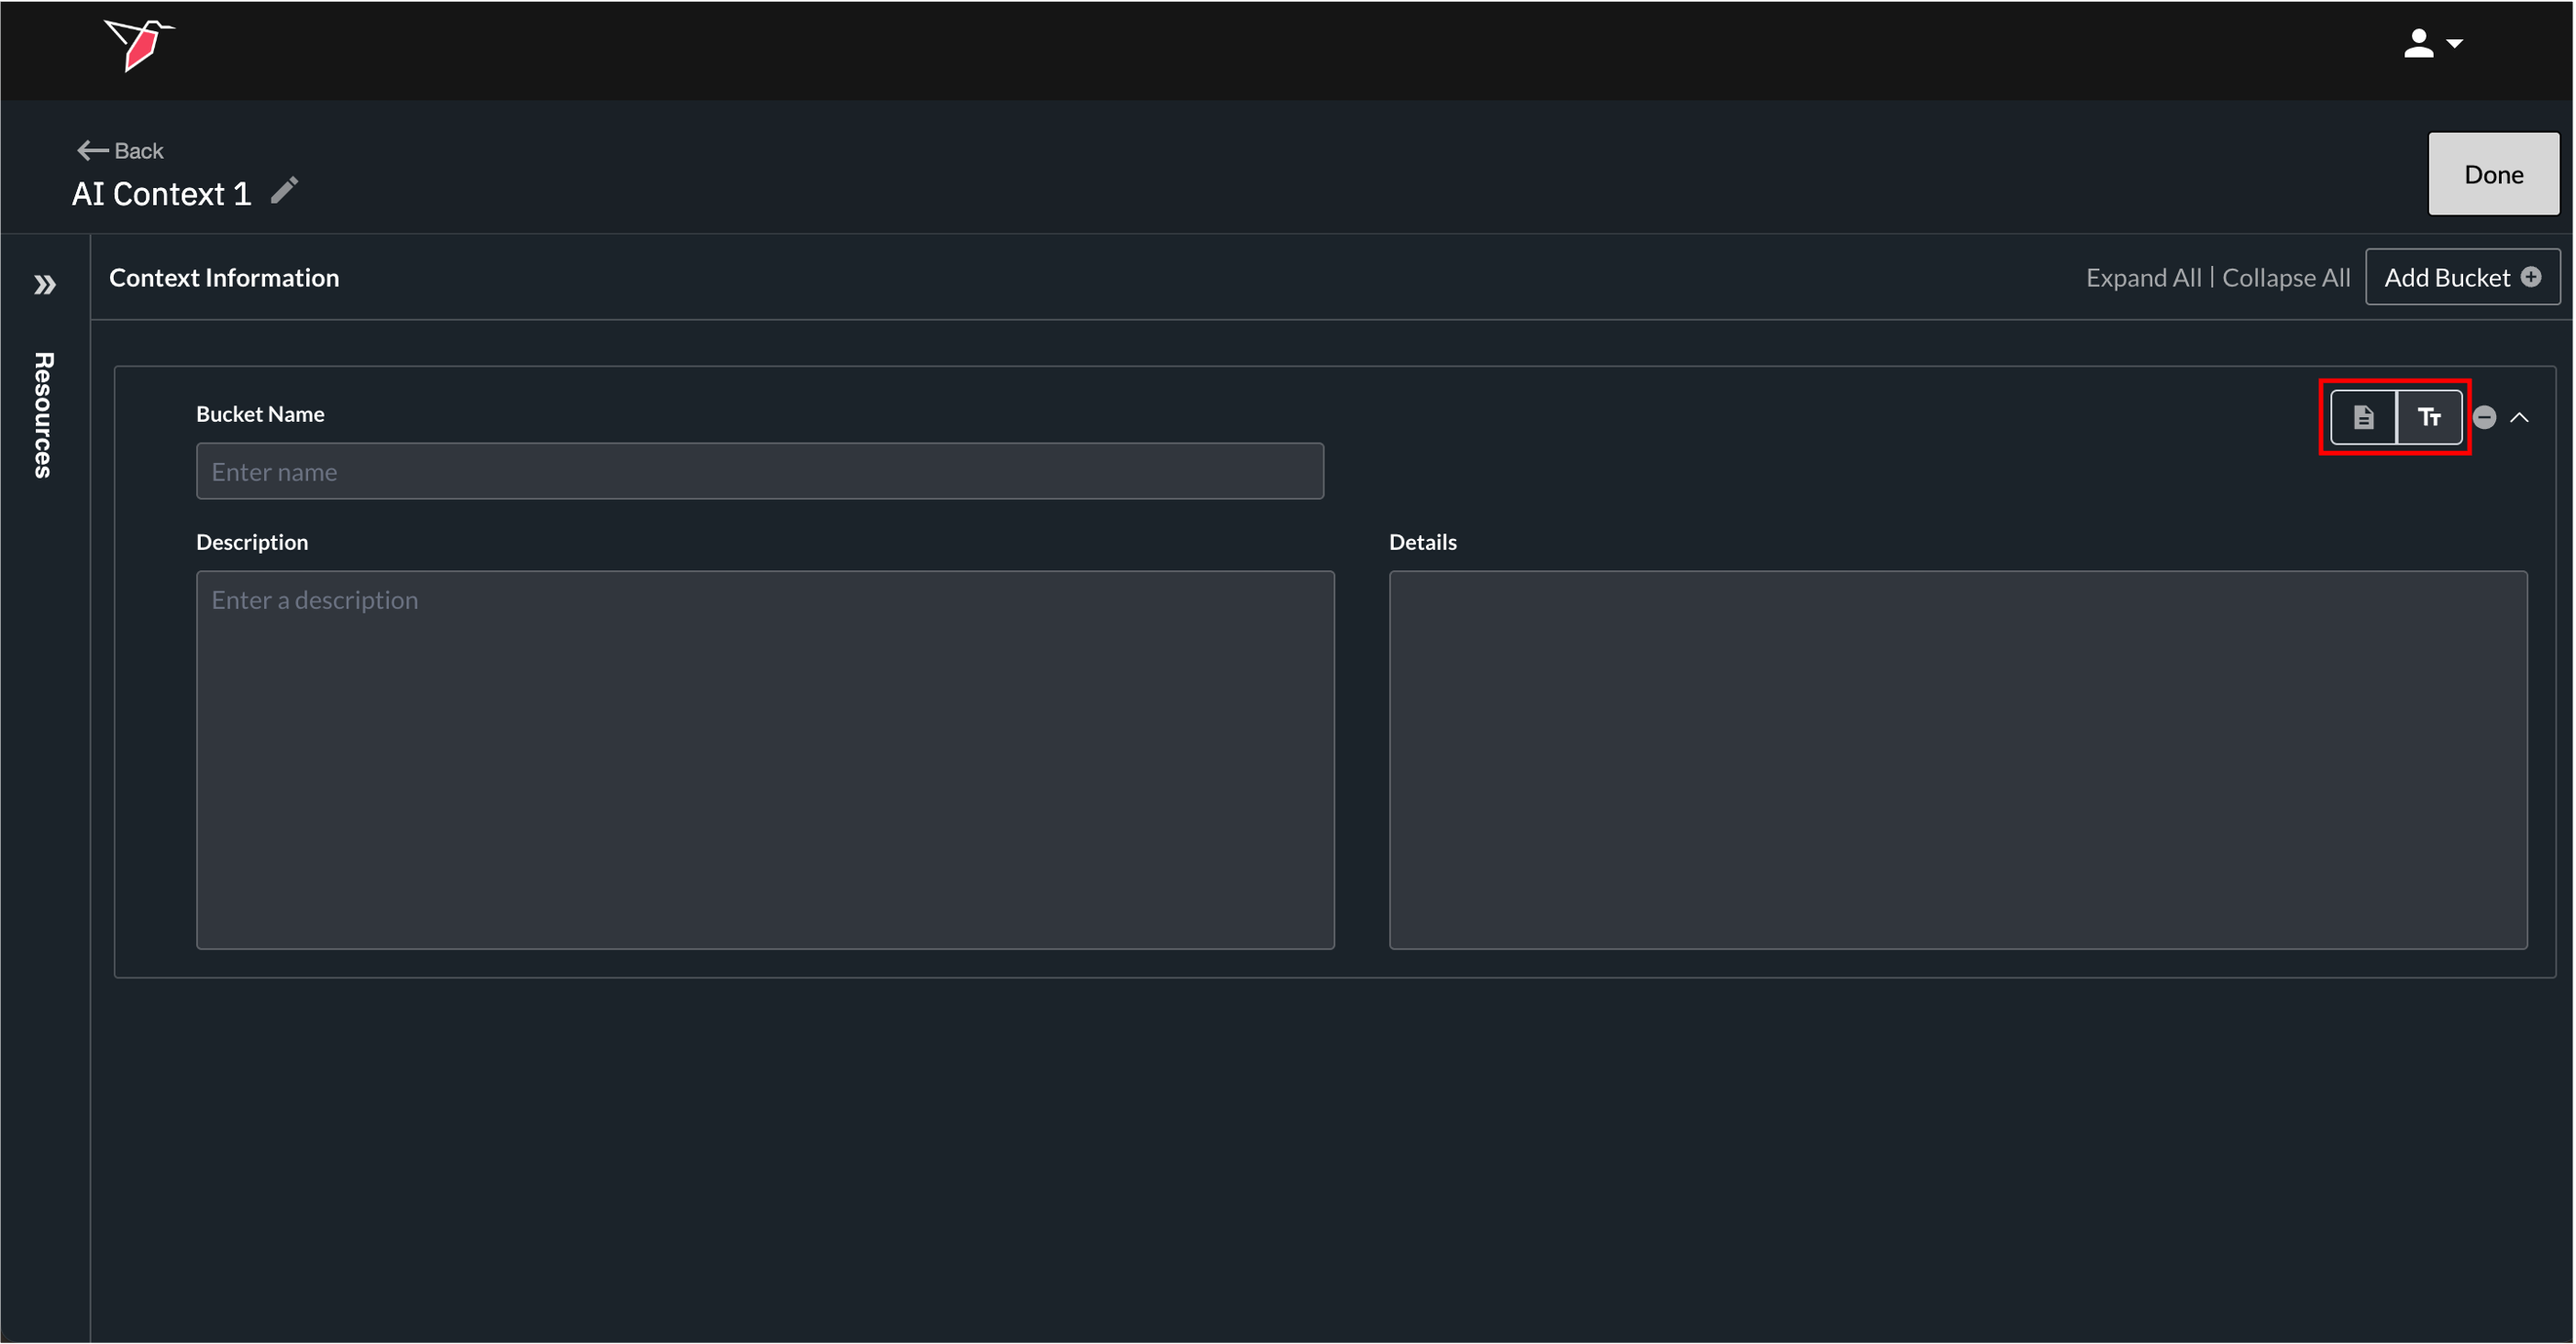
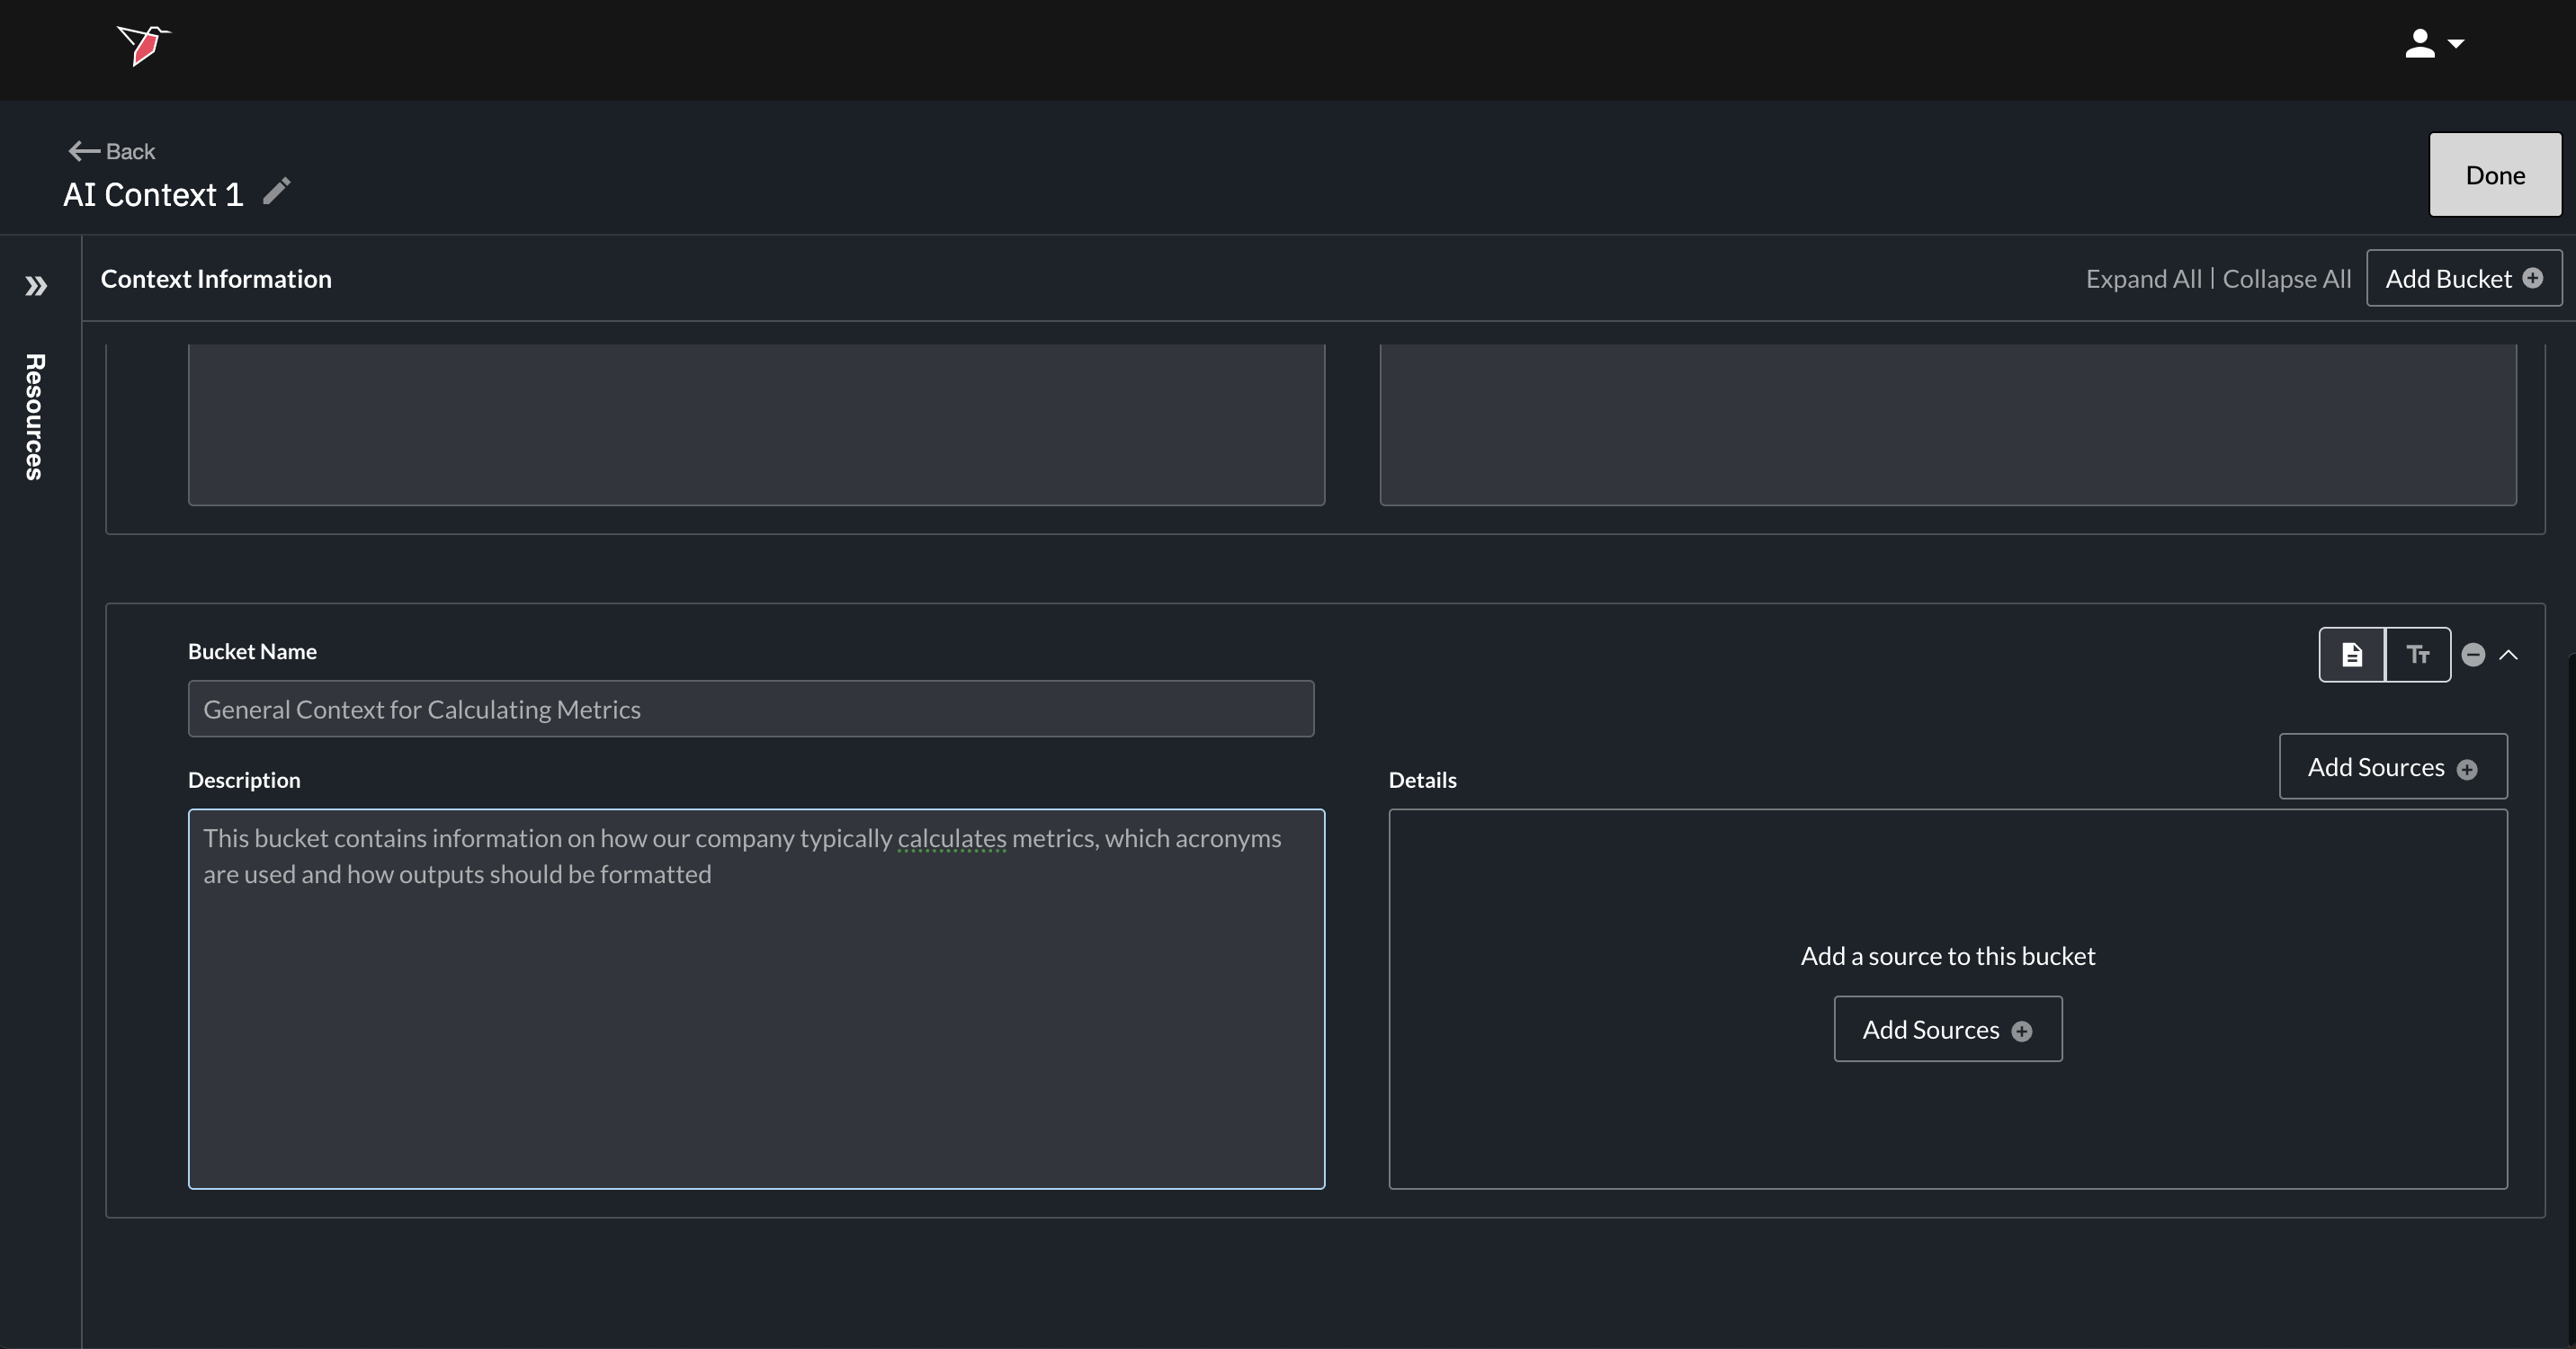
By default, when you add a bucket, it opens in Text mode (indicated by the text icon in the input node toggle in top-right corner of the bucket). This mode is useful when you want to type information directly—especially if the context isn’t yet documented elsewhere. It also enables other users to easily edit or expand the content later.
Text mode supports everything from clear, structured formulas to less formal descriptions. To populate a bucket in this way, fill in the fields as follows:
- Bucket Name: A simple, human-readable name for the context bucket.
- Description: A very short description of what the context bucket is (should not include the actual details for the context in the bucket – just a few words to describe what the bucket is at a top level). This description can help the AI understand when or how to use the information contained in the bucket. The Description field is in general an optional field.
- Details: The explanation, formula, or details of the definition
- Definition details can be written in freeform natural language which does not need to adhere to a specific syntax. If helpful you can use Markdown to format your text, which helps keep your context clear, structured, and easy for other users (and the AI) to read.
Best practices for writing definition details:
- Details should be as concise as possible, while still conveying the core information that will be used by the AI agents. Extraneous information that doesn't help an AI agent understand how to use the definition should be excluded. Here is an example of the same details written concisely (good) vs. with extraneous information (bad) for a definition called 'Discounted price':
- Good: Listed price - sales discount
- Bad: The discounted price is the price after the sales discount has been subtracted from the listed price. Sales discounts are based on promotions that can be run to drive more sales. The listed price will vary from product to product and can also vary by the market in which the product is sold.
- Details should be as concise as possible, while still conveying the core information that will be used by the AI agents. Extraneous information that doesn't help an AI agent understand how to use the definition should be excluded. Here is an example of the same details written concisely (good) vs. with extraneous information (bad) for a definition called 'Discounted price':
- Definition details can be written in freeform natural language which does not need to adhere to a specific syntax. If helpful you can use Markdown to format your text, which helps keep your context clear, structured, and easy for other users (and the AI) to read.
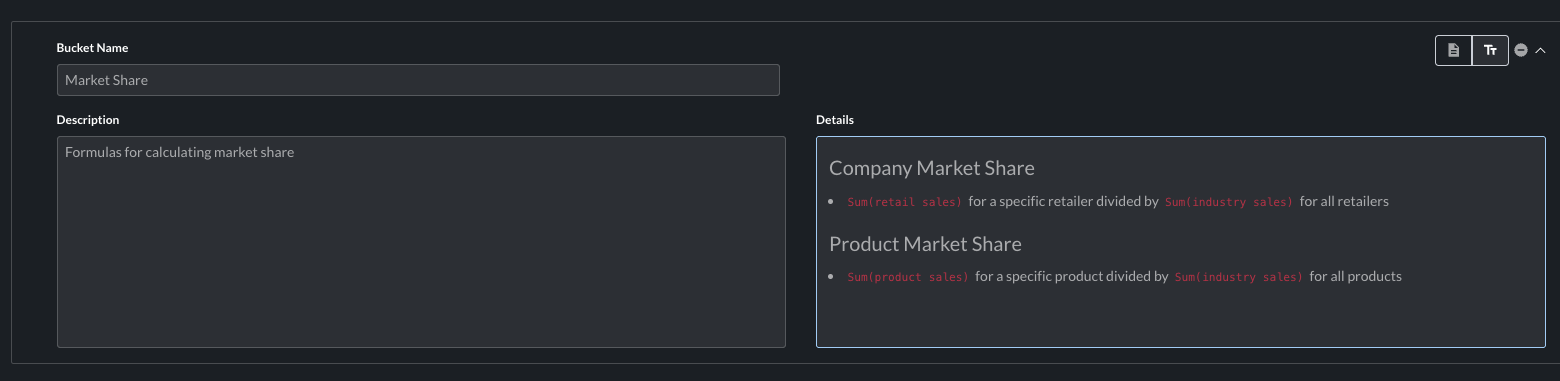
See below for an example of a fully completed bucket using text input:
Adding files into the bucket
Instead of adding context directly by typing into the bucket text input field, you can attach existing documents (sources) if the information already exists elsewhere. You can choose from any documents you have connected to the node (via collection nodes), and the same document can be added to multiple buckets if needed.
You can preview any document before adding it by clicking the eye icon, which will open a preview in a new browser tab.
After creating a new, empty bucket, switch the bucket mode from Text to Source mode using the input mode toggle in the top-right corner of the bucket.
Once in Source mode, start by filling in the Bucket Name and Description fields:
- Bucket Name: A simple, human-readable name for the context bucket.
- Description: A very short description of what the context bucket is (should not include the actual details for the context in the bucket – just a few words to describe what the bucket is at a top level). This description can help the AI understand when or how to use the information contained in the bucket. The Description field is in general an optional field.
Next, add your documents (sources) containing the context information to the bucket:
- In the Details section of the bucket, click Add Sources. This will open the Add Sources page.
- Select the files you want to include using the checkboxes on the left next to each source. You can remove any file at any time using the delete icon on the right-hand side of each source or unchecking a selected source in the checklist on the left side panel.
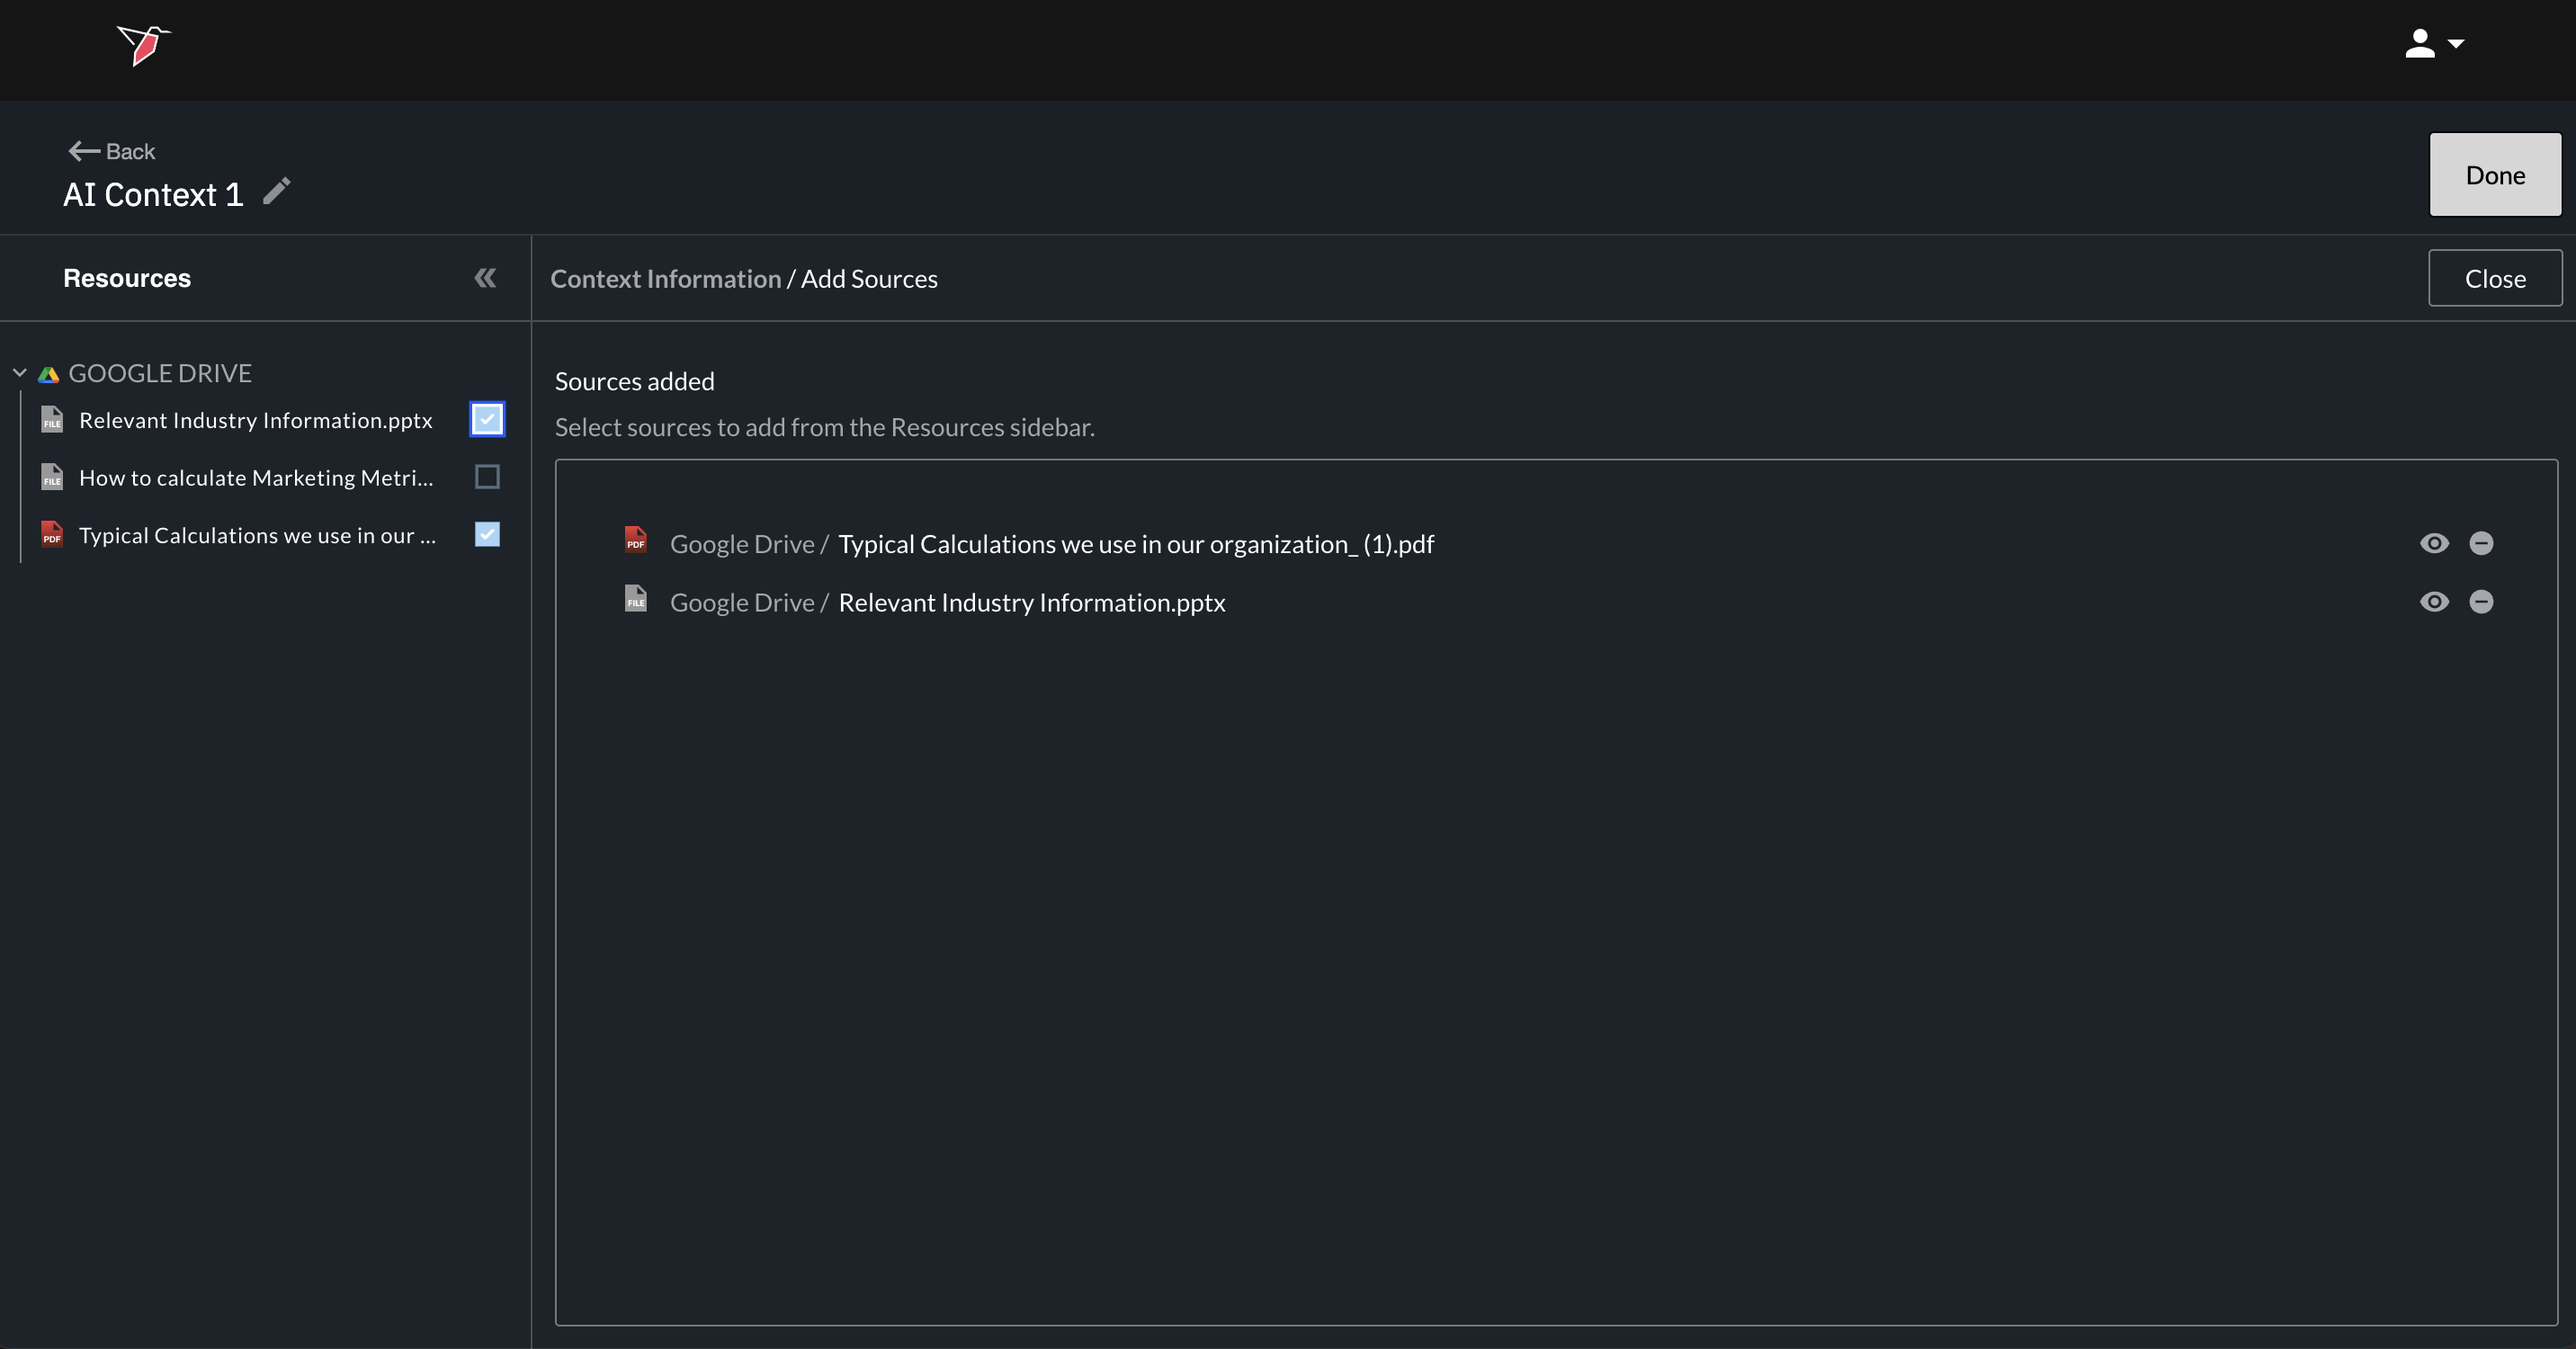
- Once you’ve selected all relevant sources, click Close.
- The selected sources will now appear in the bucket.
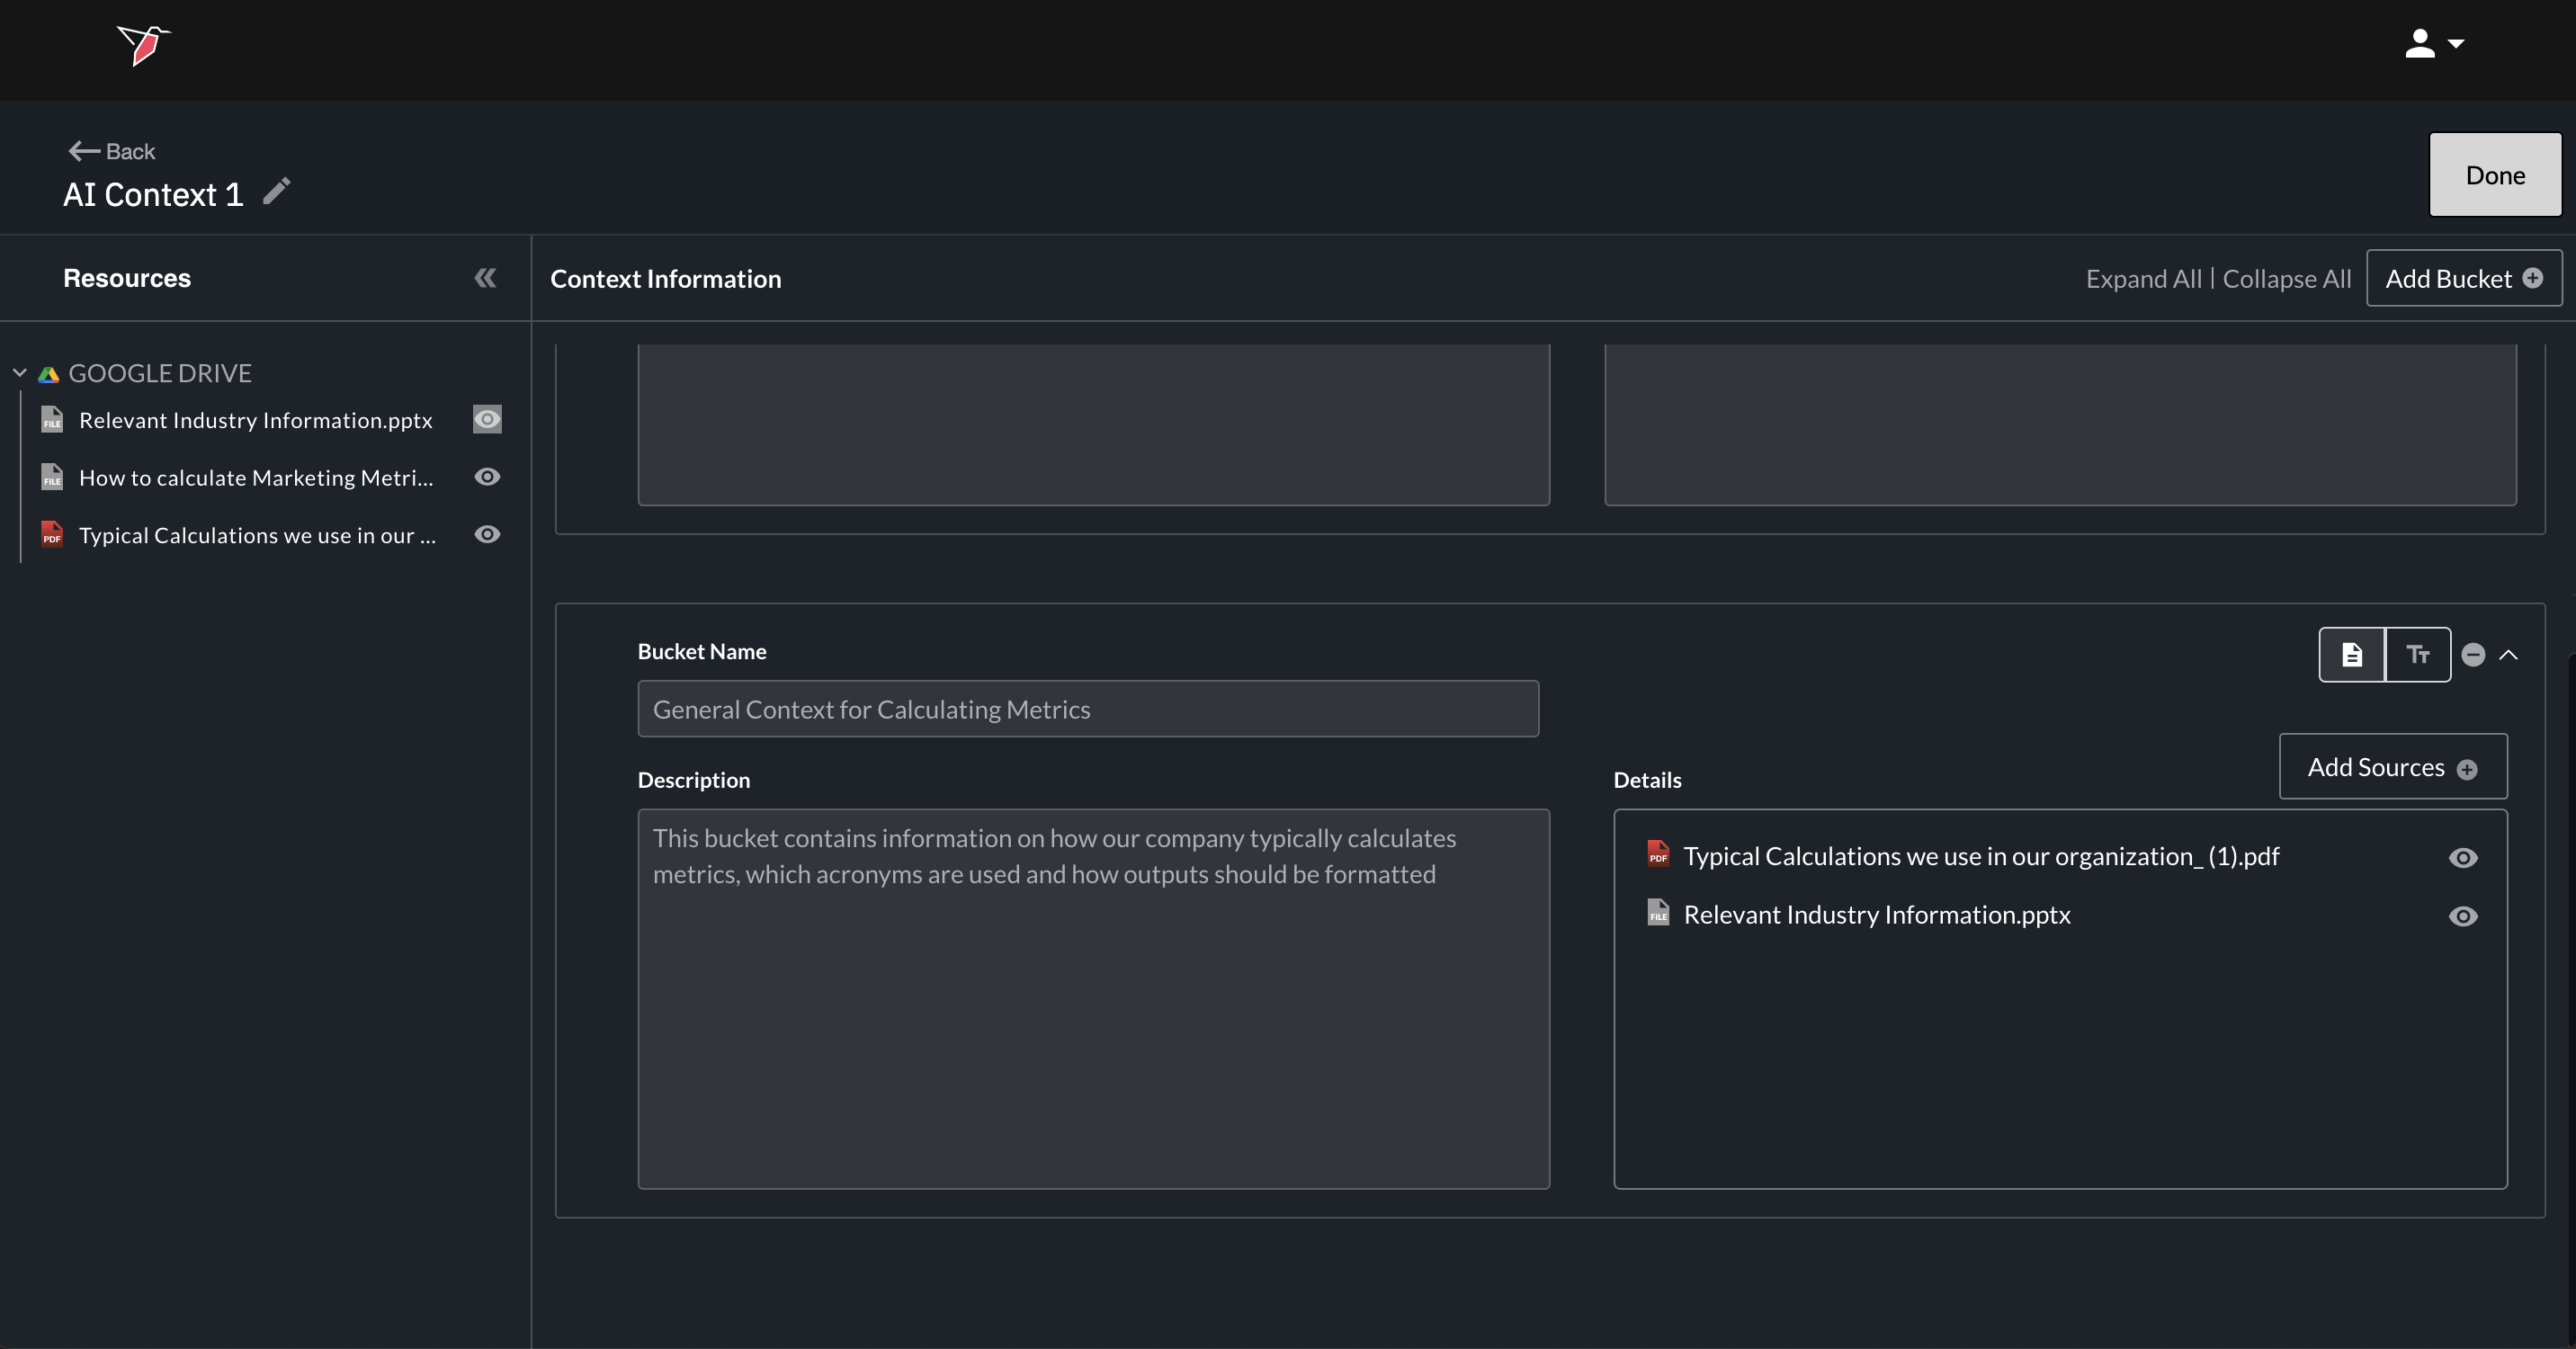
- You can continue adding additional buckets as needed, following the same flow (using either Text or Source mode for each one)
- Click Done to finalize your AI Context Node configuration.
How to Use AI Context Node Within Your Workflow
One or more context nodes can be connected to the relevant node where the context is being used. If you want the agent to take all available context into account, no additional action is required. However, if you want the agent to use only specific parts of the context for example, certain buckets for certain types of questions—you can specify this in the tool, for example in the prompt box in AI DT or in the agent’s custom logic in AI Chat. See the guides for the respective tools on how to implement this these.