Running Nodes and Workflows
Running Nodes
Once you have added one or more nodes to the canvas, you must run them to execute the processes they represent, such as data collection, transformation, processing or refreshing the output.
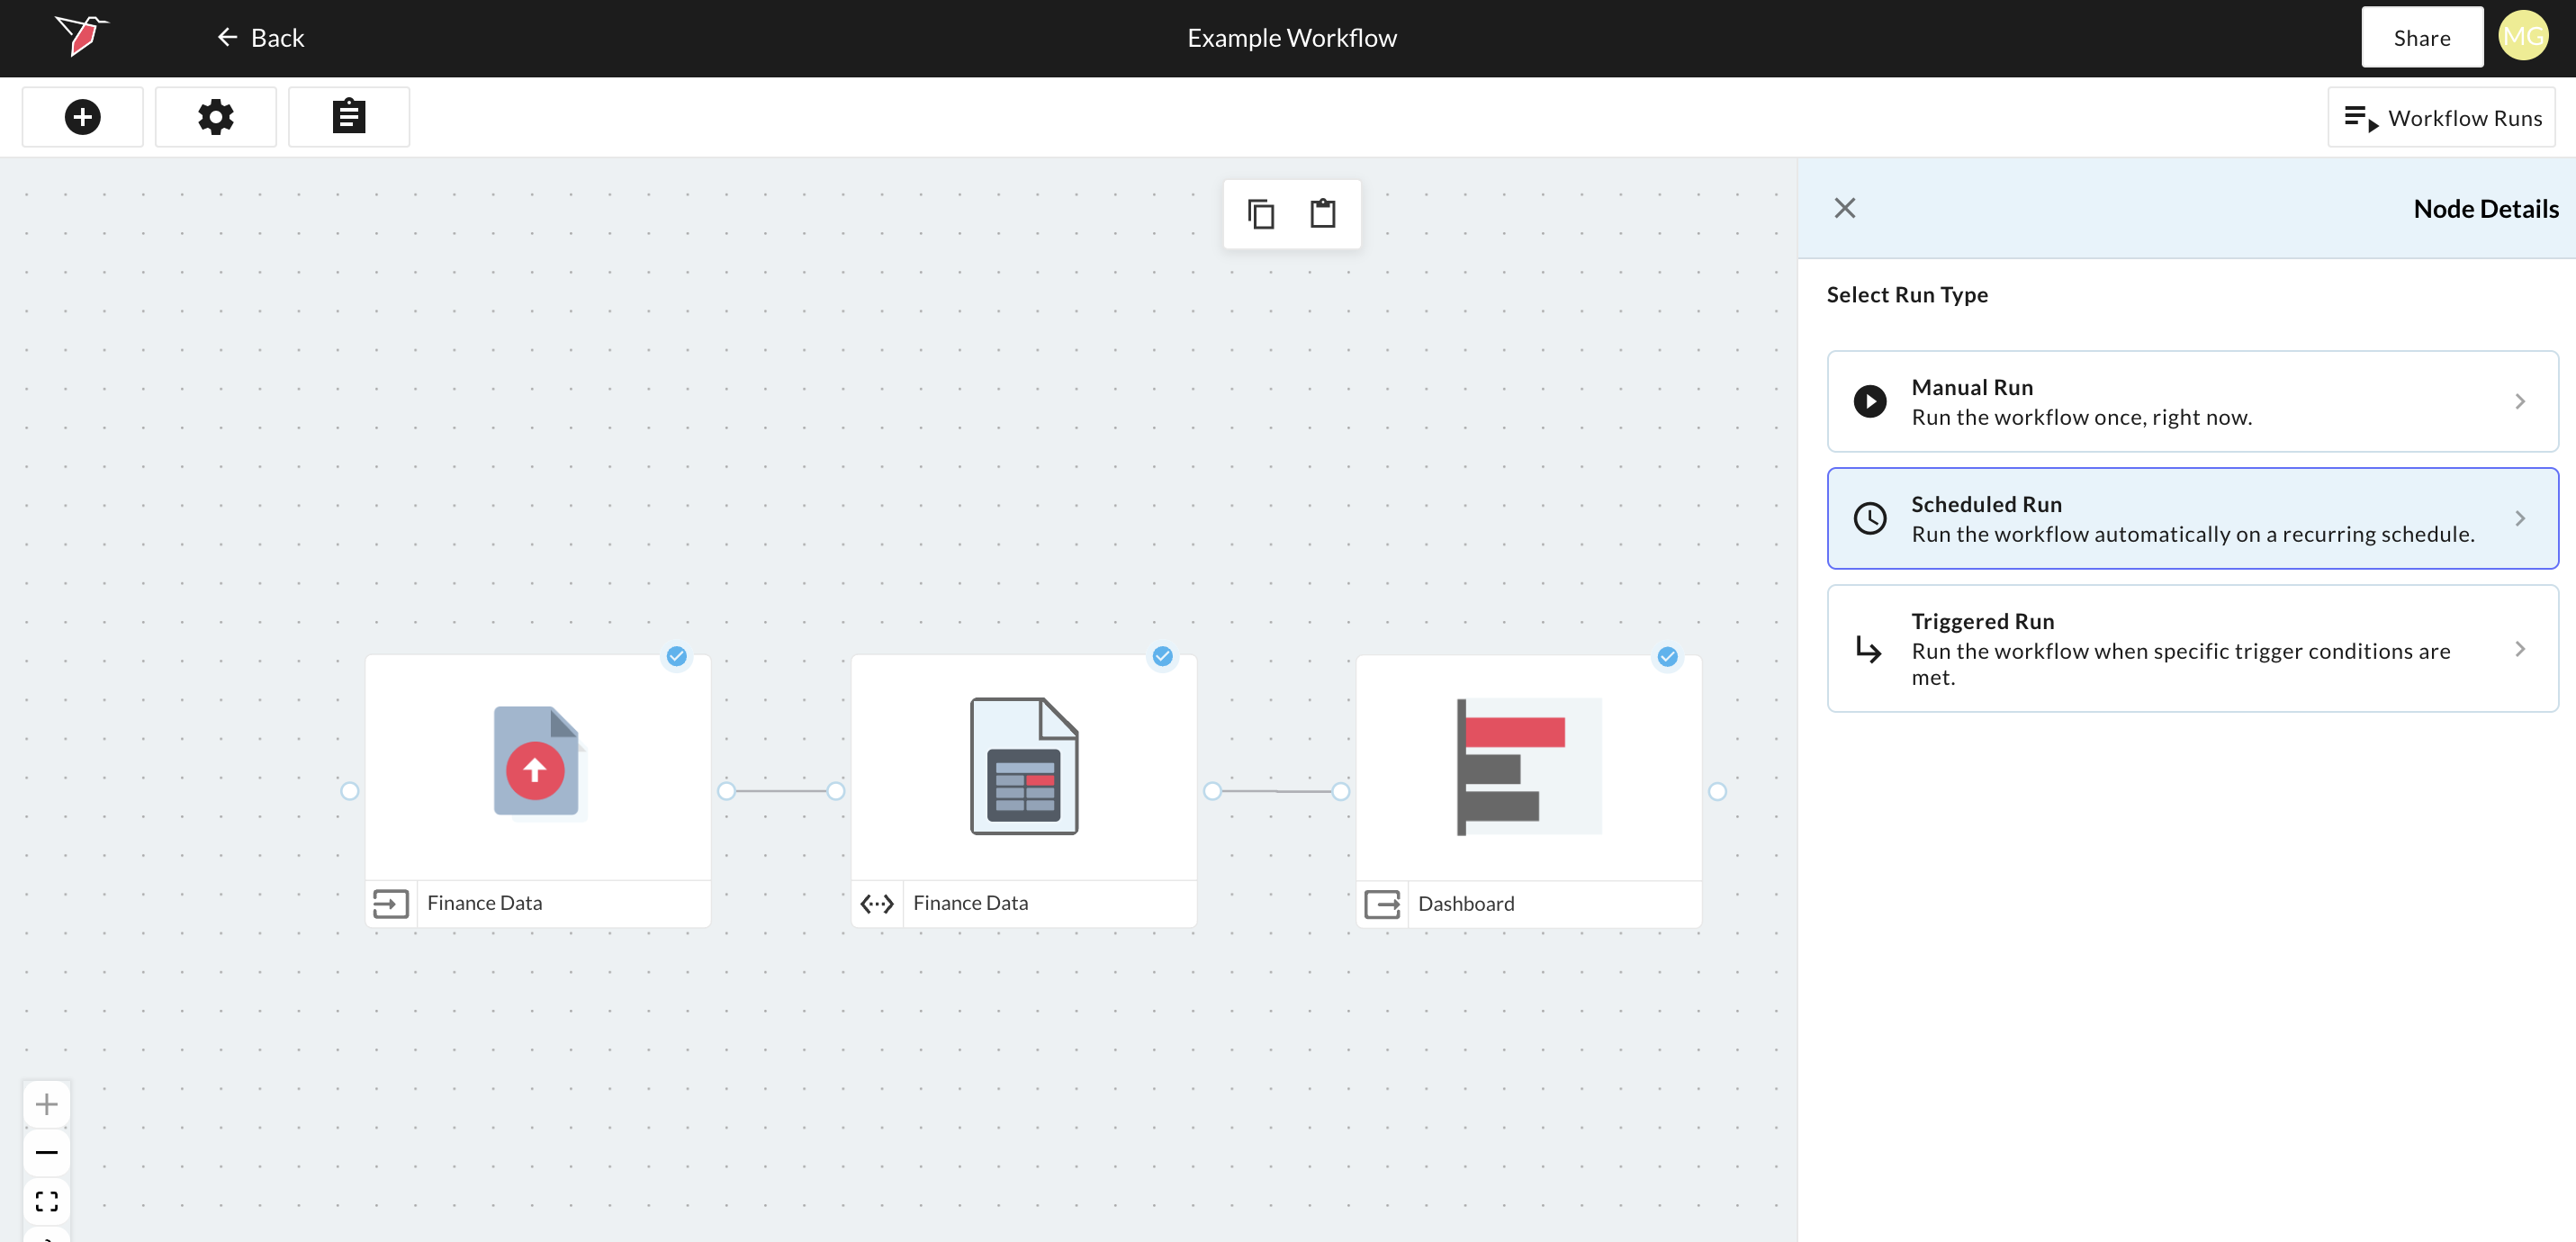
There are 4 ways to run nodes:
- Single Node Manual Run run a single node manually
- Workflow Manual Run: run multiple nodes together as an ad hoc manual run
- Scheduled Run: run the workflow automatically on a recurring schedule
- Triggered Run: run the workflow when specific trigger conditions are met
The sections below describe each option.
1. Running a single node manually
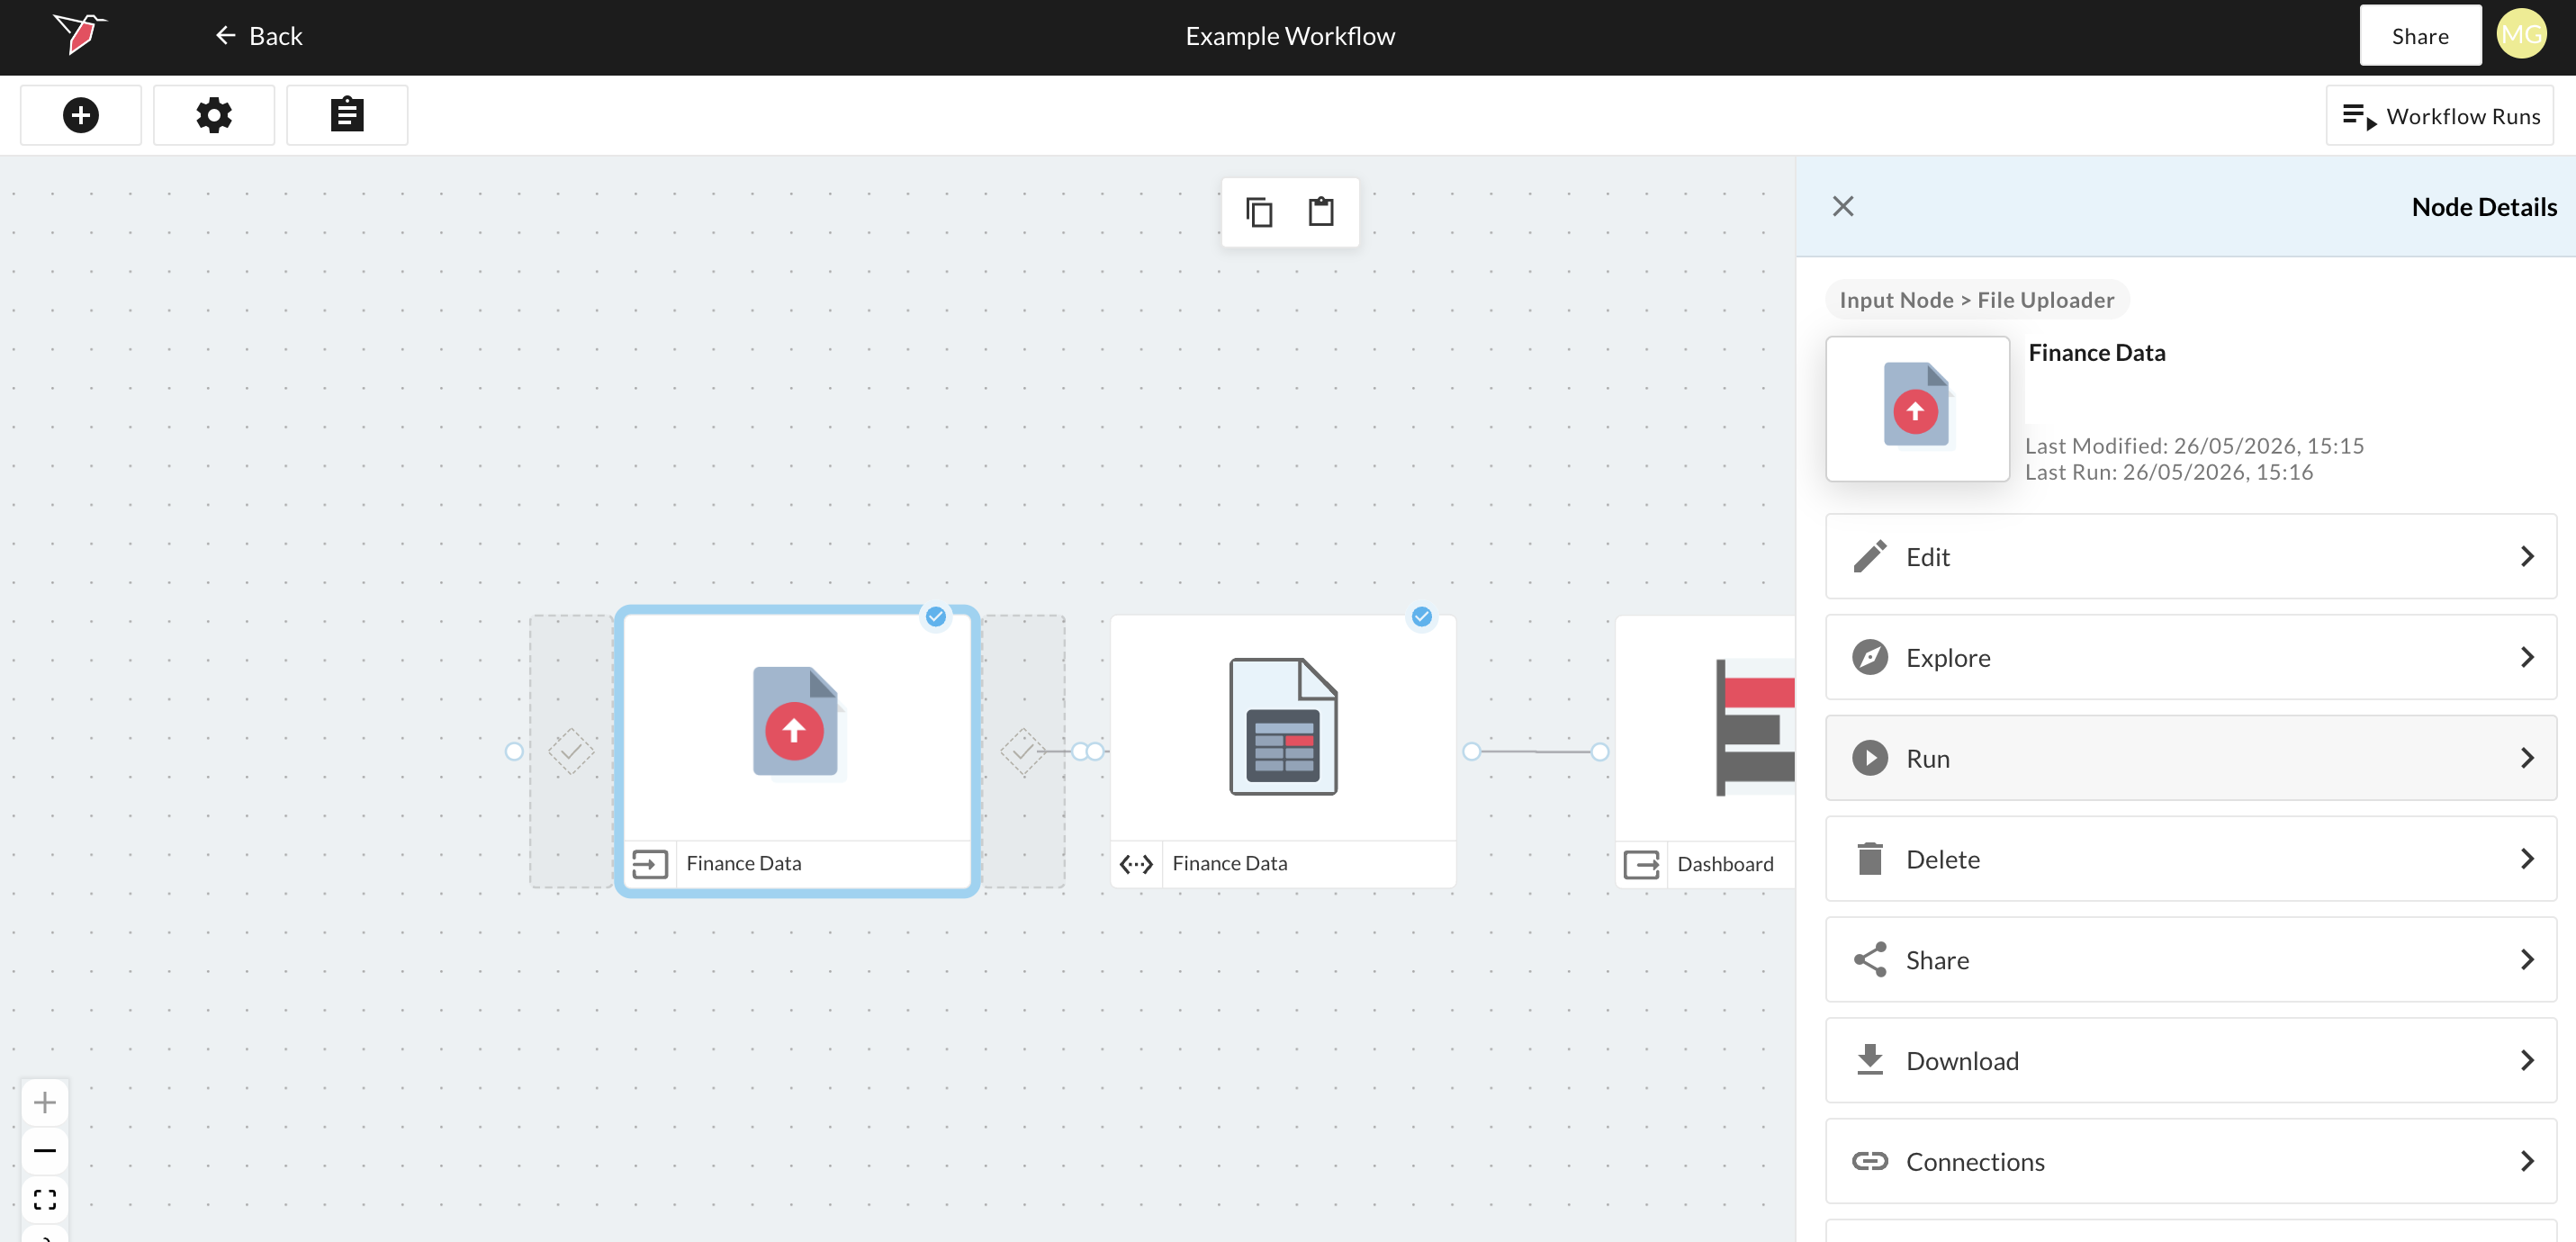
You can run an individual node on its own to execute only the process tied to that node.
To do this, select the node on the canvas and click Run in the right-side panel. Only the selected node will be run.
This approach is useful when you want to run one specific part of a workflow independently.
2. Run multiple nodes manually
You can run multiple nodes together as a one-time workflow directly from the canvas. This type of run executes immediately and also saves the configuration of nodes selected as a reusable workflow in case required to re-run in the future.
Click the Workflow Runs button in the top-right corner of the canvas to open up the canvas right-side panel.
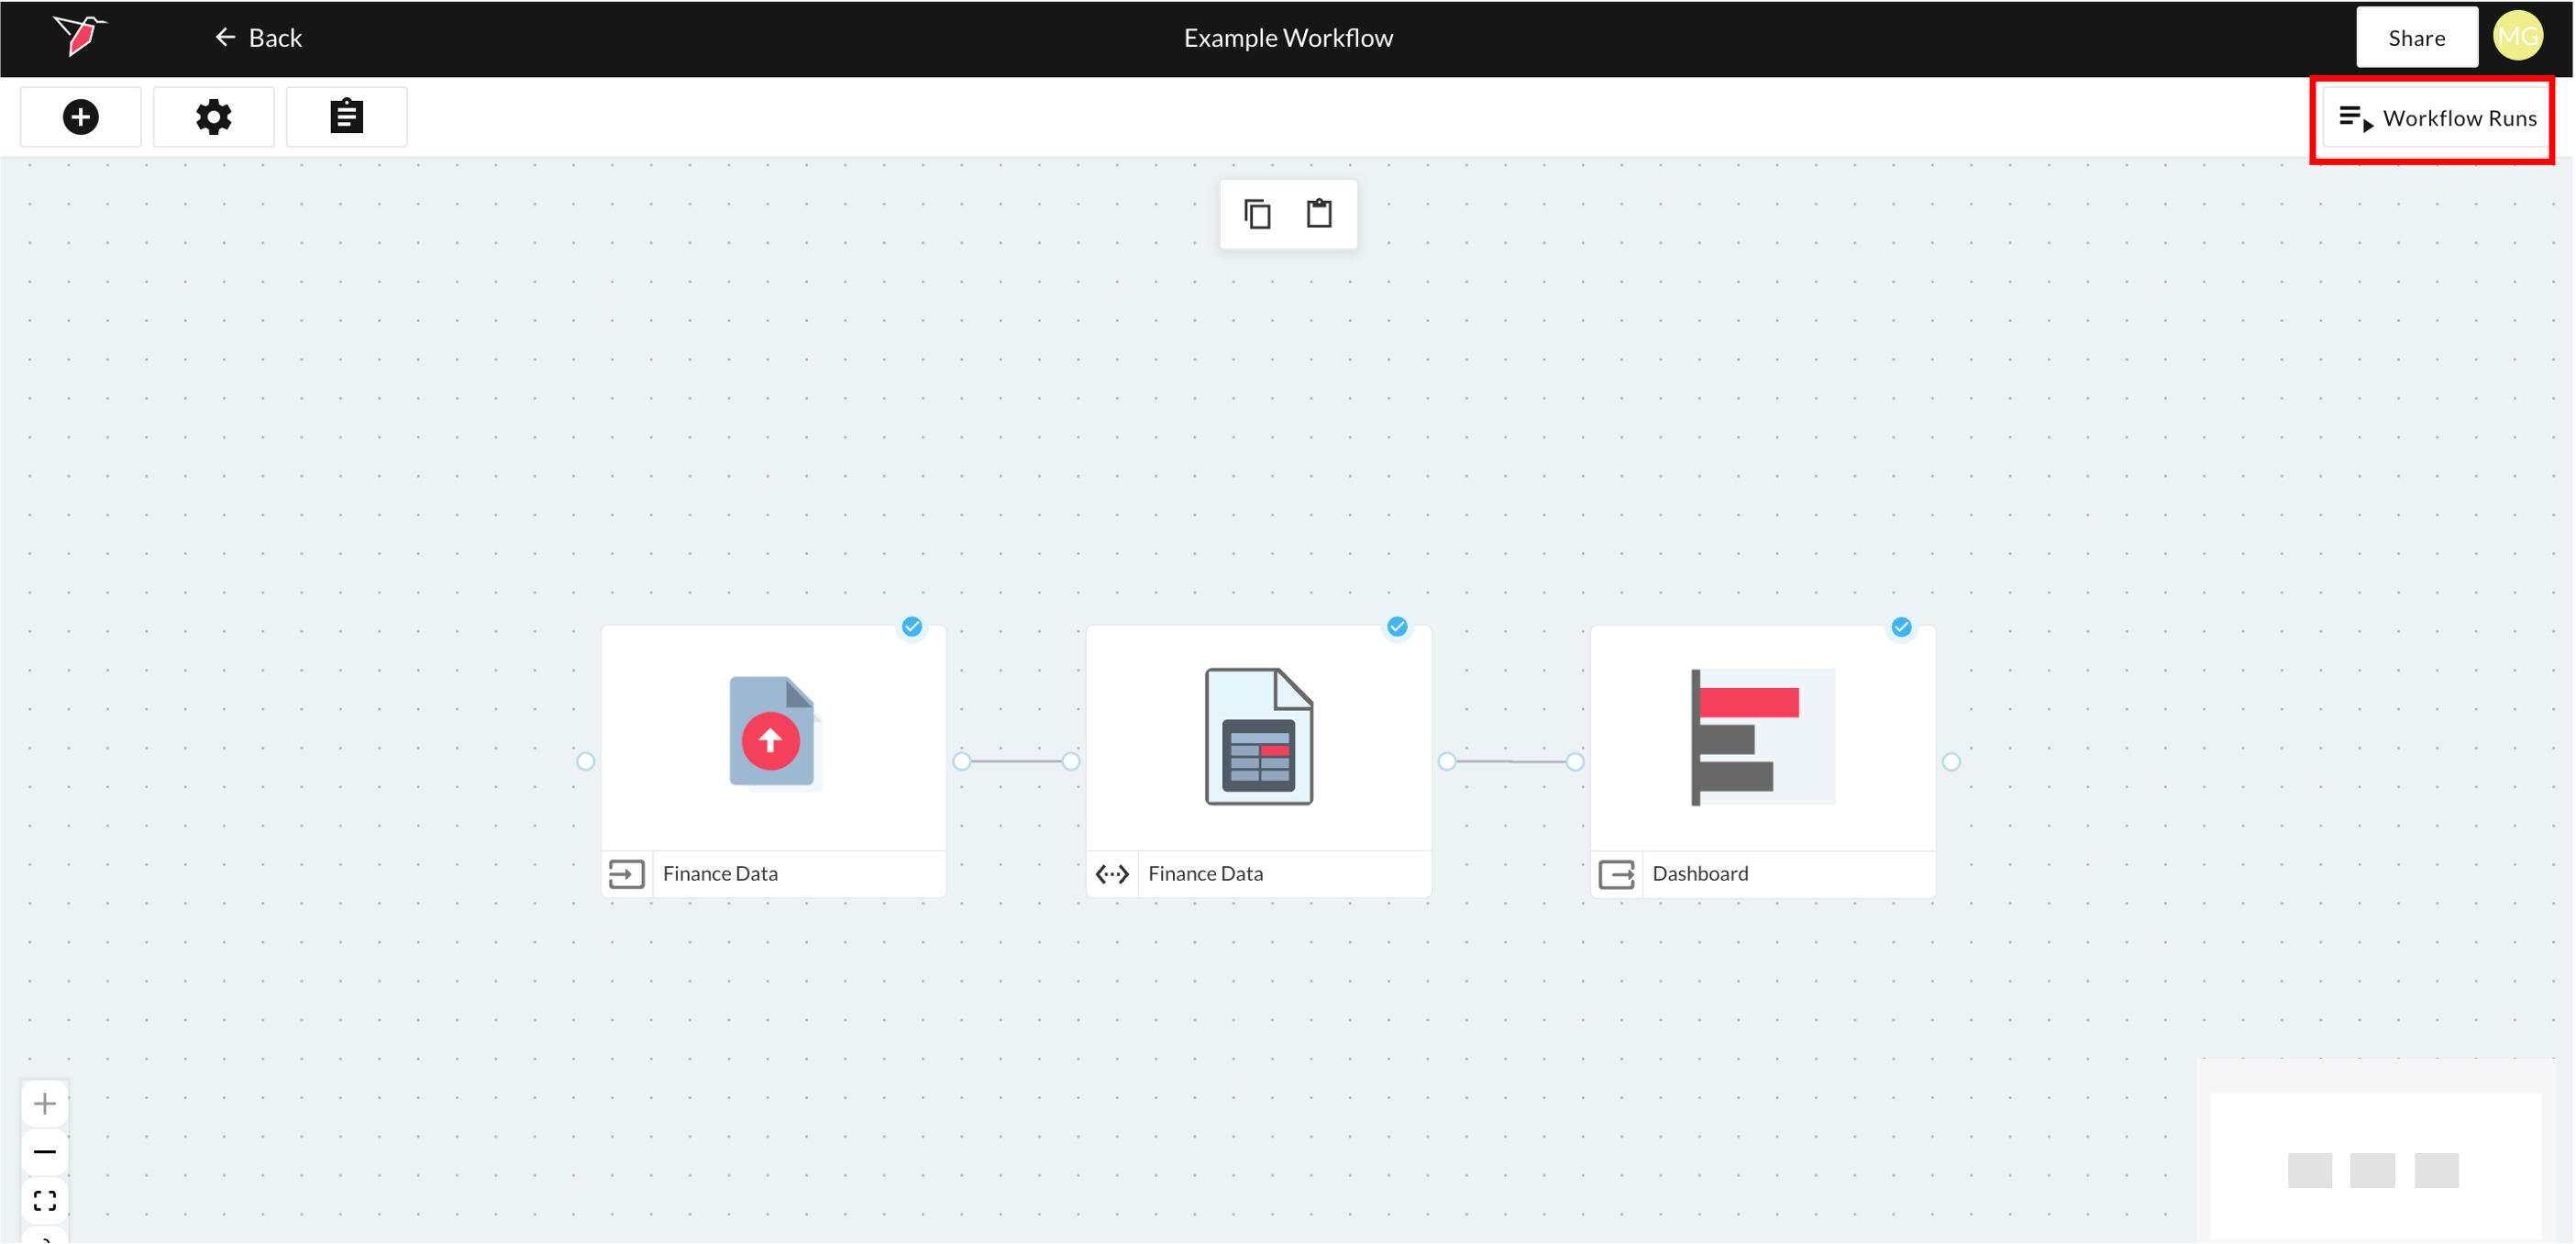
Click + Run

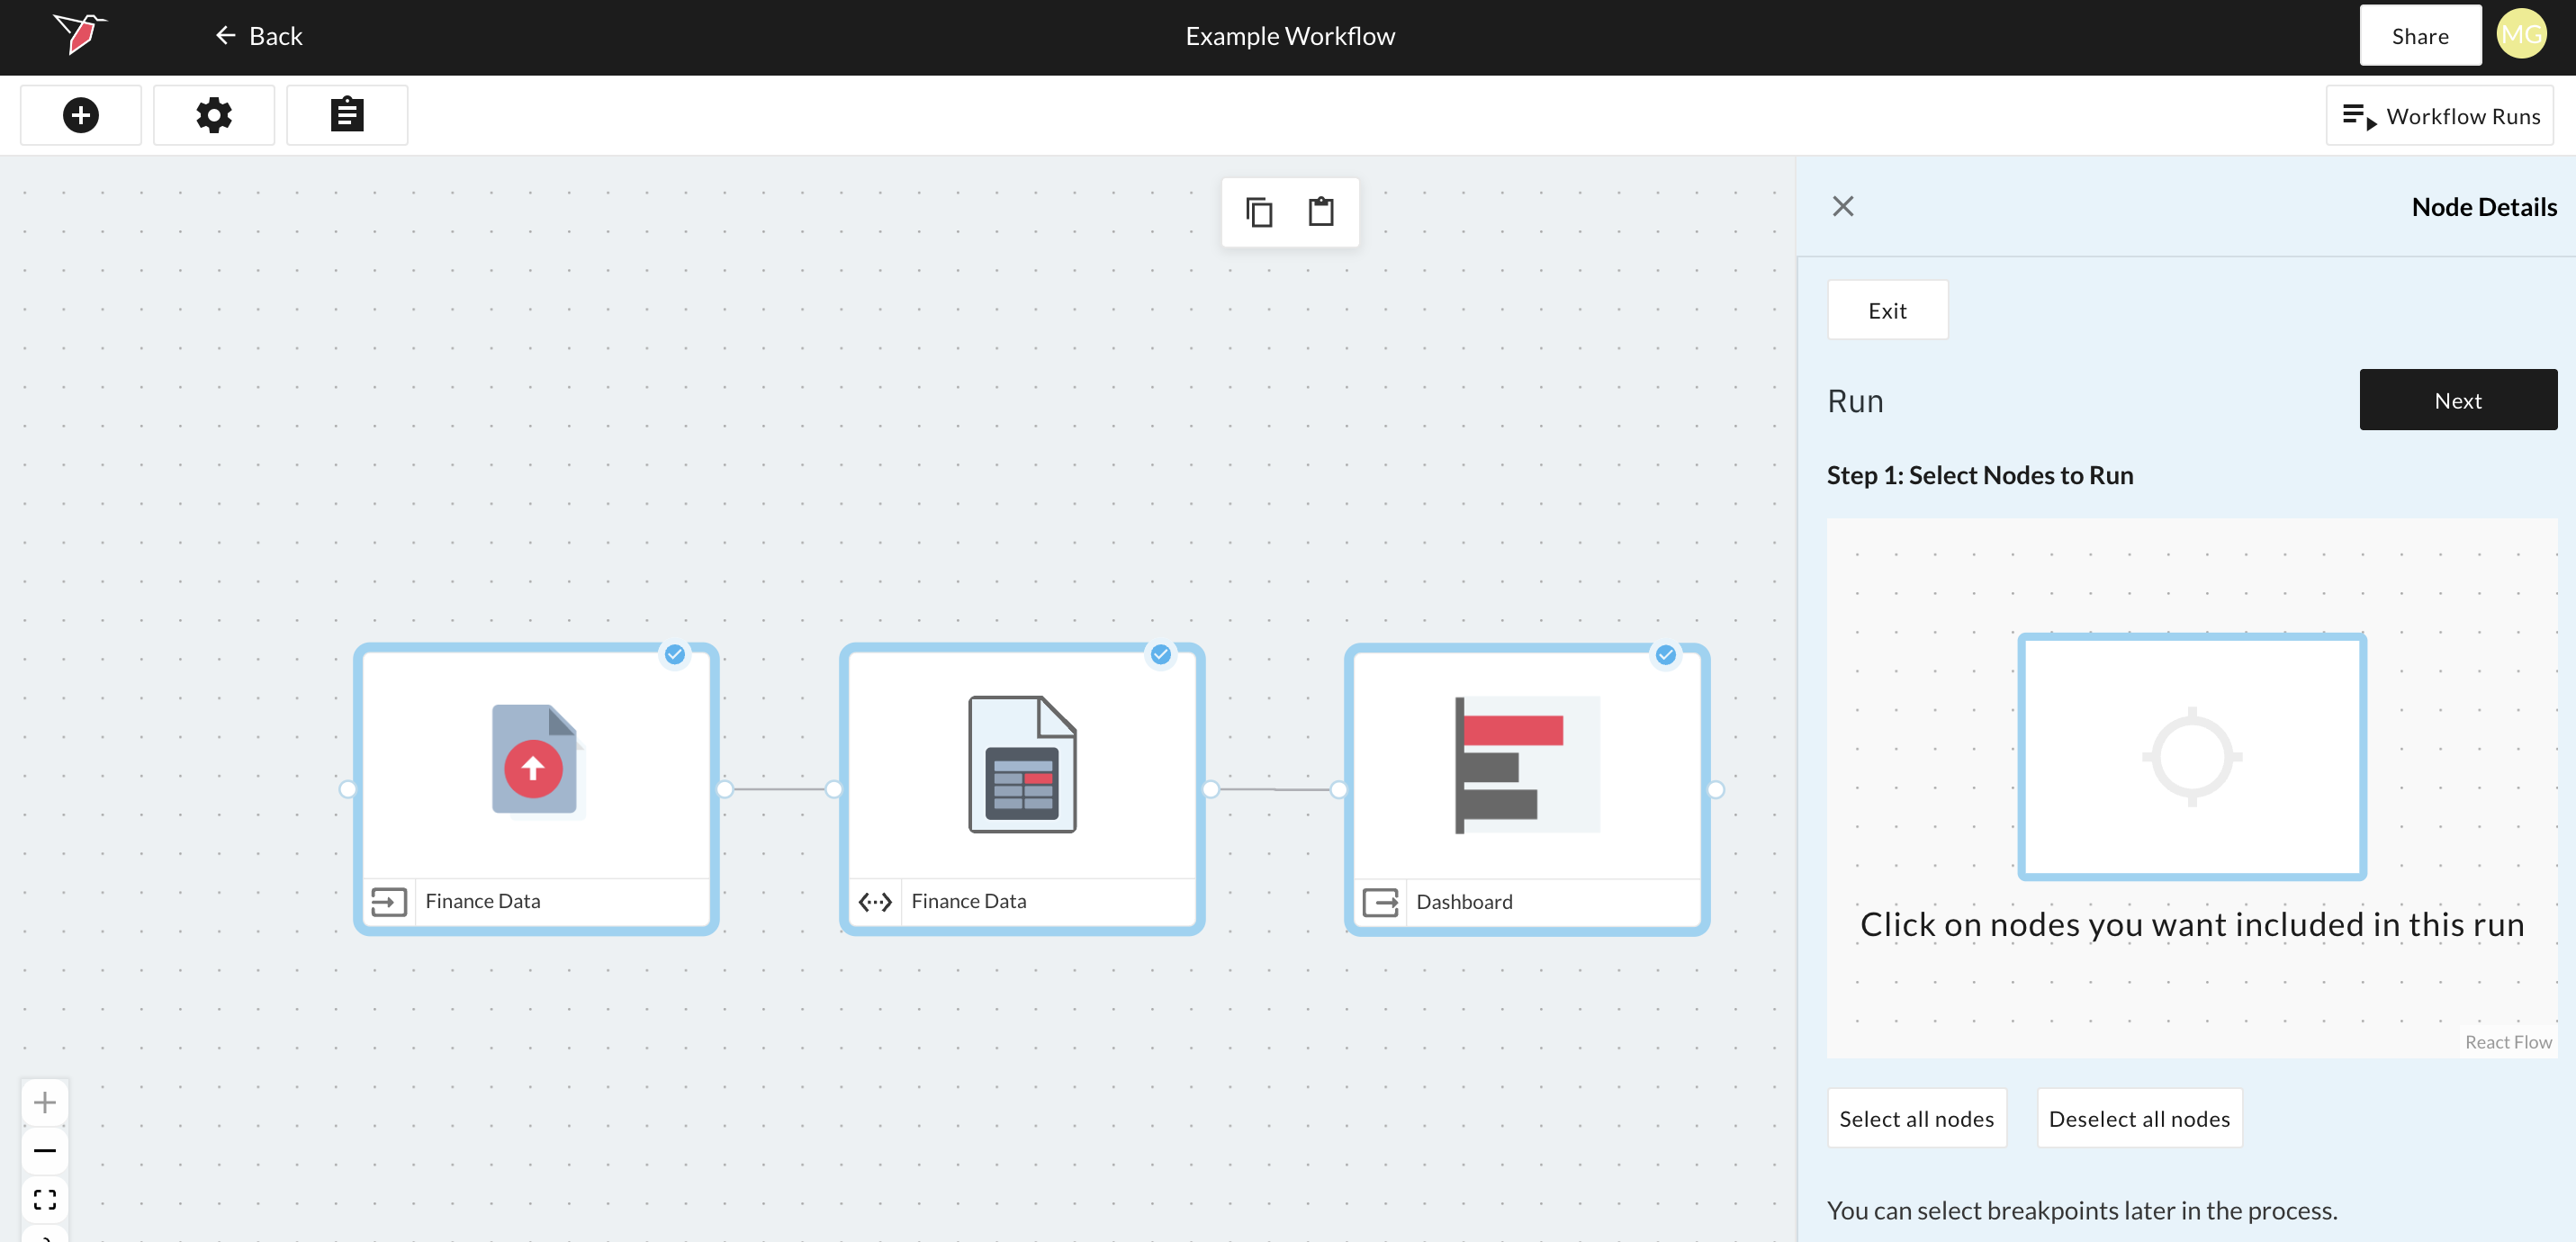
Select Manual Run from the list of Run types available.

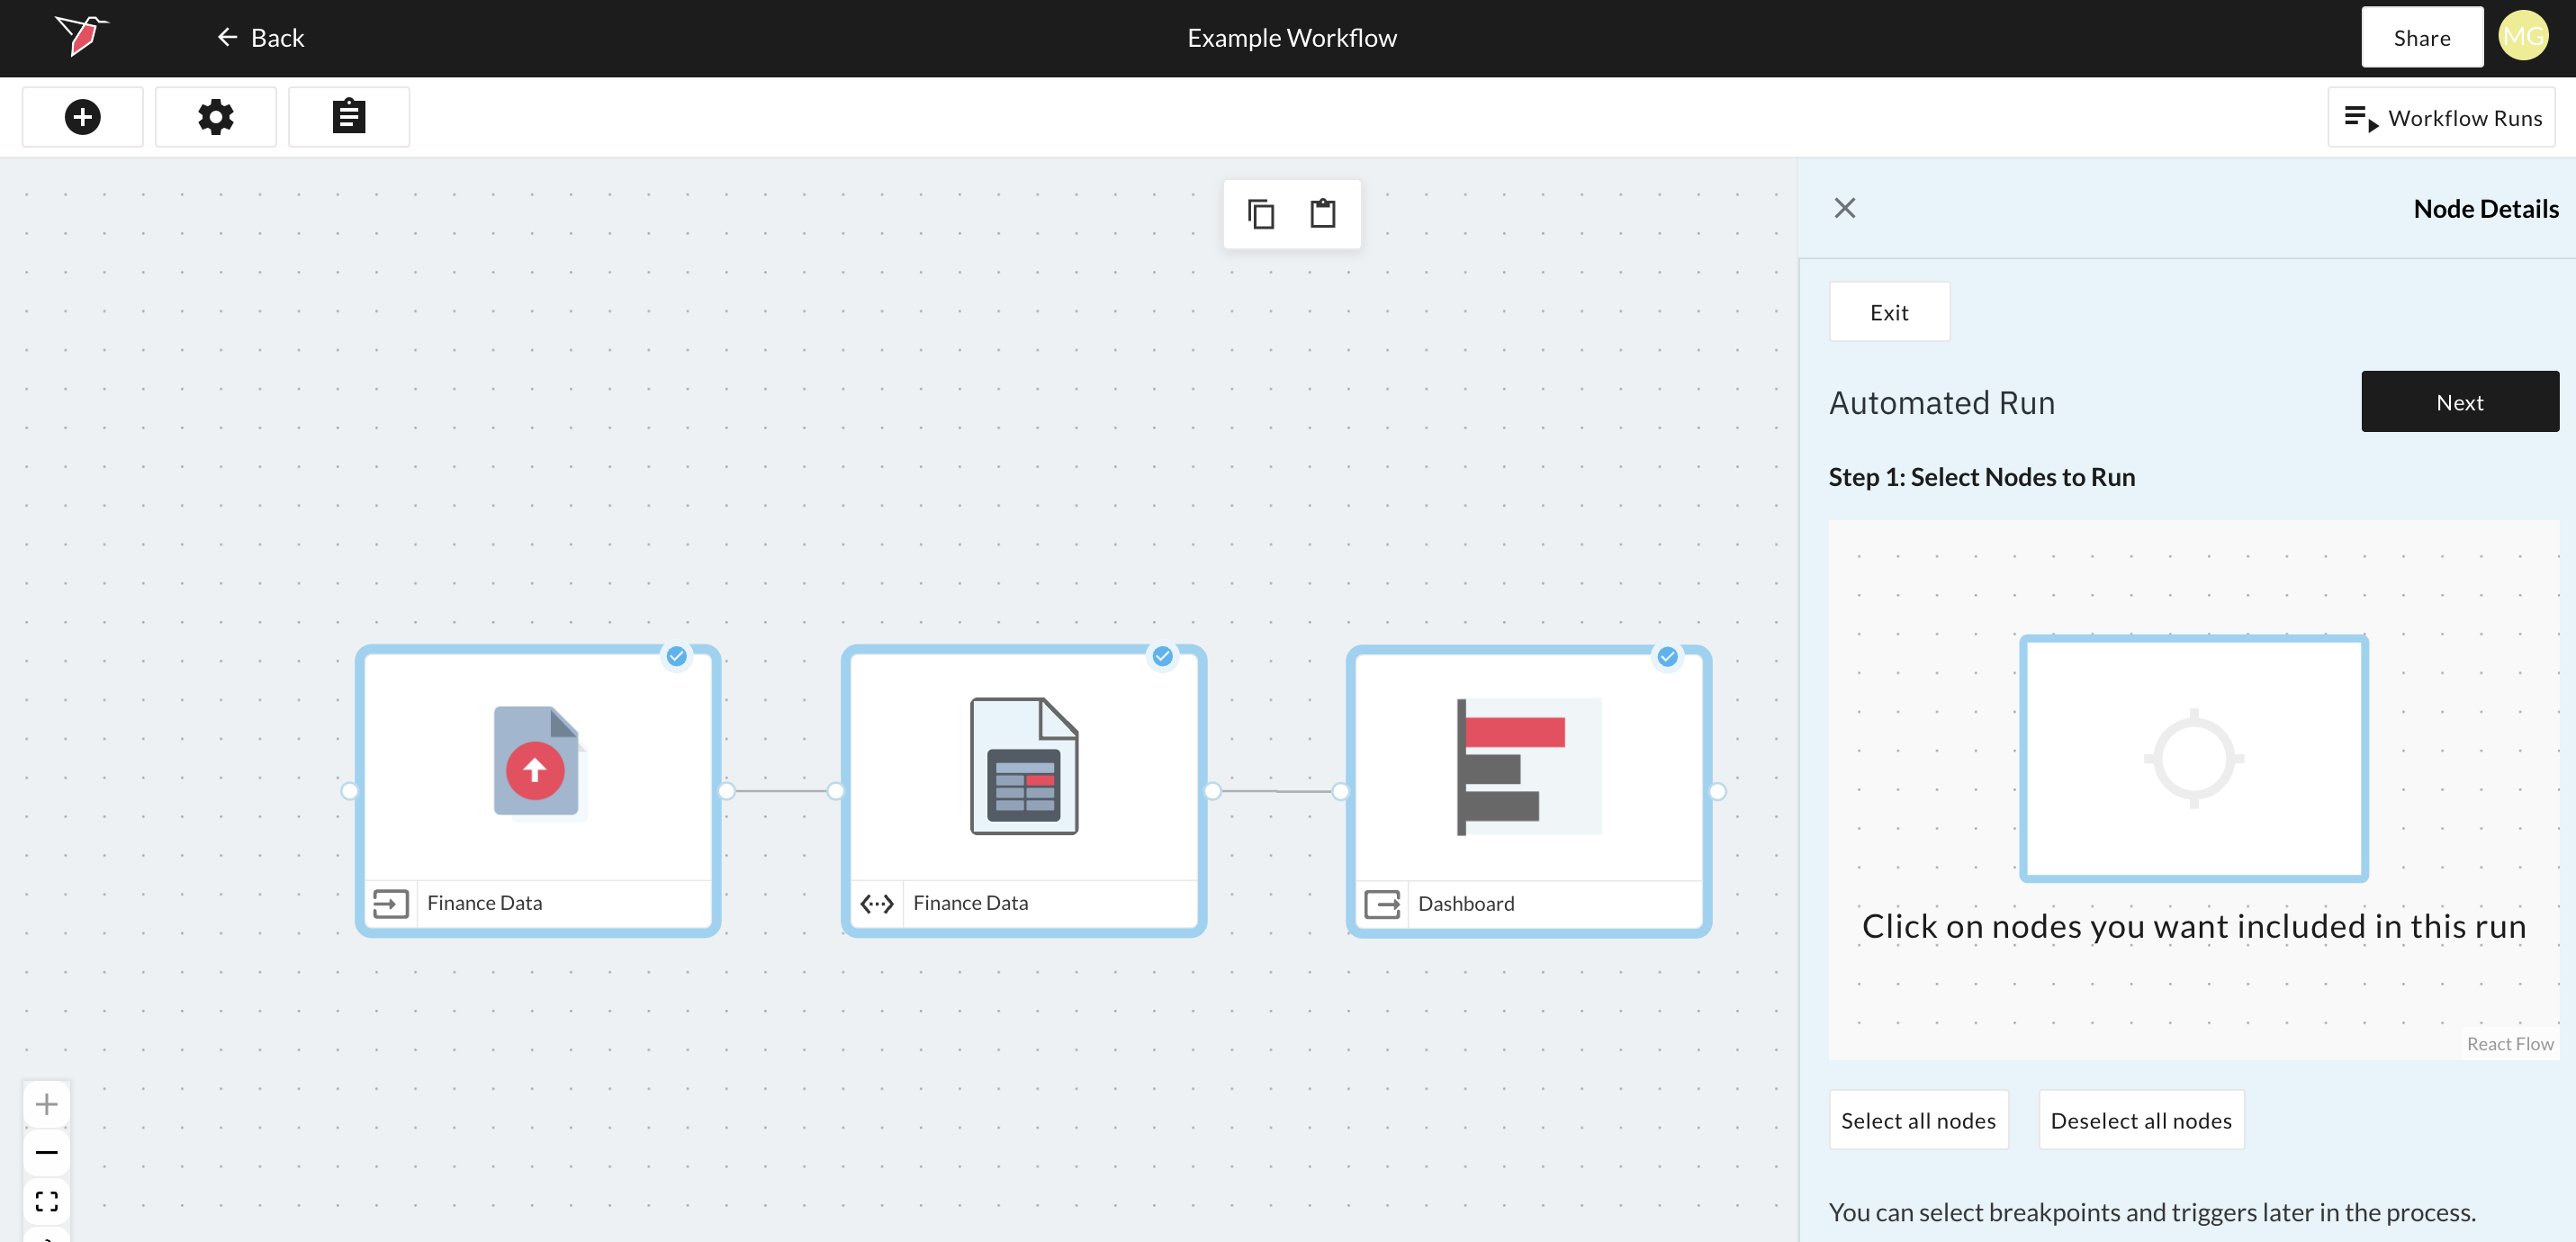
Select the nodes you wish to include in the run, then click Next.
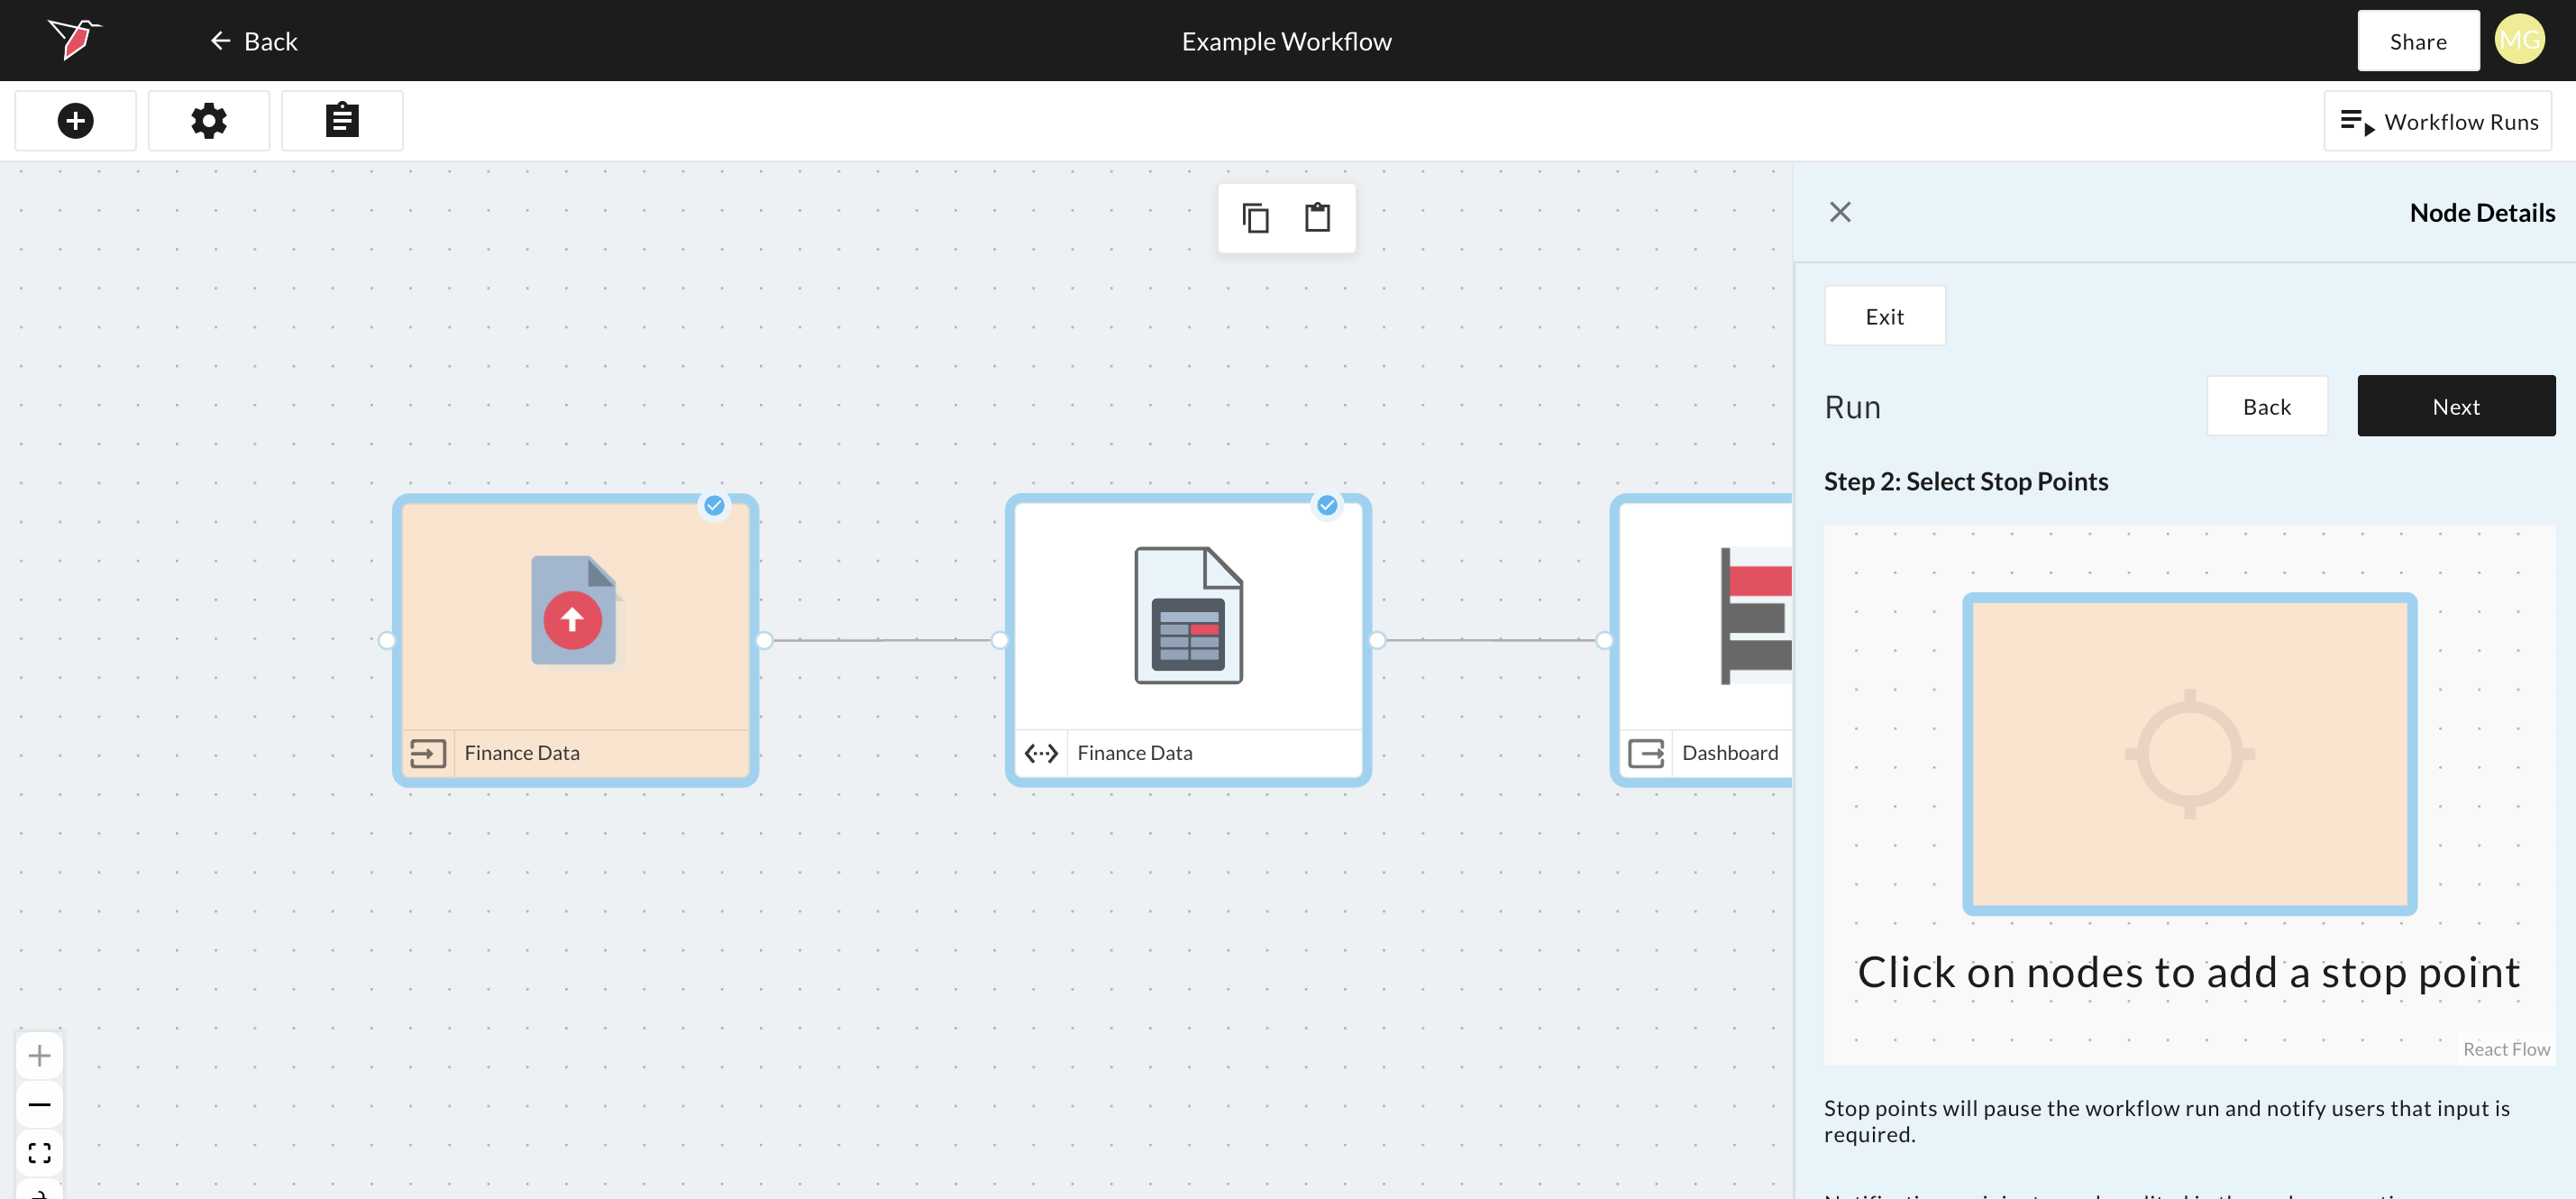
You can also optionally add stop points to a run. Stop points pause the workflow during execution and notify users that input is required before the run can continue. At run time, users will need to manually provide input then continue the run by clicking continue on the node(s) with the stop point(s) by clicking continue.
Select the nodes where you want user input to be provided at run time. Any nodes selected as stop points will be highlighted in orange on the canvas.
Click Next when added or if you want to skip past this step.
A default name will be given to the run which you can overwrite if desired.
Click Start Run to kick off the run.
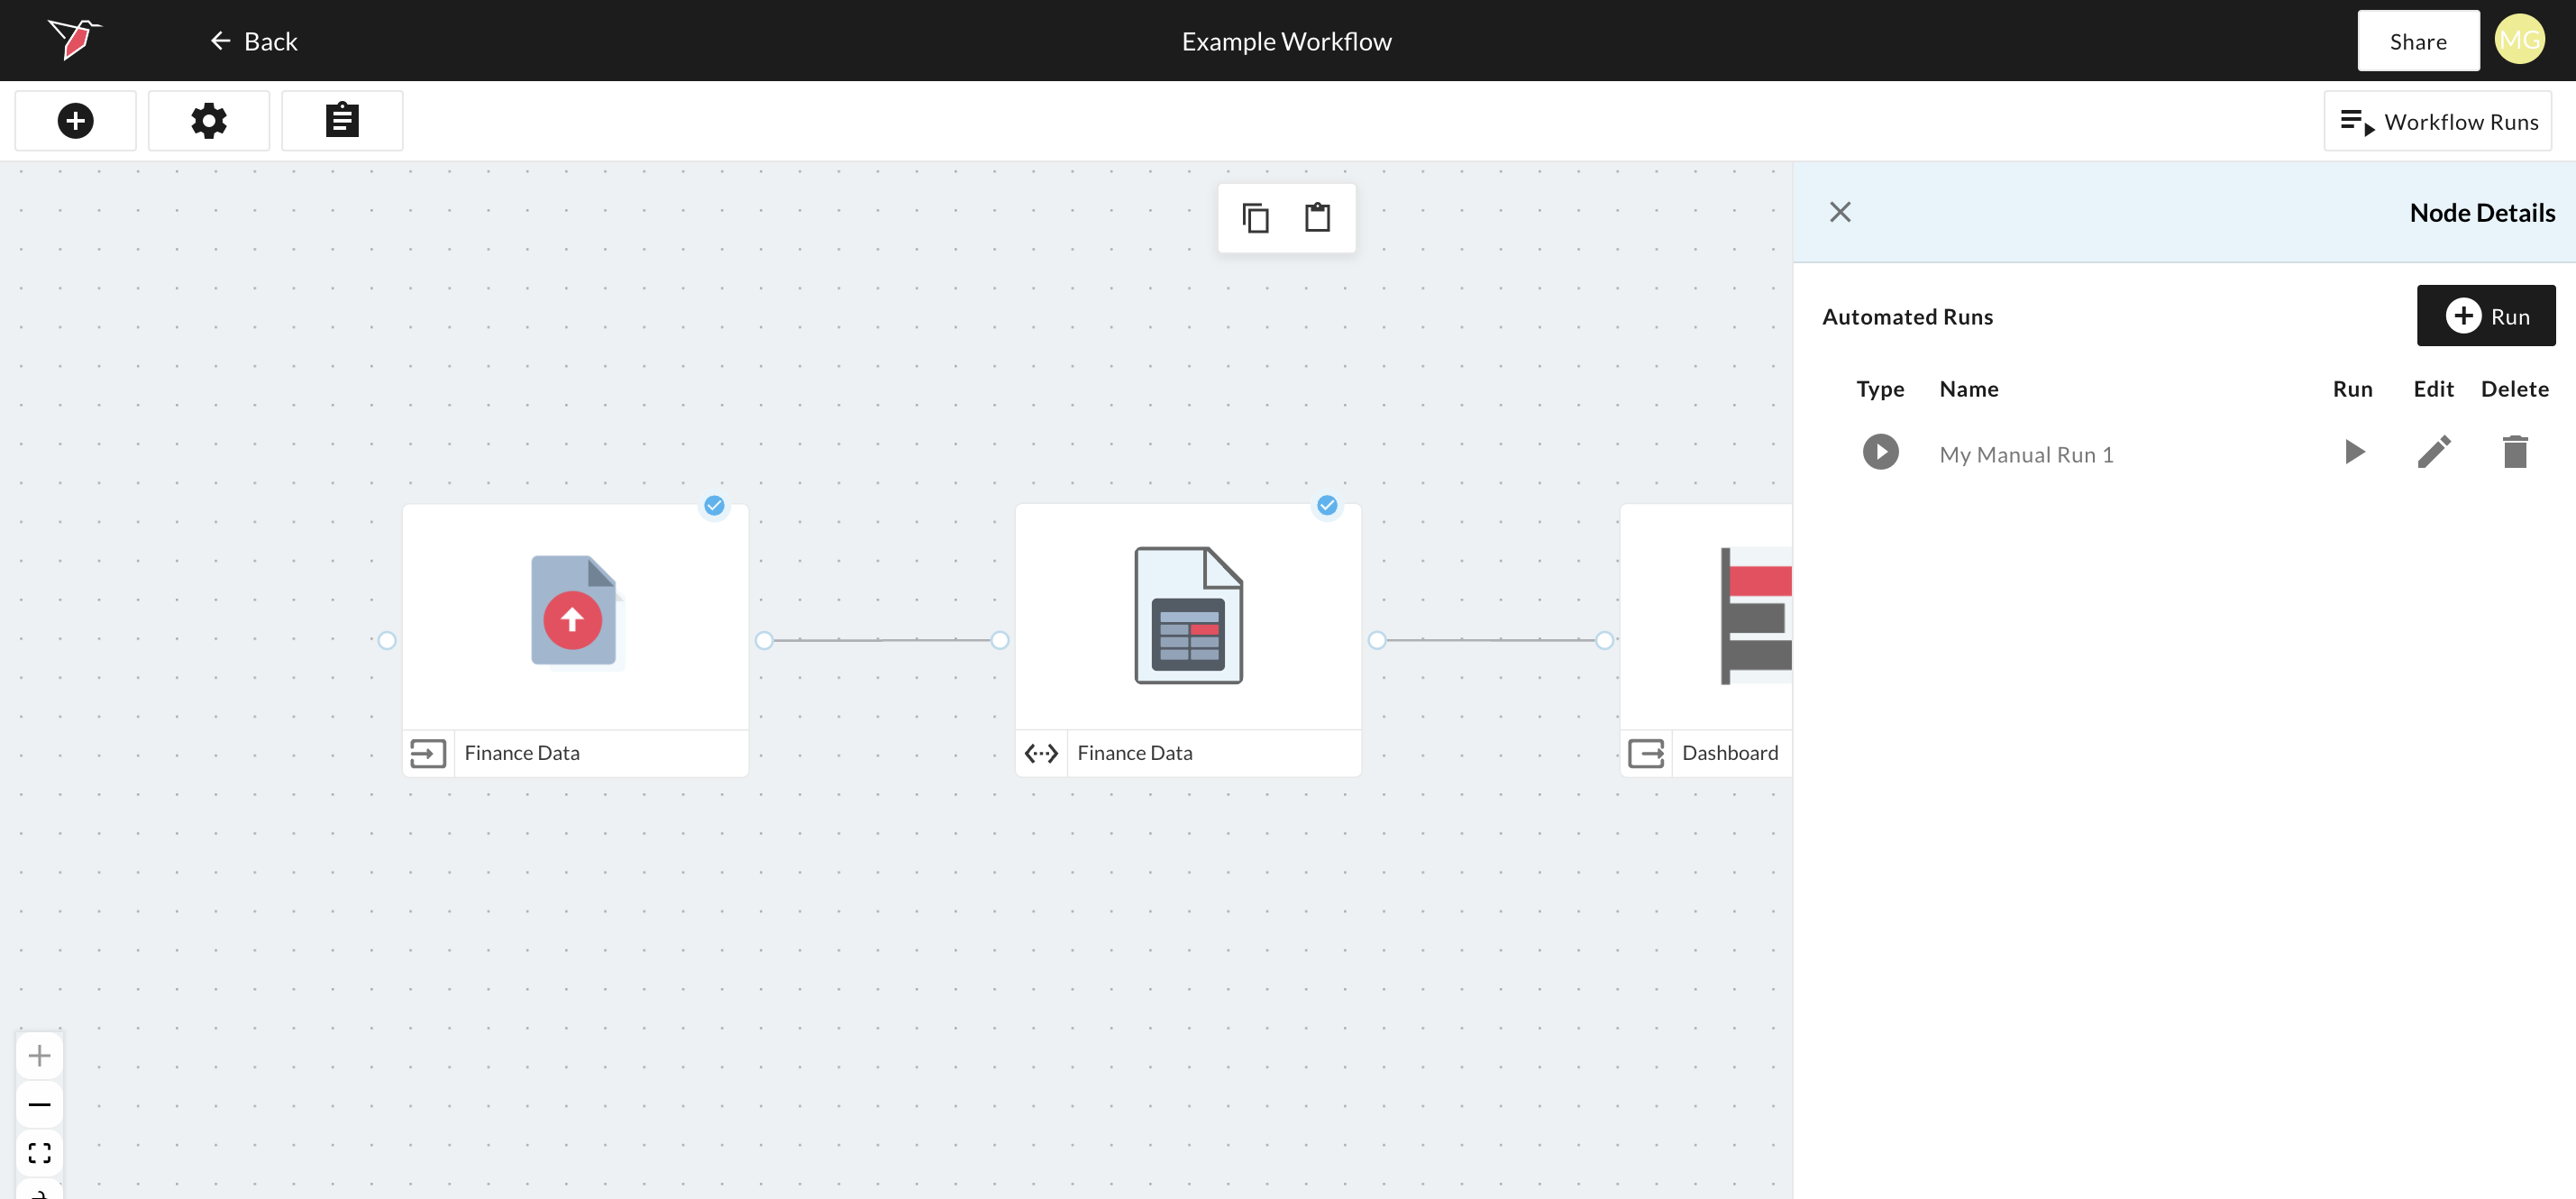
Note you will see it saved in the list of runs for use again if required. You can also edit or delete the run from this panel.
3. Scheduled run
Scheduled runs allow you to configure reusable workflows that execute one or more nodes together on a schedule.
You can create multiple scheduled runs on the same canvas, each including a different set of nodes. These runs can be managed and executed independently.
To create an scheduled run:
- Click Workflow Runs on the top-right of a workflow canvas then click "+ Run" --> Scheduled Run
- Select the nodes you would like to run in this automation by clicking on each of them.
- Click Next to select Stop Points. Stop points allow you to pause an automated run to make configuration overrides for that specific run. Once stop points have been selected or if you wish to skip this step, click Next.
- Configure the run schedule:
- Schedules allow this selection of nodes to be run in time increments of minutes, days, weeks, or months with a start date and time and an end date and time.
- You can also select whether to skip workflow runs if it encounters a failure a certain amount of times.
This example schedule below would start at 13:31 pm and run every one day at midnight. Since there's no end date on this example it would run every day in perpetuity.
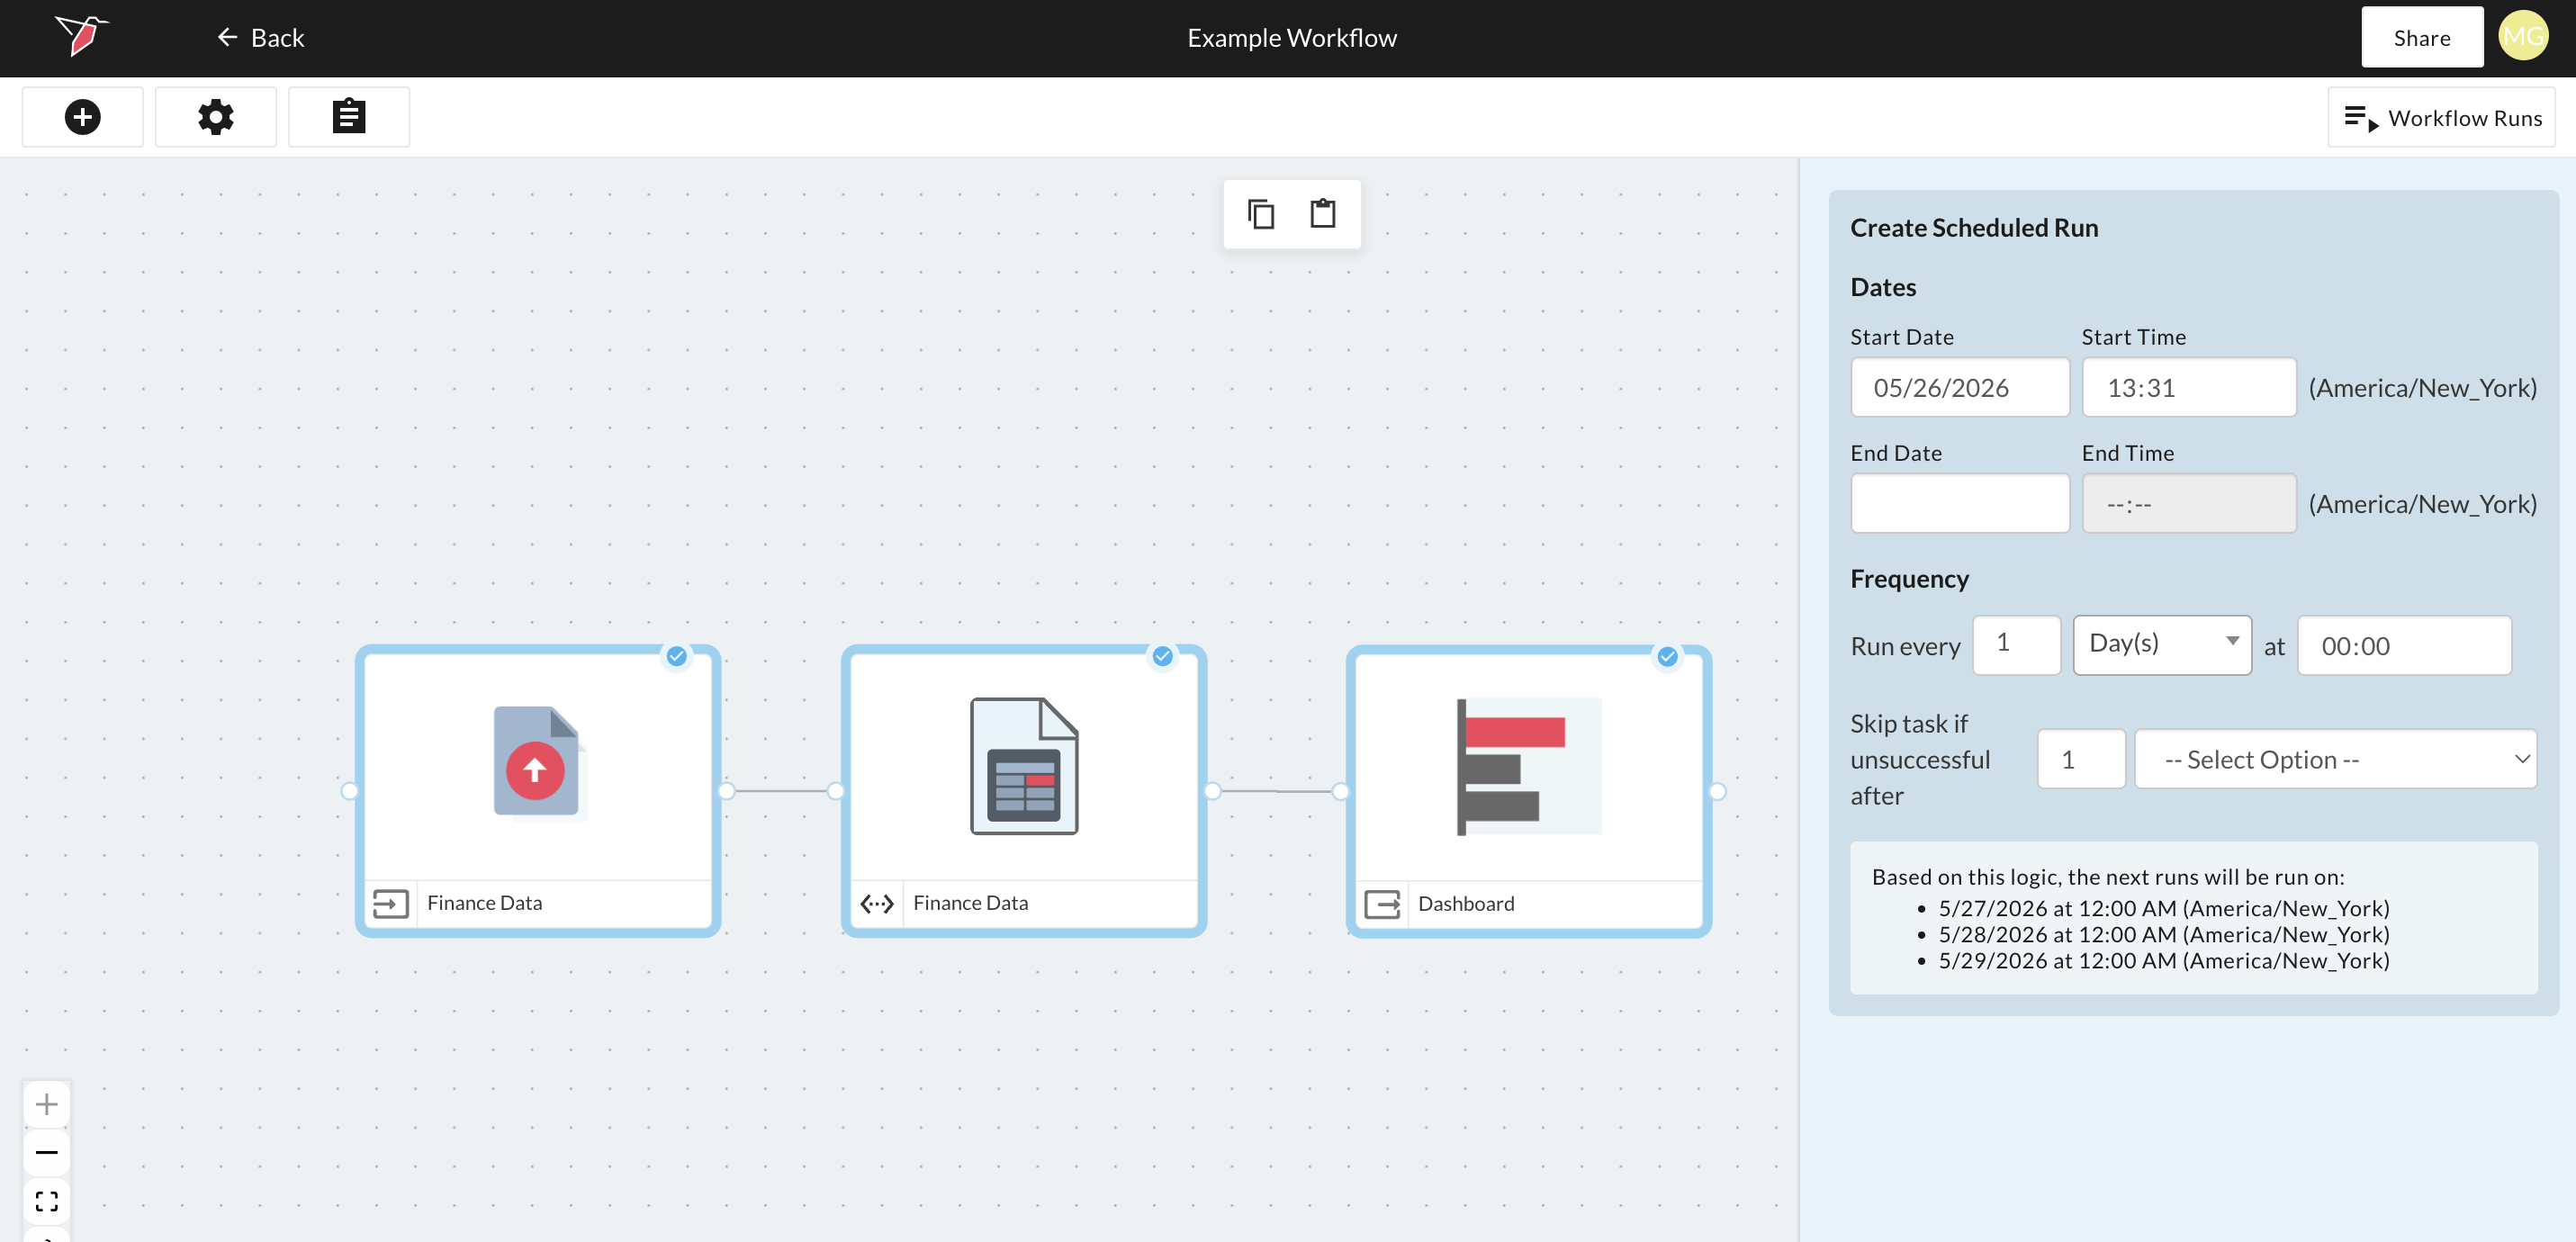
d. Click "Next" to go to Step 4 - Event handling.
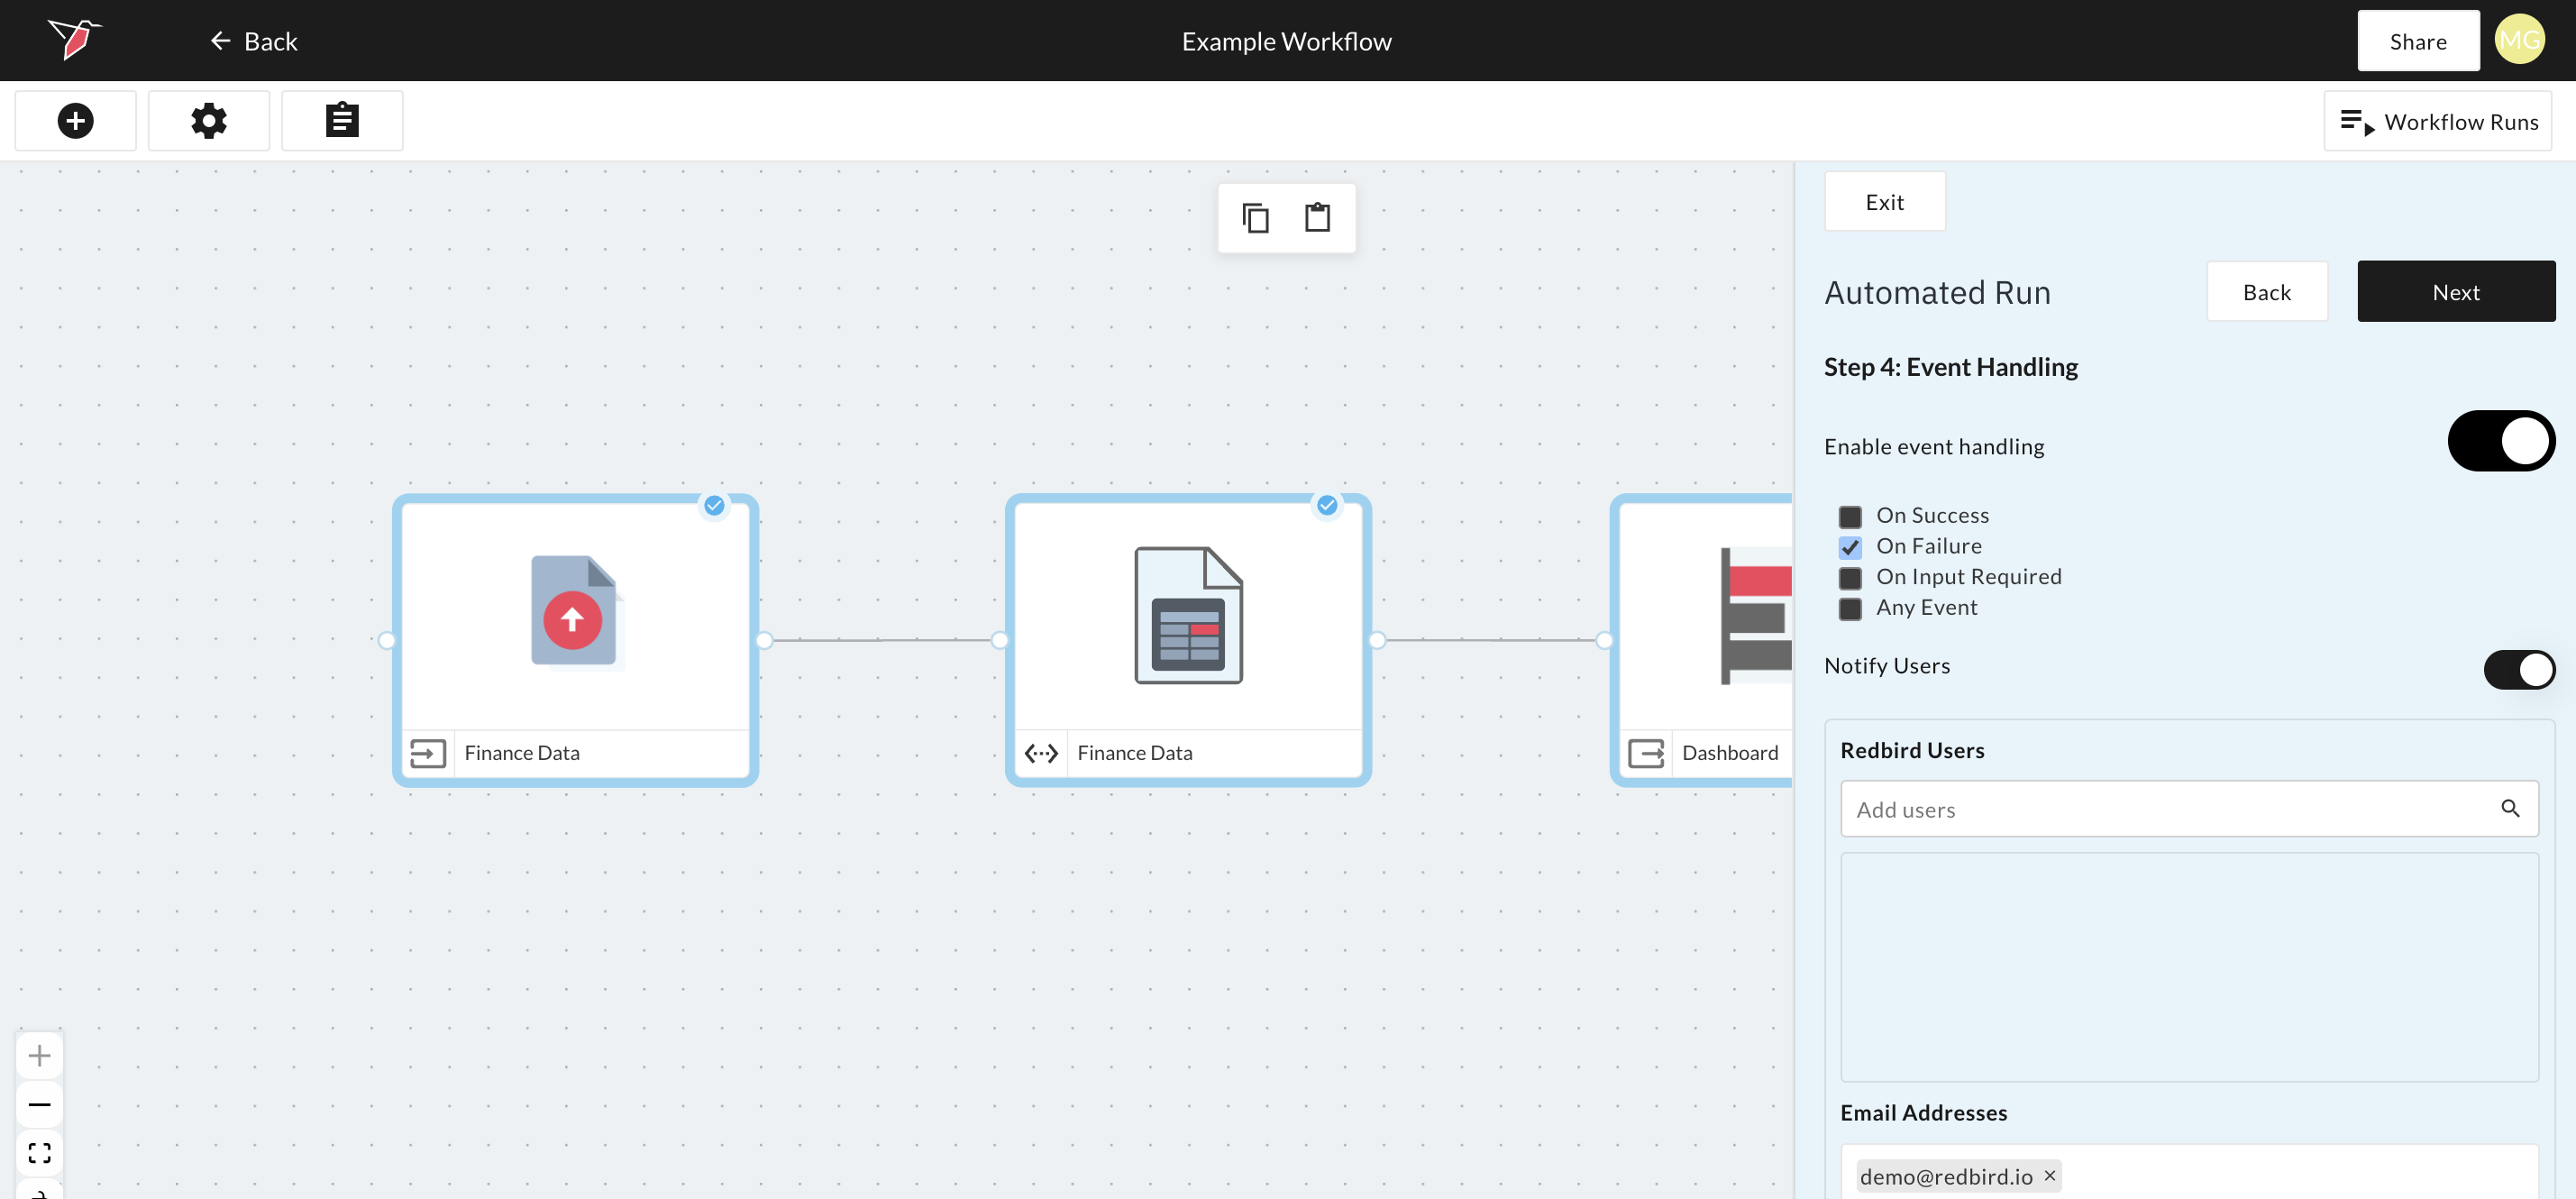
Event Handling - Configuring notifications in a scheduled run
The Event Handling step allows you to take certain actions based on different events or outcomes of the automated run. In this example, I want to email [email protected] if the run fails. To do that I can select the "On Failure" event and then enter the email address in the Email Addresses section. You can also notify other Redbird users or Slack Channels on your team by selecting them in the respective sections.
On Step 5, give your automated run a name if you wish to overwrite the automatic one given, and then click Done. Your schedule will be enabled and your automation will kick off automatically at the next scheduled time.
4. Triggered Run
Triggered runs allow you run the workflow when specific trigger conditions are met, for example when data in another node is updated or another node(s) or workflow(s) have finished running, or when a threshold is exceeded.
Triggered runs are different from node-level checkpoints. Triggered runs initiate a workflow run for selected nodes when conditions are met. Node-level checkpoints only gate whether a node proceeds when a run is already underway. See Checkpoints for more.
You can create multiple triggered runs on the same canvas, each including a different set of nodes. These runs can be managed and executed independently.
To create an scheduled run:
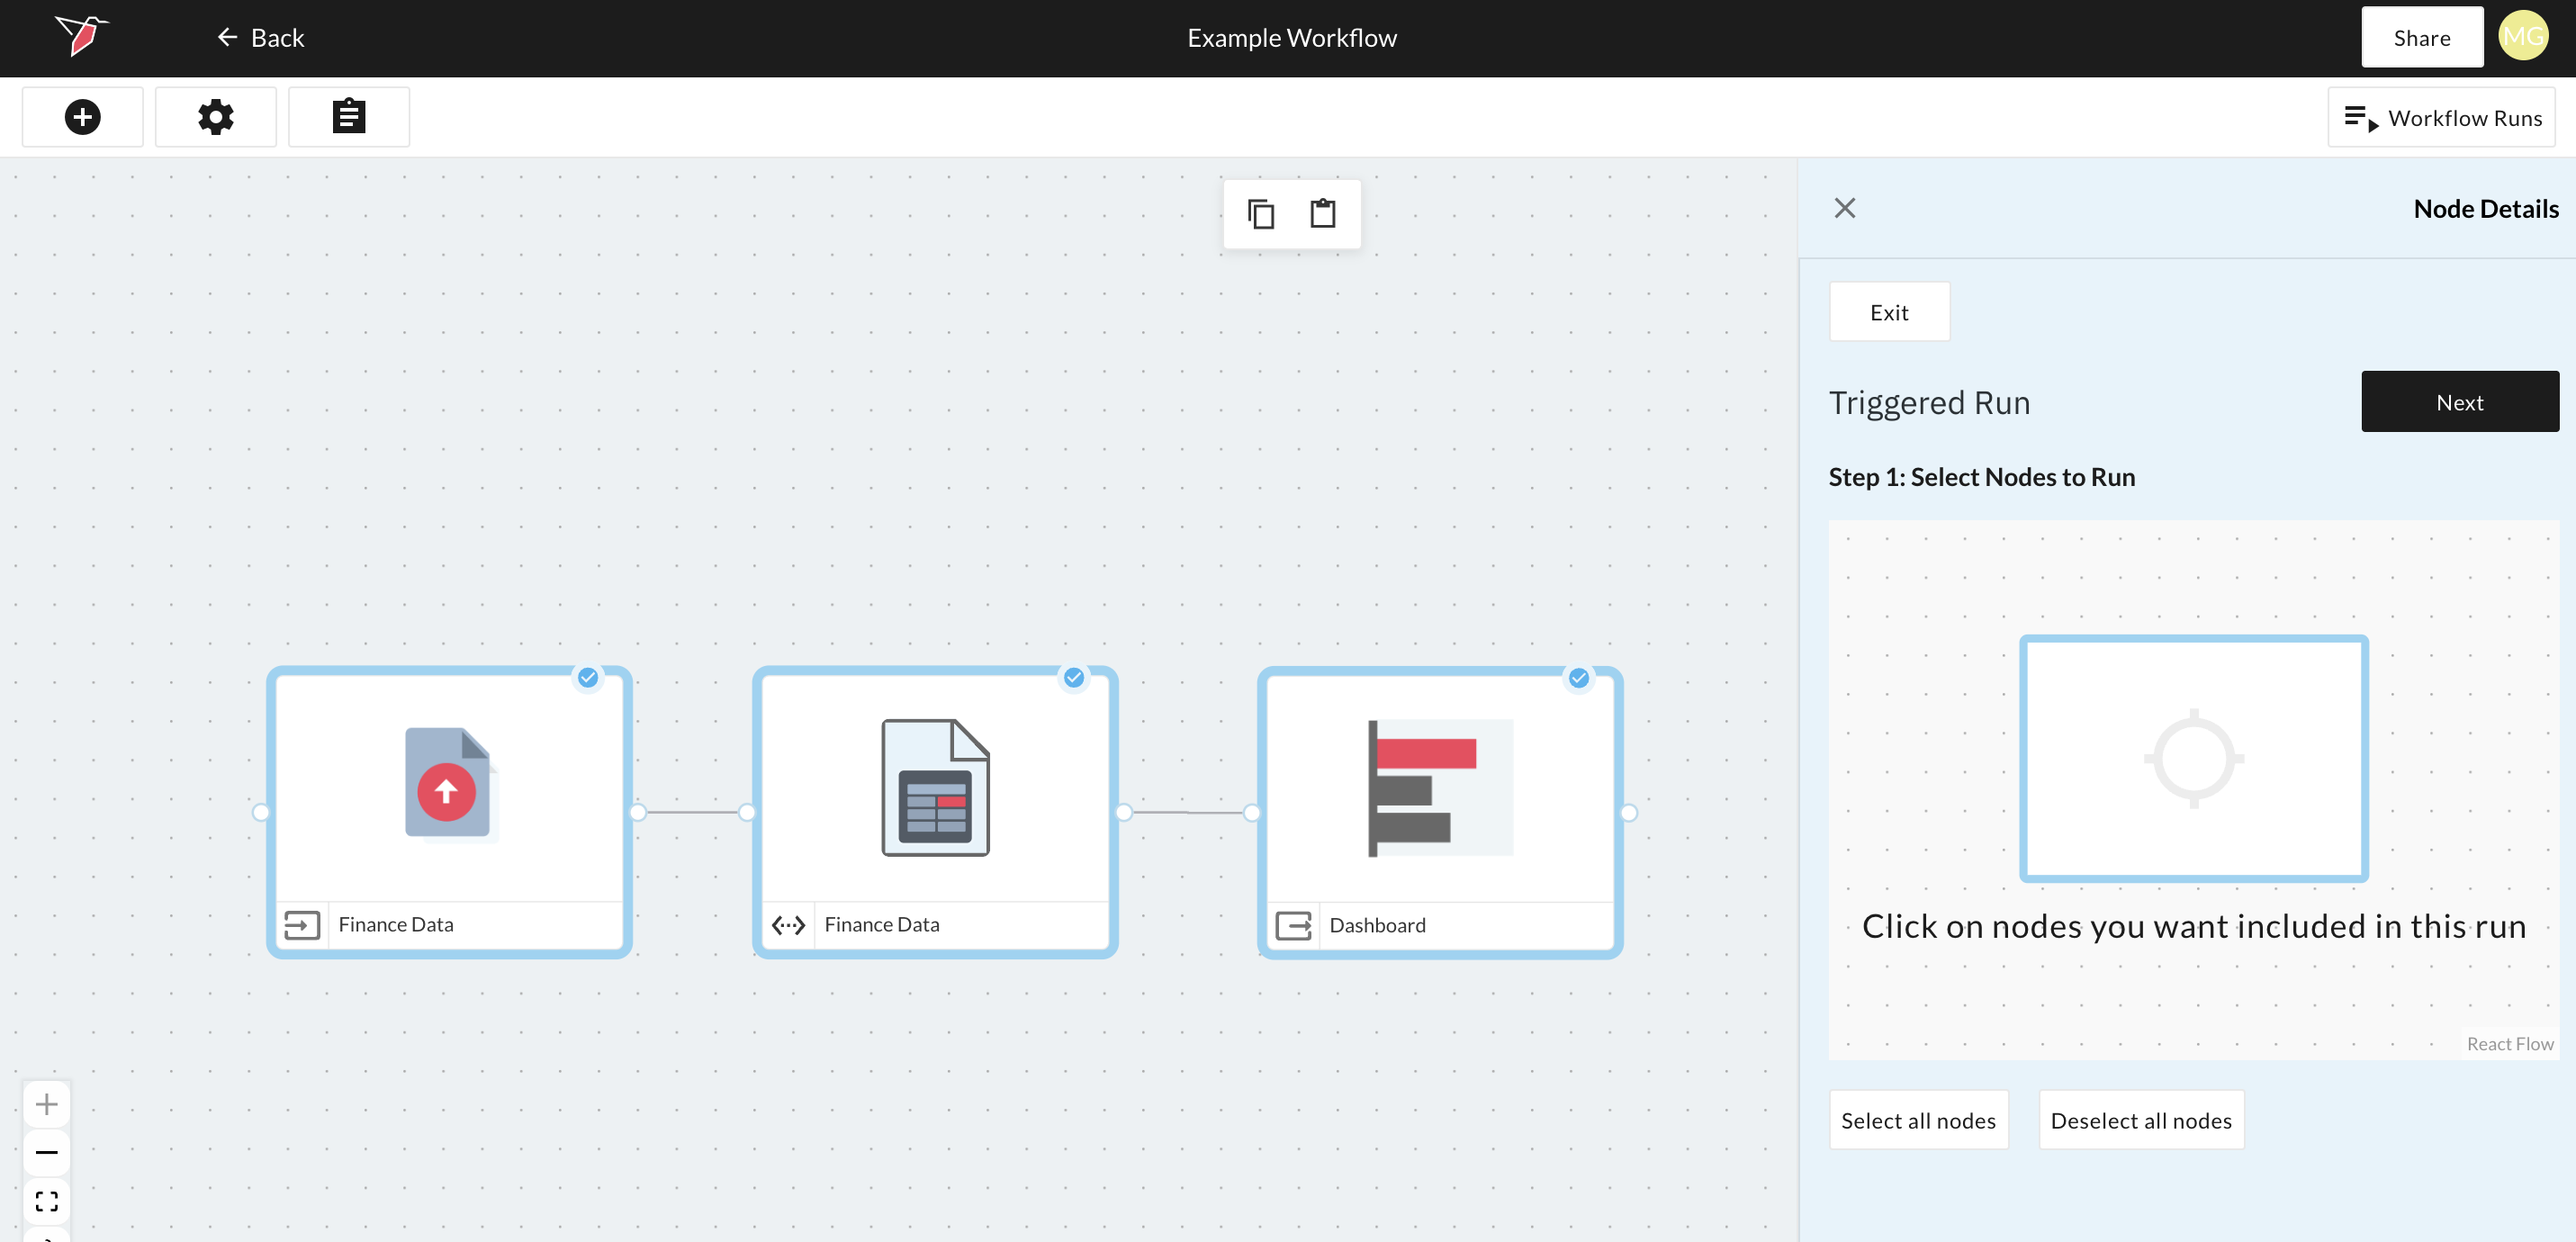
- Click Workflow Runs on the top-right of a workflow canvas then click "+ Run" --> "Triggered Run"
- Select the nodes you would like to run in this automation by clicking on each of them
- Click Next to select Stop Points. Stop points allow you to pause an automated run to make configuration overrides for that specific run. Once stop points have been selected or if you wish to skip this step, click Next.
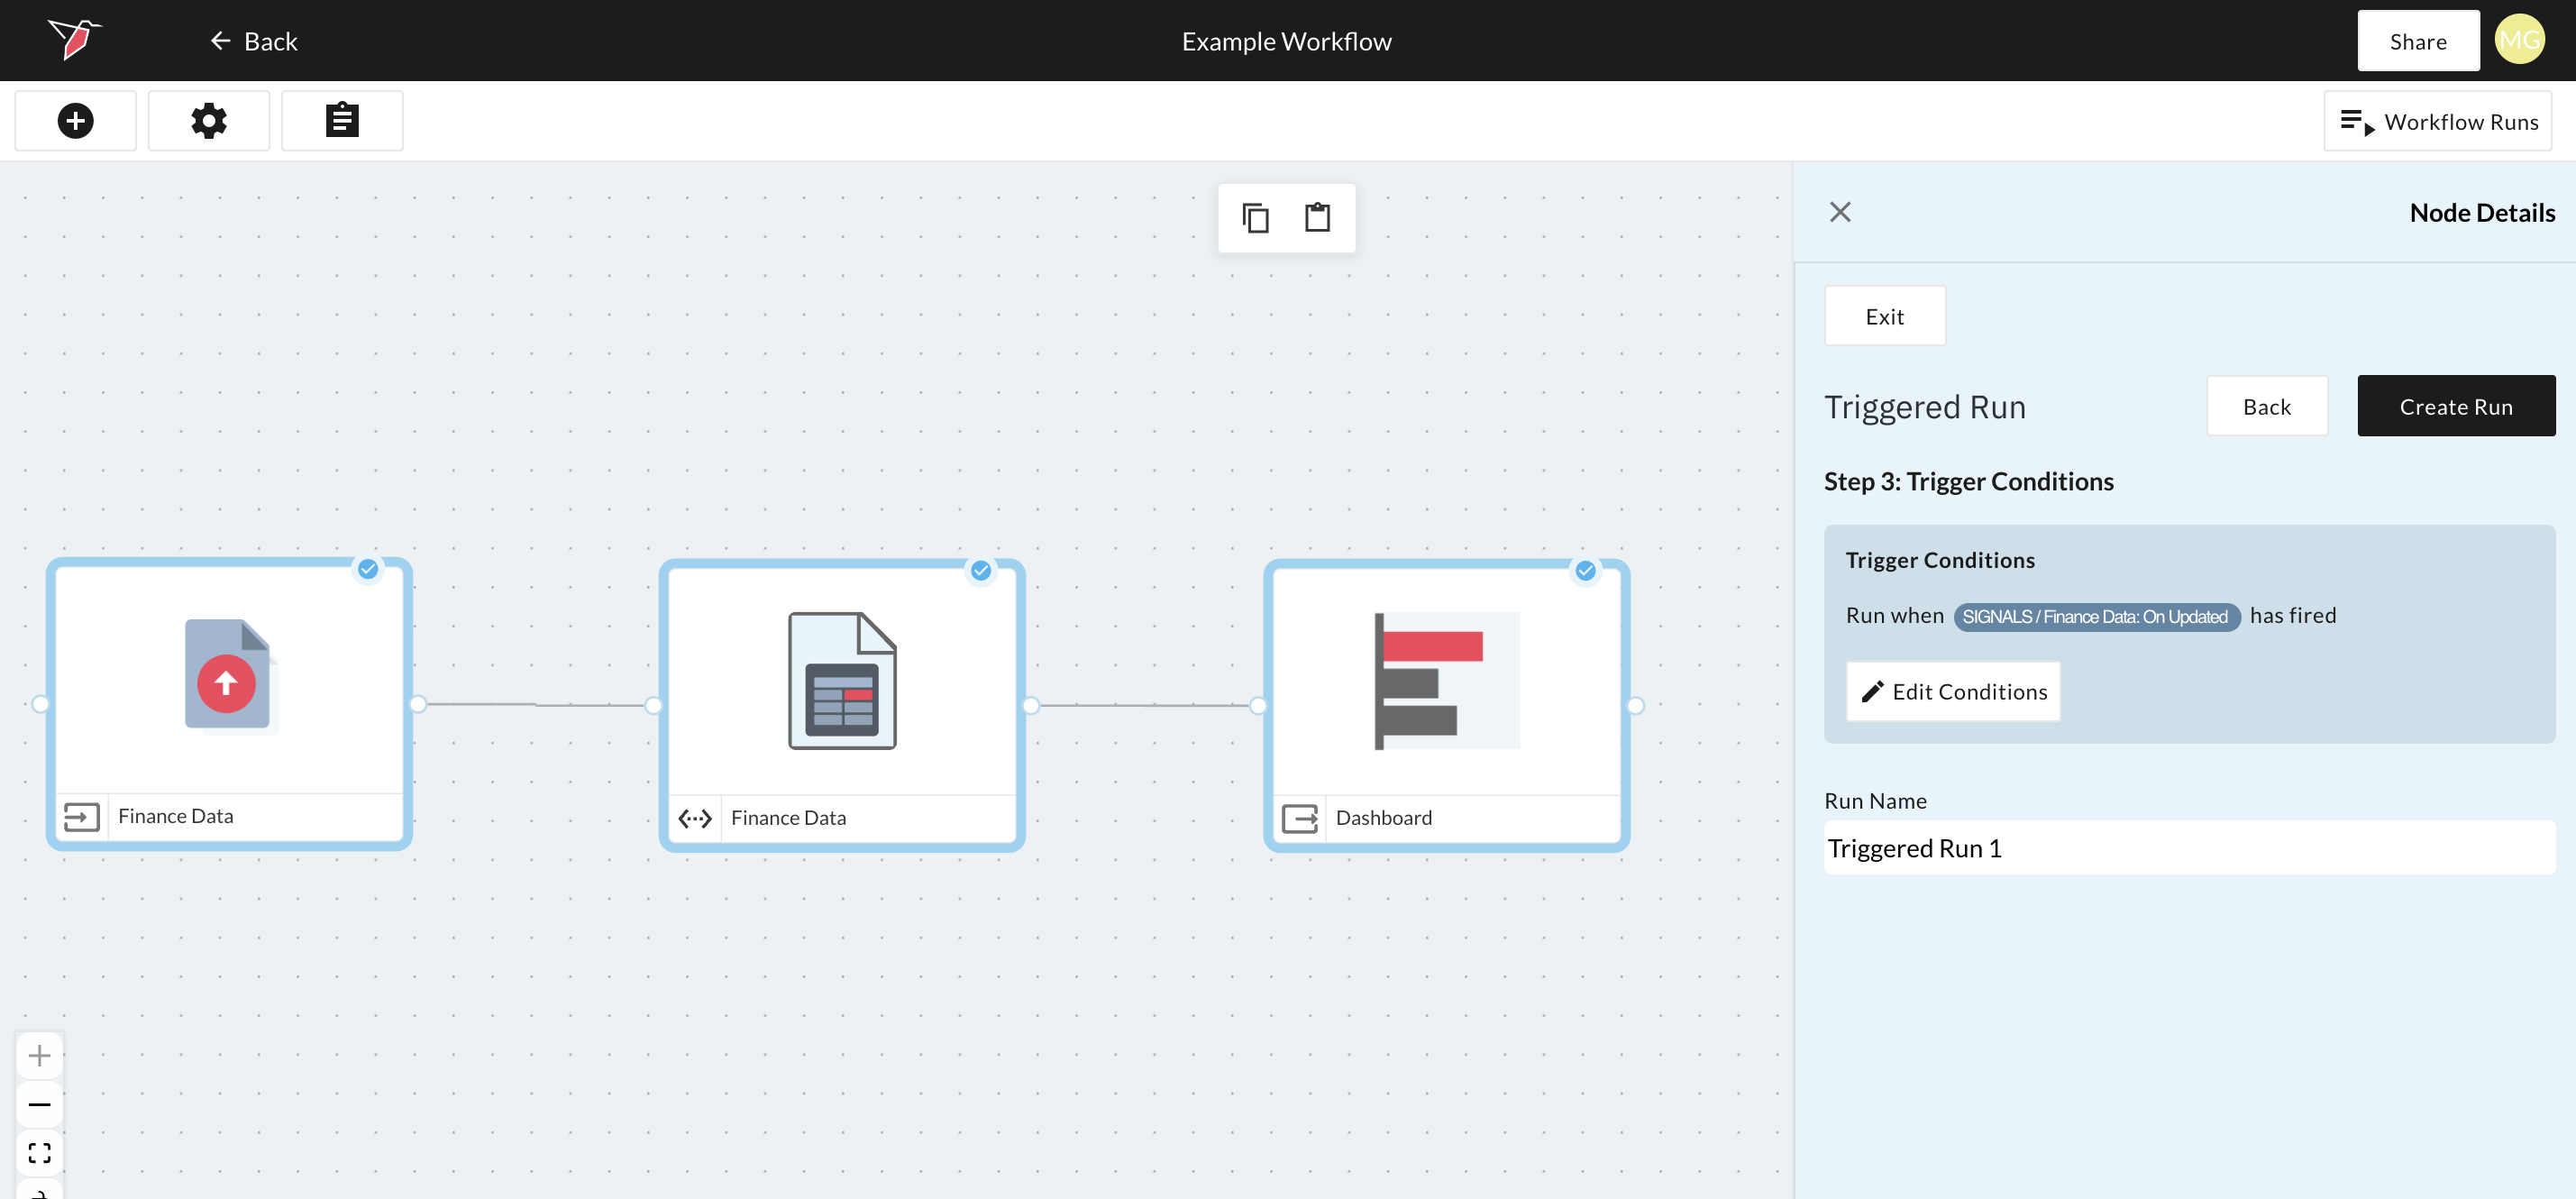
- Configure the trigger conditions by clicking Edit Conditions
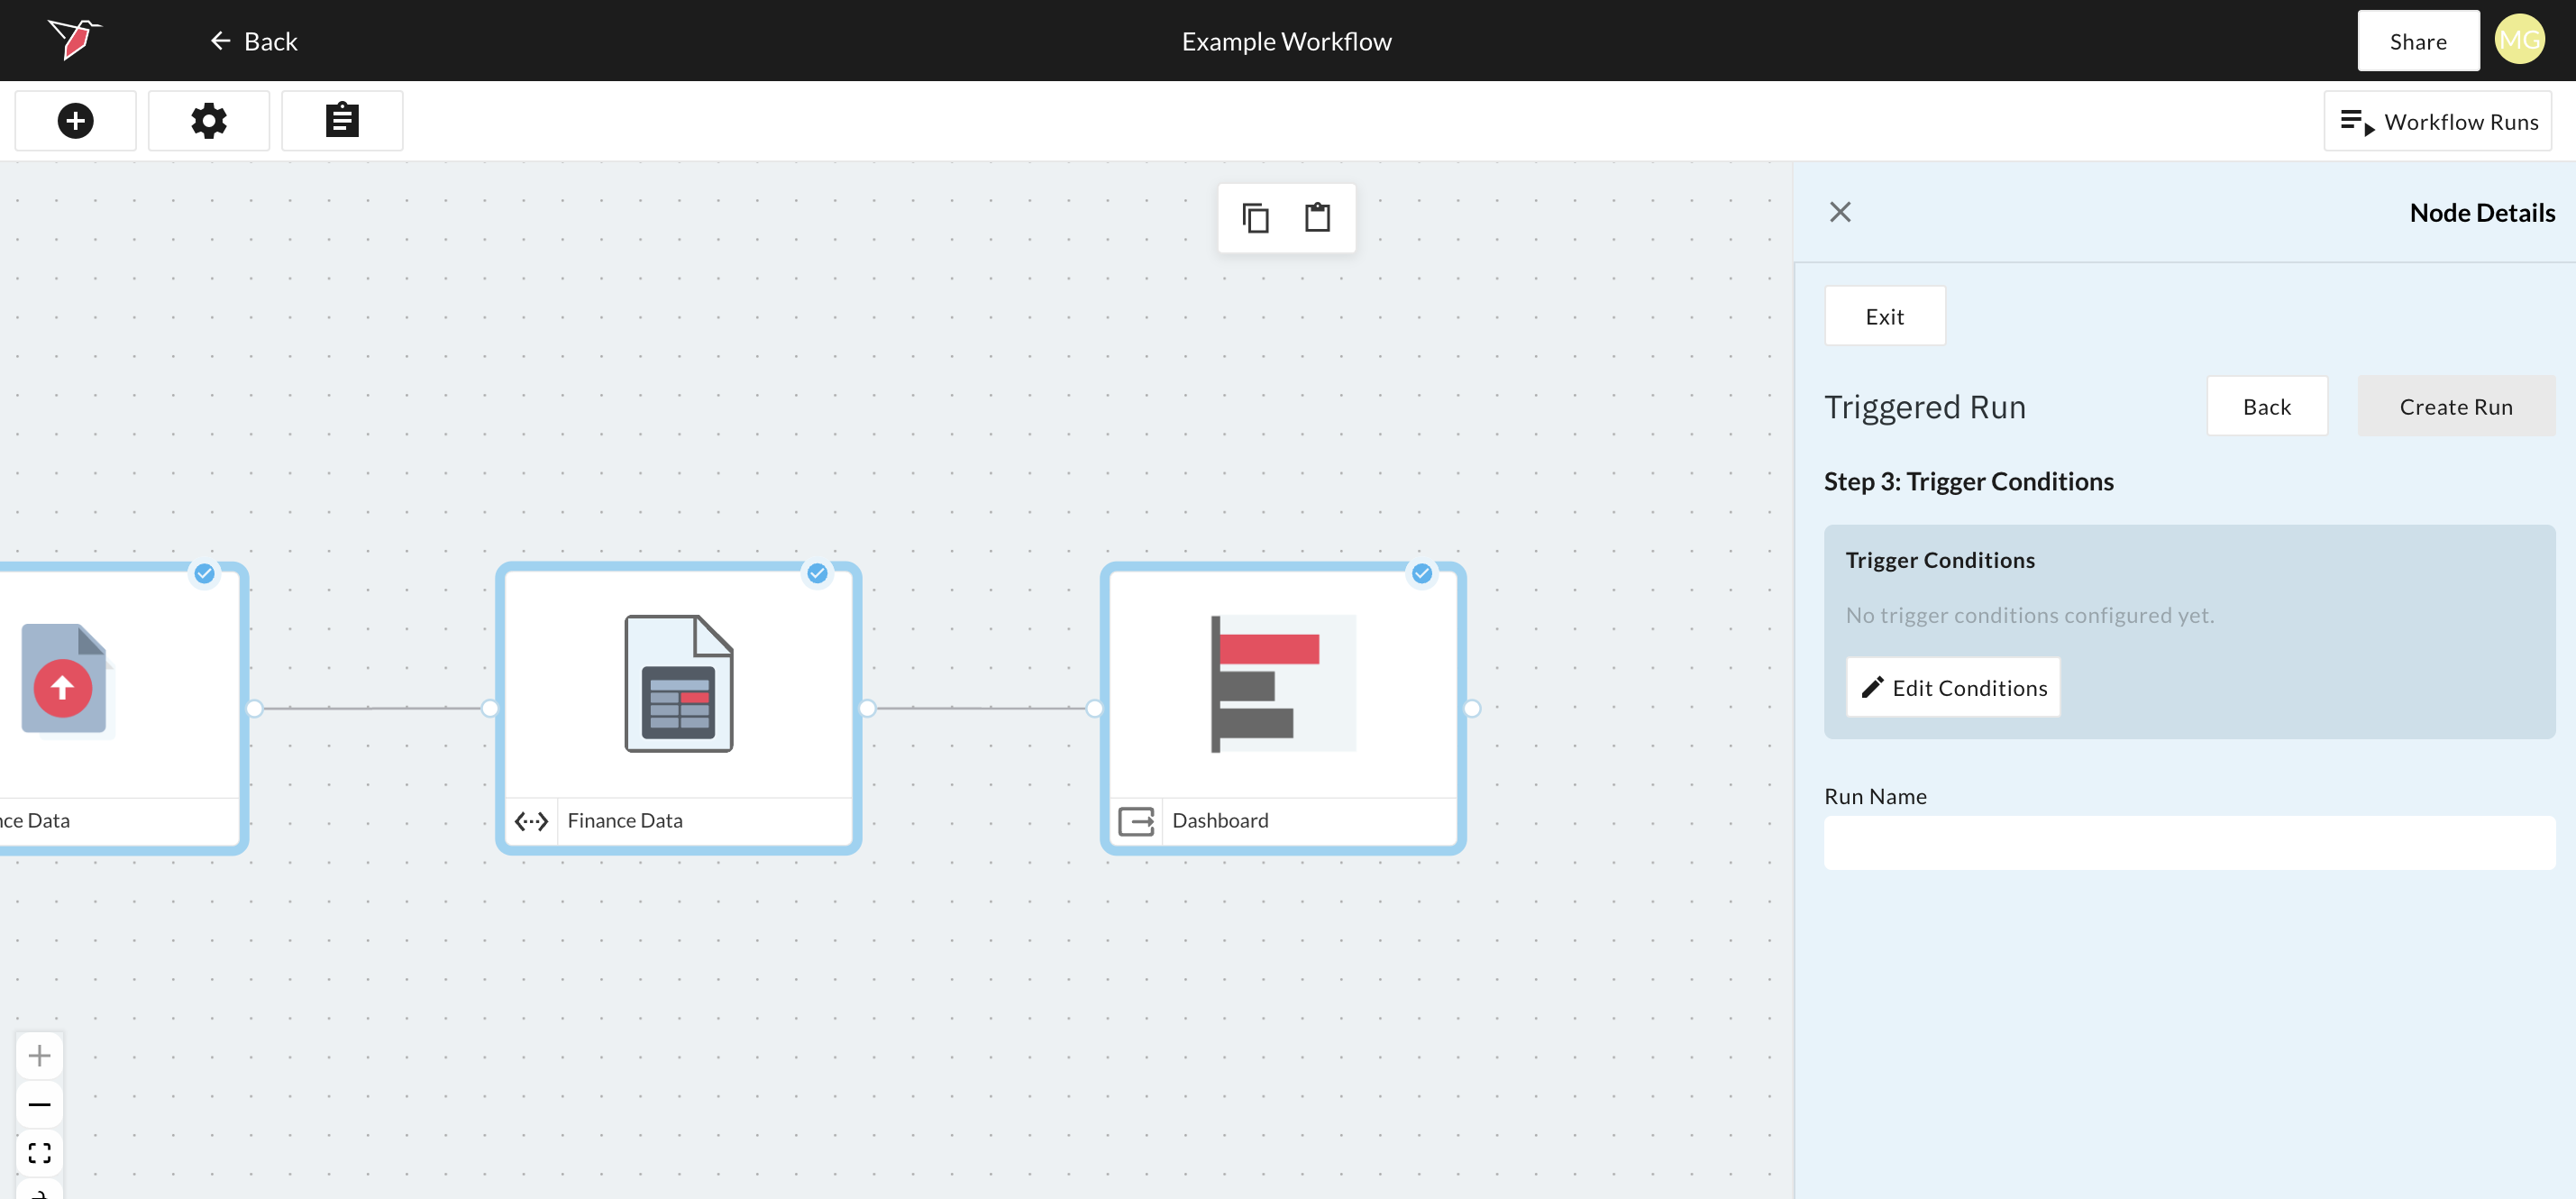
- This opens the Checkpoint Configuration Node, where you can describe the condition for the workflow run in natural language using the condition prompt box. Conditions reference signals and can combine them using and/or logic and optional time-based logic. The data or event logic itself (e.g., "the dataset has more than 100 rows") or Node has run successfully/has updated/errored is defined in the signals themselves, not here. See the Checkpoints documentation for full details on how signals and conditions work.
Quick guide on how to configure checkpoints
- Available signals: All signals present on the current canvas appear in the Signals panel on the left. To reference a signal in your prompt, type
/. - Importing signals: To use a signal that isn't directly available (e.g., from another canvas), click the + icon next to Signals and paste in the signal code.
- Examples of logic that can be added to the checkpoint configuration page:
- "Run if Signal A fires."
- "Run if Signal A or B fires"
- "Run when Signal A and Signal B fire, but not Signal C."
- "Run when Signal A has fired every day over the last week."
- Testing the condition: Click Evaluate to check whether the condition would be met given the current state of the signals (i.e., would it run as of now).
- Saving: Click Done to return to the canvas.
- A default name will be given to the run but you can overwrite it if desired.
- Click Create Run.
Viewing and Managing Workflow Runs
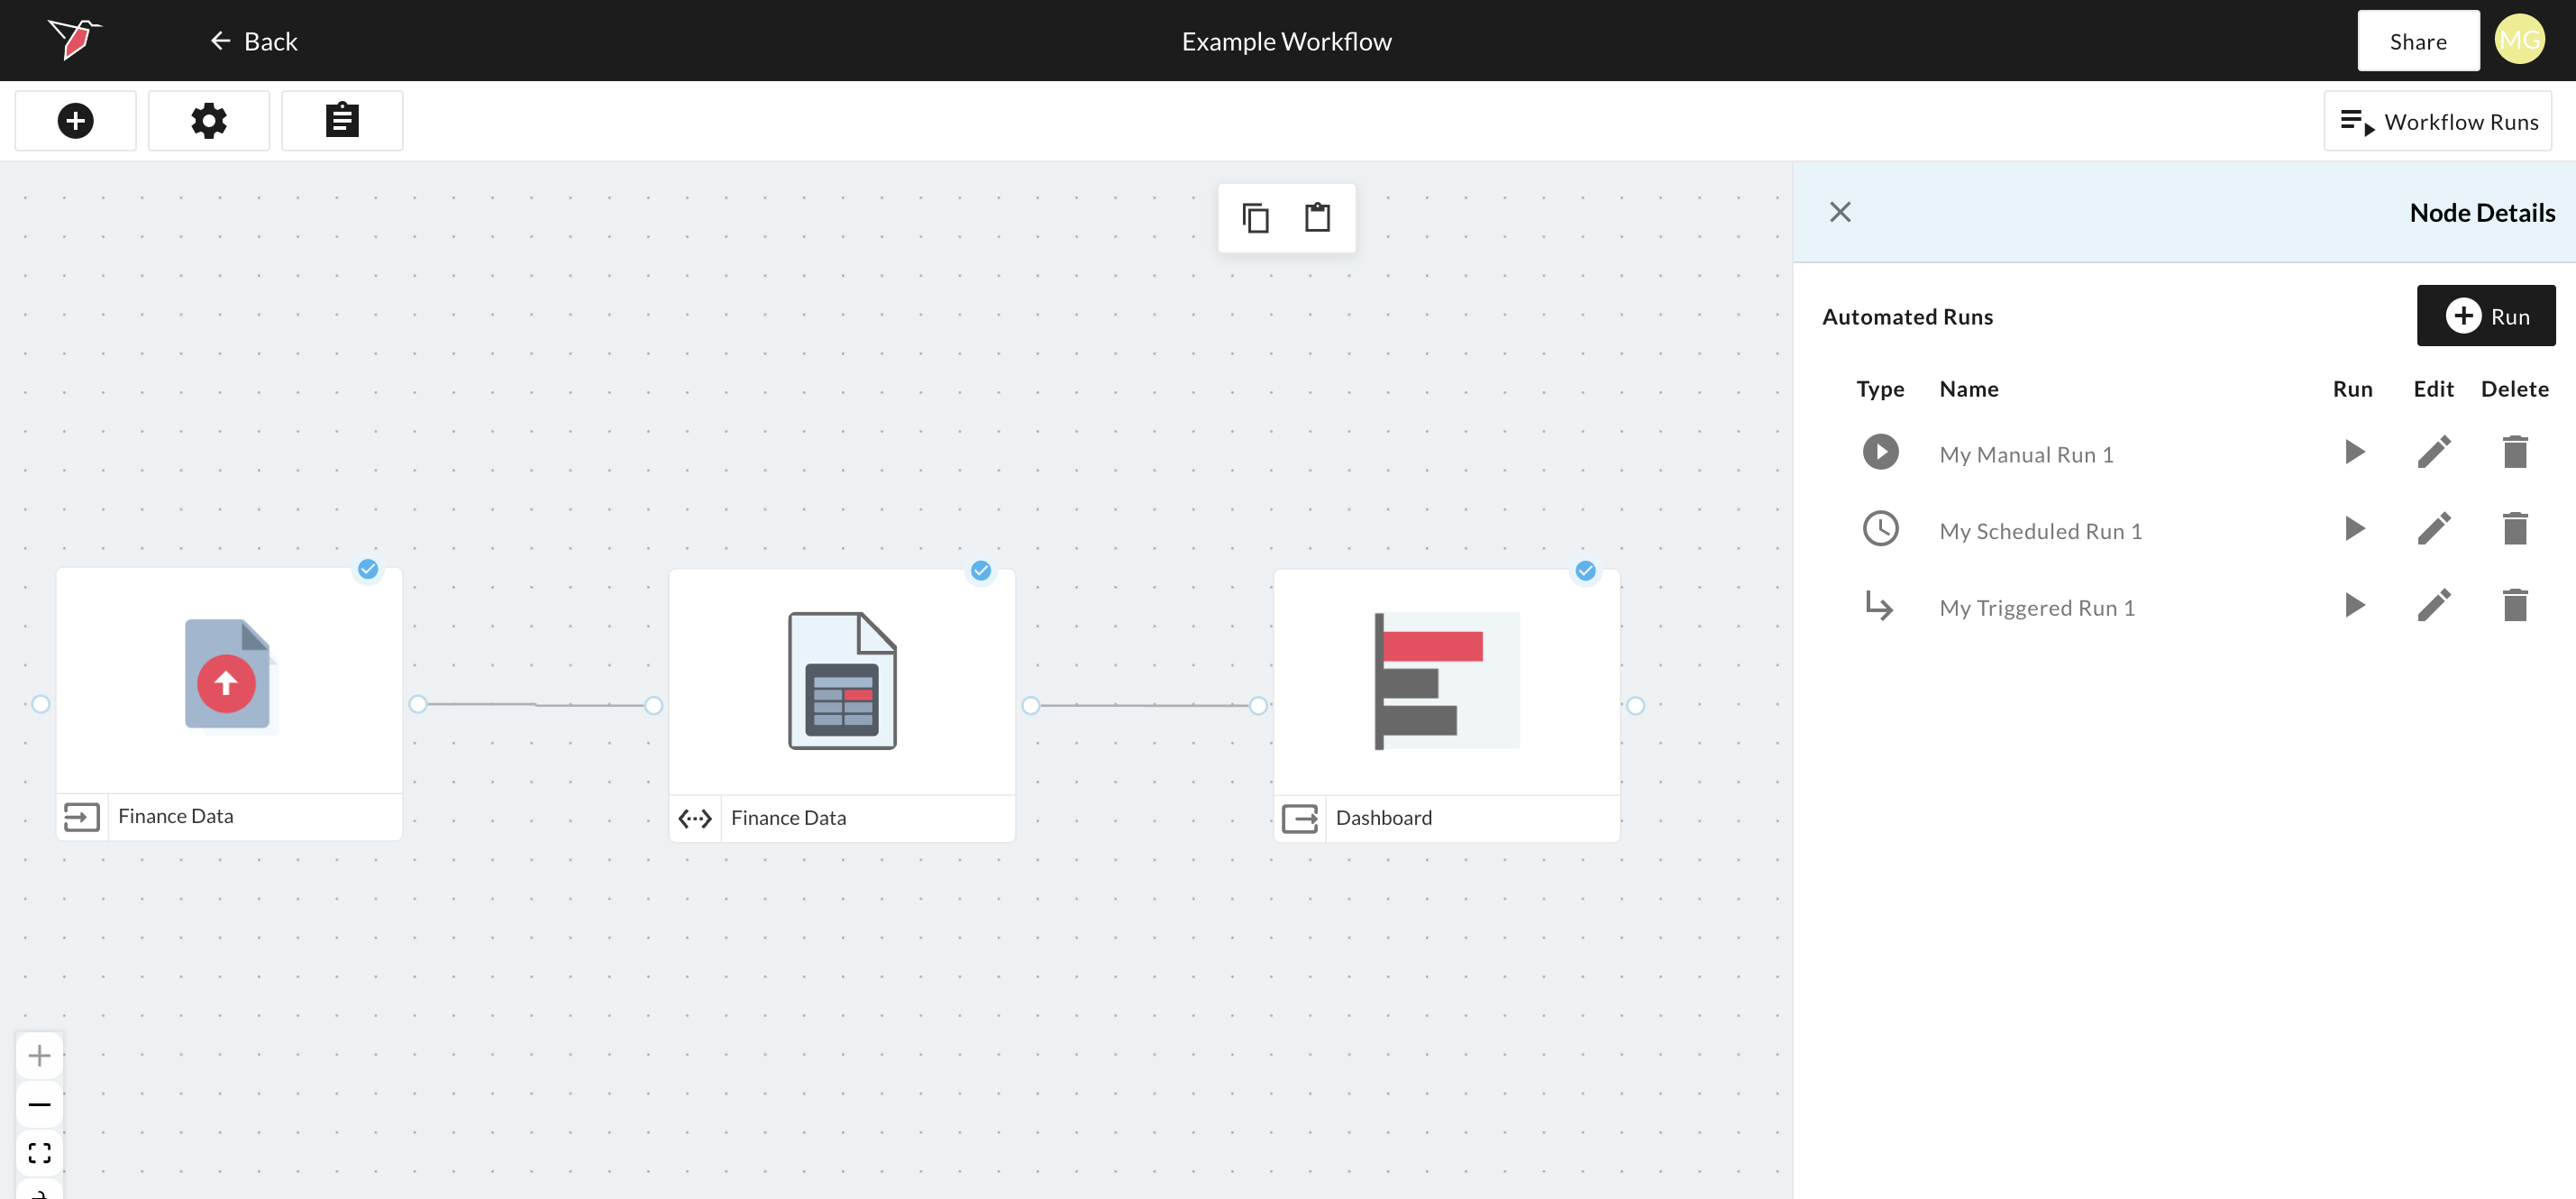
Scheduled or triggered workflow runs, once set will appear in the Automated Workflows section on the canvas (accessible via the Workflow Runs button), where the run can also be manually triggered, edited, or deleted using the relevant icons under each column. The type of run will be denoted by the symbol in the Type column e.g. Play Icon for Manual, Arrow for Triggered, or Clock for Scheduled.
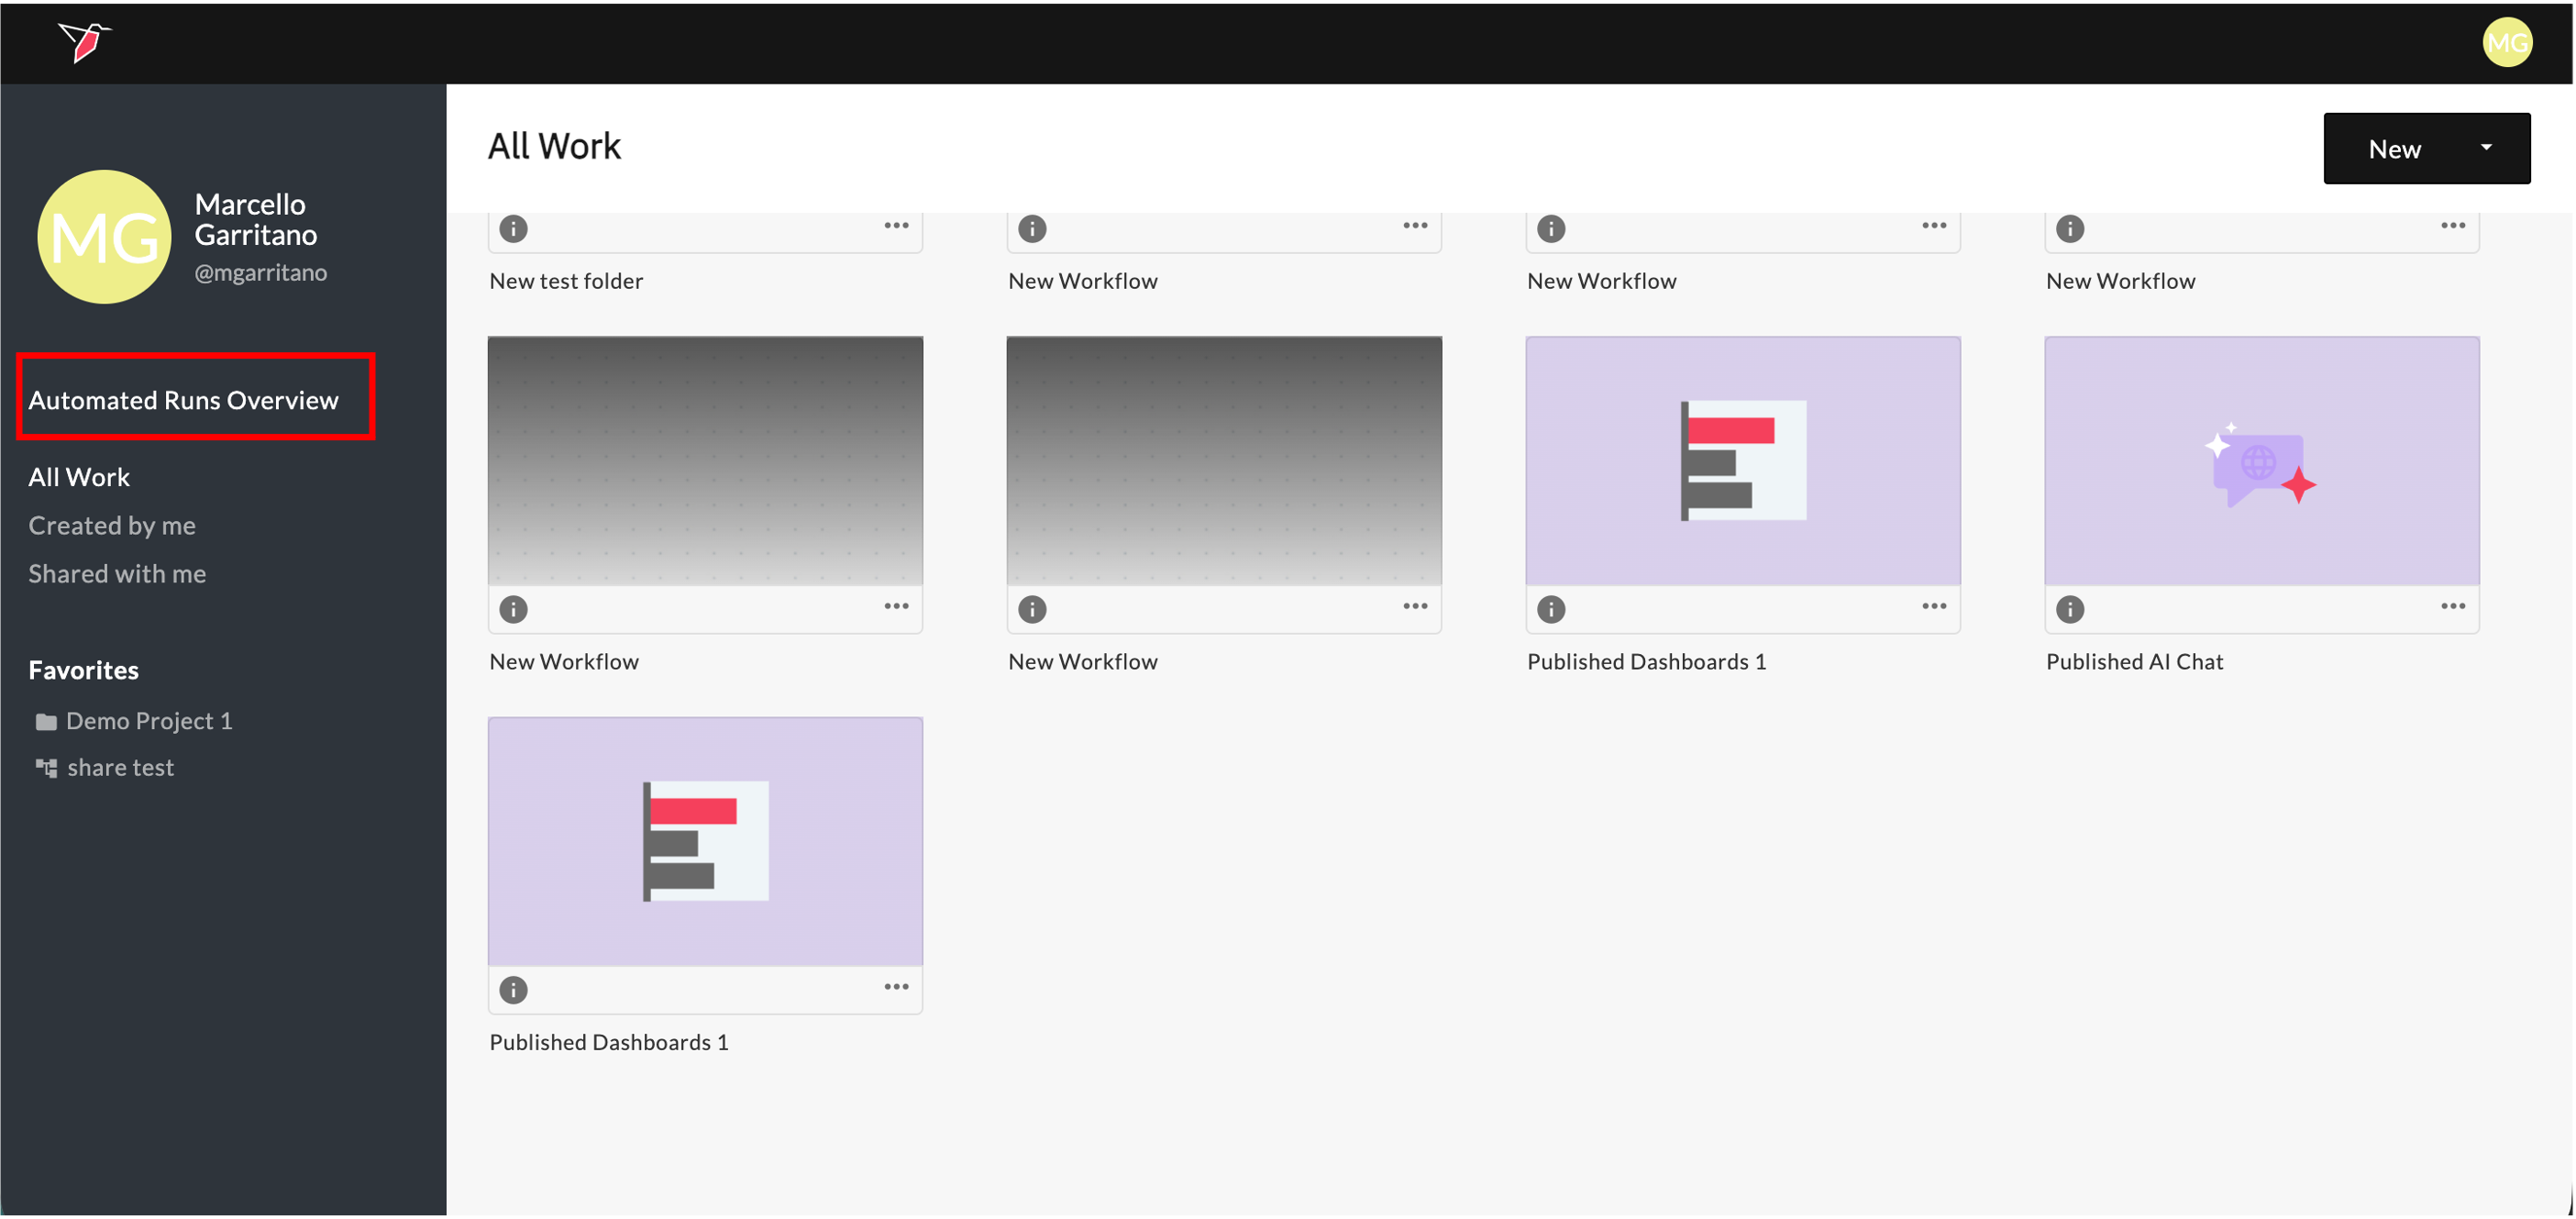
You can also access an overview of all active automated runs (i.e. with a schedule or trigger) within your Redbird account by clicking Automated Runs Overview on the home page.
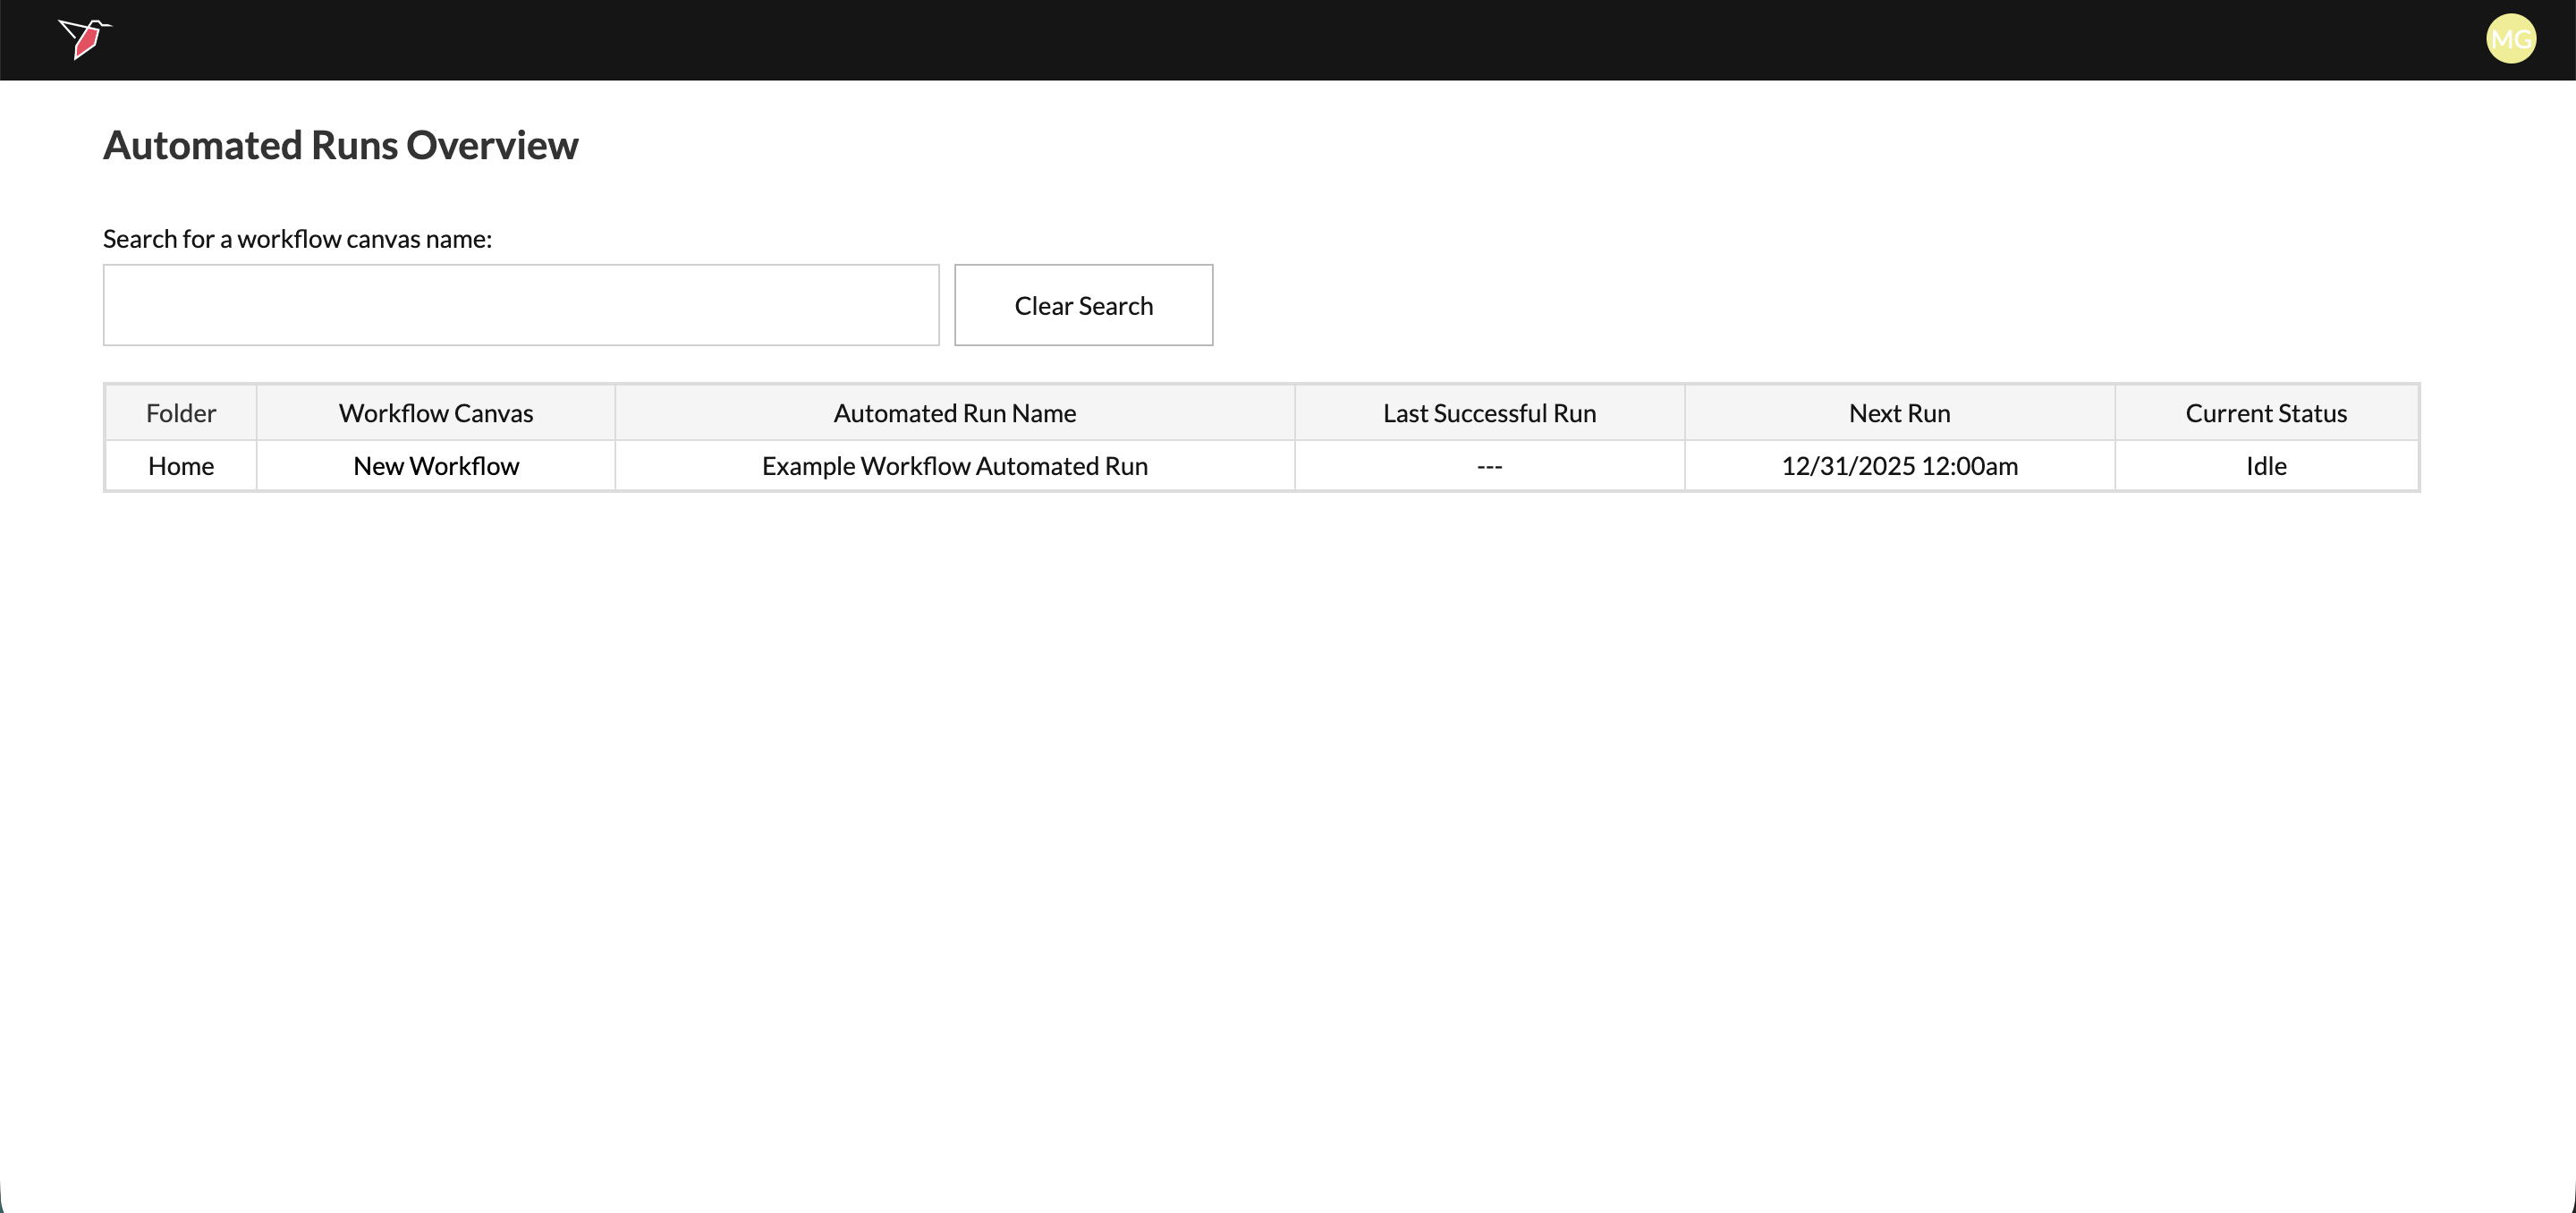
From this view, you can search for a specific automated run or browse the full list of scheduled runs, including the folder it belongs to, the associated workflow canvas, the automated run name, the last successful run, the next scheduled run, and the current run status.
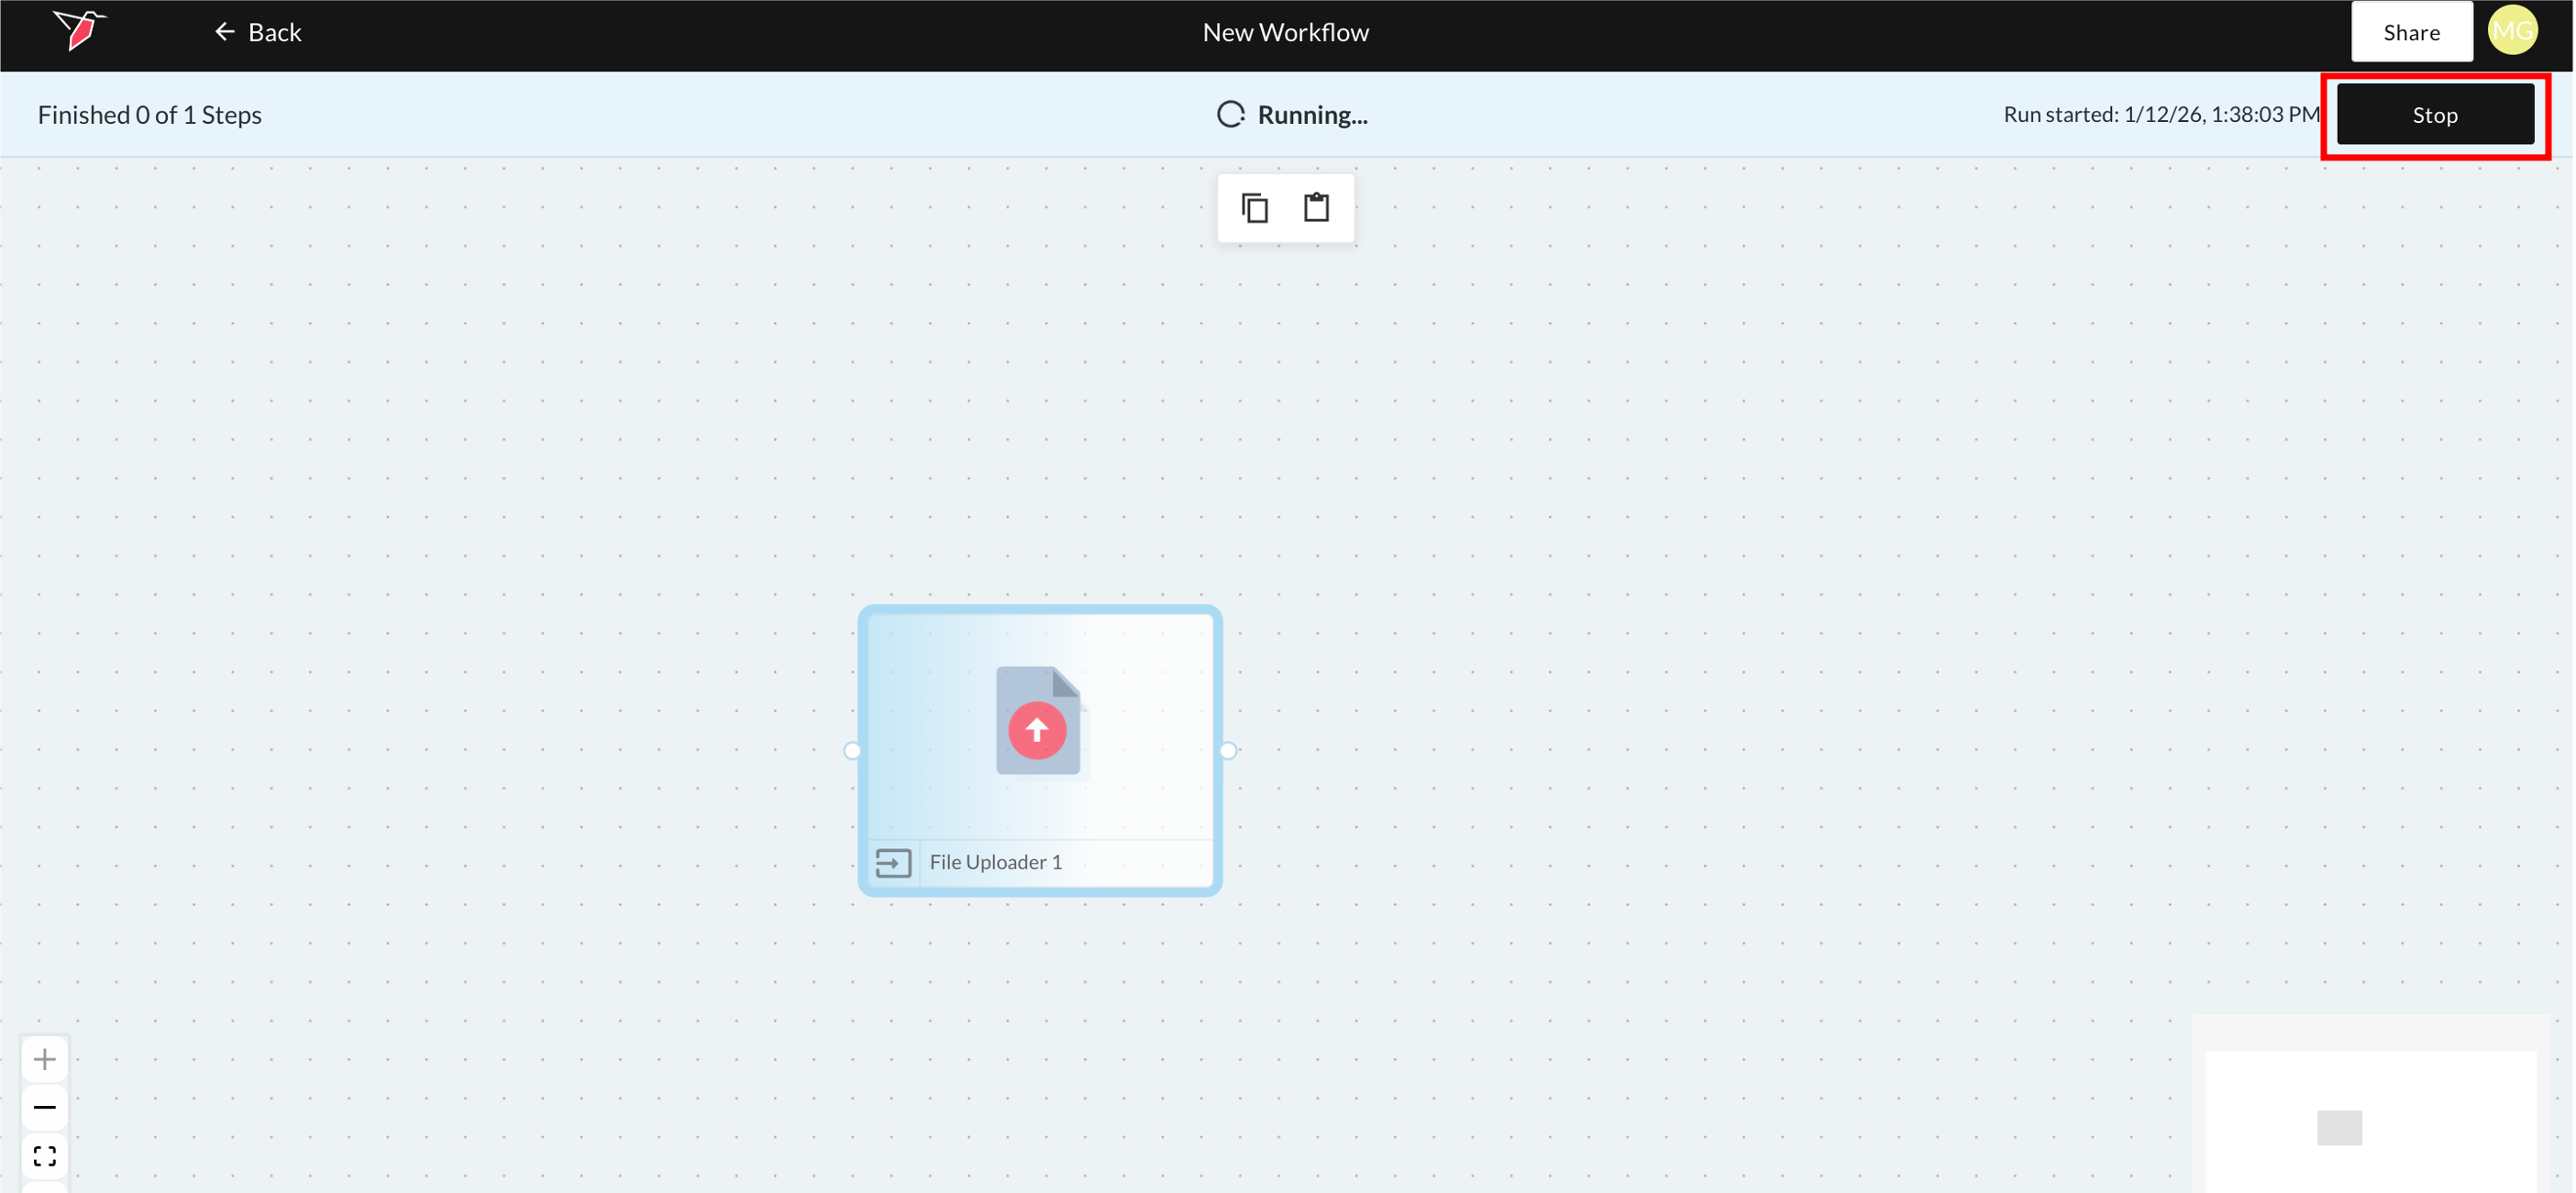
Stopping a run
Whether you run a node ad hoc or as part of a workflow in an workflow run, the run will continue until all tasks are completed, user input is required, or an error occurs.
You can manually stop a run before it finishes—effectively cancelling it—by clicking the Stop button on the workflow banner that appears at the top of the canvas while the run is in progress. The run will stop at the earliest possible point.