Configuring Redbird Tabular Datasets
Scope
This guide applies to structured Redbird tabular datasets.
If your upload created a File Collection node, you must first extract or transform it into a structured dataset. See here for more information on how to do that.
Background
Once a single structured data table is loaded into Redbird as a Collection, a Redbird dataset node is automatically generated. A dataset is a copy of the data extracted from a Collection, it could be the entire dataset or a subset. This process ensures that the original raw data in the Collection remains untouched.
You can customize the autogenerated process — for example, by changing the data types assigned to columns or filtering out specific rows or columns. If you only want to work with the most recent year’s data from a repository containing historical records, you can define those conditions when revising the dataset.
The Process of Generating a Dataset
The process of generating a dataset is a one-time setup that helps Redbird understand how to interpret the data that was loaded into the platform. This includes:
- Specifying column name
- Determining how to treat null values in the data
- Assigning data types to columns
- Specifying date formats
Redbird will autocomplete this step the first time the collection runs.
Reviewing and Editing the Dataset Configurations
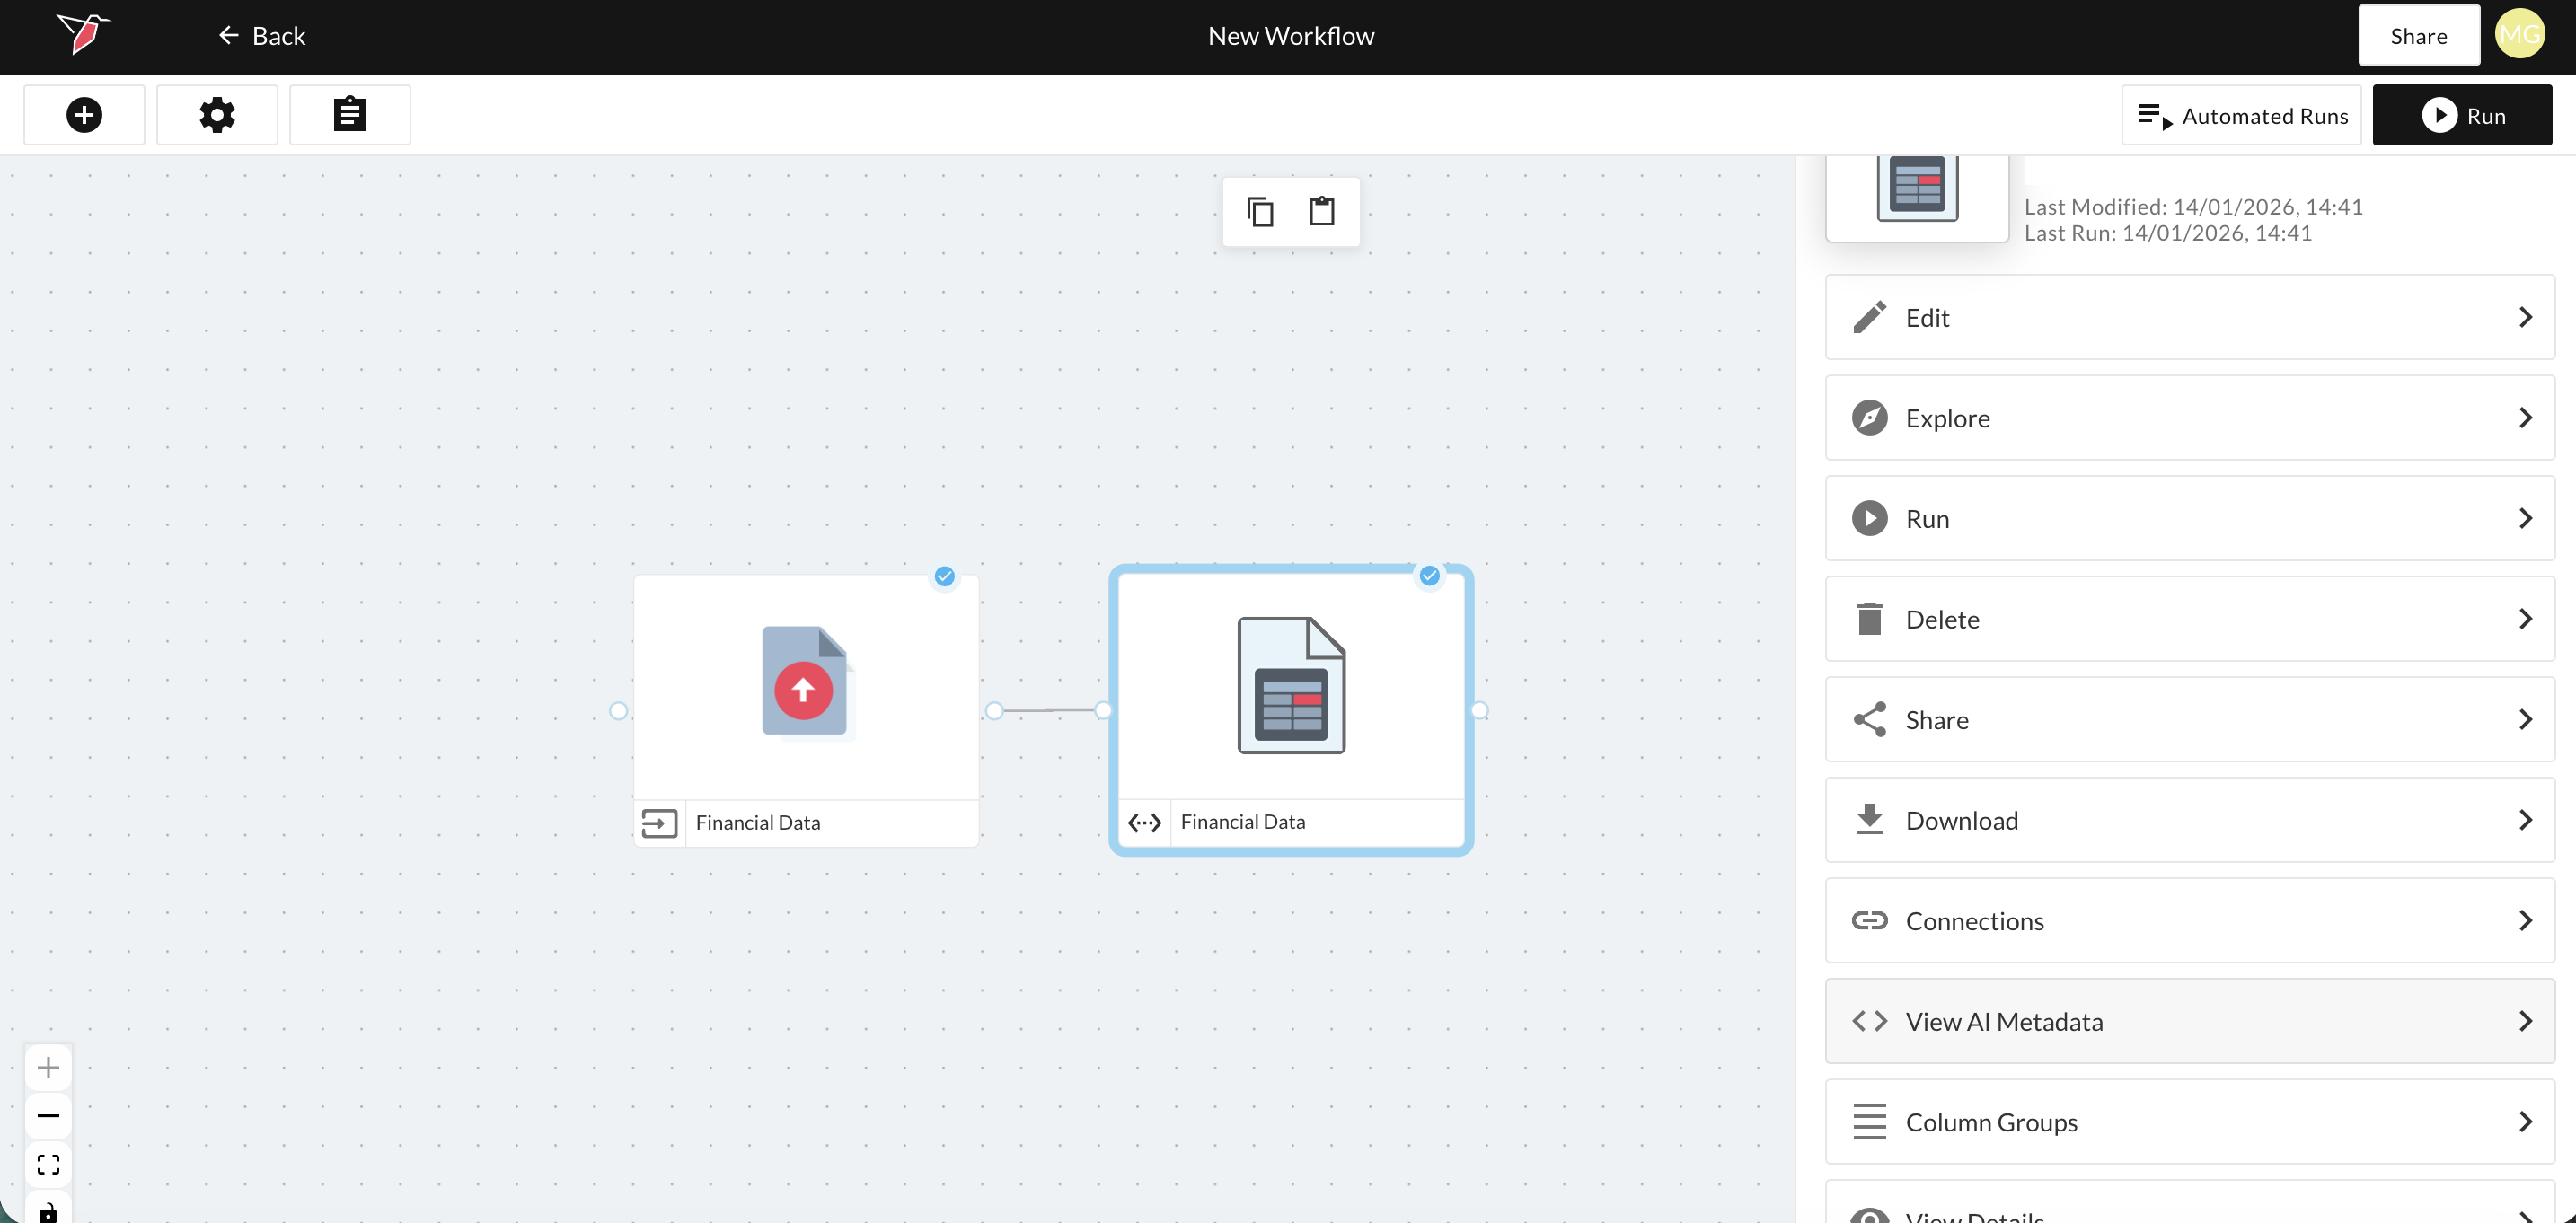
You can review the data types assigned to the columns by clicking on the dataset node then clicking View Details in the right-side panel.
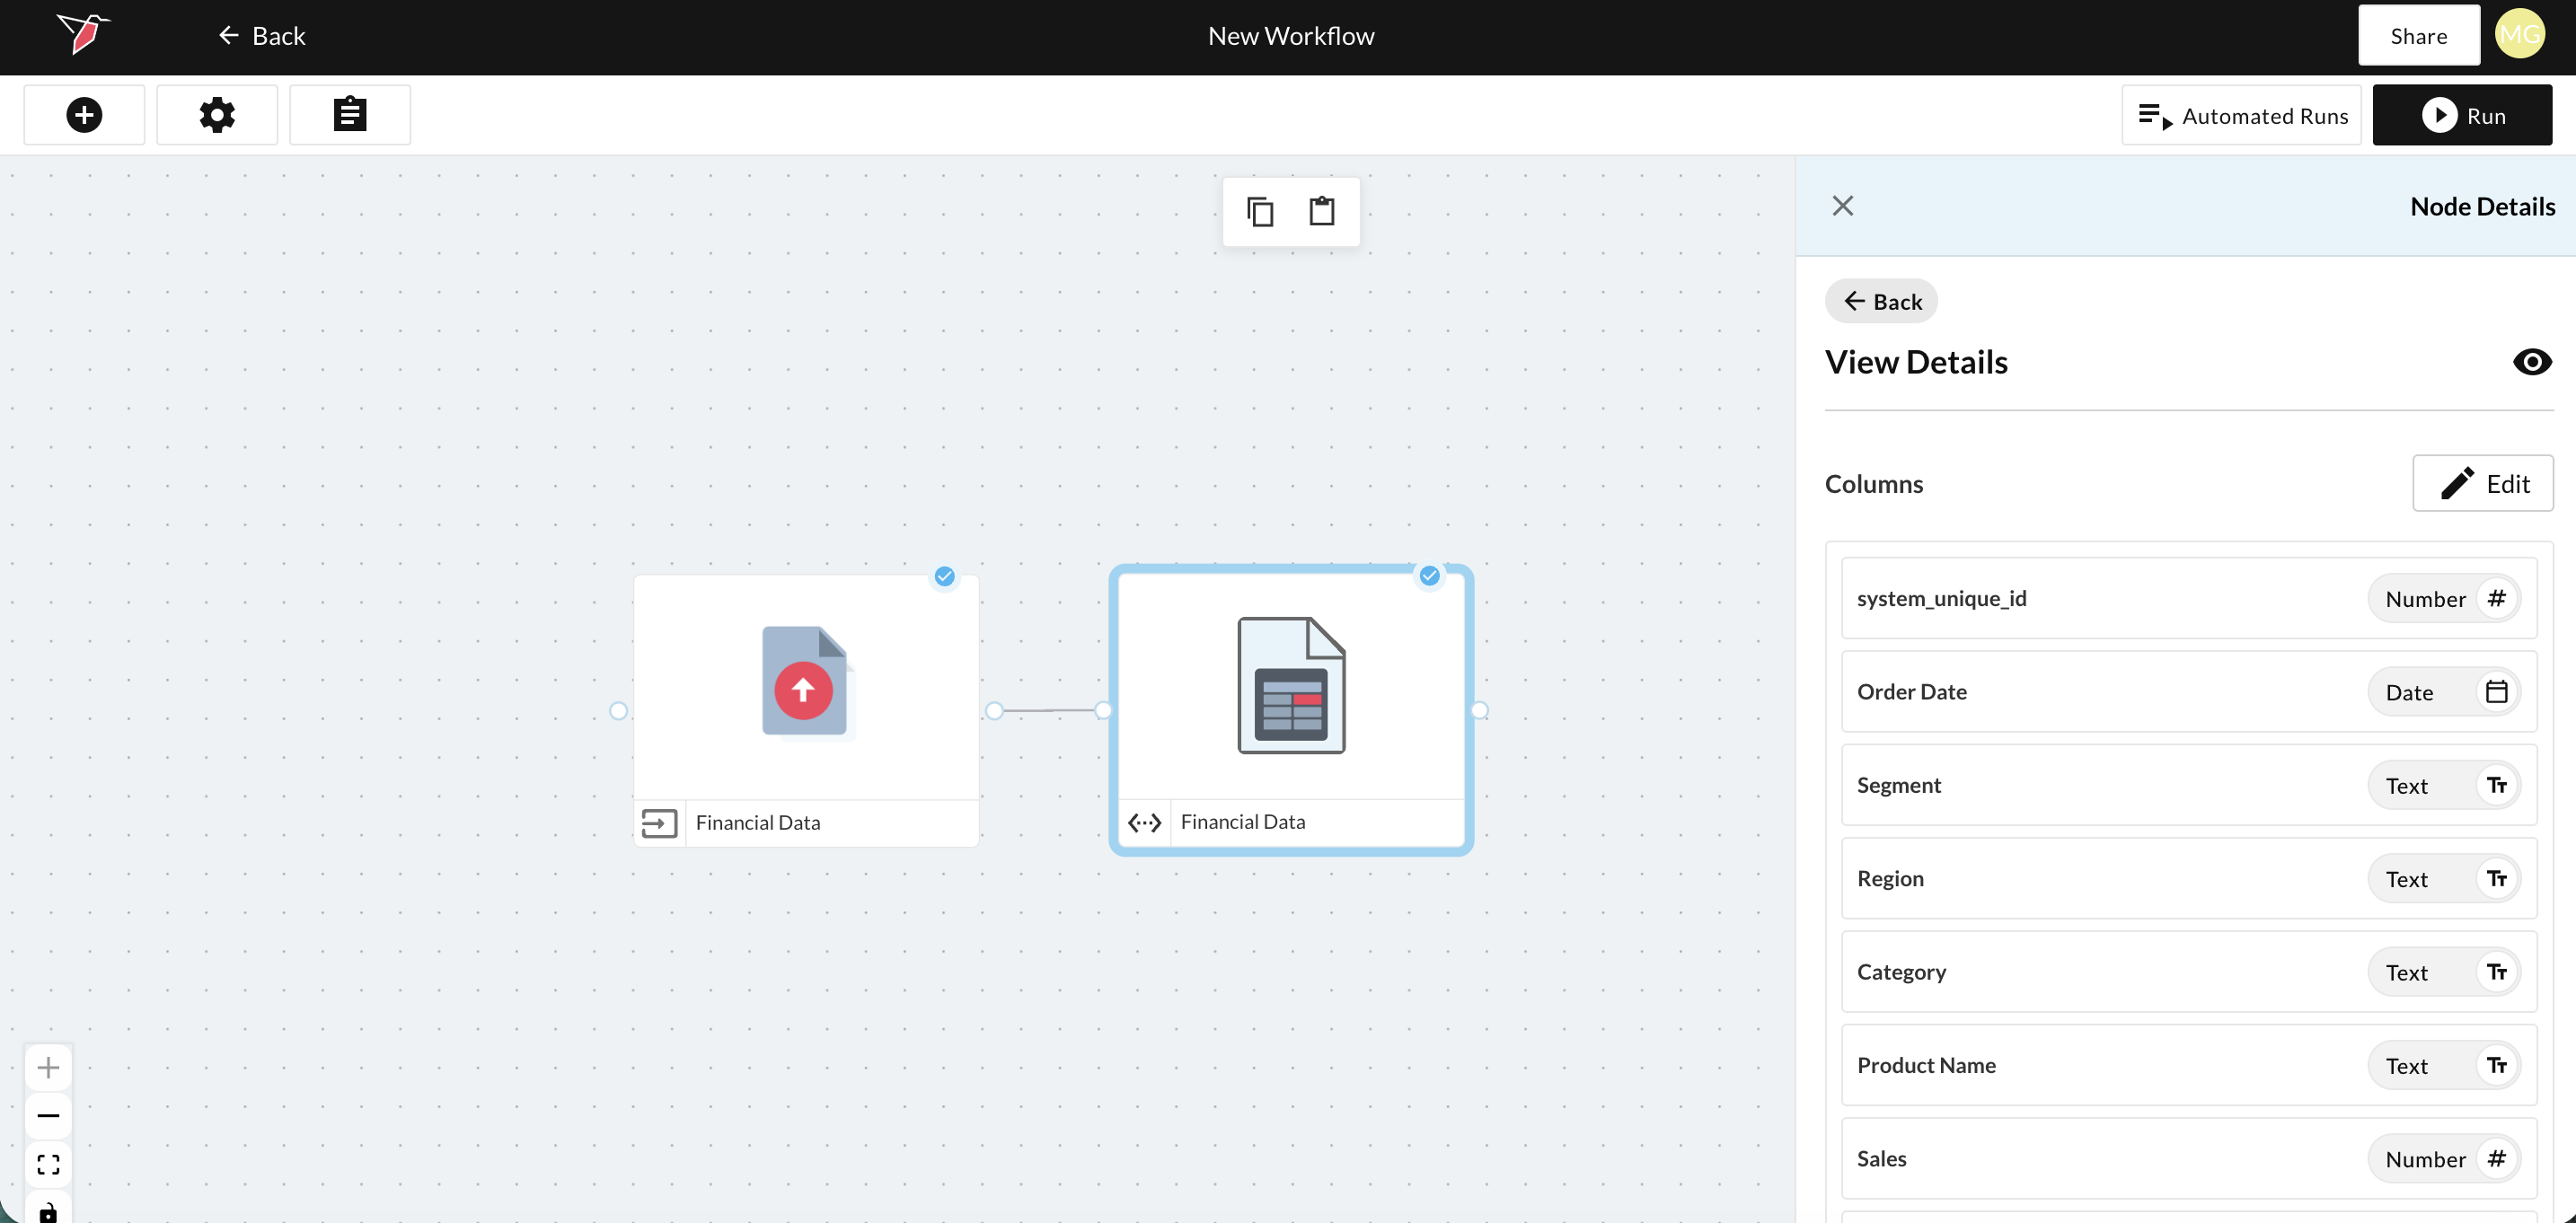
You can then edit the Dataset configuration either by clicking Edit from the View Details pane or from the previous Node Details pane in the right-side panel.
This will drop you into the 5 step Dataset Generation Wizard.
Step 1: Modifying Column Names
The first step in the Generate Dataset process will allow you to modify the column names of your dataset. If you want to edit them, make sure that the column names:
- Do not contain any special characters
- Are unique
- Are not left blank
To modify the column names, please do the following:
- Type in a name in the textbox to the right-hand side of the original column name.
- Alternatively, you can click Import to pull in column names from a mapping table previously loaded to Redbird as a Raw Data collection.
Use case: Fictitious LLC ran multiple surveys on a proprietary platform and generated multiple flat file outputs. The columns had encoded names (Q1, Q2, Q3, etc.) that needed to be renamed to make them human-readable. In this case, an analyst prepared a mapping table with the encoded file names and the corresponding human-readable names. Once the file was prepared, the analyst loaded it into Redbird, which used the mapping to rename the columns to be human-readable.
Note:The mapping table files contain one column for the encoded/original column names, and another column for the desired column names.
- To look up column names.
- Upload a file using the Raw Data app. To learn more about uploading CSV files to Redbird see this article.
- Click Import on the Column Names step.
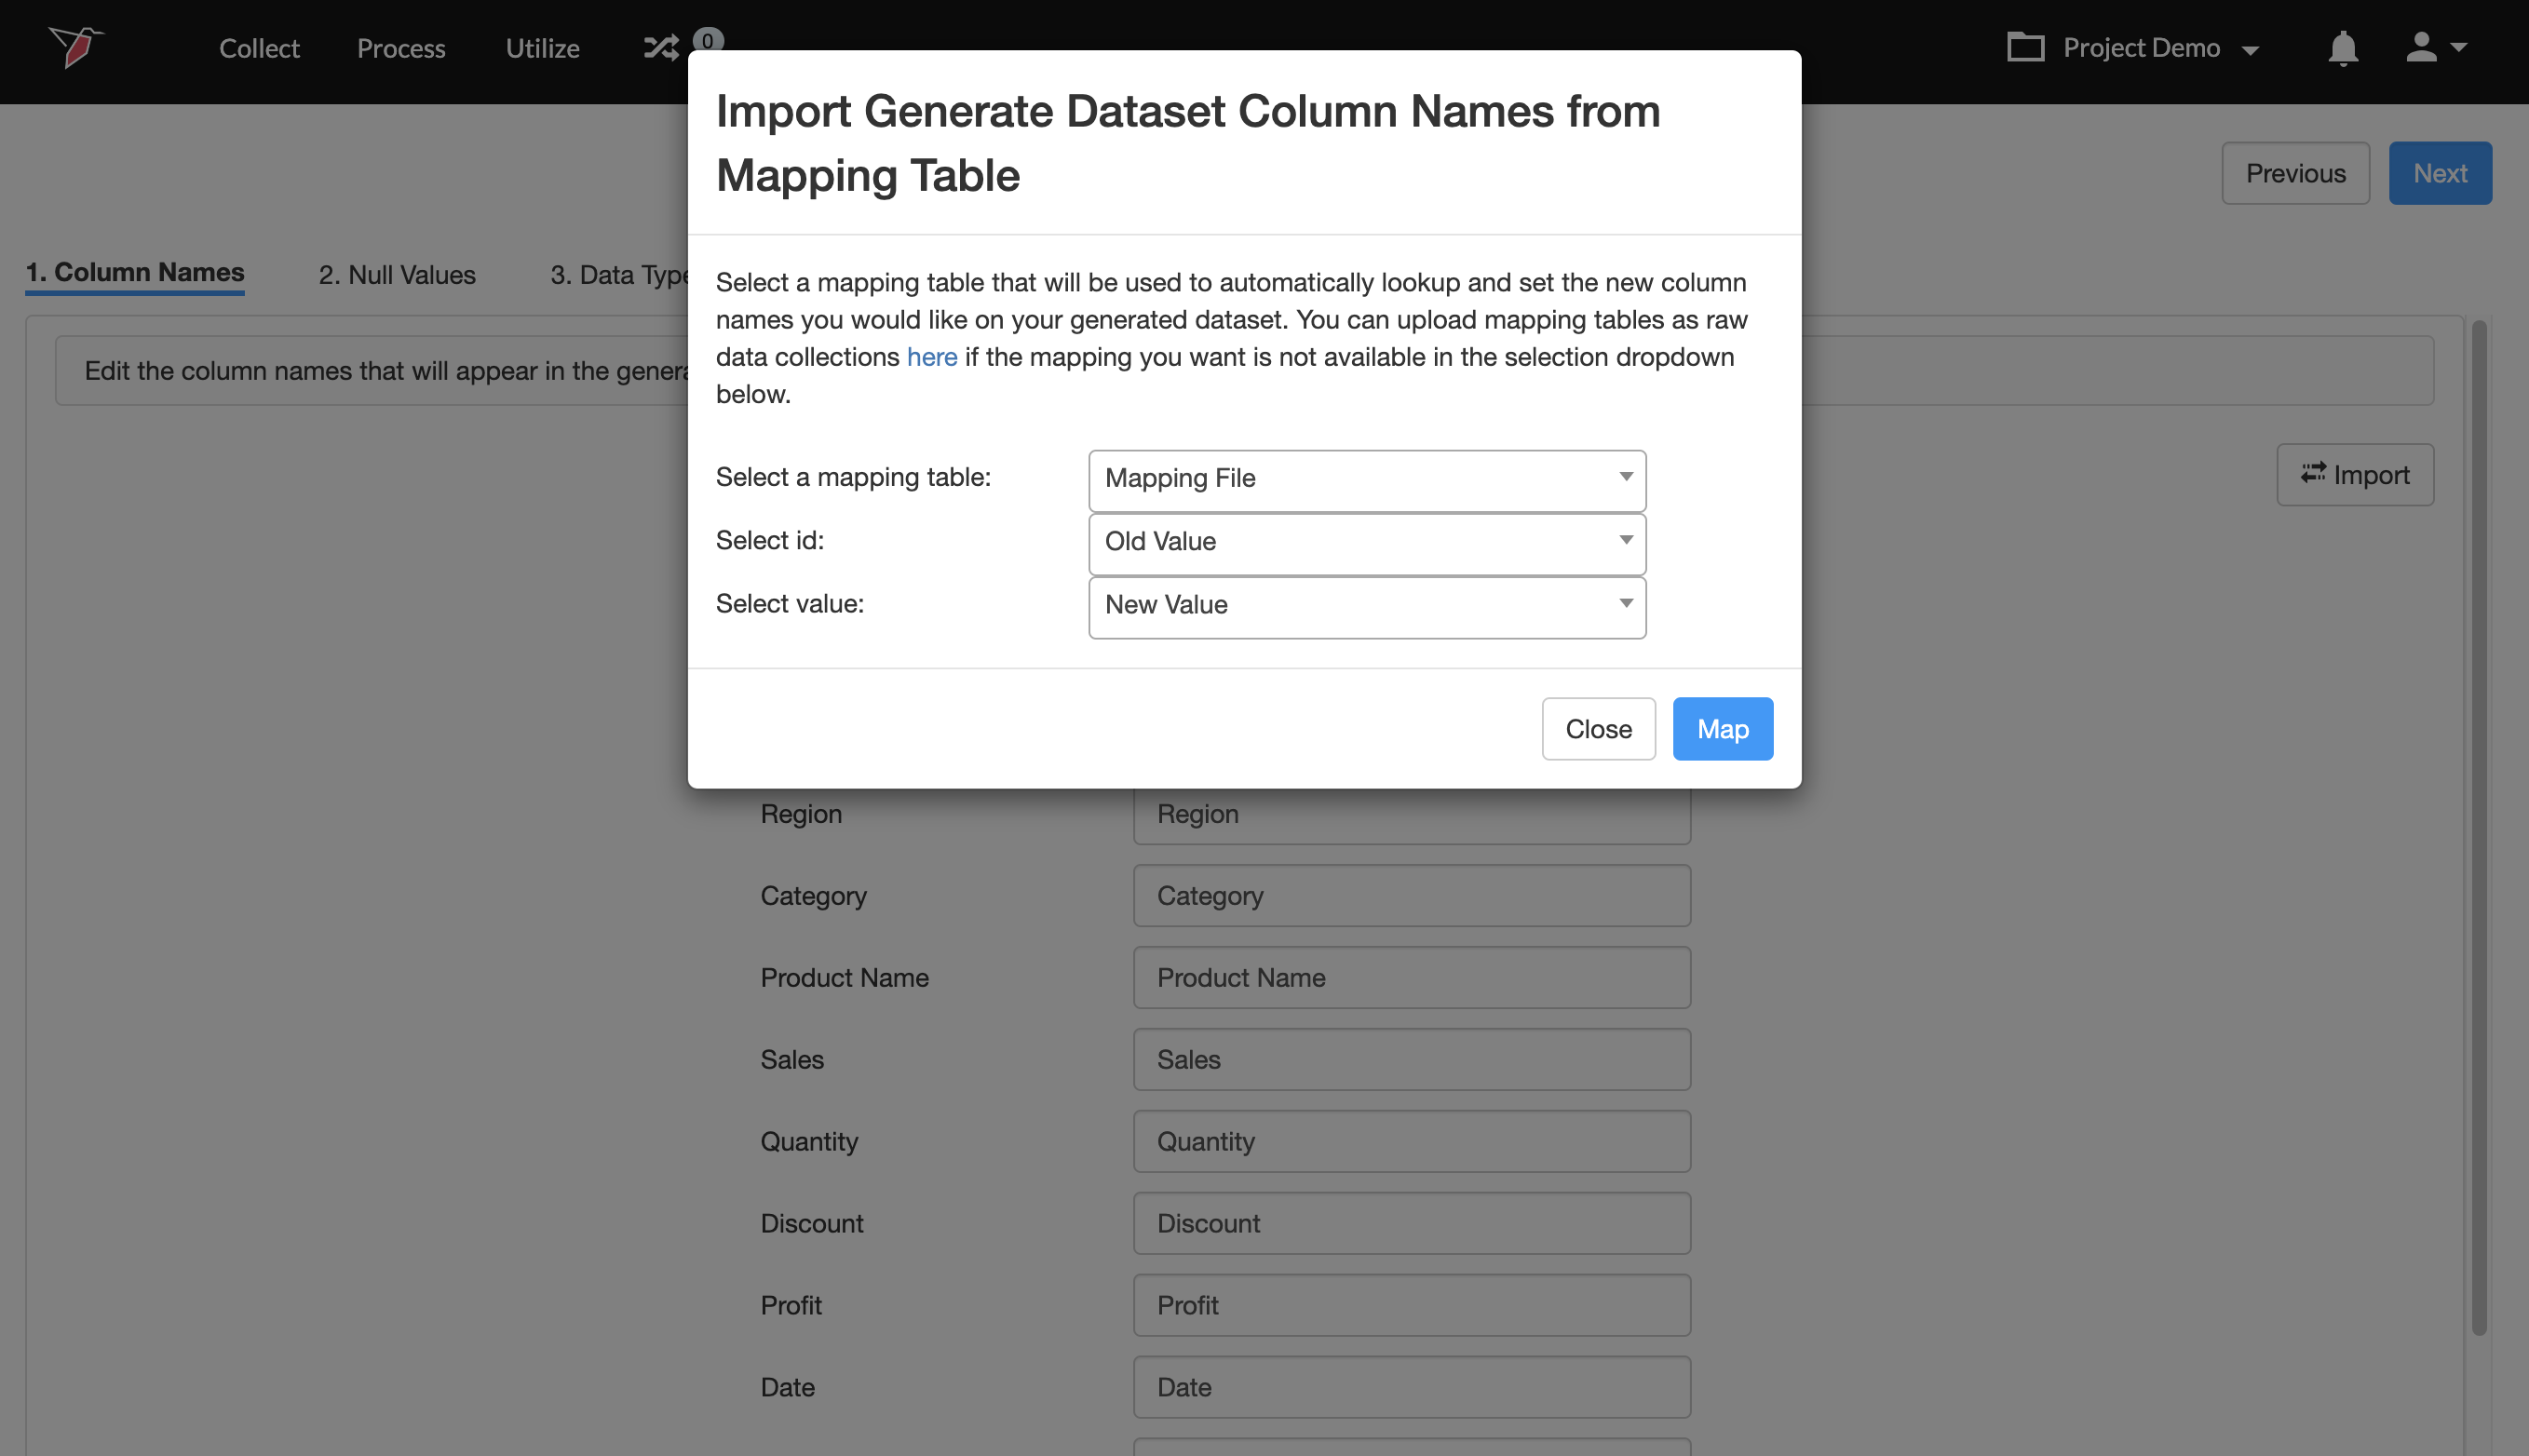
- In the pop-up that appears, choose the collection that contains the lookup values.\
 \
\ - Next, choose the column that contains the list of original column names from the Select ID dropdown.
- Then, choose the column that contains the list of desired column names from the Select Value dropdown.
- Finally, Click Map.
- Once you are done, click Next
Step 2: Configuring Null Values
The Collection may have certain values that you would want to consider as null or blank values. You can easily map those values to Null in this step.
Use case: An analyst at Fictitious LLC received their annual P&L data file, and uploaded it to Redbird. Multiple columns have #N/A, #VALUE!, #ERROR! values that need to be mapped to blank / null values.
To map null values in bulk for all columns, do the following:
- In the Bulk Mapping Values section, enter a value in the Input value to map to NULL field. For example, #N/A.
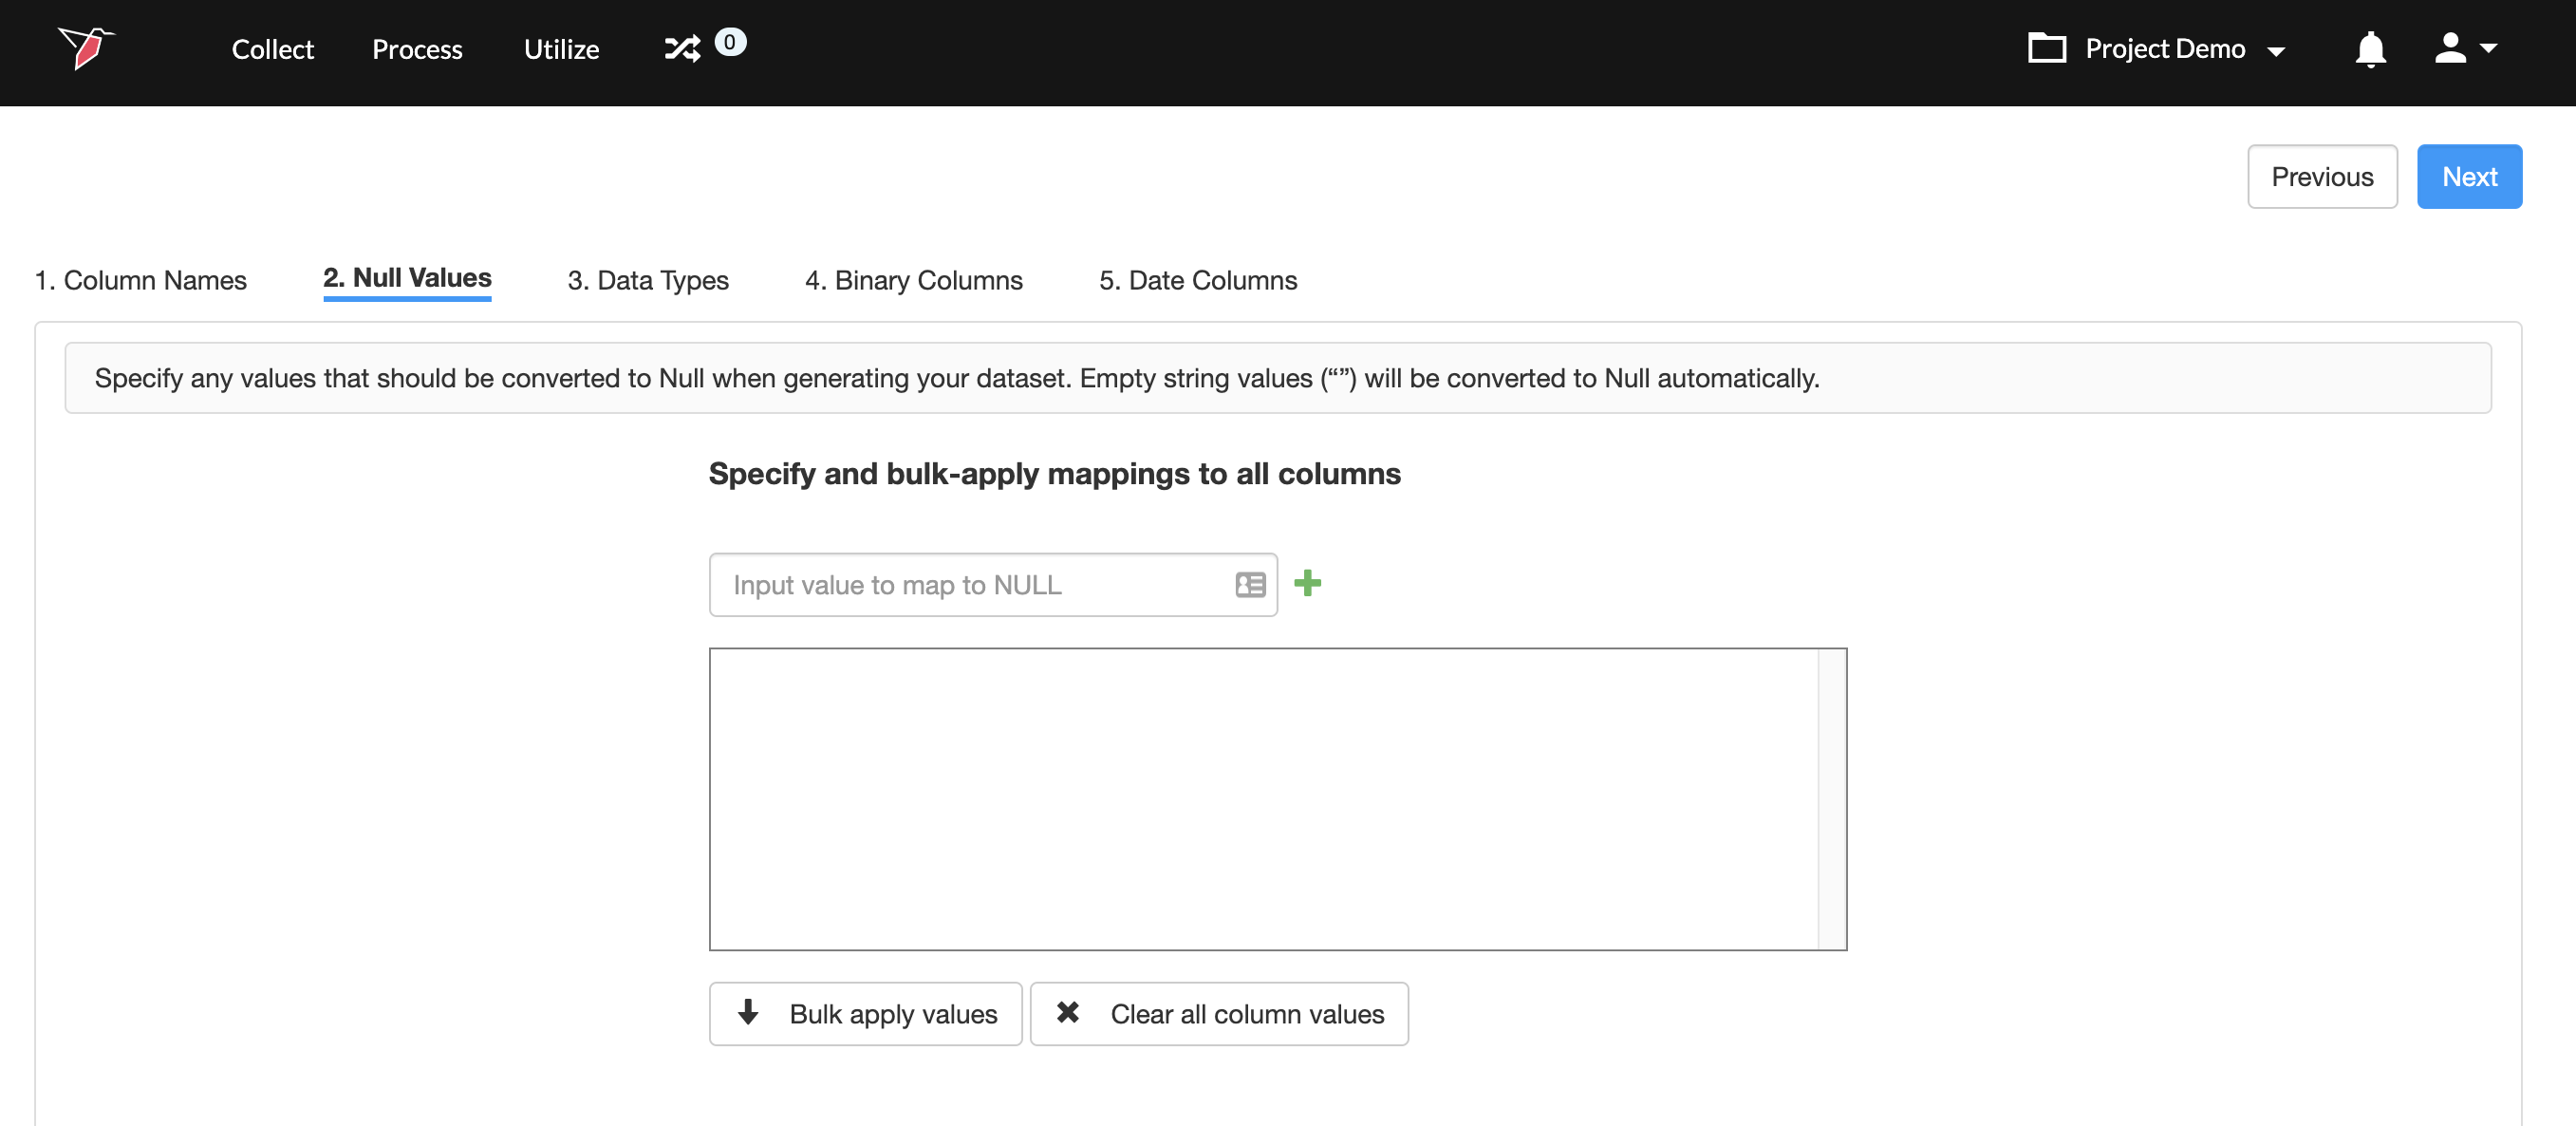
- Click + . The value #N/A will be added to the box below, which means that if a value in a column is #N/A it will be mapped to blank. You can add more than one mapping this way.
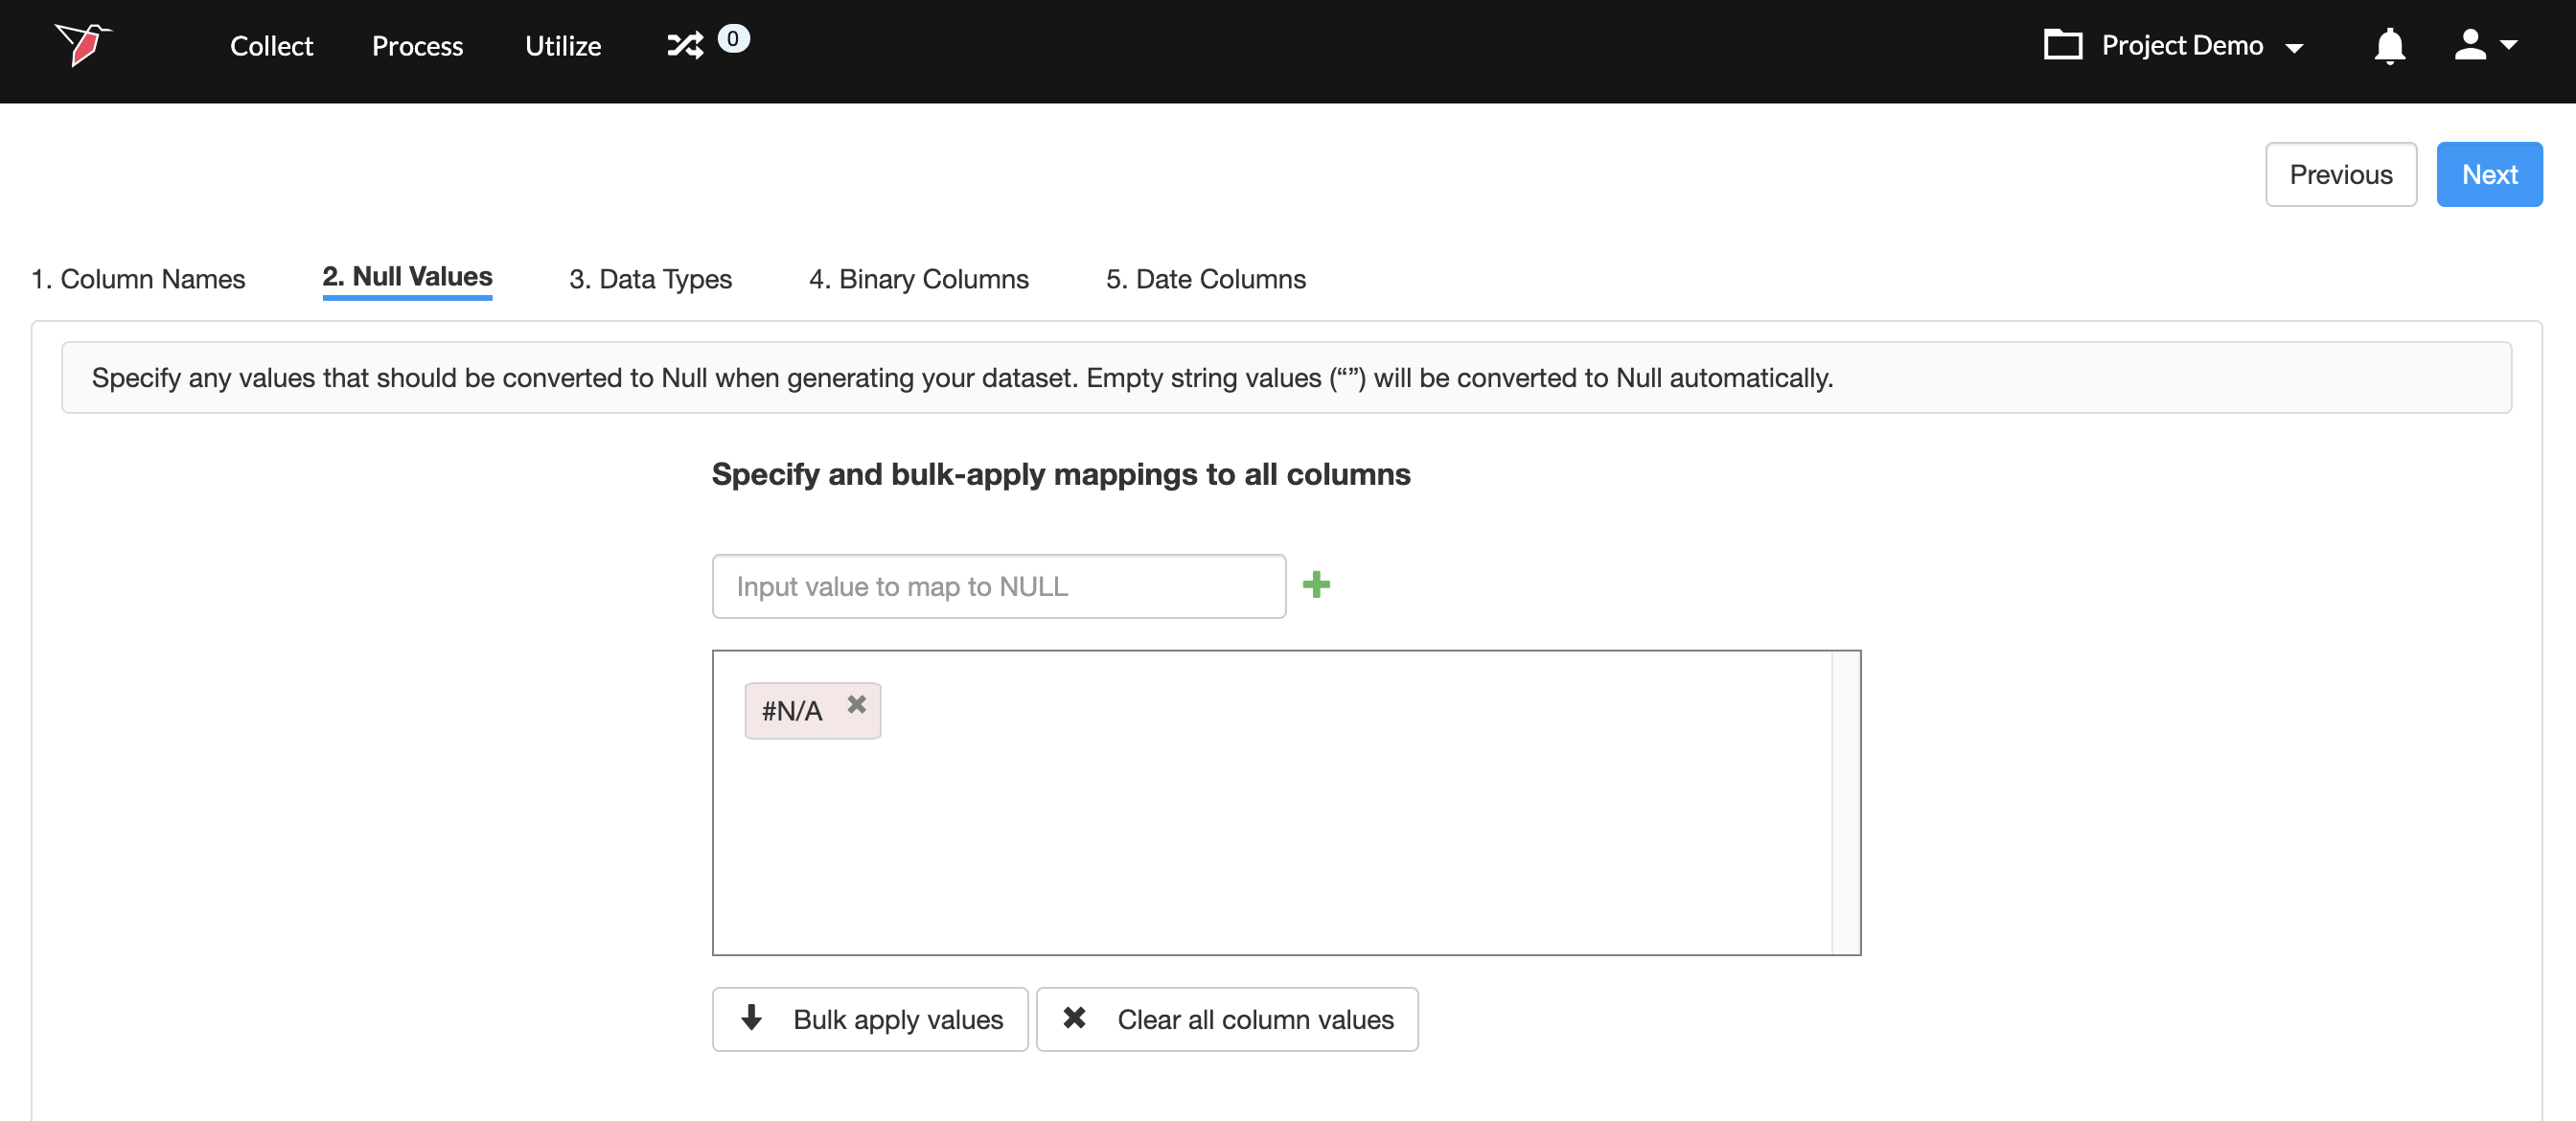
- Once you have added all the values, click Bulk apply values. This will take the values you added in step 2, and apply to all columns in the dataset.
- To delete all mappings just click Clear all column values.
- Once you are done, click Next.
To map null values only for specific columns, do the following:
- Navigate to the desired column, and enter a value in the Input value to map to NULL field. For example, #ERROR!
- Click + . The value #ERROR! will be added to the box below, which means that if a value in this column is #ERROR! it will be mapped to blank. You can add more than one mapping this way.
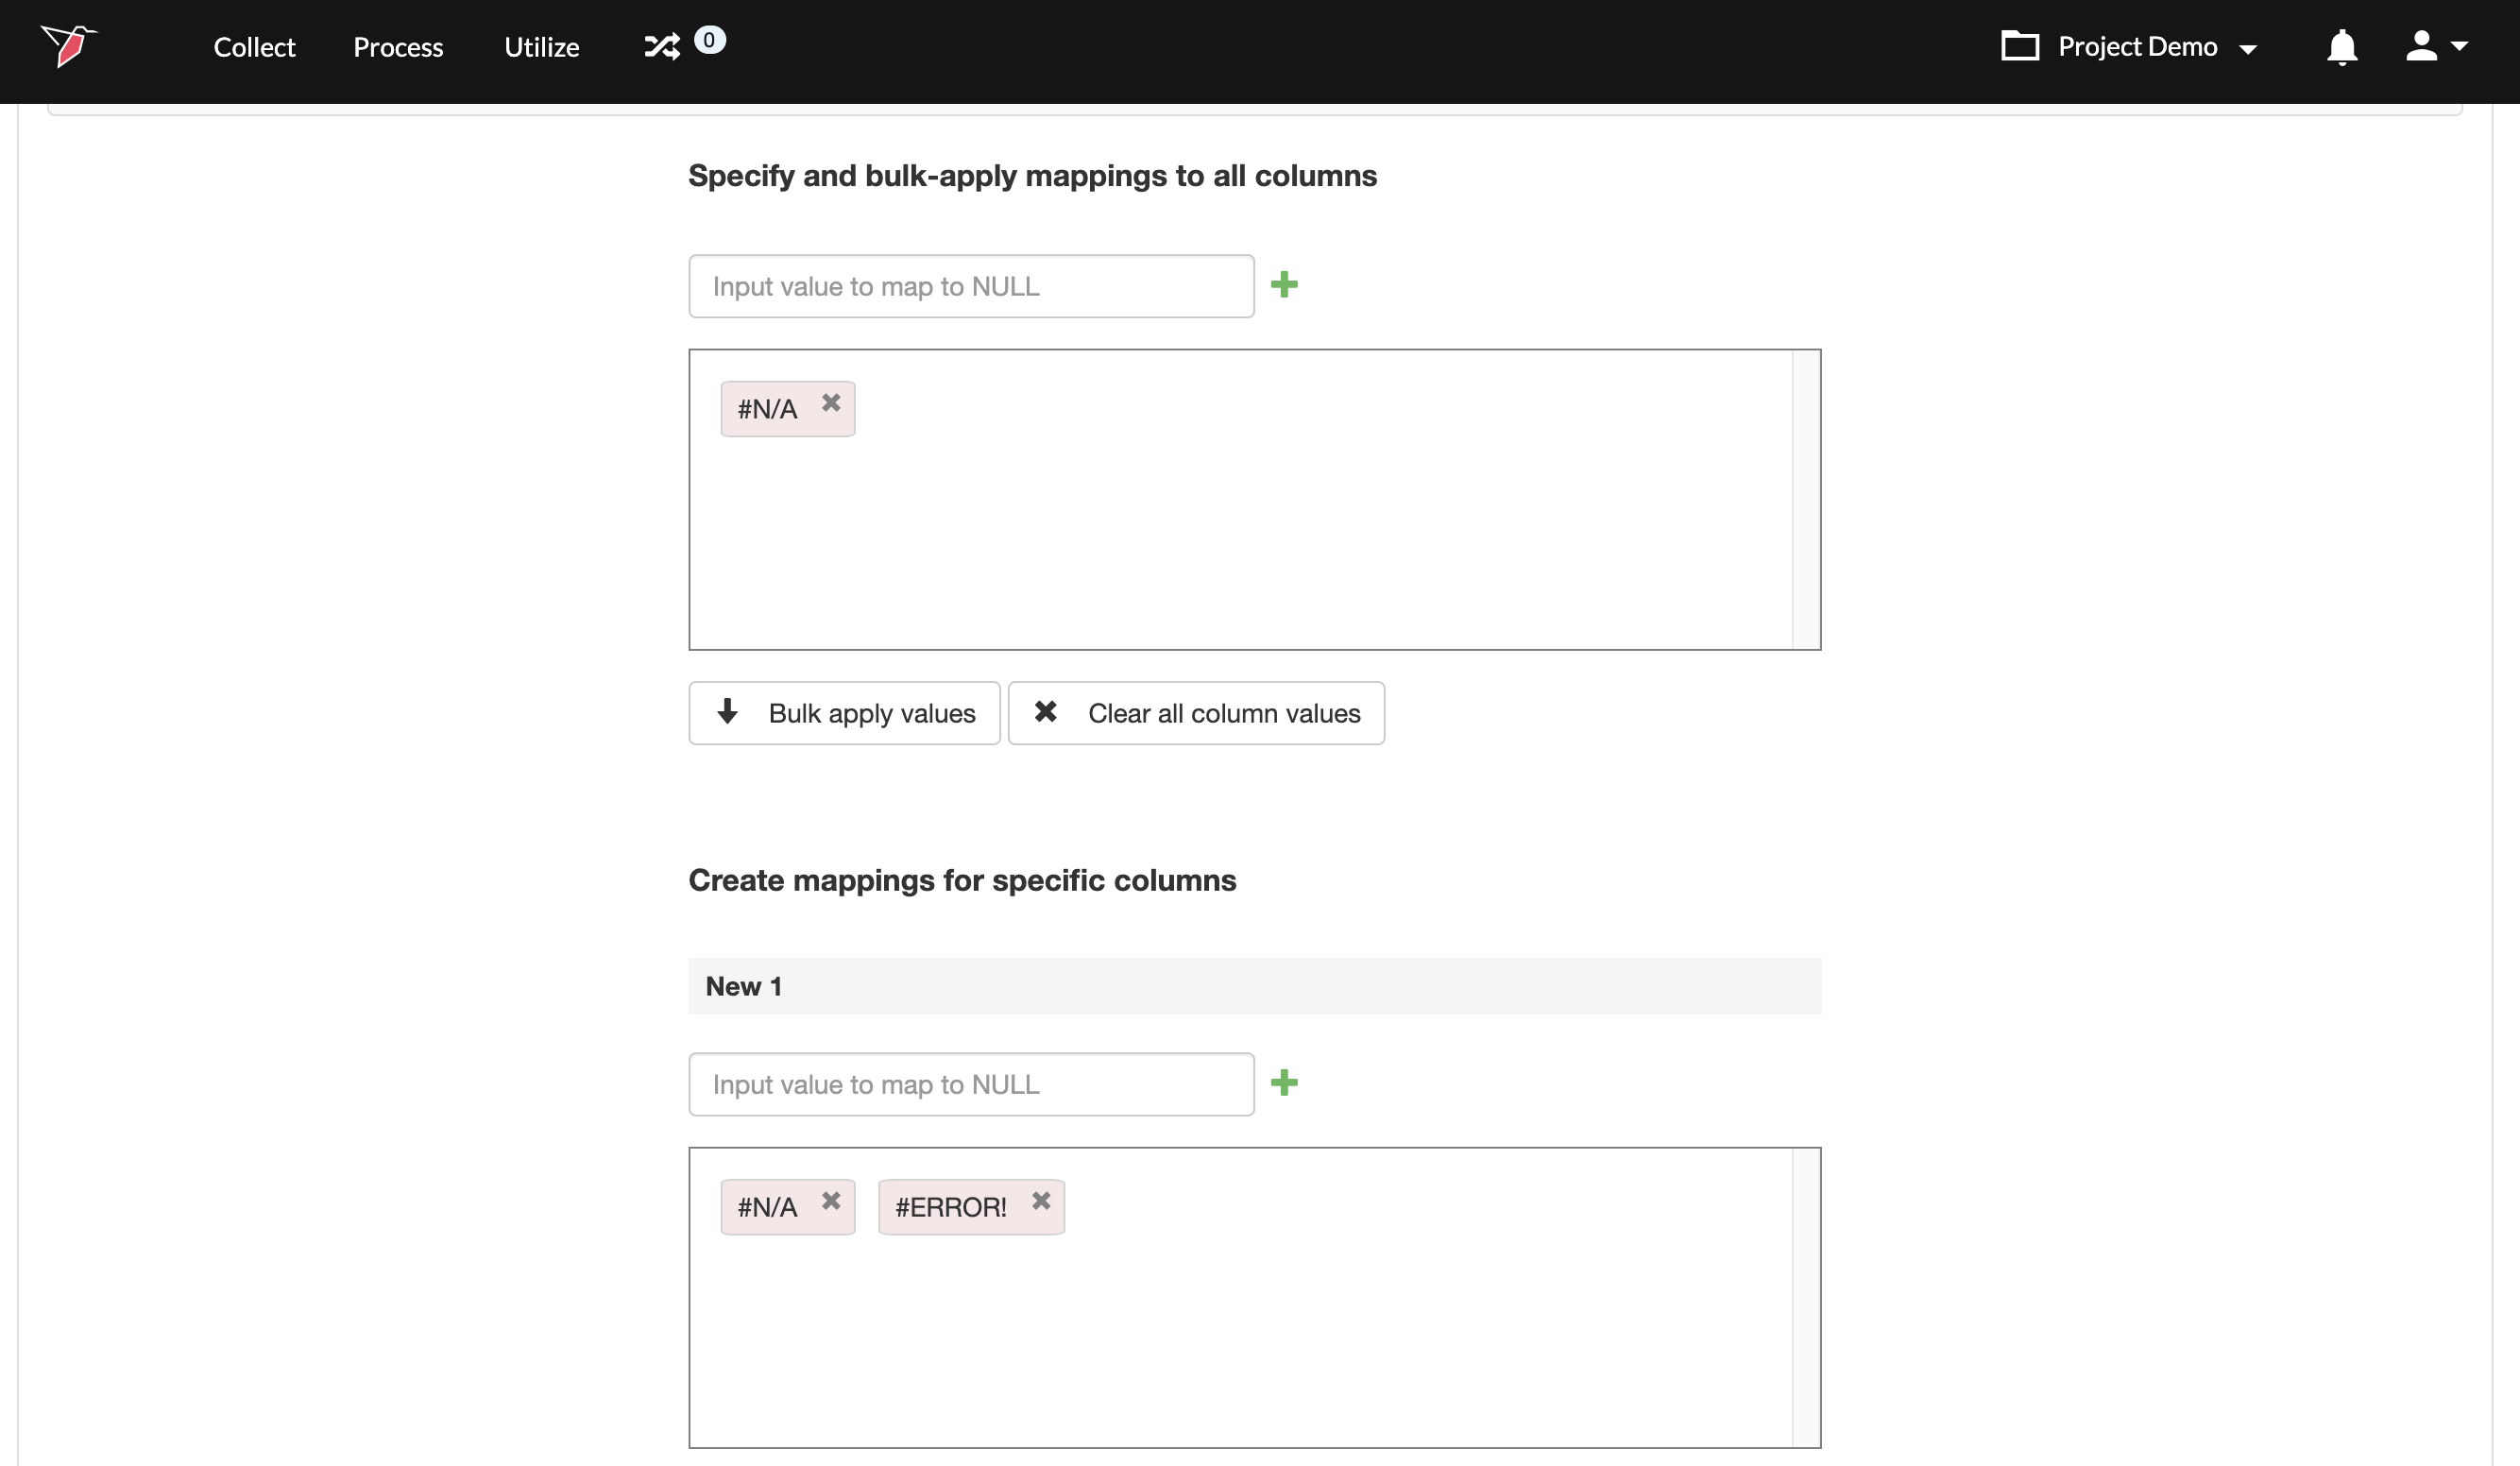
- Once you are done, click Next
Step 3: Configuring Data Types
In this step, you can review and adjust the data types assigned to the columns in your dataset. This is important as columns will be treated differently within Redbird based on their data type. For example, mathematical operations can only be performed on numerical columns.
The following data types are supported by Redbird:
- Text: A column that contains text values should be mapped to the text type. Examples of text columns include categorical information, alphanumeric IDs, comments, URLs, or anything that does not fit into the buckets below.
- Numerical: Mathematical operations can be performed on columns that have been mapped to the numerical type. Also, formatting such as removing commas, converting percentage values to decimals, etc., are automatically taken care of when mapping columns to this type.
- Binary: These columns can have only two values: True and False.
- Date: Columns mapped to this type represent date values. These columns can be used to perform time-based calculations such as rolling averages.
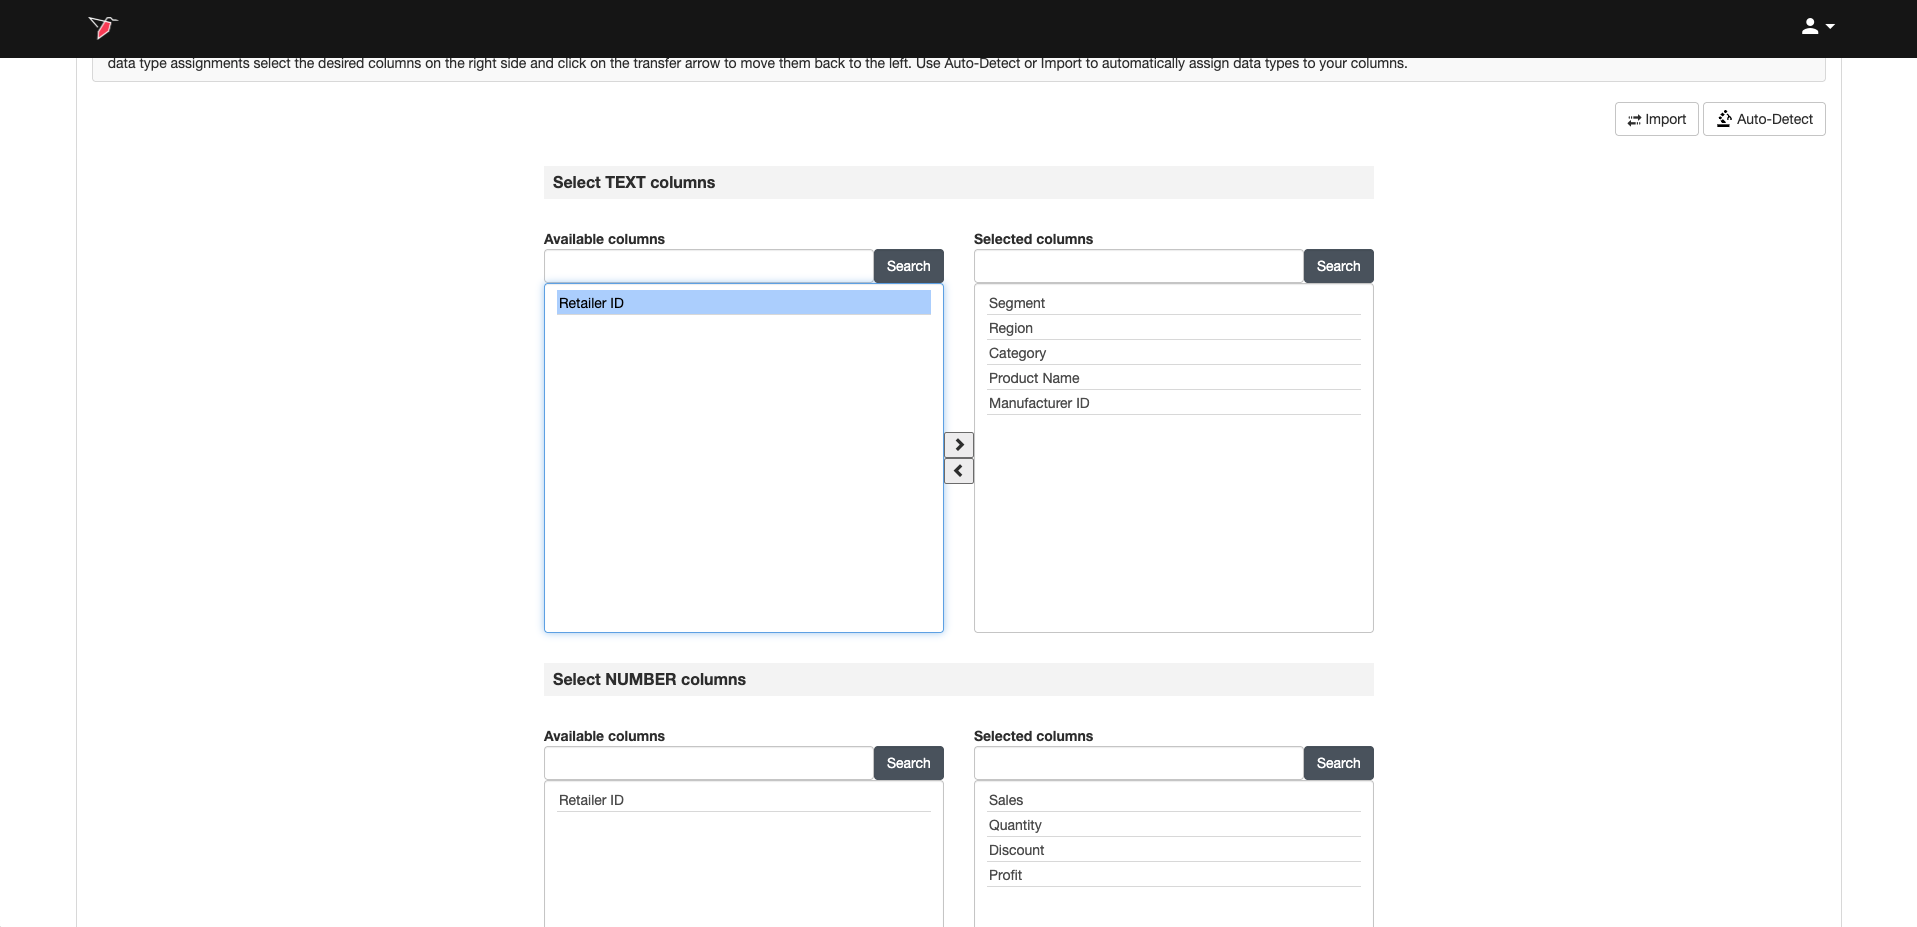
For each data type, you’ll see two buckets:
- The Available Columns bucket on the left shows all columns that have not yet been assigned a data type
- The Selected Columns bucket on the right shows the columns that have been assigned to that data type.
To reassign columns to a different data type:
- In the Selected Columns bucket (right), click the column names you want to move.
- Use the left arrow button to move them back to the Available Columns bucket (left).
- Scroll to the data type section you want to assign the columns to, then use the right arrow button to move them into the Selected Columns bucket for that type.
Tip:You can use CTRL / CMD + click select more than one column, or CTRL / CMD + A to select call columns.
If you cannot find the column you are looking for, you can search for them by typing in the name in the box and clicking Search.
Alternatively, you can click on Auto-detect to let Redbird make the best guess and assign any unassigned columns to their respective types.
Once you are done, click Next.
Importing a Data Type Configuration
Redbird also allows you to import the data types from a dataset or collection that was previously configured. To do this:
- Click Import.
- Click Collection or Dataset.
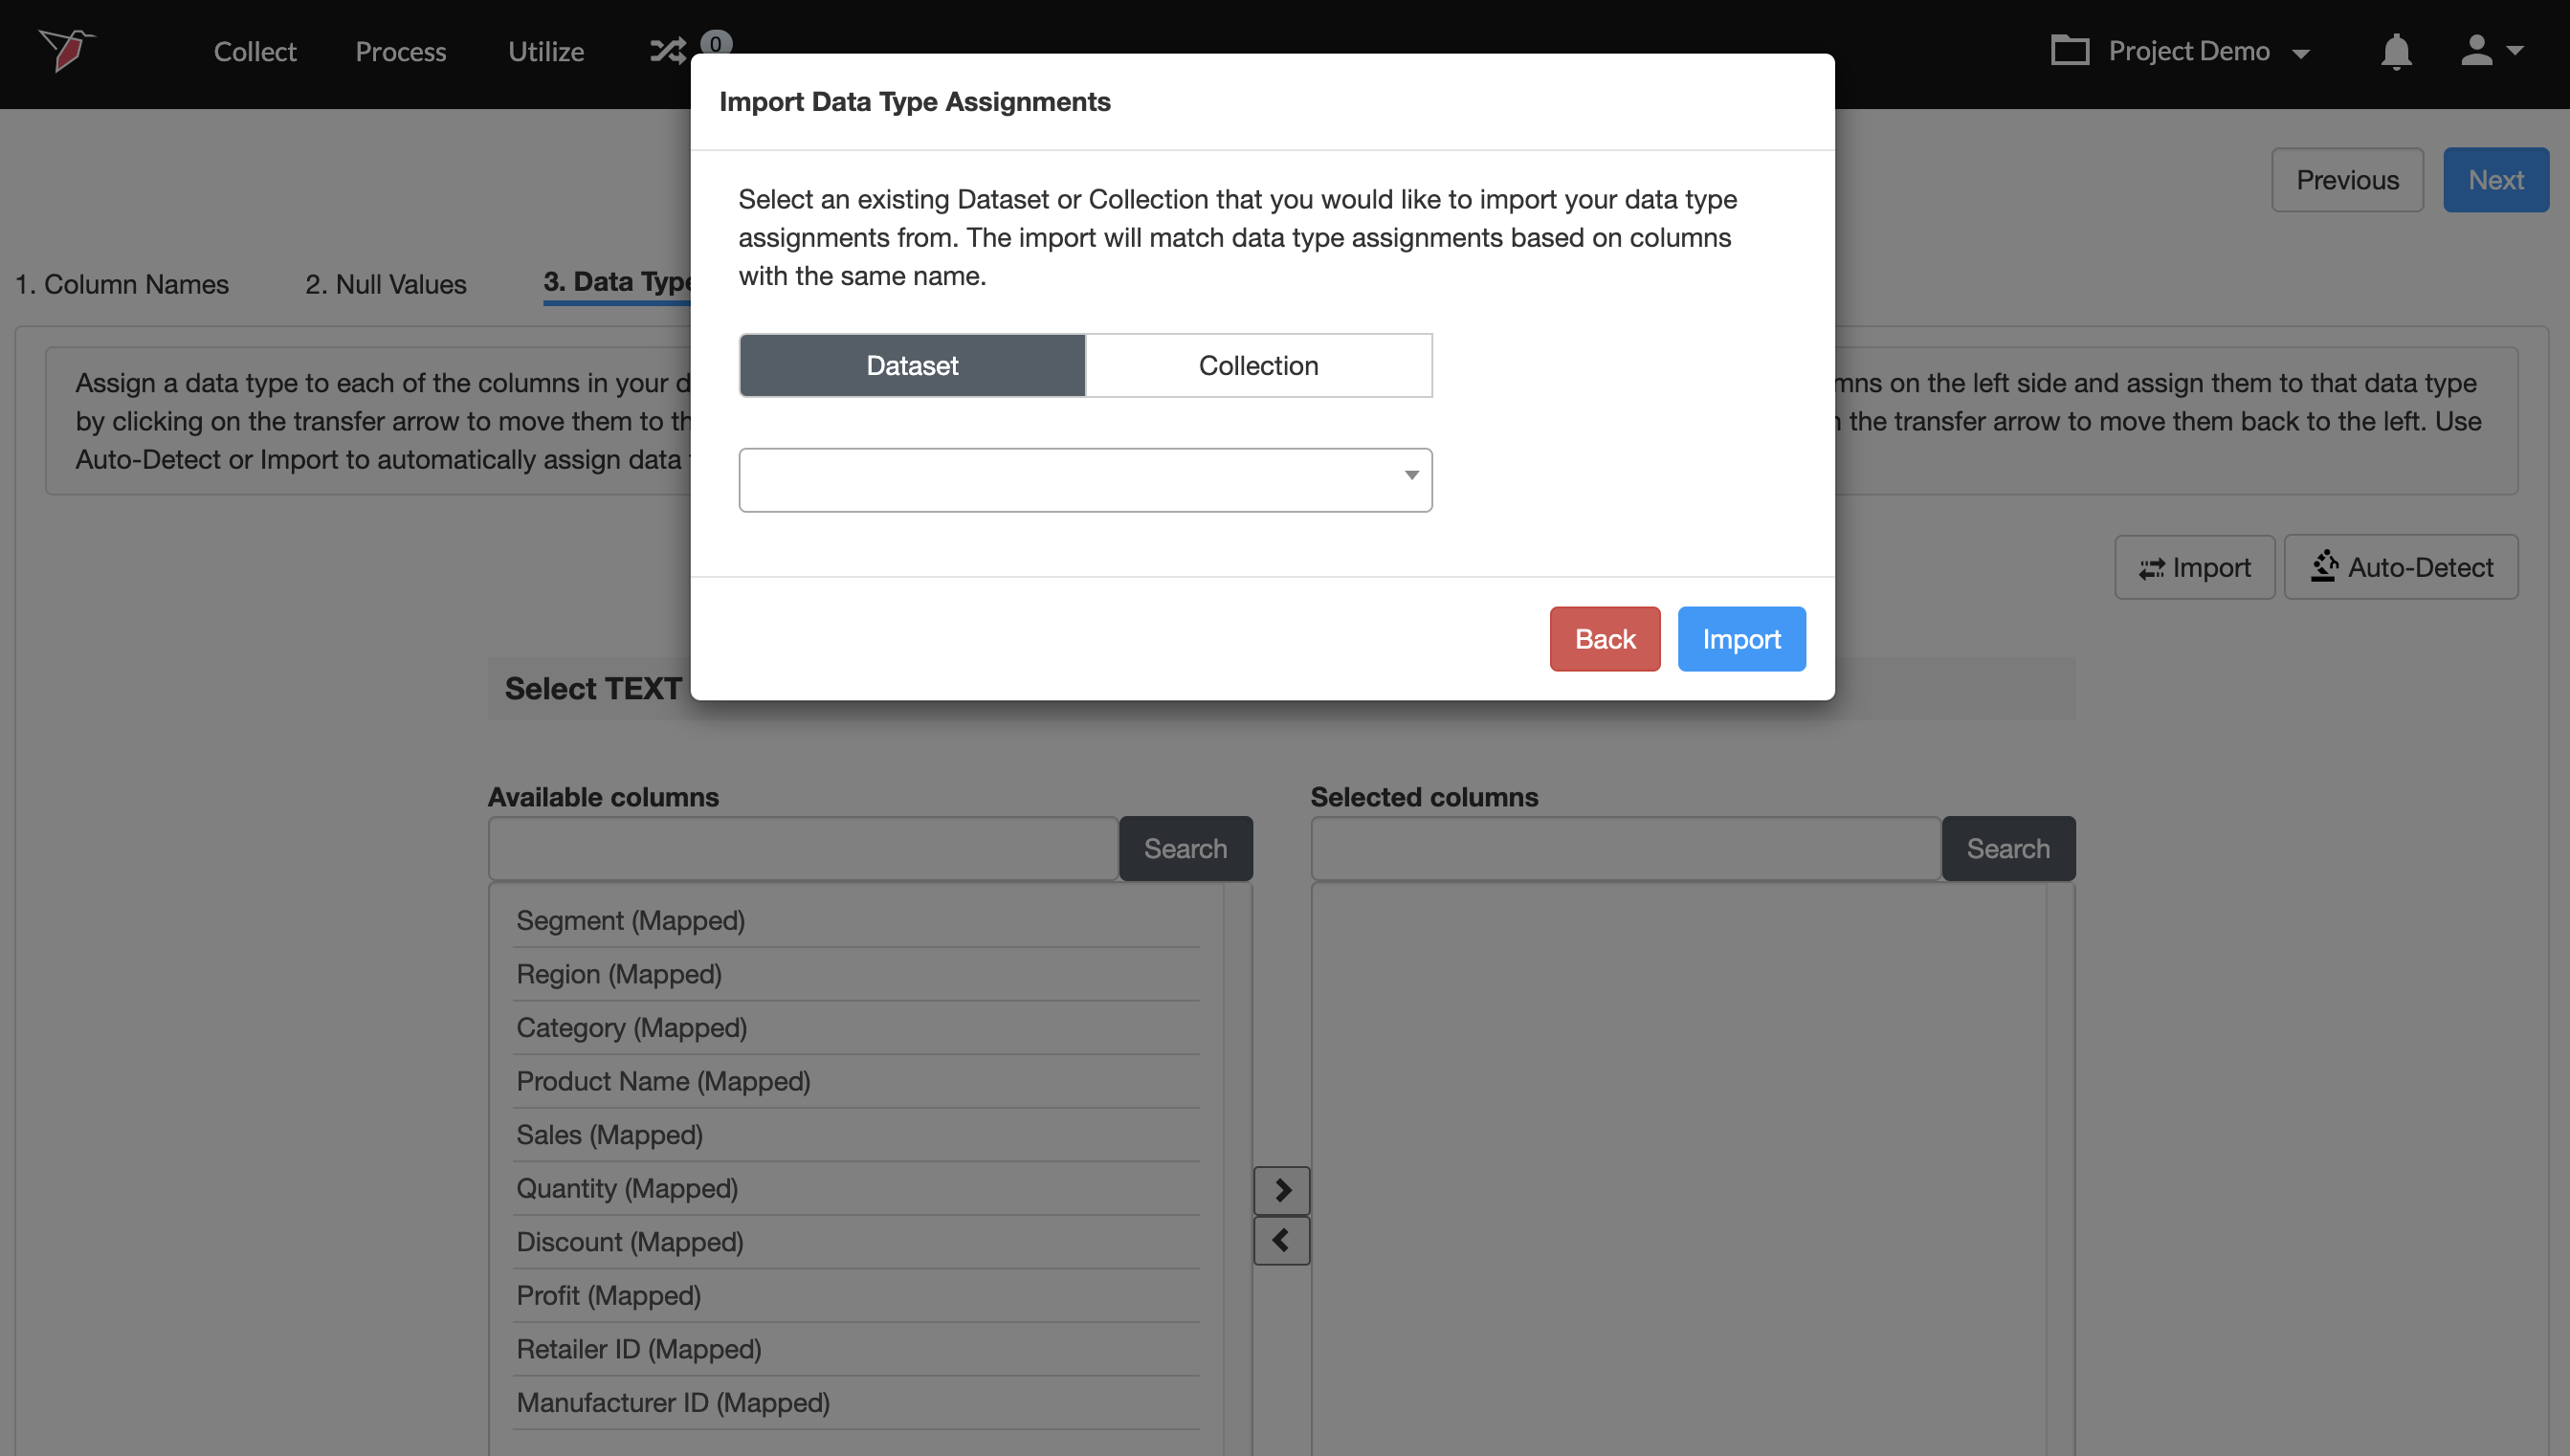
- Choose the desired item from the dropdown below.
- Click Import.
- Once you are done, click Next.
Step 4: Configuring Binary Columns
If any columns were assigned to the binary data type, you will be taken to this step. To configure binary values:
- For each column in the dataset, the unique values in the column are pre-sorted into the True bucket on the left and the False bucket on the right, based on values commonly seen in binary columns like 0 and 1.
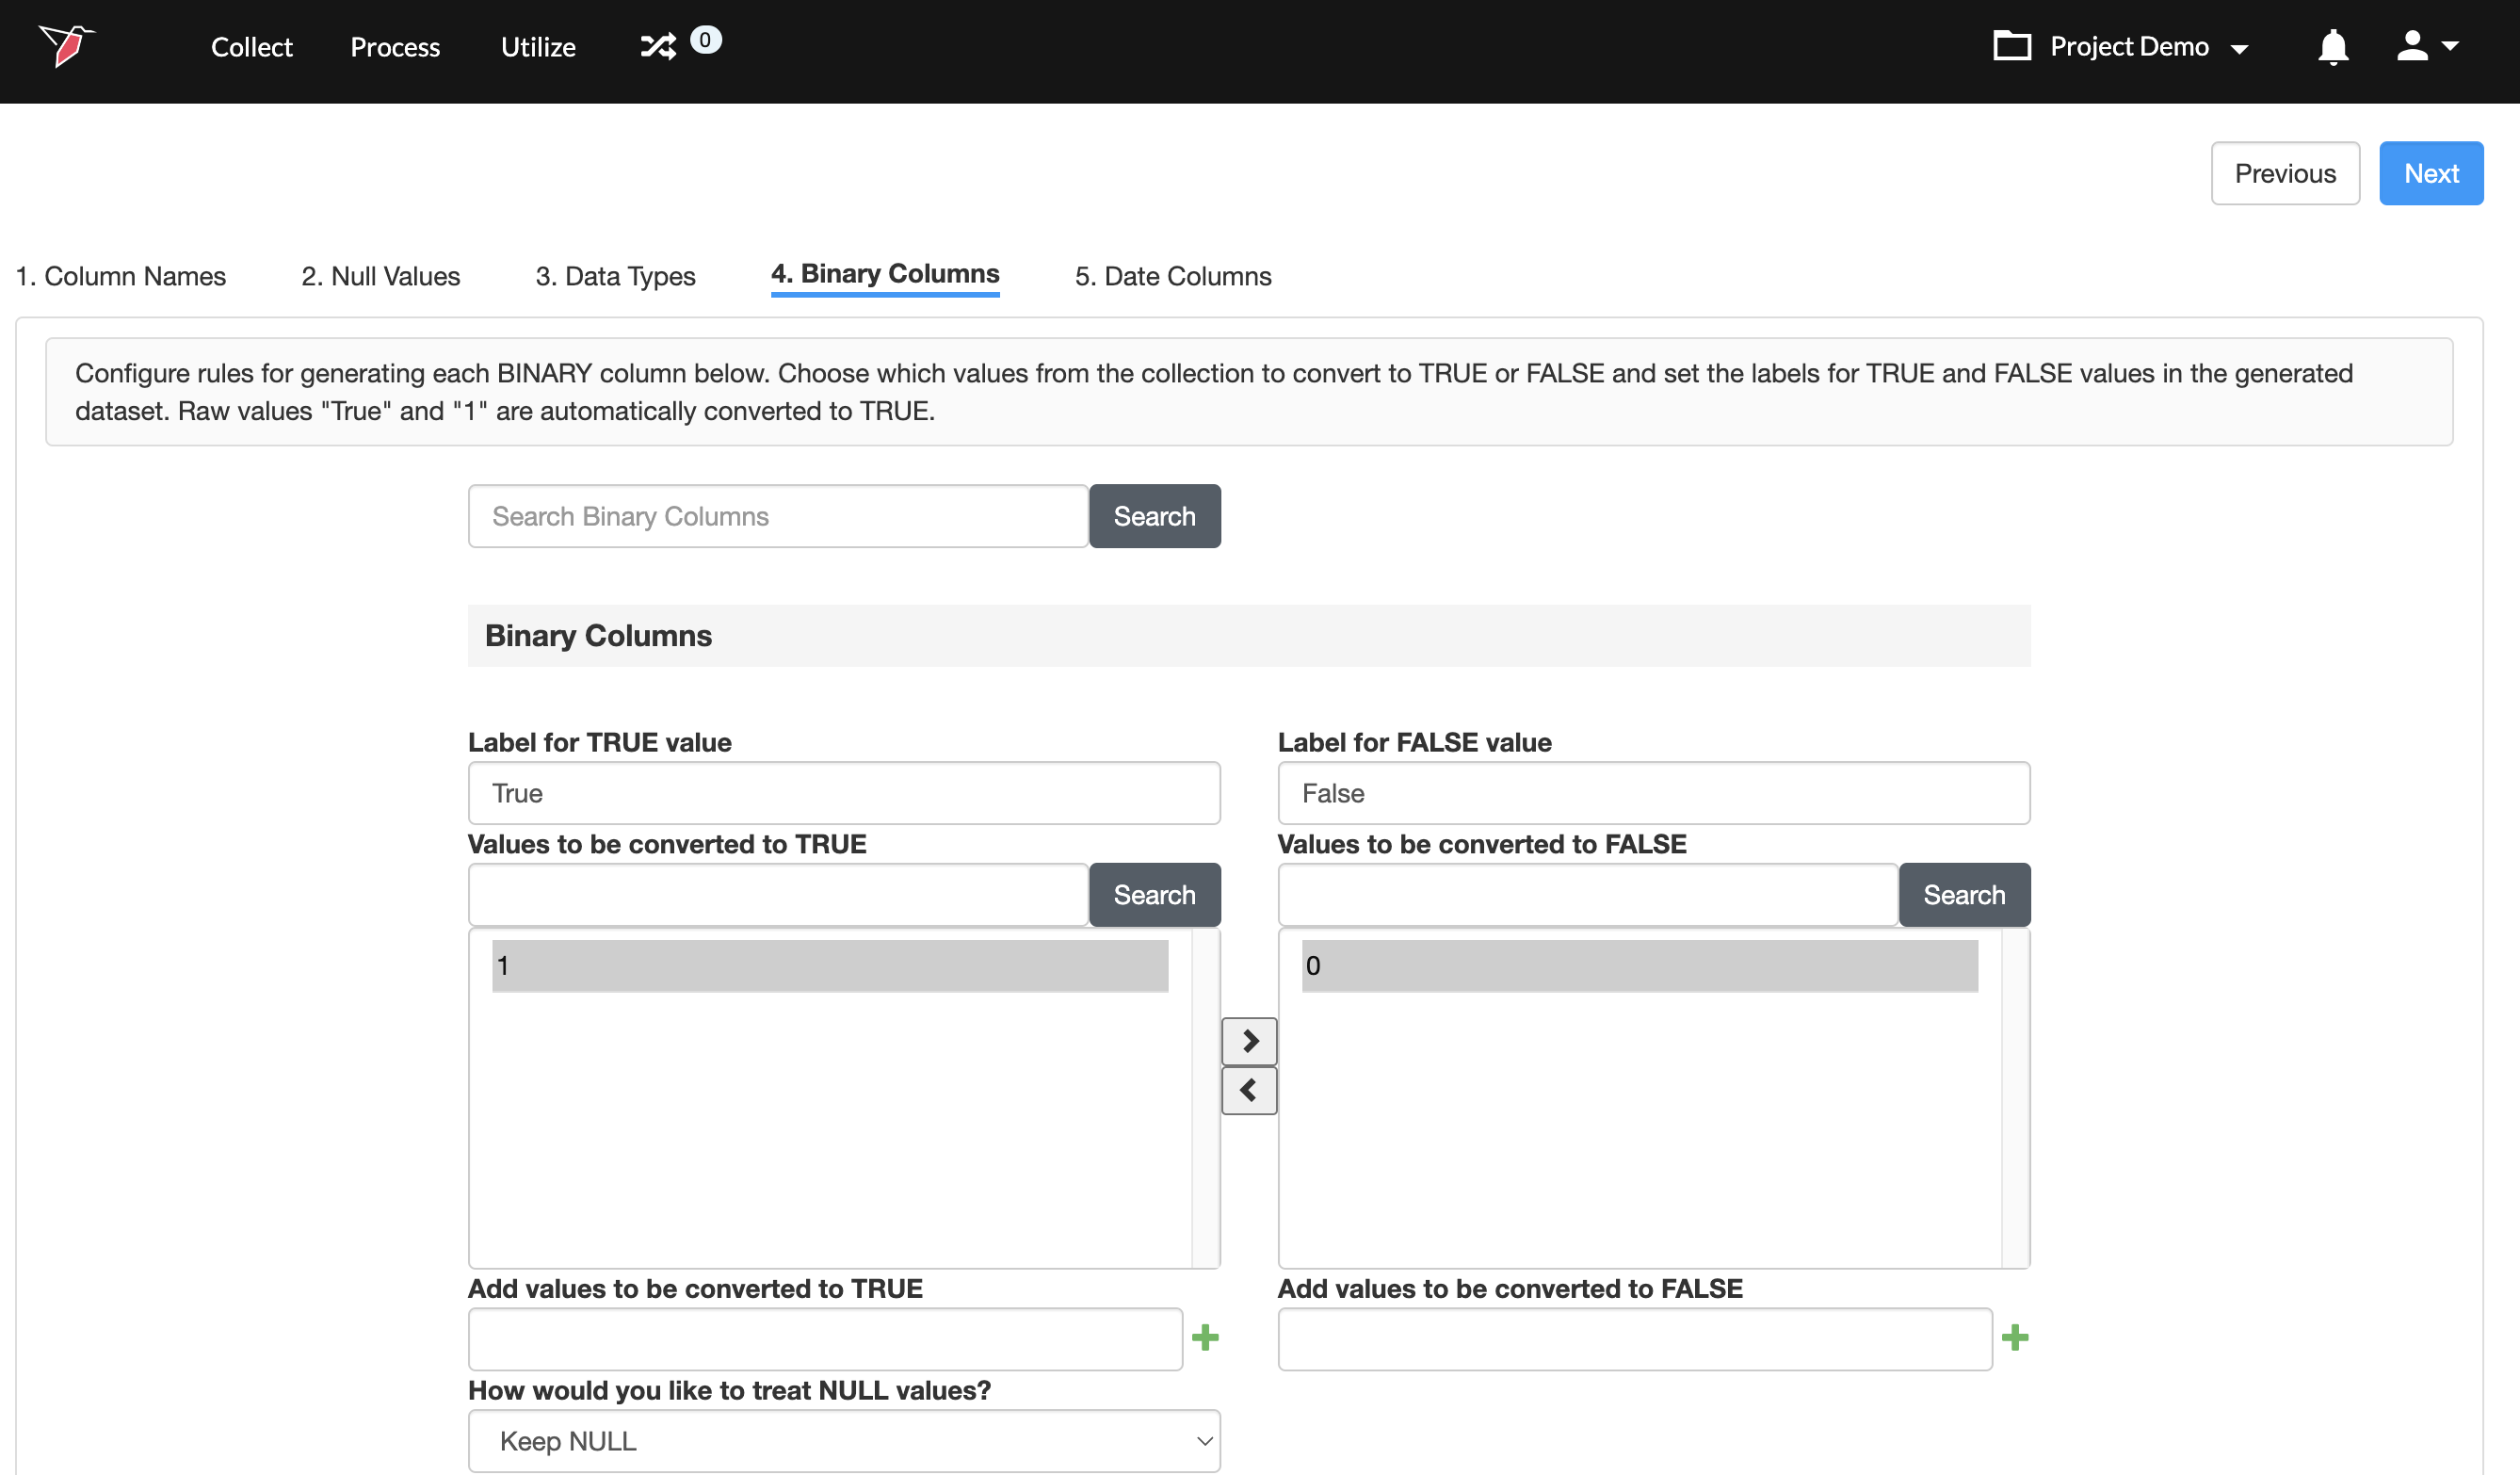
- You can move the values to the respective bucket using the buttons.
- If you anticipate that more unique values will be added to a column when the data updates or when you load more data into the collection, you can add these values to the list by typing them in the Add values to be converted to TRUE / FALSE field, and clicking the + button.
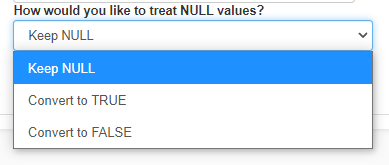
- Choose how you want the null values to be treated by clicking on the dropdown.
- Repeat steps 1-4 for all binary columns.
- Once you are done, click Next.
Step 5: Configuring Date Columns
If any columns were assigned to the date data type, you will be taken to this step. To reconfigure date values or configure date values for any newly added columns:
- For each column assigned to the date type, a random value will be chosen and shown to you. If the value shown does not represent a date value, you can click on Refresh date example to display a different value.

- On the date value text, click and highlight the portion that represents the month.
- Next, highlight the portion that represents the date.
- Then, highlight the portion that represents the year.
- Repeat steps 1-4 for all the date columns.
- Finally, click Next.
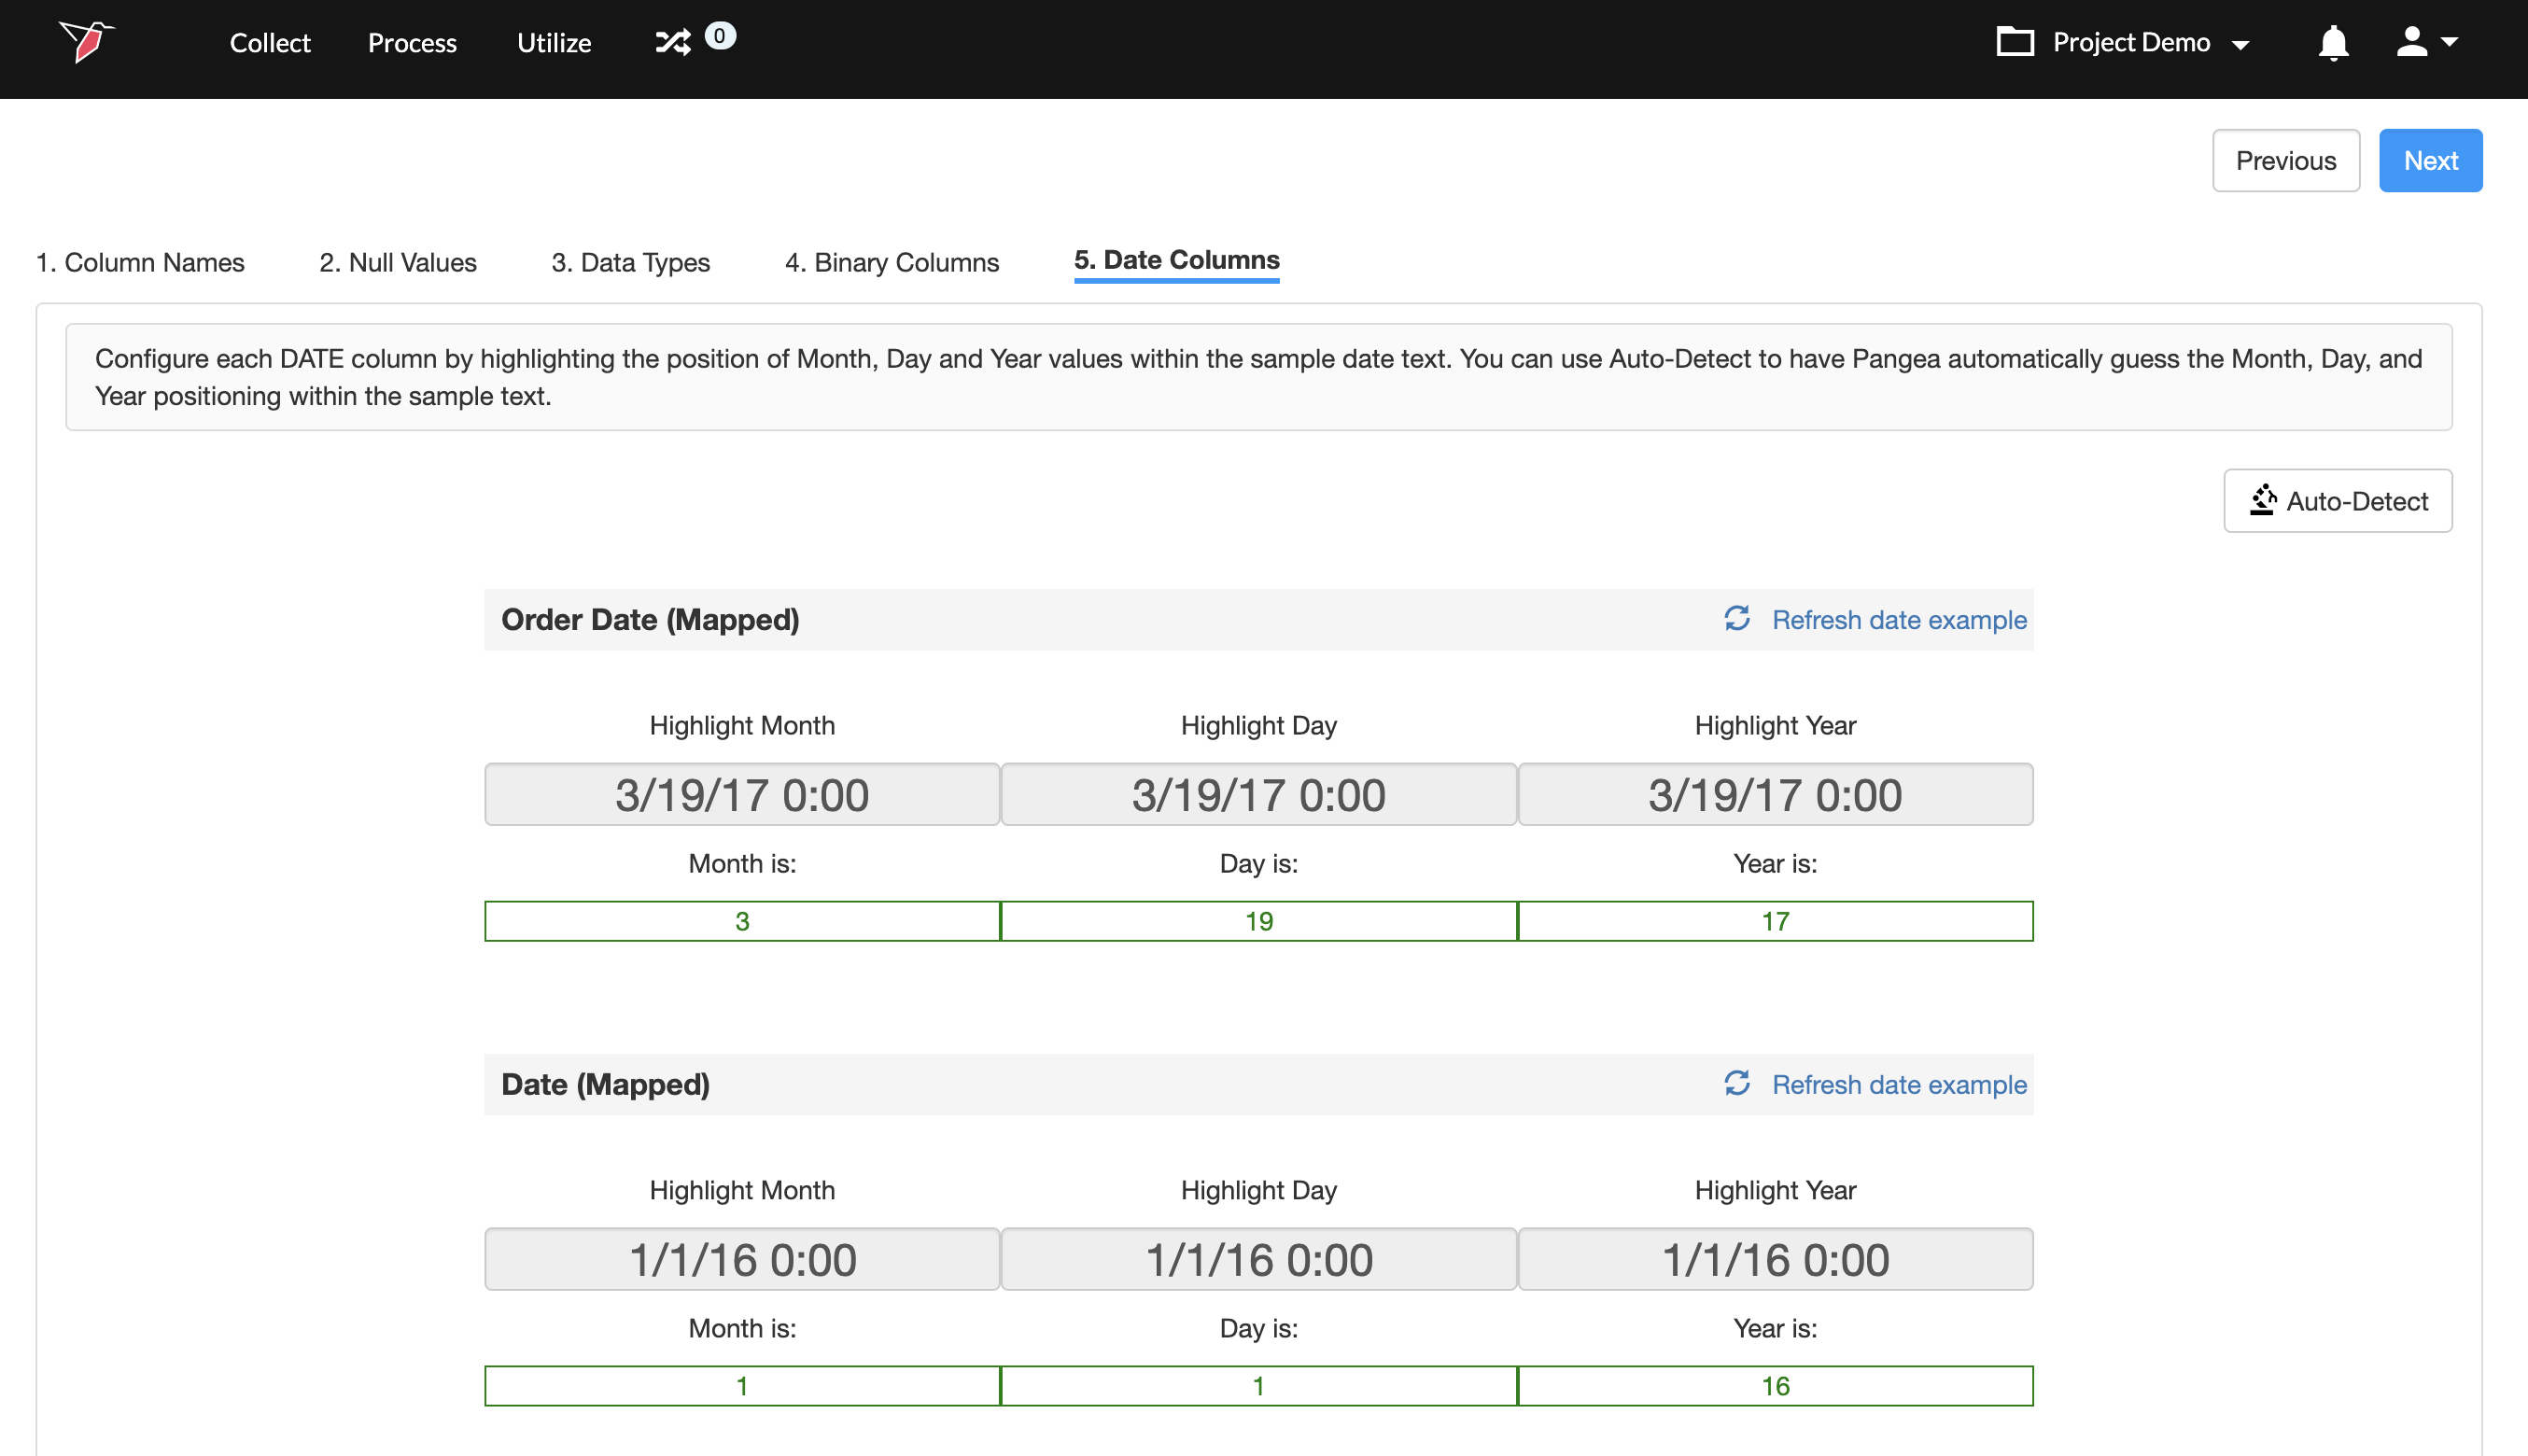
Tip:You can click on Auto-detect to identify the data format automatically.
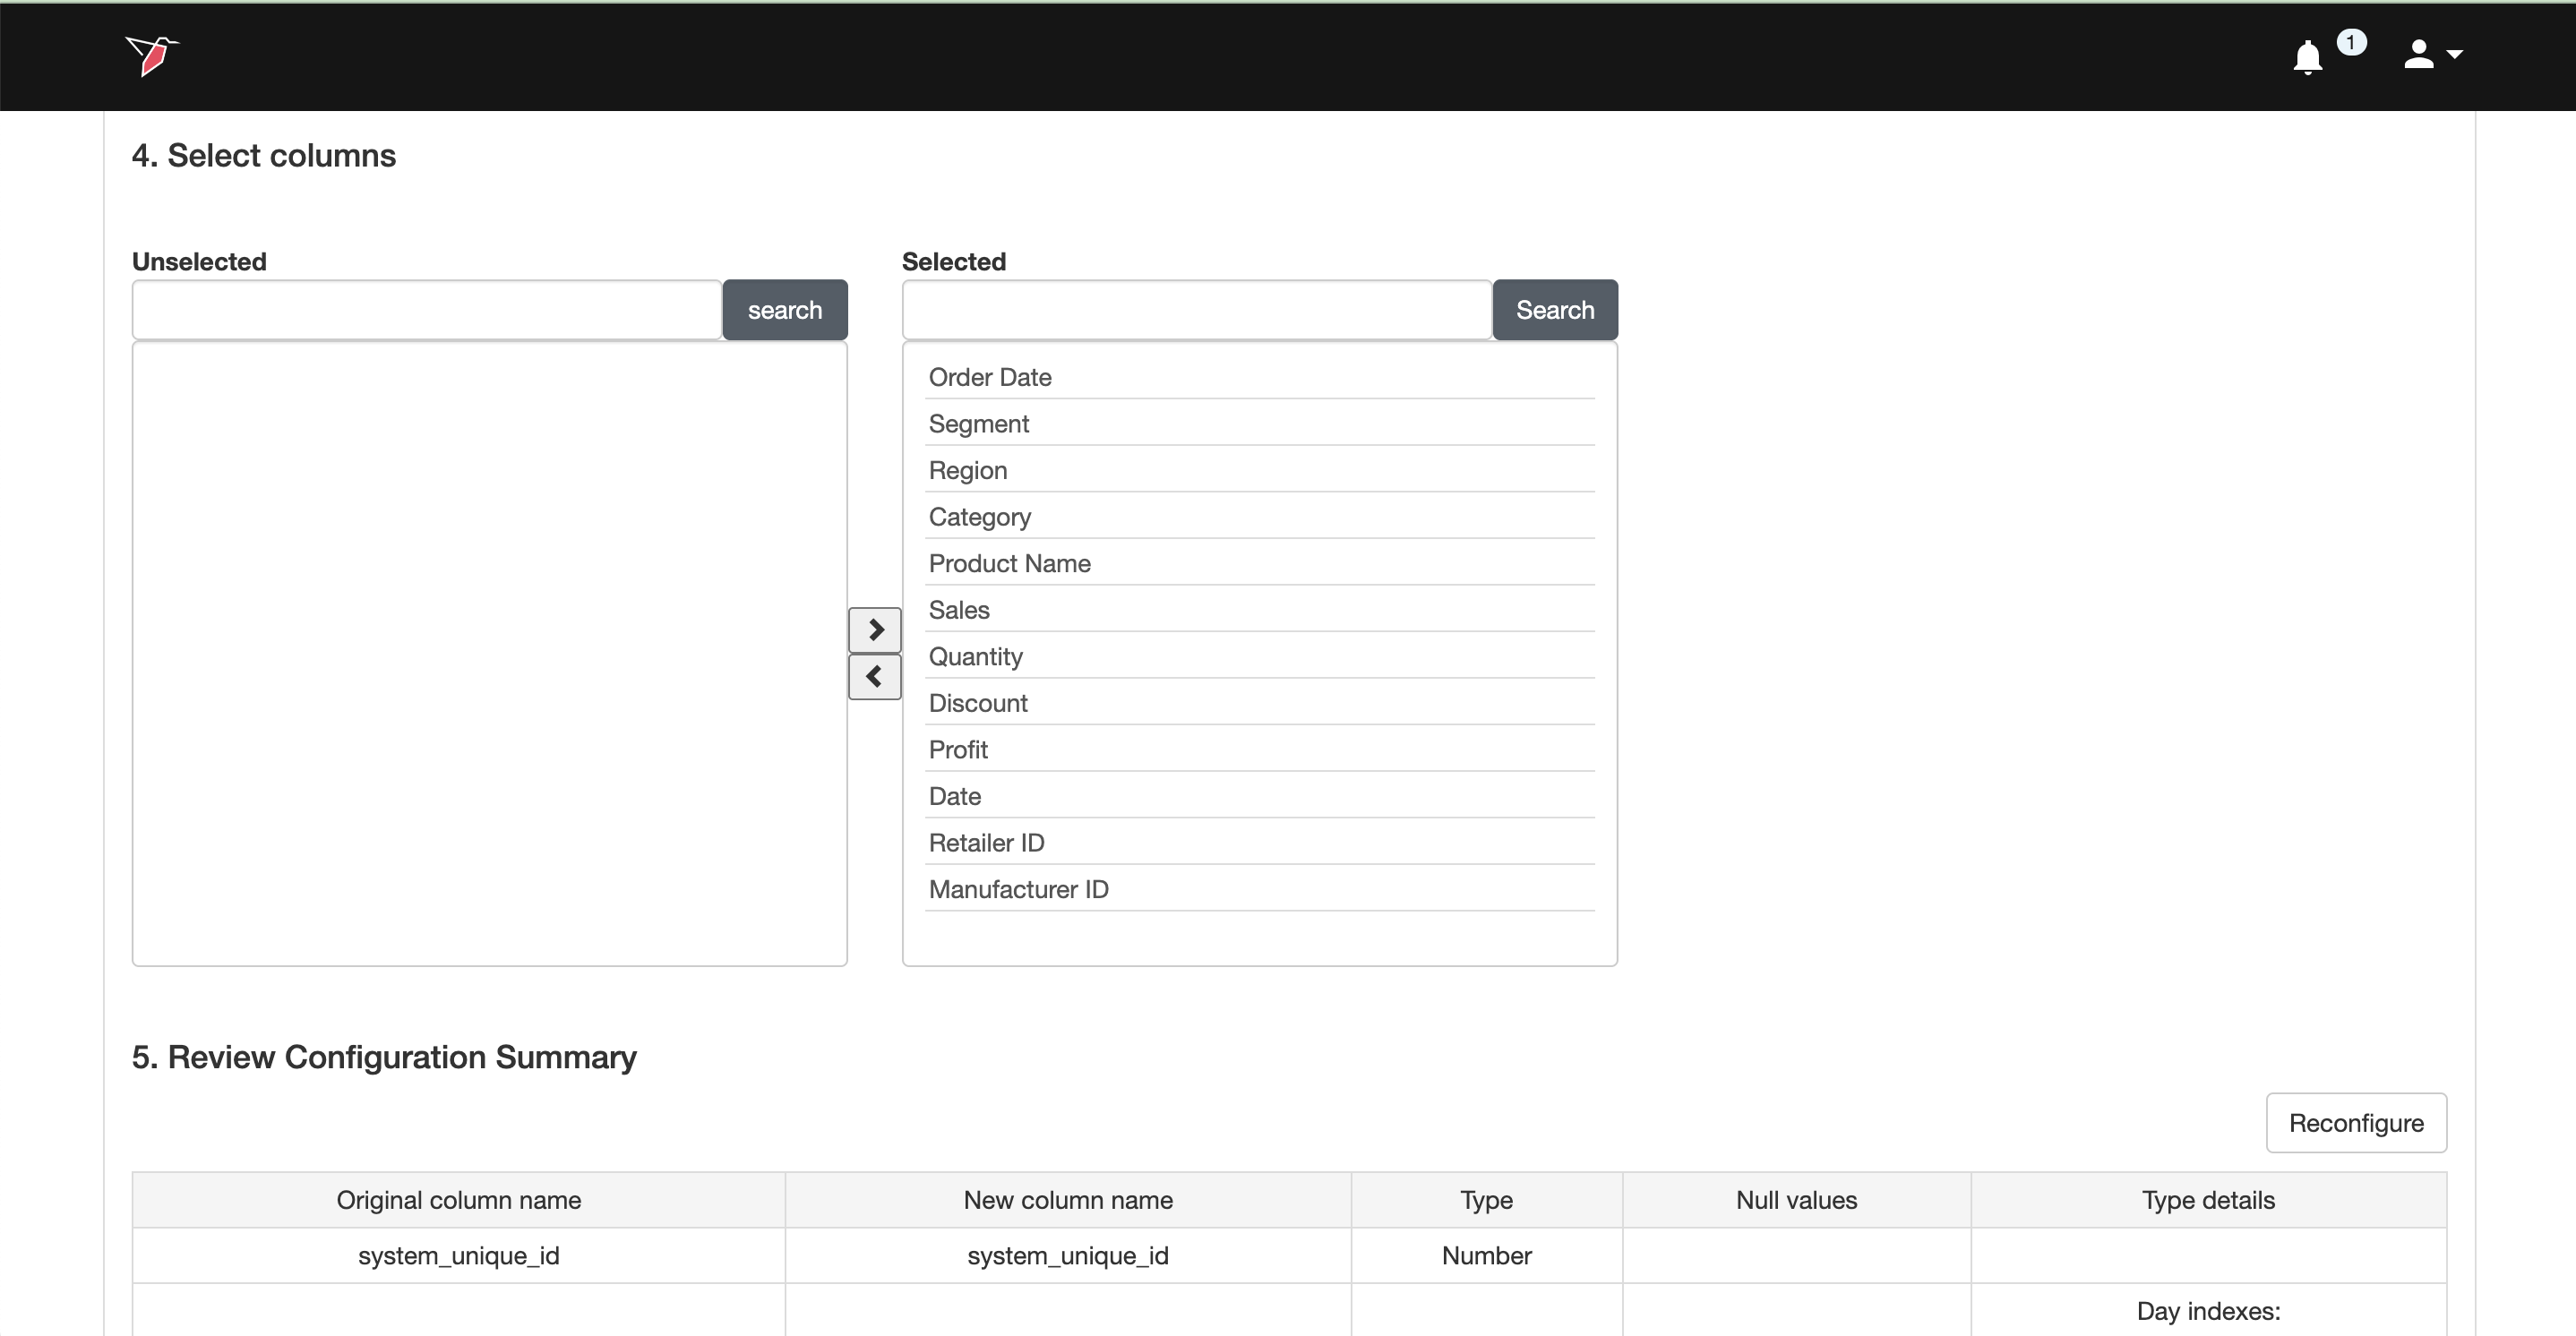
Configuration Summary Page
Once the dataset configuration is complete, you will be taken to the summary page. From this page, you can:
- Edit the name given to the dataset (by default it will be given the same name as the collection node)
- Apply filter(s) to subset the data
- Choose how to manage new columns that enter the dataset upon running a workflow - here you have three options.
- Do not add columns to dataset
- Require user input before proceeding
- Autodetect new column types (default setting)
- Select the columns that you wish to be included/excluded in the dataset
- Review and edit the configuration - The Review Configuration Summary section displays how the columns are currently configured. If you need to make changes (for example, renaming a column or adjusting a data type), click Reconfigure and follow the steps to update the setup.
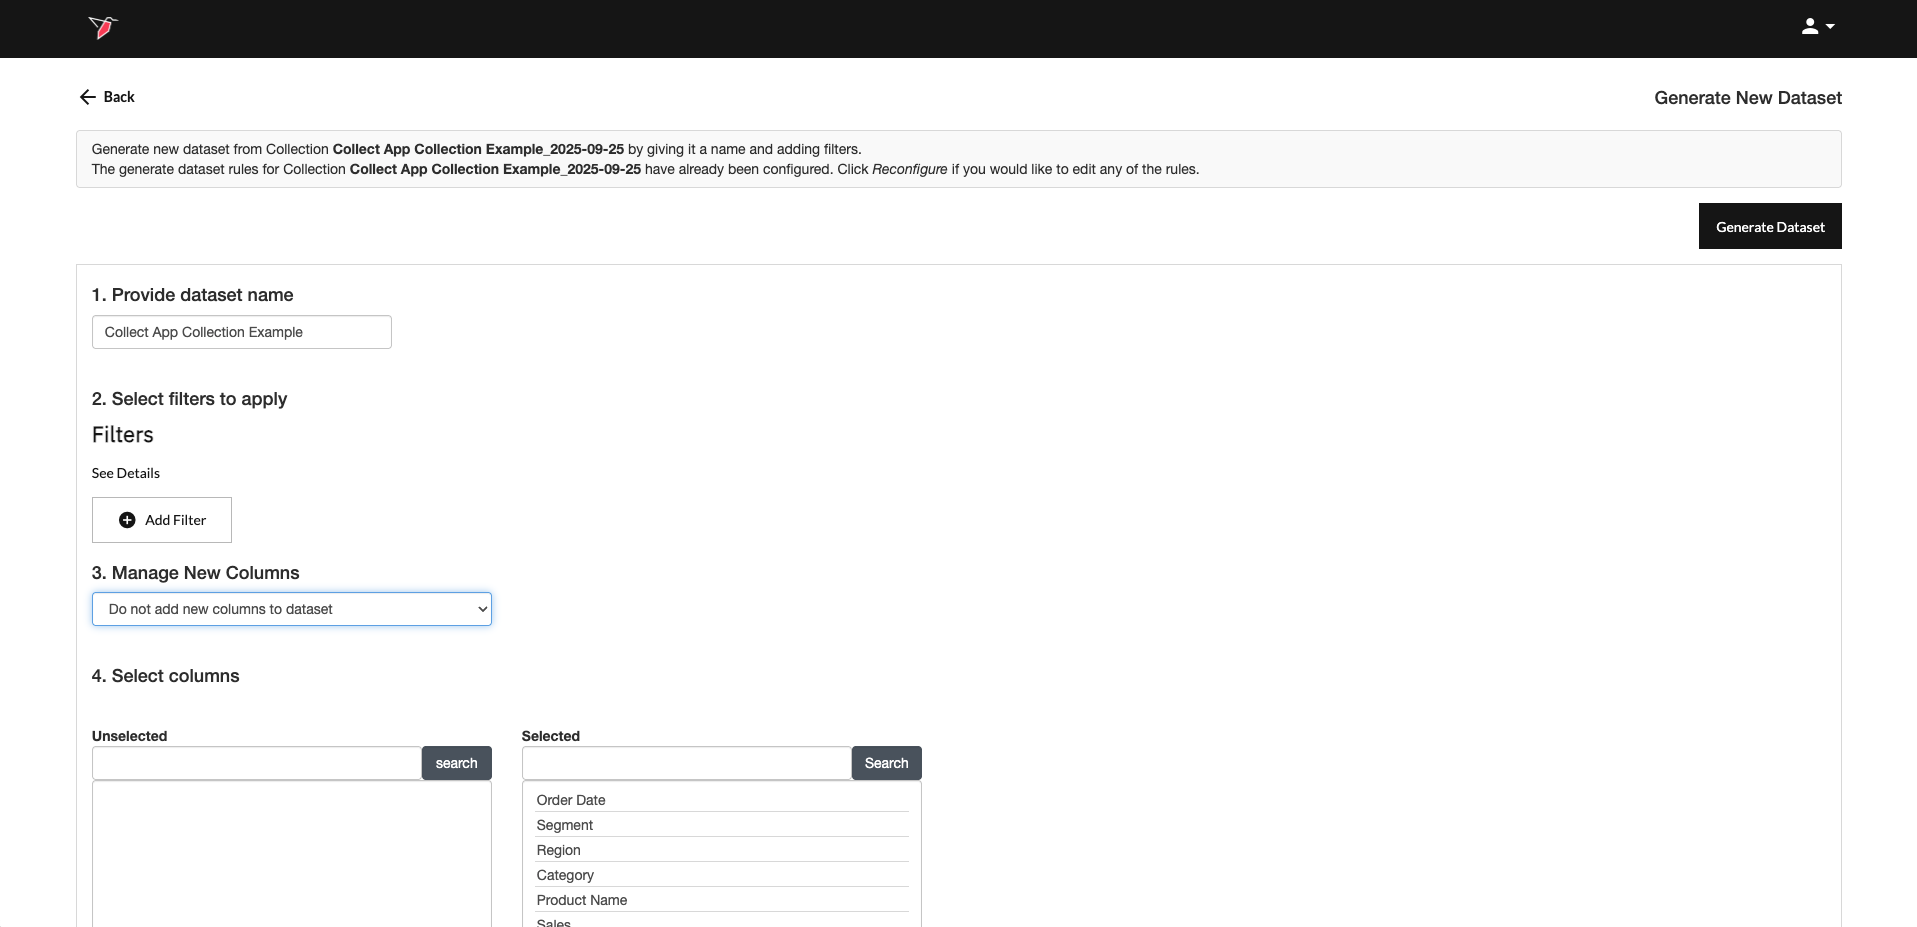
Once you are ready, click Generate Dataset. This will refresh the existing dataset node based on the new configurations.
AI Metadata
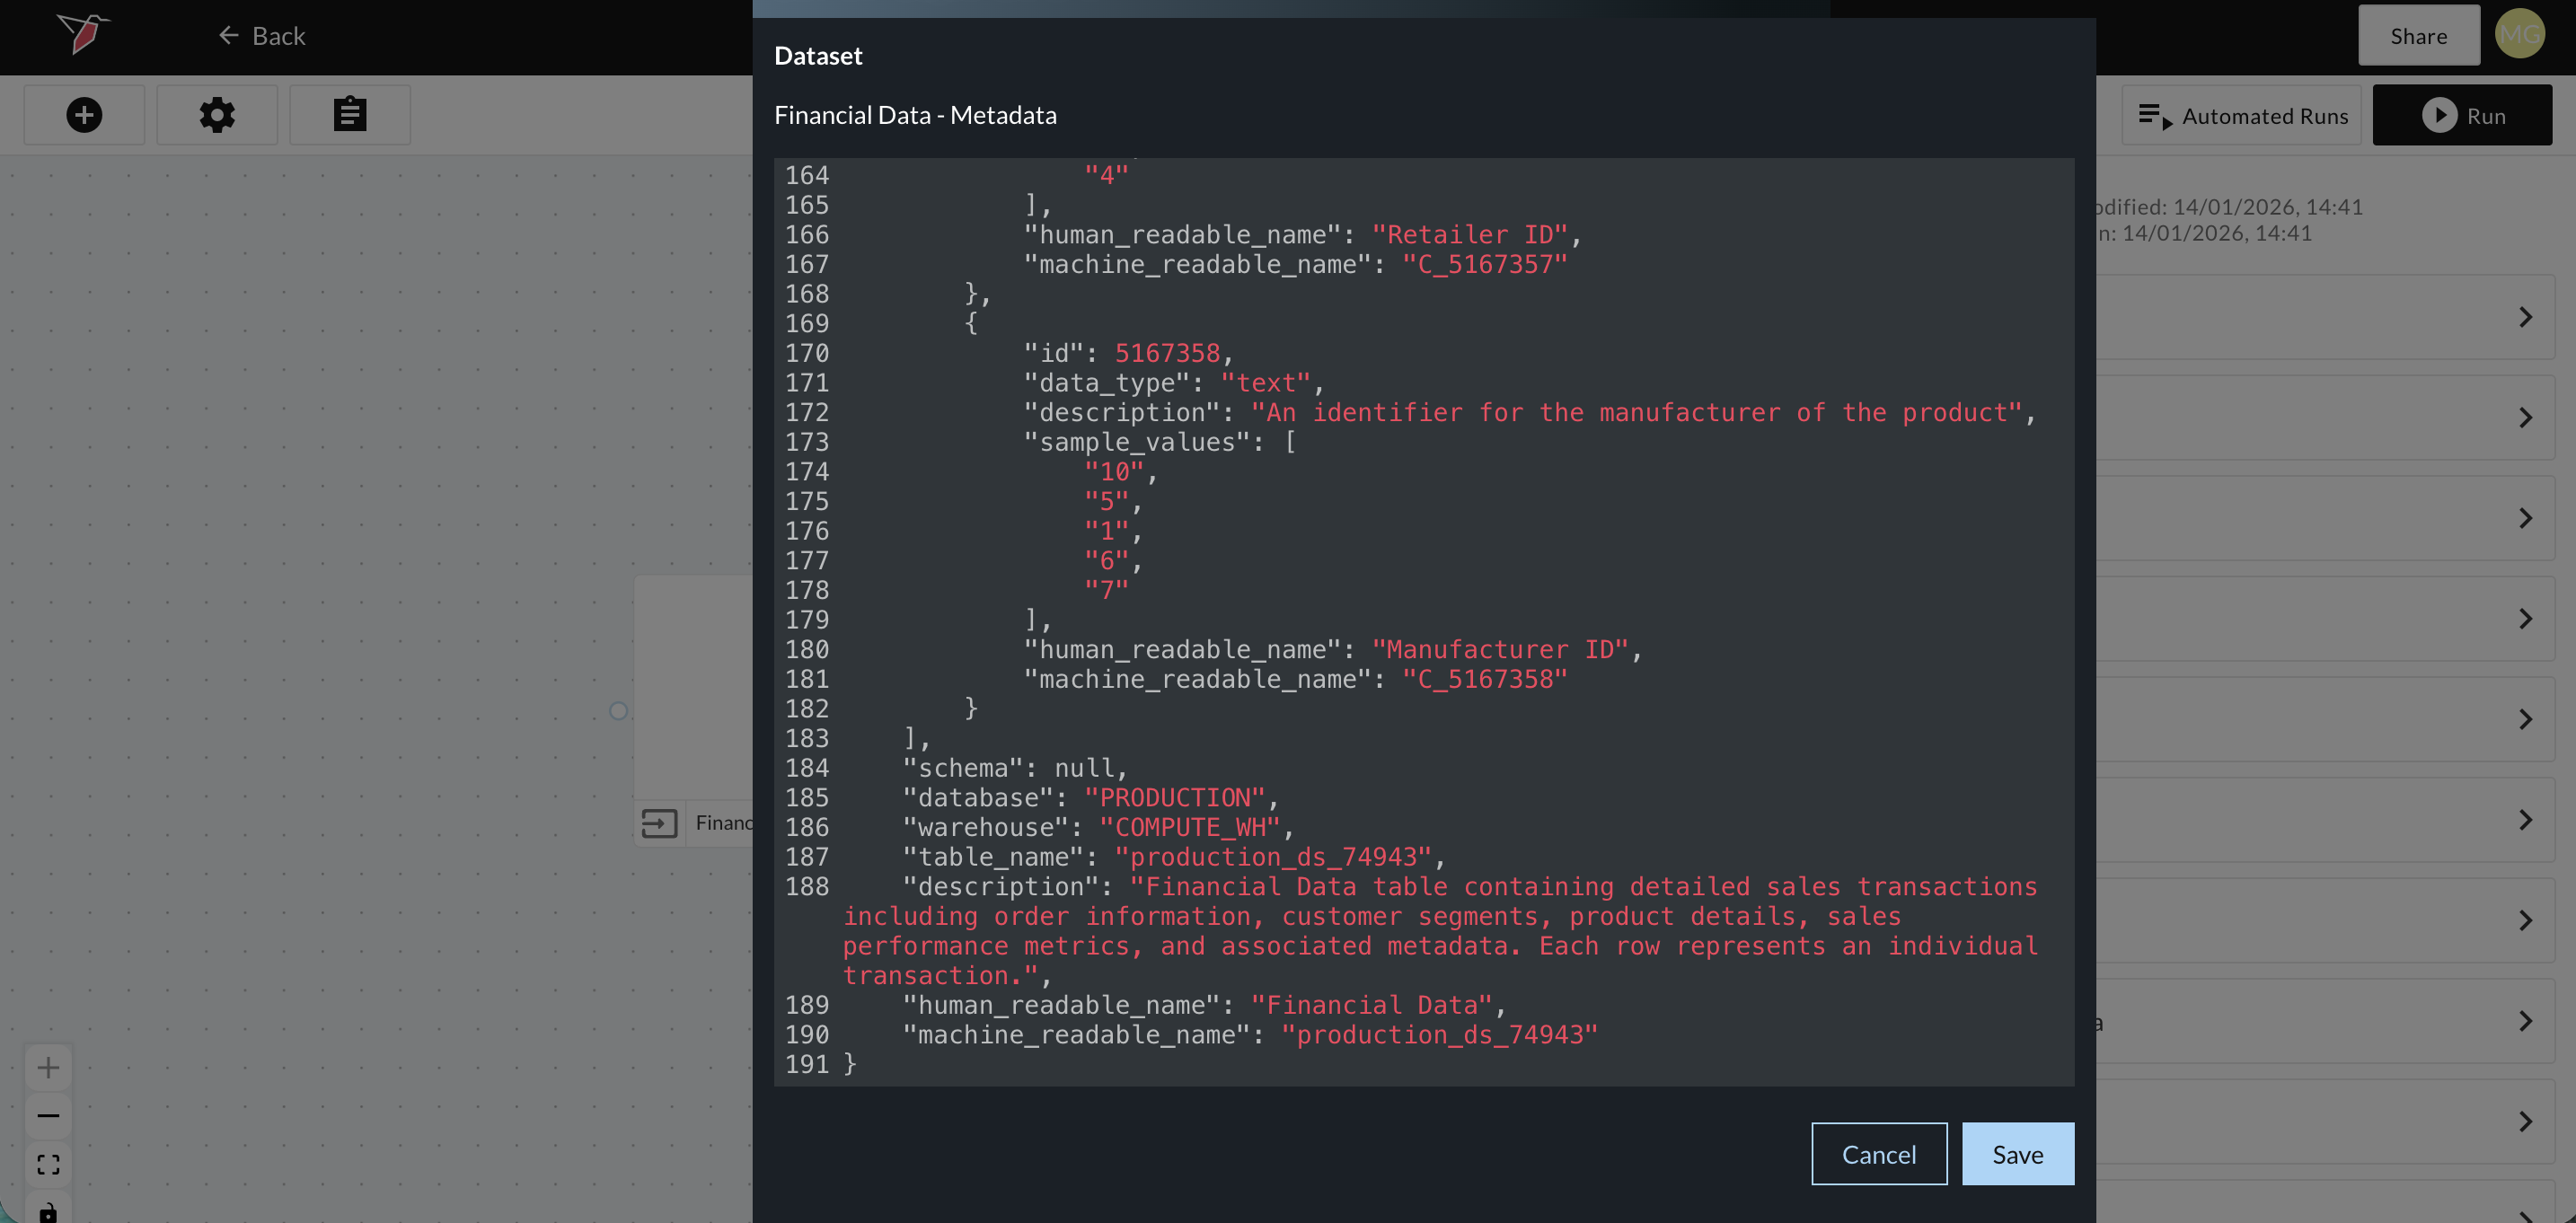
Once a dataset is generated, Redbird uses AI to scan its contents to understand the type of data included in each column as well as the dataset overall. Based on this analysis, Redbird generates descriptive metadata. This metadata enables the dataset to be leveraged downstream in other AI-driven processes, such as AI Chat.
You can view and edit this metadata by selecting the dataset and clickin**g View AI Metadata **in the right-side panel.
A modal will appear displaying the metadata in JSON format. You may edit any of the fields highlighted in red if needed, then save your changes. Be sure that any edits continue to adhere to valid JSON formatting.