Example Usage of Redbird Collect Extension (RCE)
Getting Started
The objective of this tutorial is twofold: (1) Creating a recording via the Redbird Chrome Extension (RCE), (2) Creating a configuration within the Redbird platform to collect the data.
By following the step-by-step process, you will familiarize yourself with the basic functionality of the RCE and more. For the tutorial, we will use an example publicly available website that has tabular data to show you some of the ways you can collect your data as part of an automated workflow via the RCE.
Making a Recording
First, let's get set up to create a new recording.
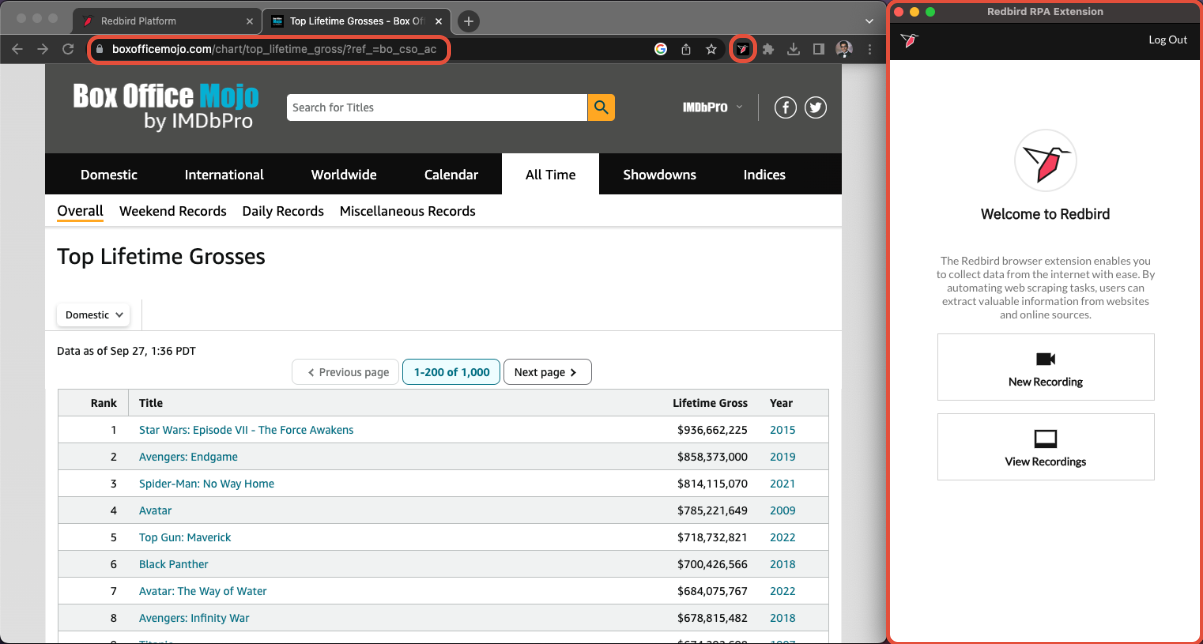
- Ensure you are logged in to the Redbird platform
- In a new browser window navigate to this Box Office Mojo Page
- Click on your RCE plugin and a plugin window should popup
Now let's create a recording.
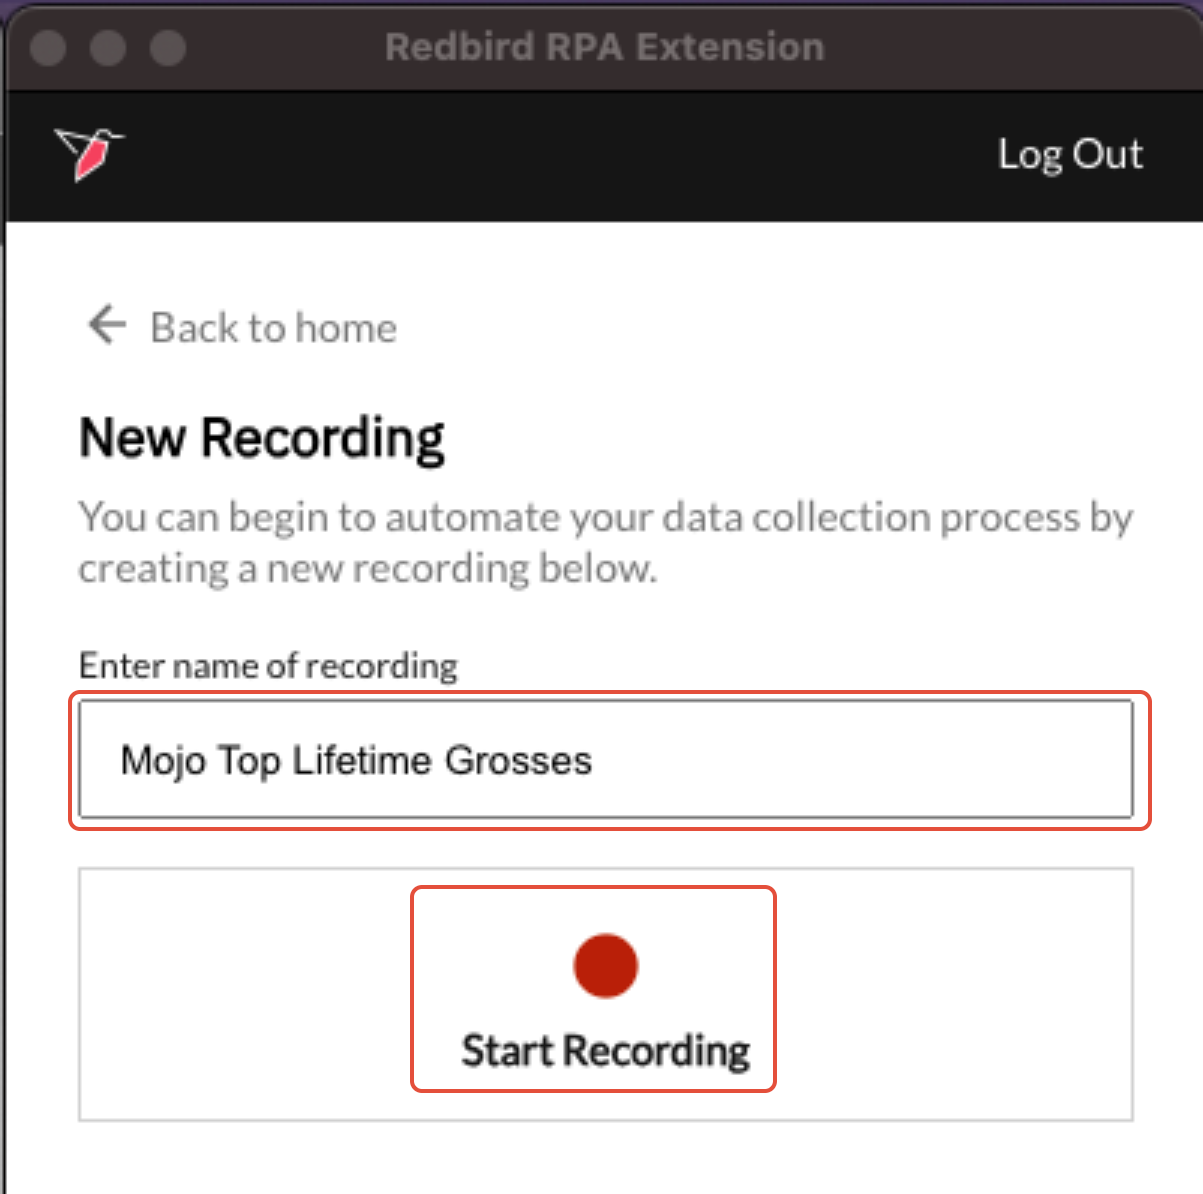
- Click New Recording to start creating a new recording.
- Name it Mojo Top Lifetime Grosses and select Start Recording
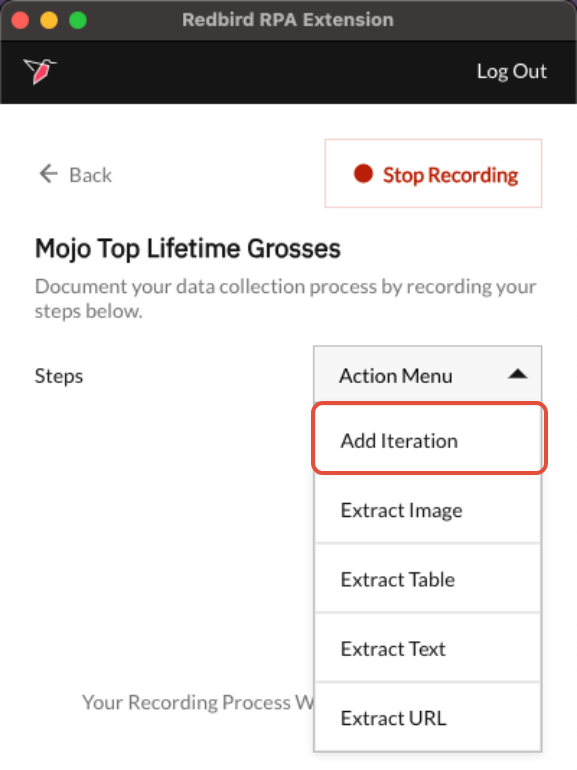
What we want to do next is create an iteration. We want to tell the extension to iterate through all the items in the paginated table. So here we need to continue on to the next pages till there are no pages left in the table.
Select the Action Menu and click Add Iteration. Once you add it click on the newly created iteration box.
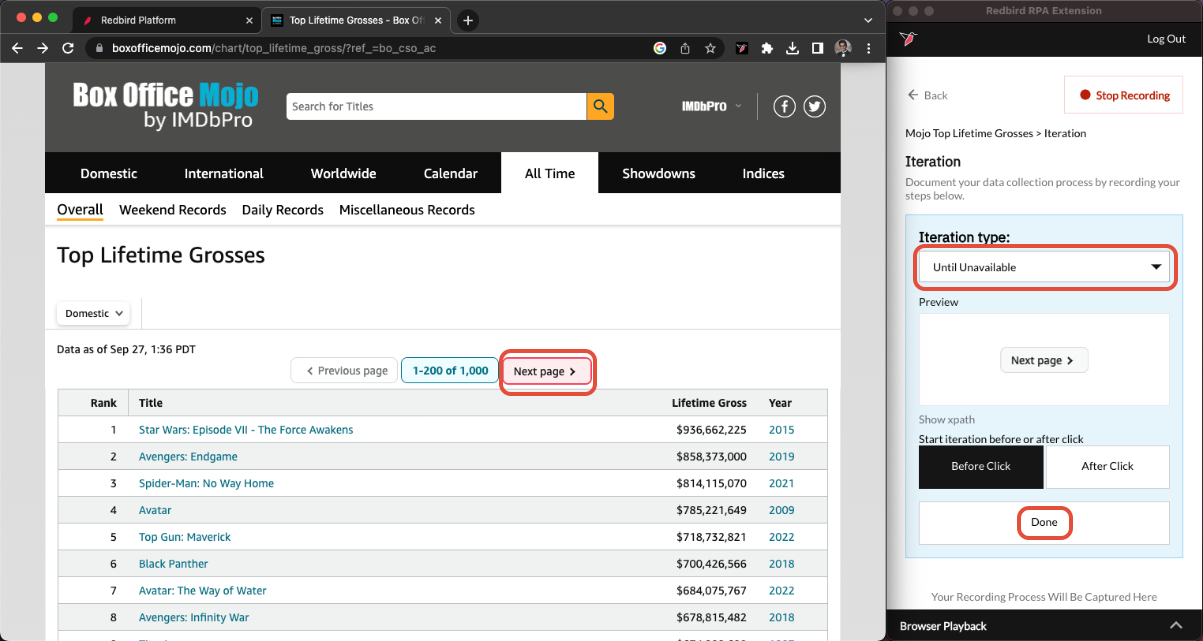
Expand the iteration box and then select Until Unavailable. Then go to the website we have on the left and click on the Next Page button. It should be highlighted with a red box when you select it. Once selected, it will populate in the preview in the RCE plugin window. Click Done.
What we did in the first iteration was tell the RCE to go through all the pages in the table. We now want to collect the data within each row of the table.
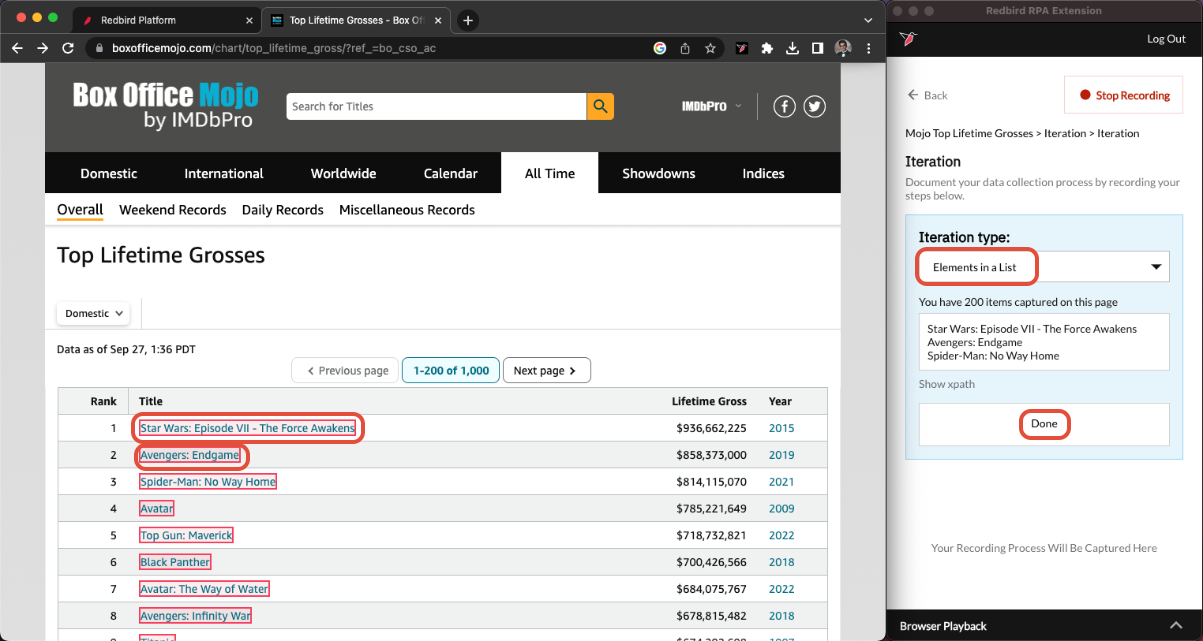
For this, we will use the Action Menu again and Add Iteration. This time select Elements in a List. Then go to the website and click on the first movie title and the second movie title. After you select those 2 items, the rest of the titles should become selected and you will see them populate in the preview of the RCE plugin. Click Done.
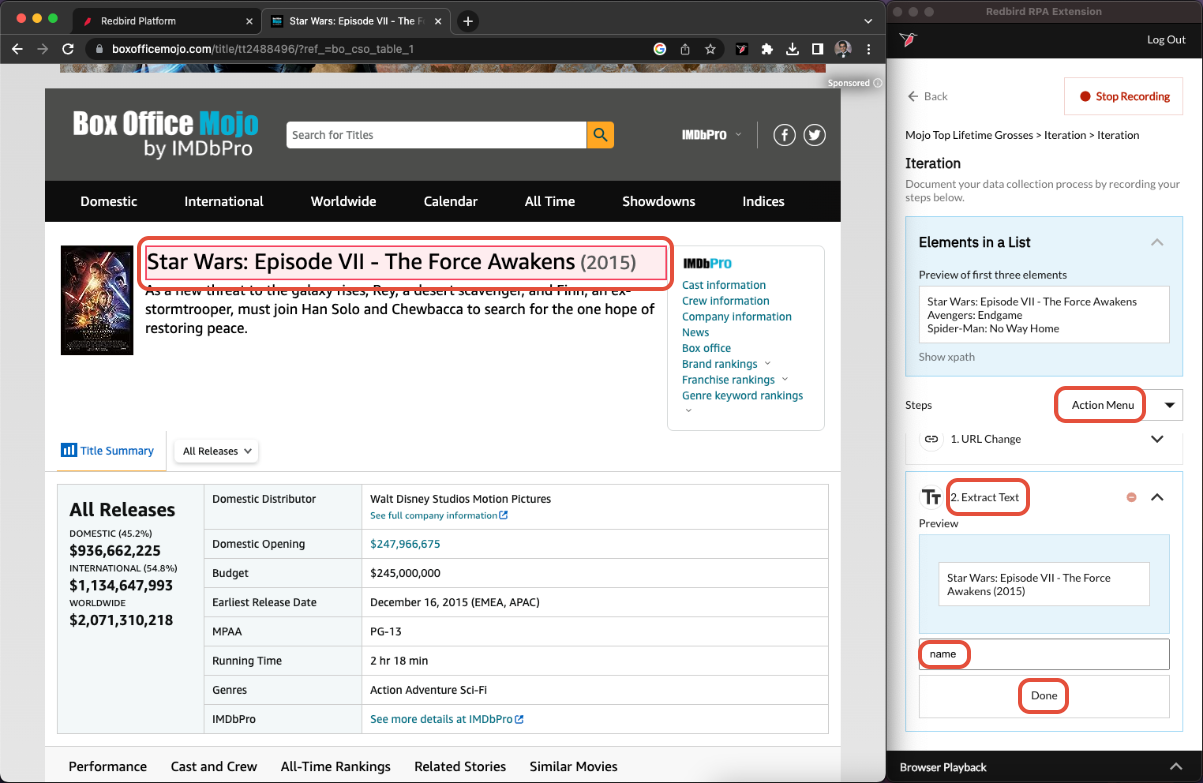
After doing the previous step, it will automatically open the detailed webpage of the first movie. This is where we can collect more data such as text, tables, and/or images. These will show up as columns when our data is collected.
Let's begin by extracting text. Select the Action Menu > Extract Text. Expand the newly created Extract Text field and then on the website, hover over the movie name and click it once it is highlighted red. This will show in the RCE preview. Give the column a name. In this case, we can call it name. Click Done.
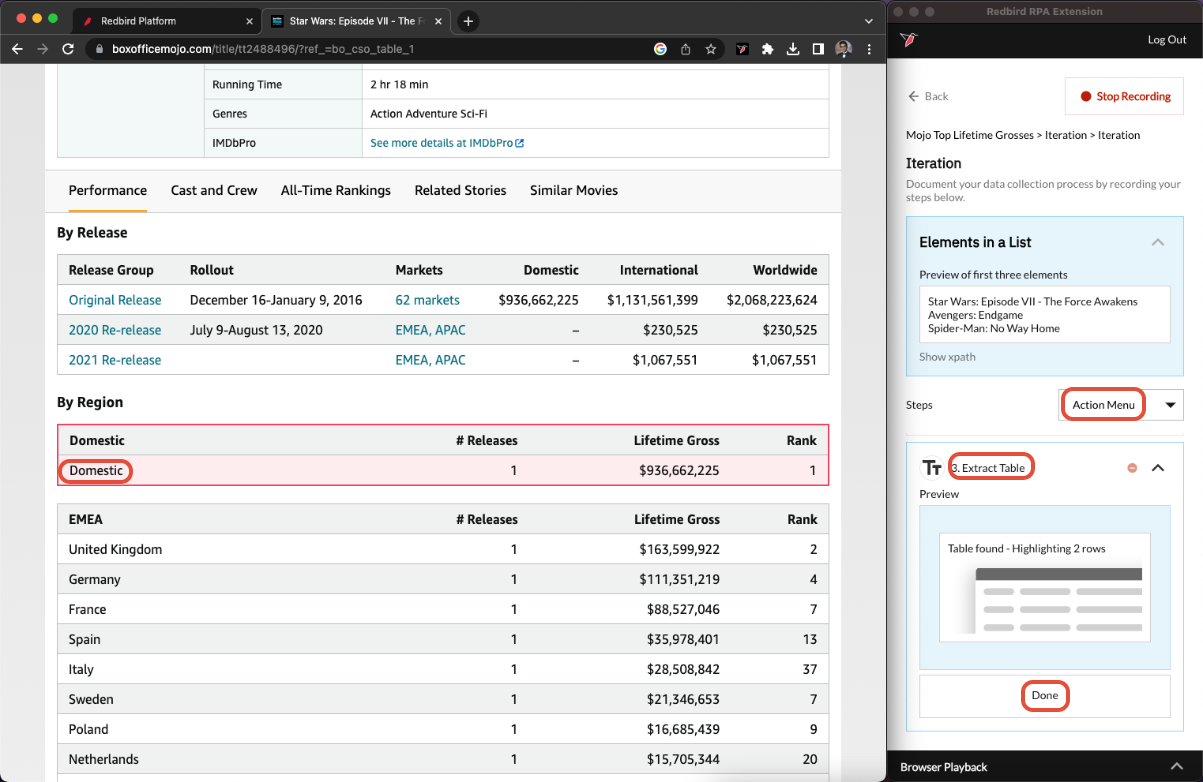
We can also extract a table and its contents. Click Action Menu > Extract Table. Now scroll down on the website till you see the By Region, Domestic table. Click on the part where it says Domestic in the data row. Redbird will auto-detect the table just by clicking one of the cells and specifying it in the preview. Click Done.
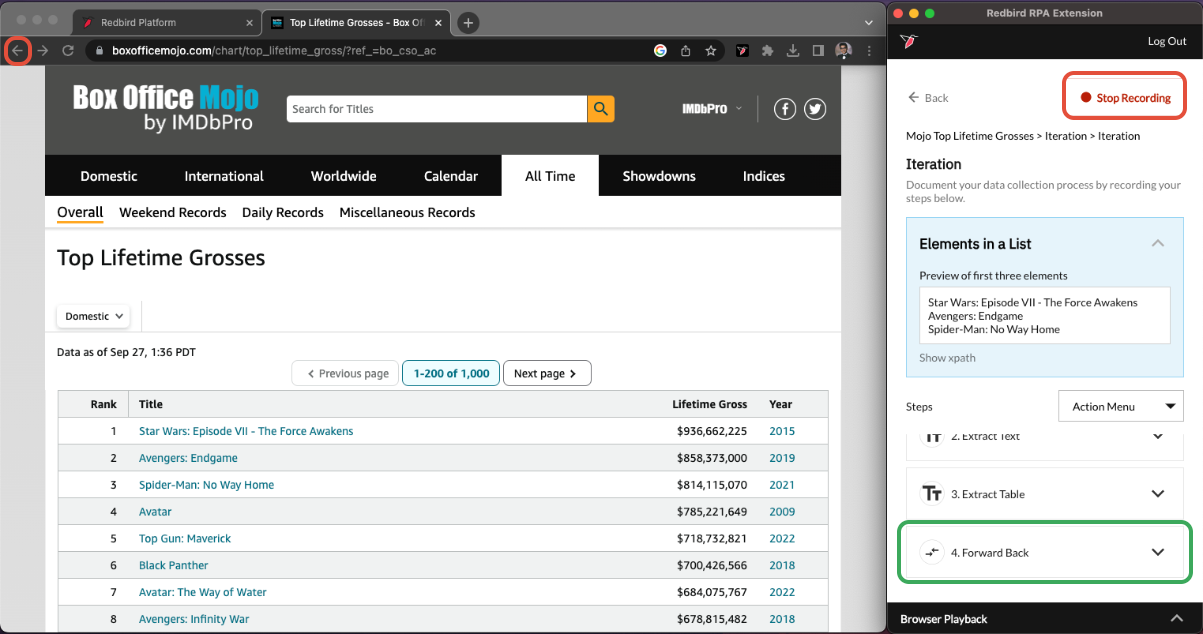
Now let's finish up! We want the RCE to know that once we are done gathering data on the linked website, to go back to the original table and continue iterating over it. Click on the back button<- of the Chrome window. This will populate a Forward Back pill in the RCE plugin. Click Stop Recording. Now we are ready to collect the data in the next step.
Collecting the Data
Now that we have finished creating a recording, we will be able to use the Redbird Platform, specifically the Extension Collect app, to collect the data from the recording we just made via the RCE.
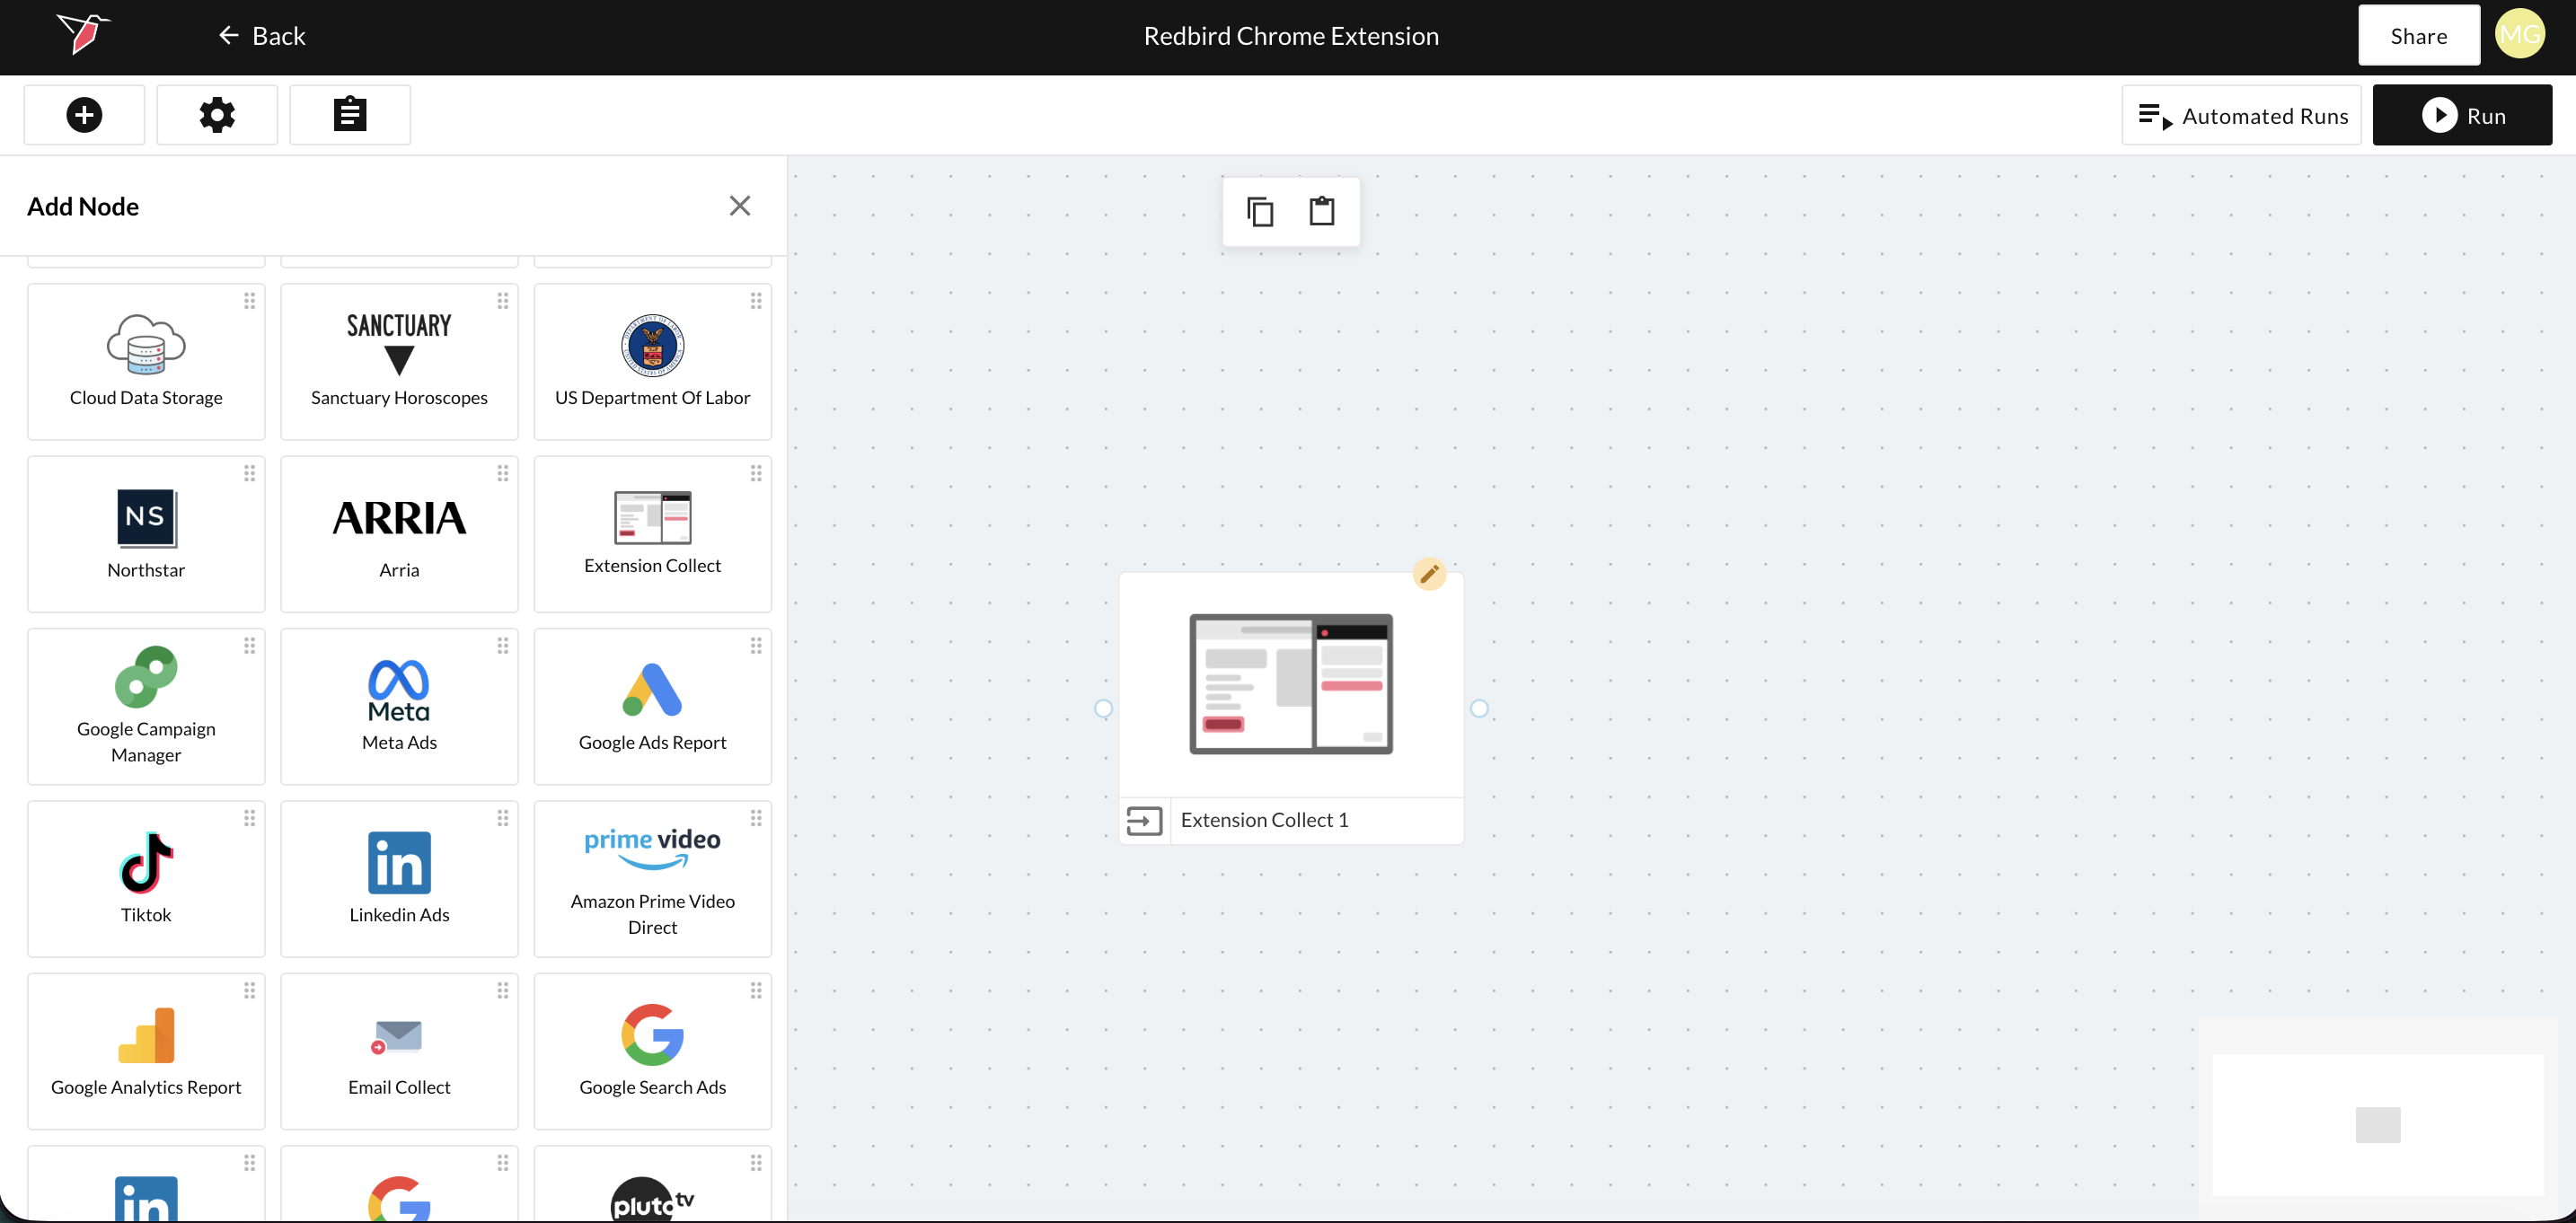
- In the canvas view, drag and drop the Extension Collect app from the Inputs section of the left-side panel. Then double-click to edit.
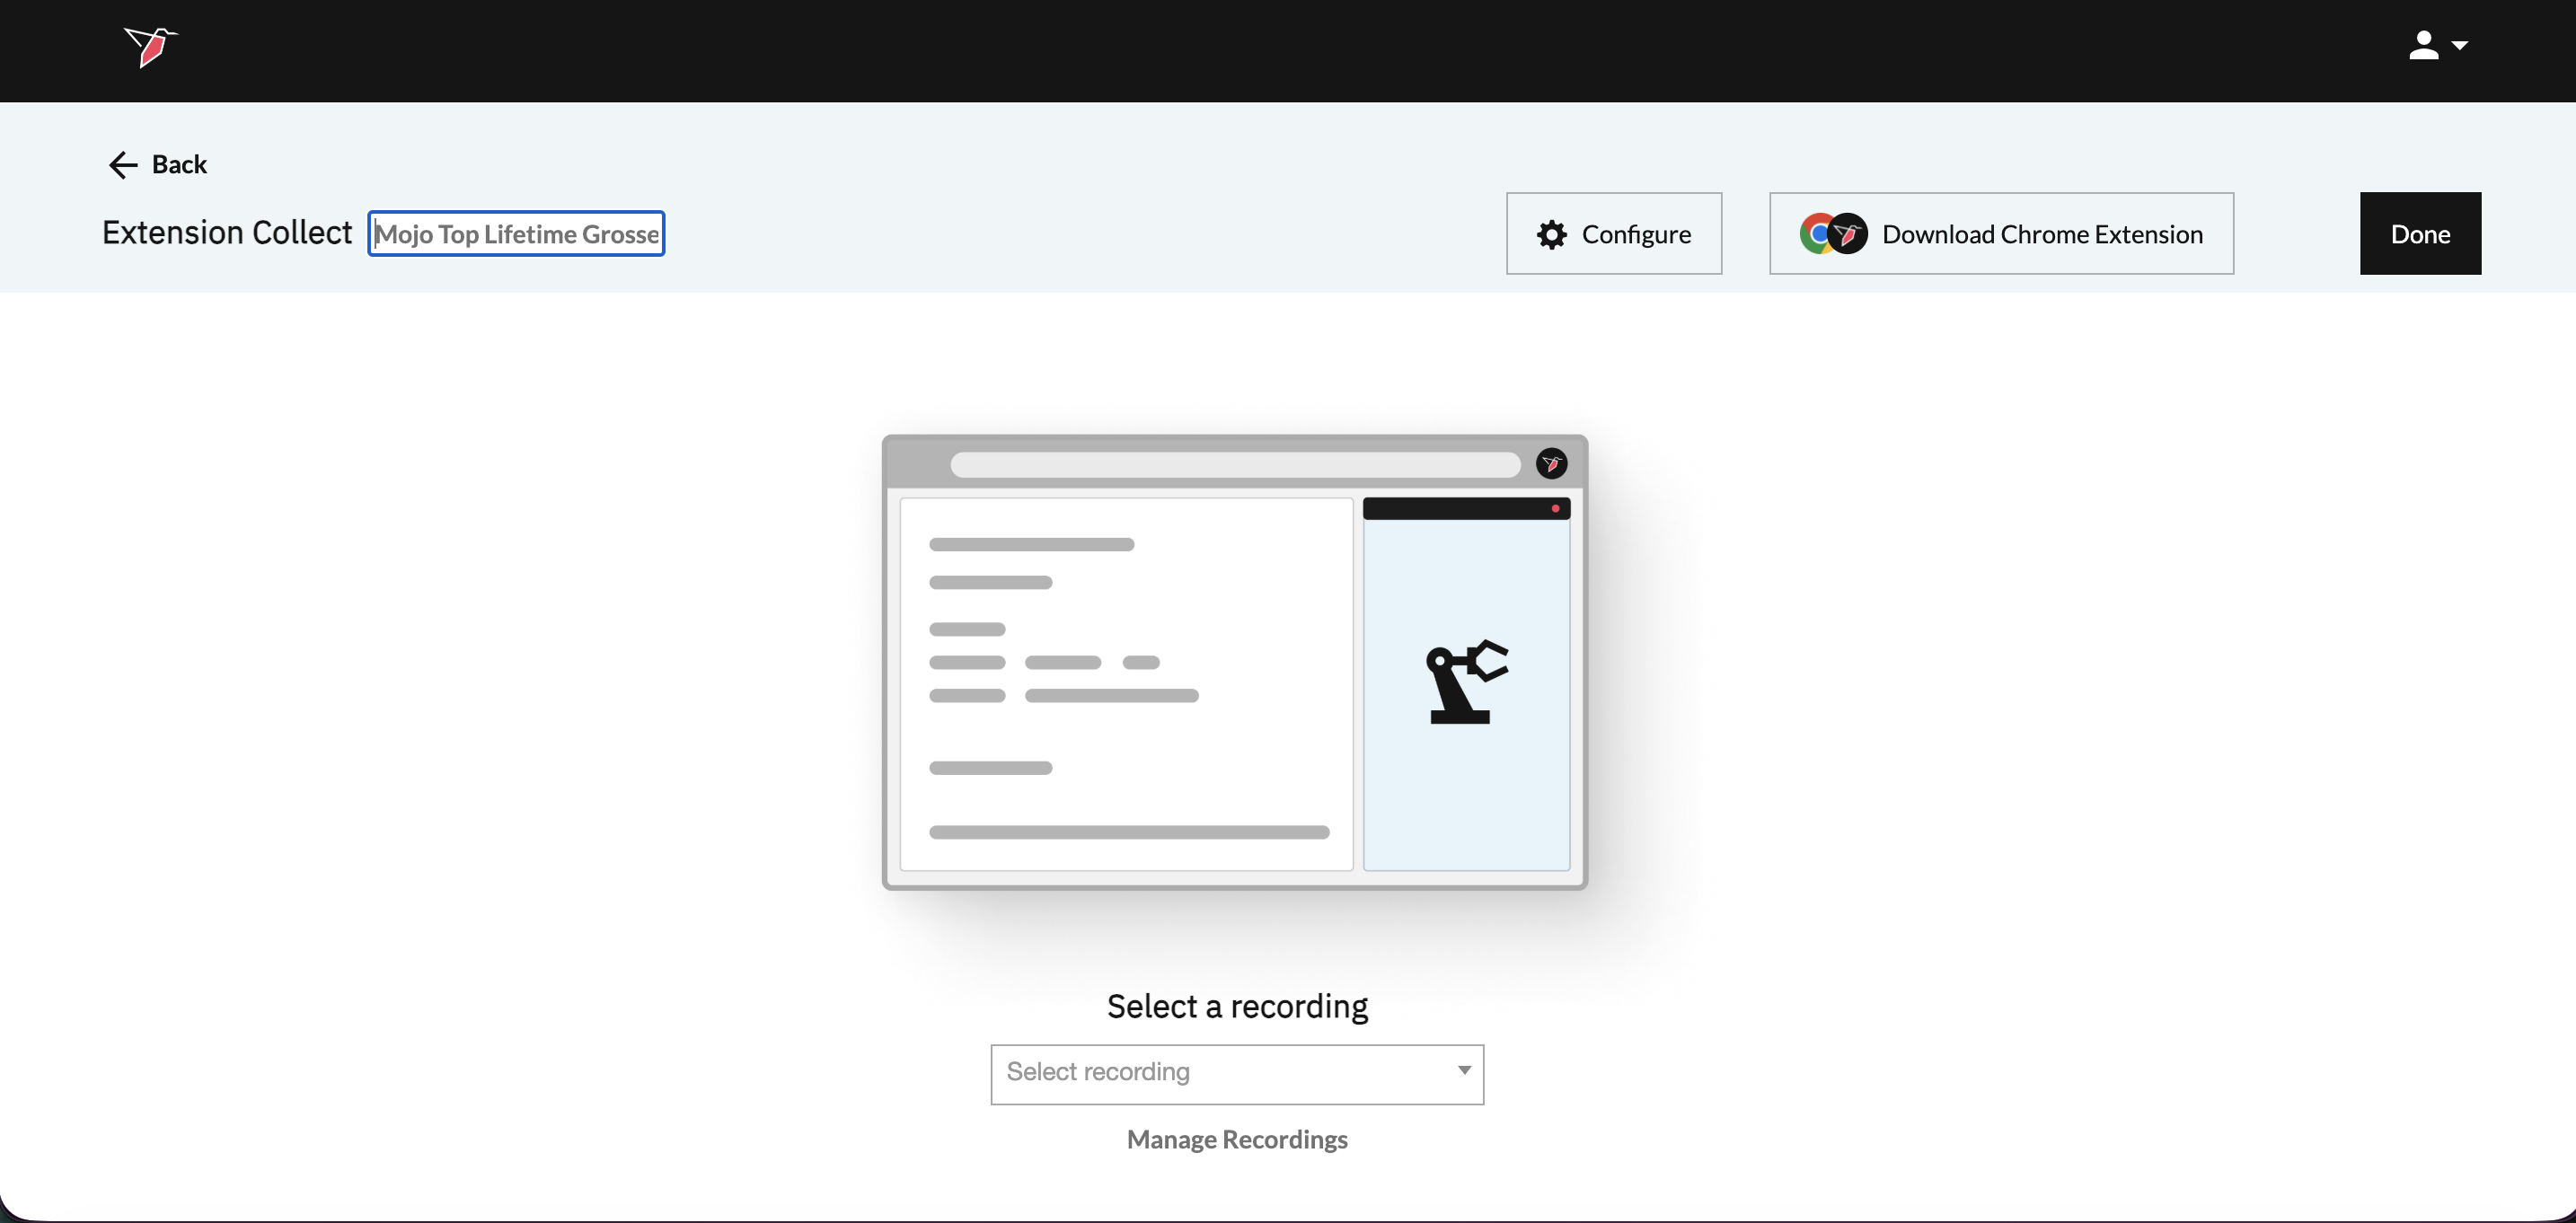
- Within the Extension Collect configuration screen, enter Mojo Top Lifetime Grosses in the Configuration Name box in the top-left to label your configuration.
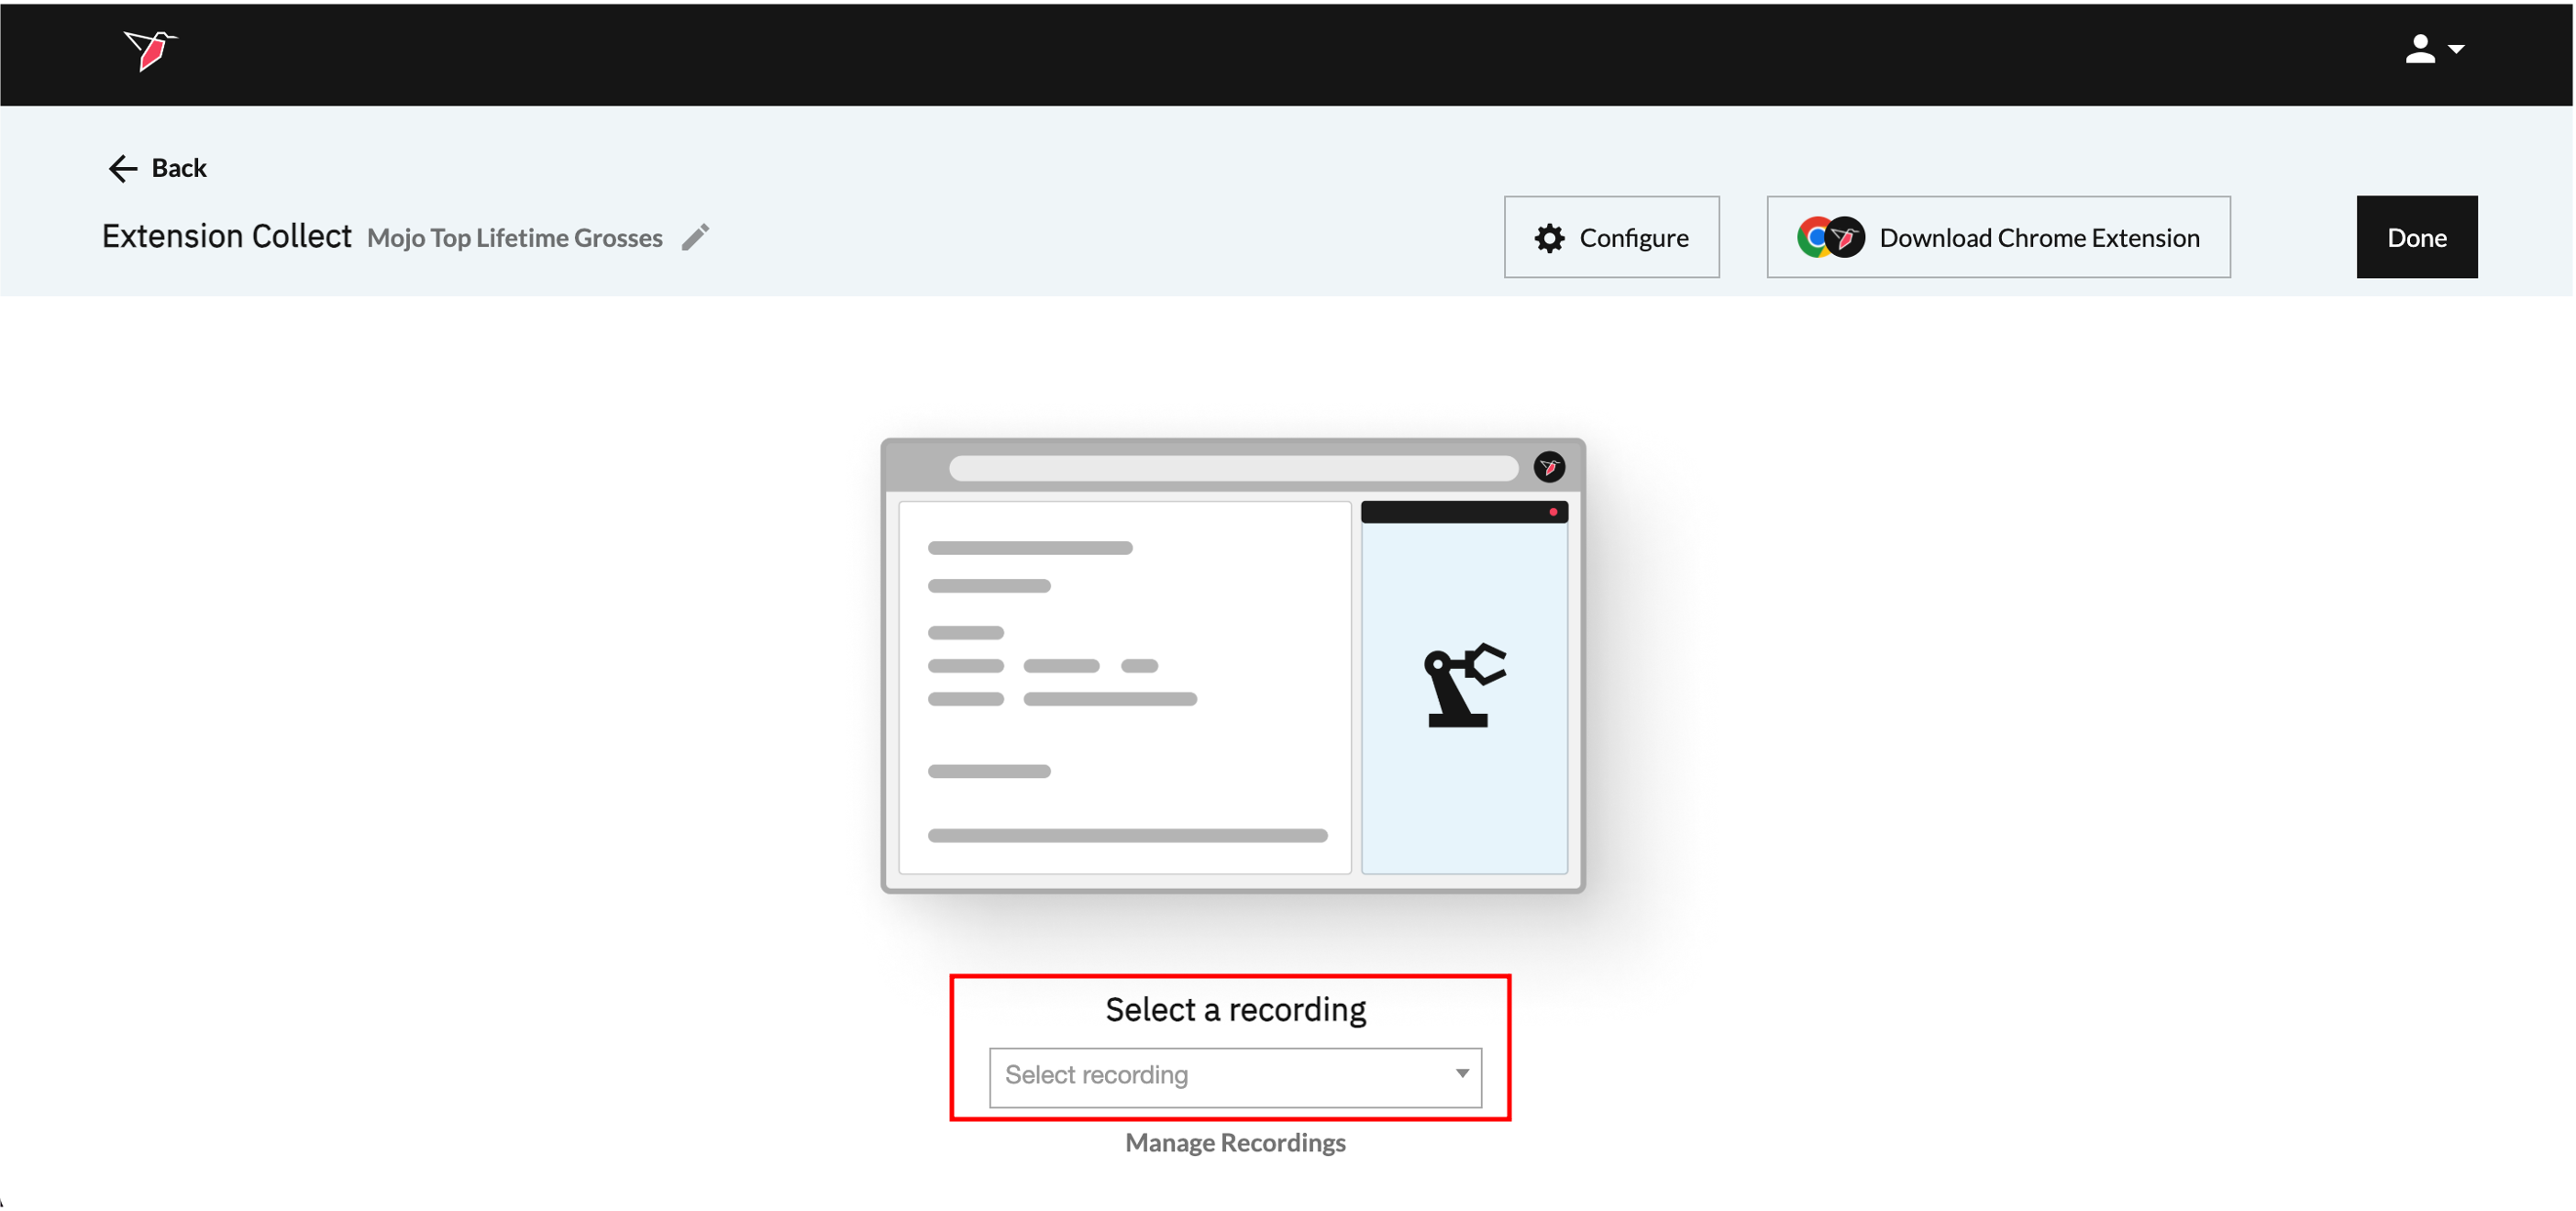
- Click the dropdown under Select a recording and select the recording we just created. It should be named Mojo Top Lifetime Grosses.
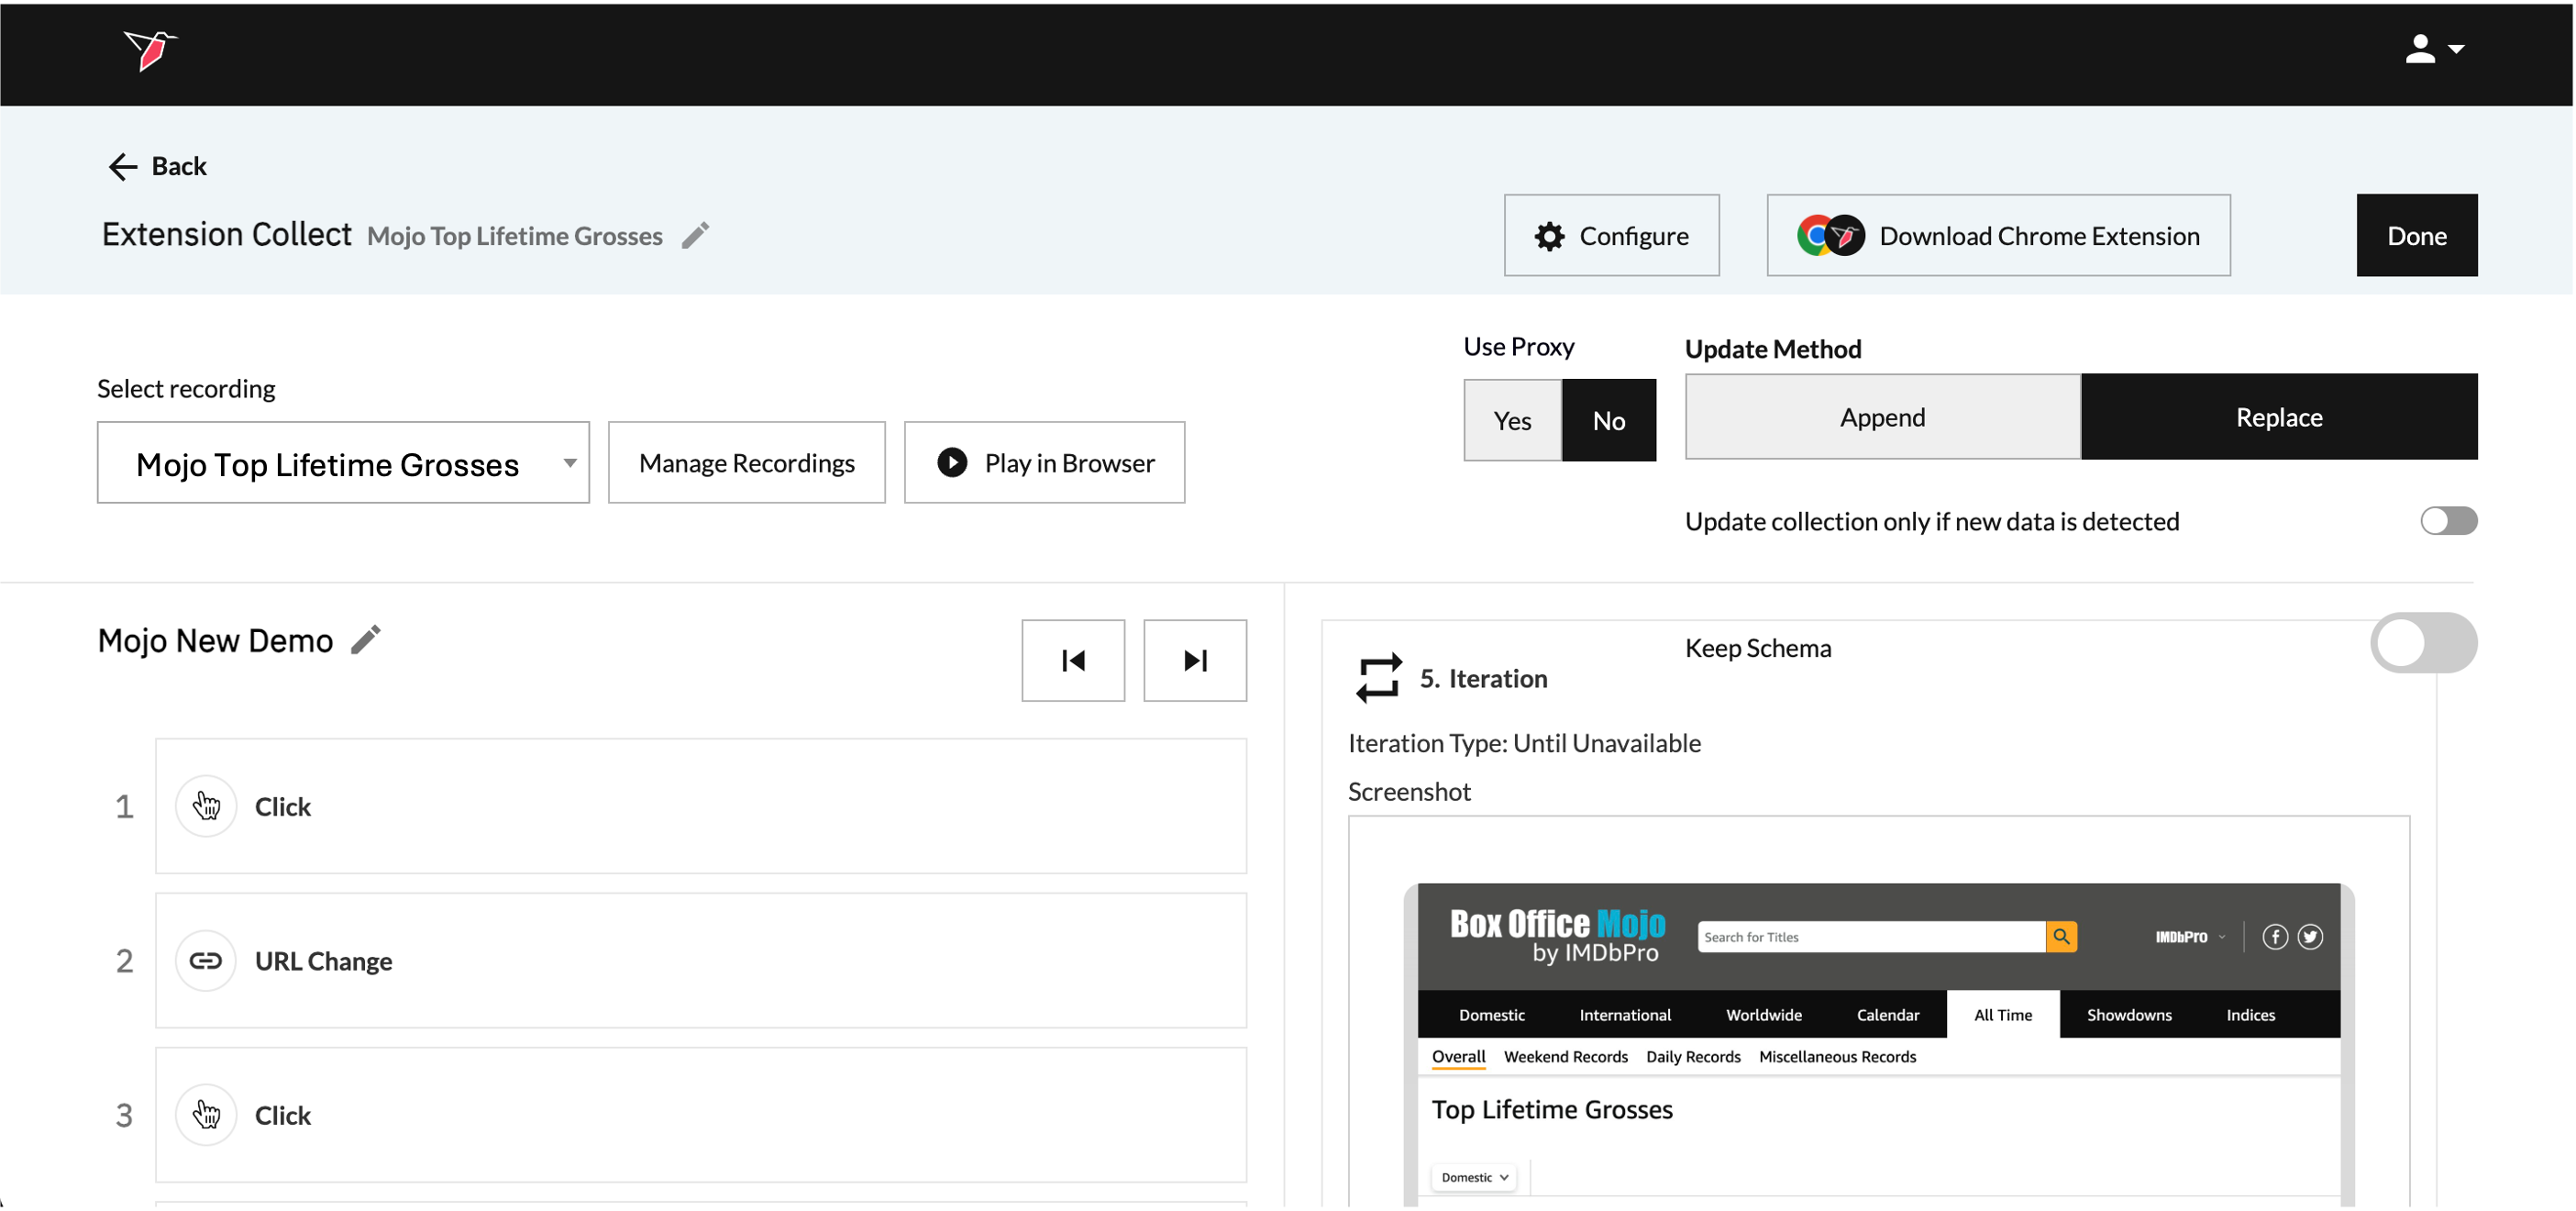
- Here you will have a preview of the step-by-step recording for you to review. You can also select using the toggle in the top right if you wish to append or replace the data each time it is run. Once you have finished reviewing, click Done.
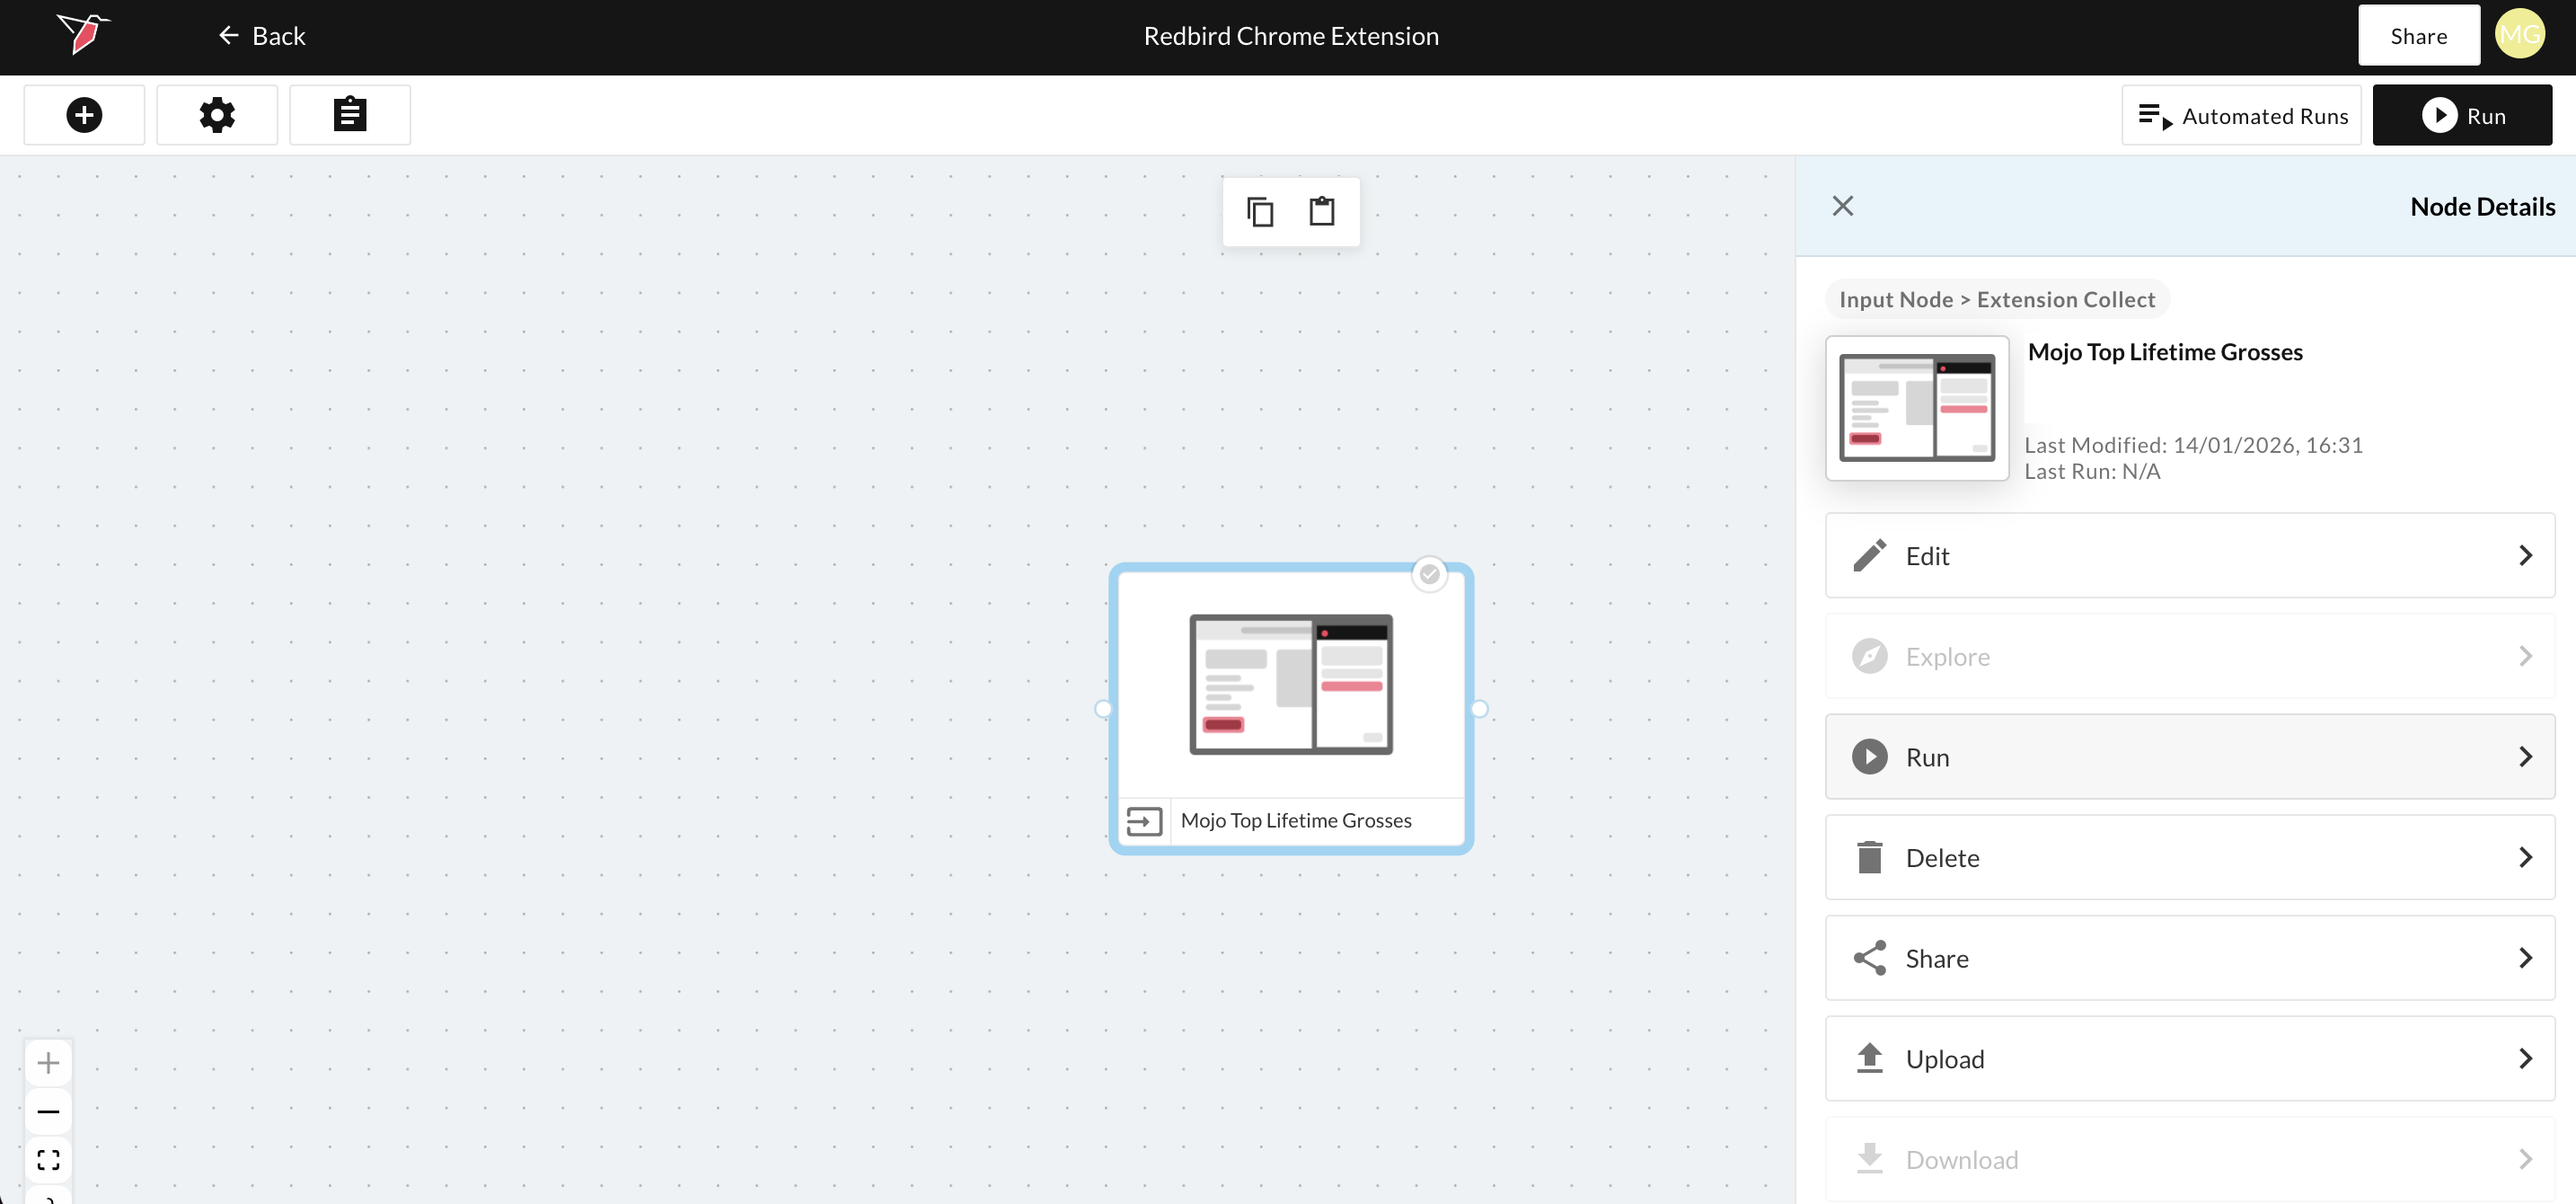
- Back on the workflow canvas, click on the node again to select it, then click Run in the right-side panel to collect the data.
In this example, we only used some of the capabilities of the Redbird Chrome Extension (RCE), however, there are a number of different ways data can be collected. Continue on to the next section to see what other capabilities there are and how to use them.
Updated about 1 month ago